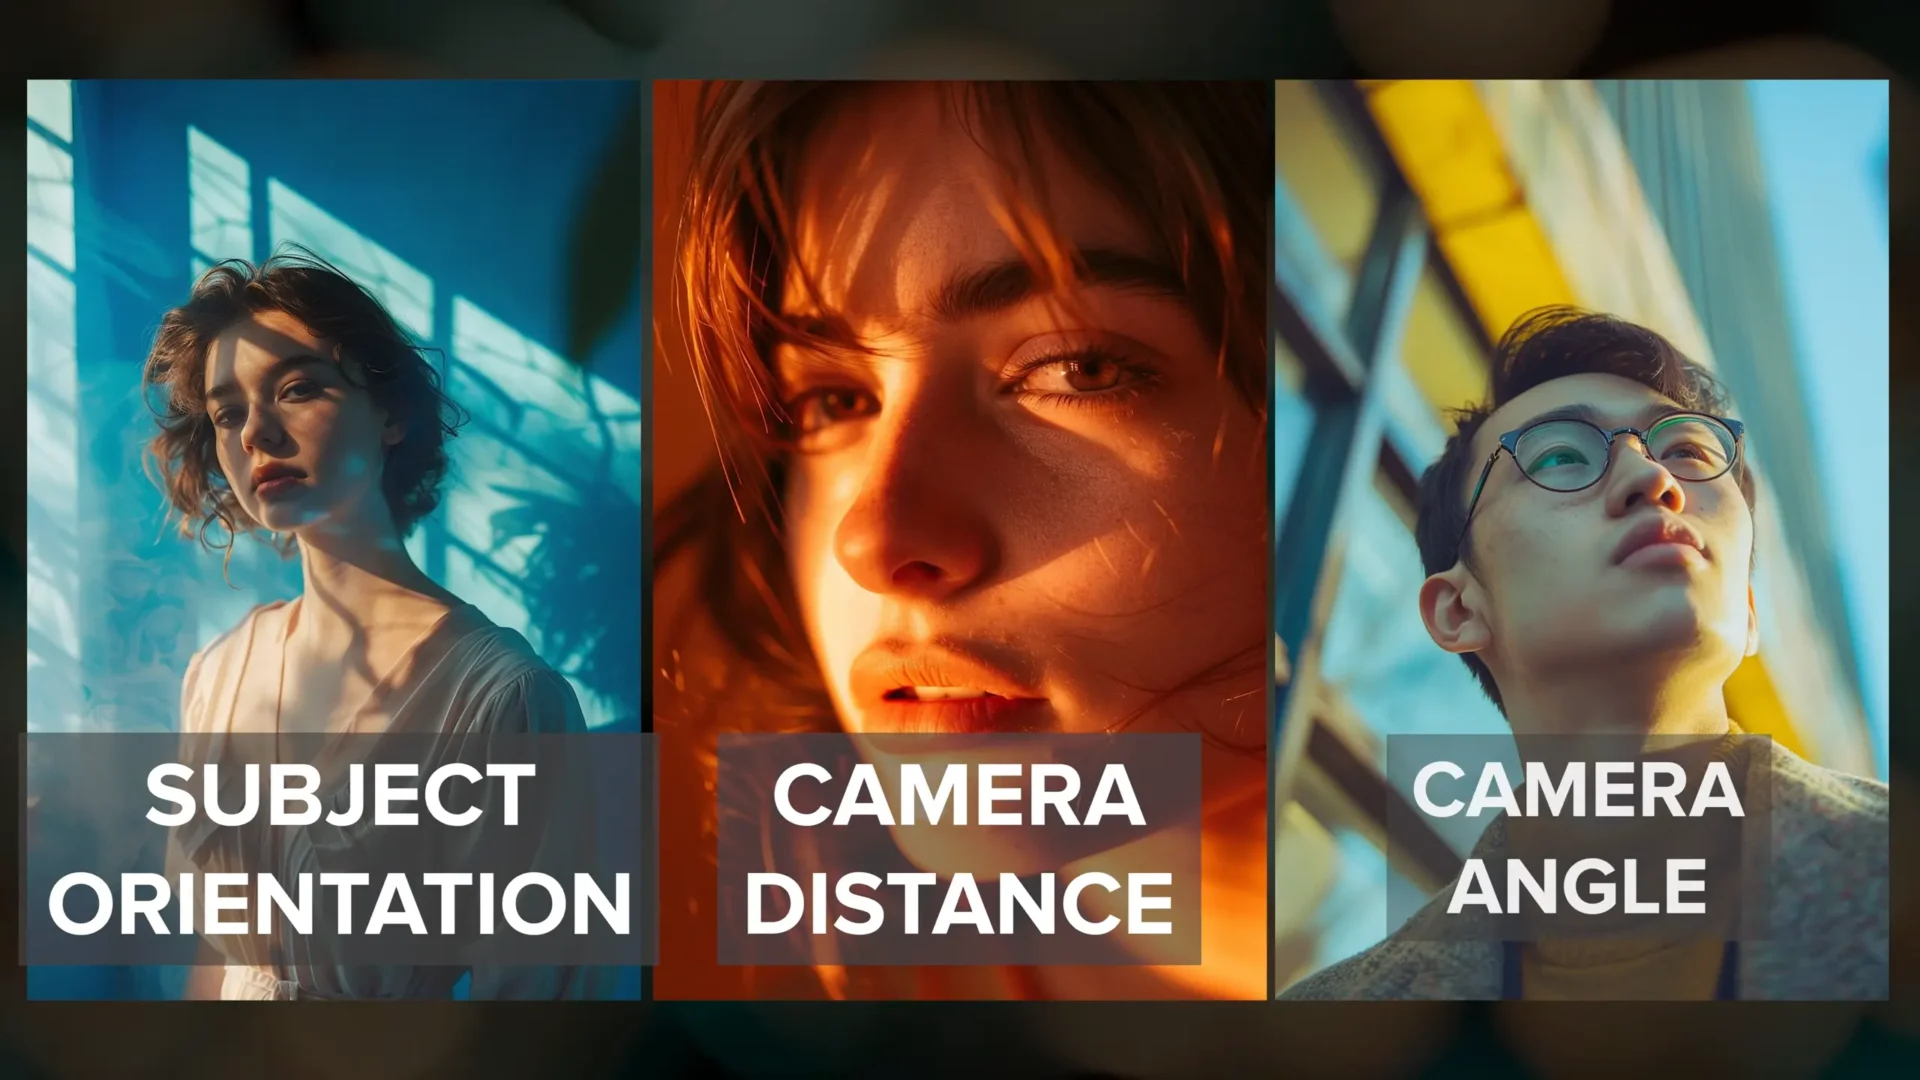
Understanding the fundamentals is key to improving your Midjourney prompting, and in this guide I am focusing on one of the most critical skills: mastering different camera shot types in prompts.
In this article, I go through subject orientation, camera shot distance, and camera angle. At the end, I bring everything together by creating multiple shots for a single character reference.
I start by covering camera shot basics, then move step by step into more specific prompt techniques that help control how Midjourney frames a subject.
Camera Shot Basics
Camera shots in Midjourney can be controlled using prompt phrases that describe how the subject is positioned, how far the camera is, and the angle from which the subject is viewed.
I divide this guide into three main sections:
- Subject Orientation Prompts
- Camera Distance Prompts
- Camera Angle Prompts
Each section builds on the previous one so that everything works together naturally.
Subject Orientation Prompts
1. Front Shot
I start with subject orientation. The first and most fundamental angle is the front shot.
In a front shot, the subject faces the camera directly. This gives a clear look at facial expression and works very well for character portraits.

Using front shot at the beginning of the prompt works well with tall aspect ratios. However, it can become less consistent as the aspect ratio becomes wider.
When that happens, I get more specific in the prompt.
Example prompt structure:
front shot of a woman in a blue room, she is looking directly at the camera
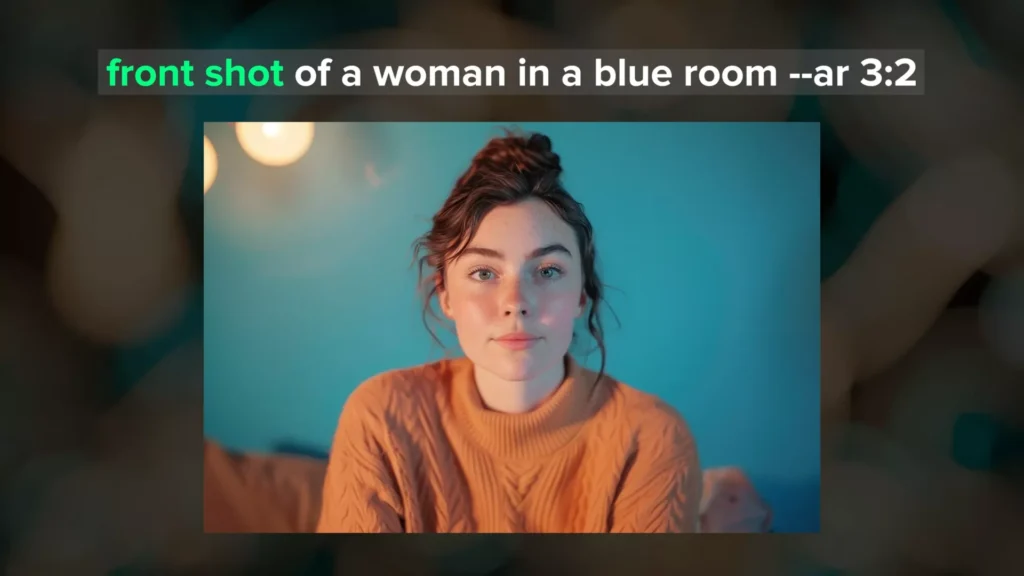
I still use the phrase front shot, but I reinforce it by adding that the subject is looking at the camera. This helps Midjourney keep the correct orientation.
2. Side Shot or Side Profile Shot
Next is the side shot, also called a side profile shot.
In this shot, the subject is shown in profile view. This emphasizes outline and form rather than facial expression.
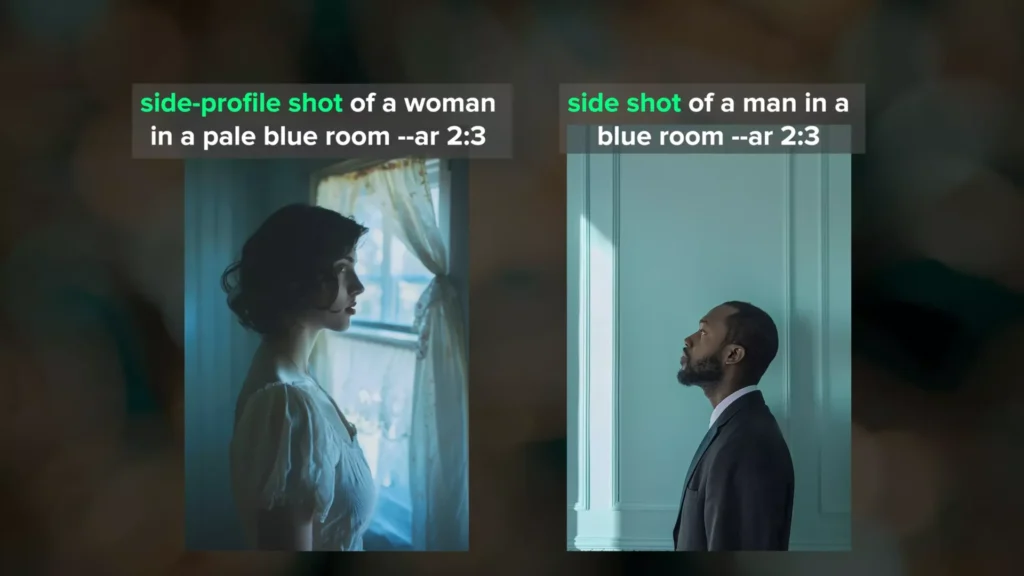
Both phrases work well for tall and wide aspect ratios. From my experience, this is one of the easiest and most consistent shot types to generate when working with subject orientation.
3. Back Shot or Back View
After that, I place the camera behind the character.
This shows context while hiding facial expression. Using backshot or back view works well for both tall and wide aspect ratios.
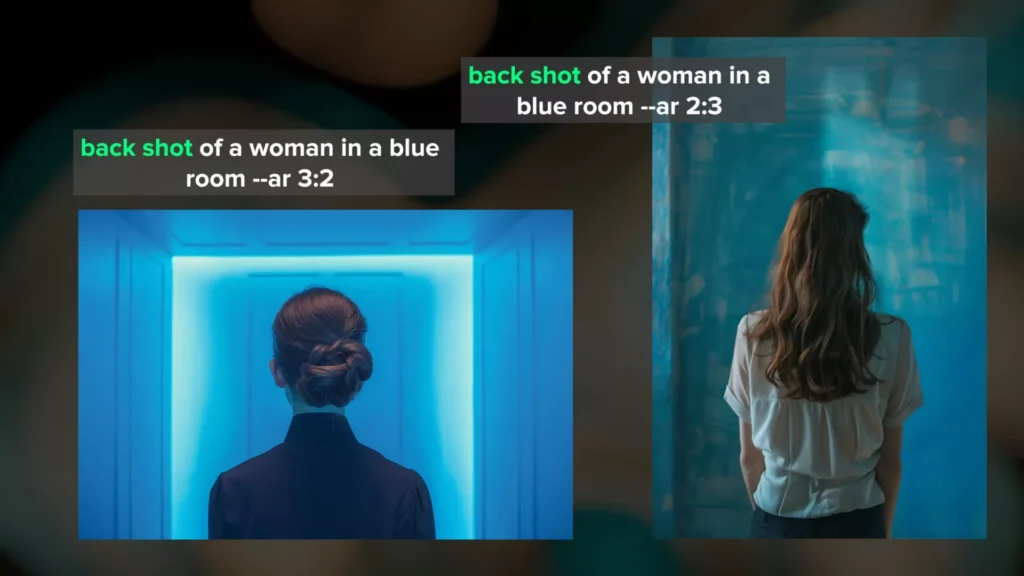
I also want to point out that I usually place subject orientation words at the beginning of the prompt because they are more impactful there. However, this does not mean you cannot rearrange the word order and still get the image you want.
4. 3/4 View Shot
Next is the 3/4 view.
Here, the subject is positioned between a front view and a side view. This balances facial expression and body form.
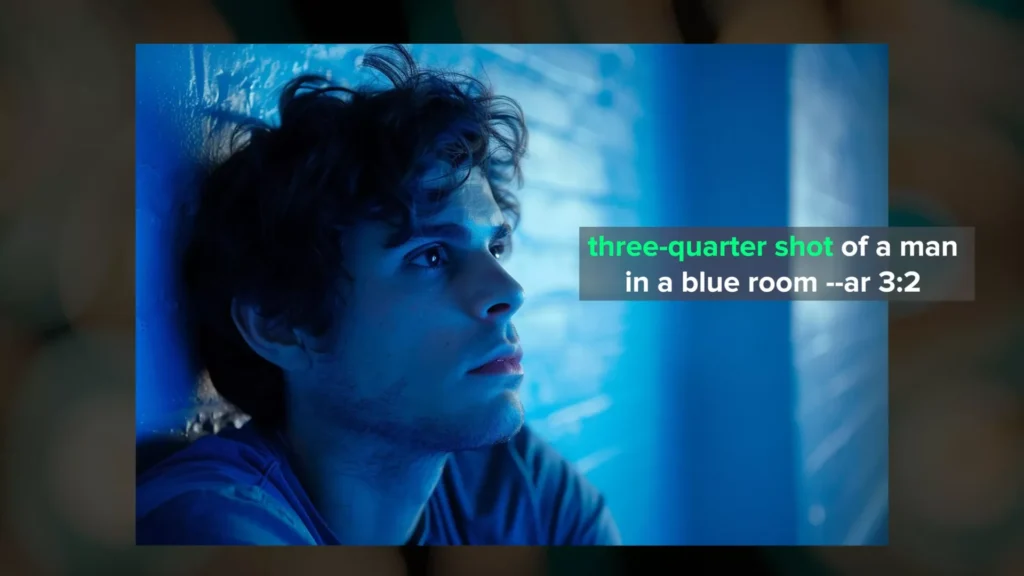
This is the most difficult orientation to achieve consistently. I have had the most success using the phrase 3/4 shot at the beginning of the prompt.
Even then, I usually get about a 50/50 success rate when it comes to correct subject positioning.
I also want to mention that I usually include the word shot in these prompts, which implies photography. If you are working with illustrations, try using the word view instead of shot.
Now that I can rotate around a character, I move on to camera shot distance.
5. Camera Distance Prompts
Camera shot distance controls how tightly or loosely the subject is framed.
Some shot distances are easier to achieve than others. I focus on four main ones here.
6. Extreme Close-Up
An extreme close-up tightly crops the character’s face and adds intimacy and intensity.
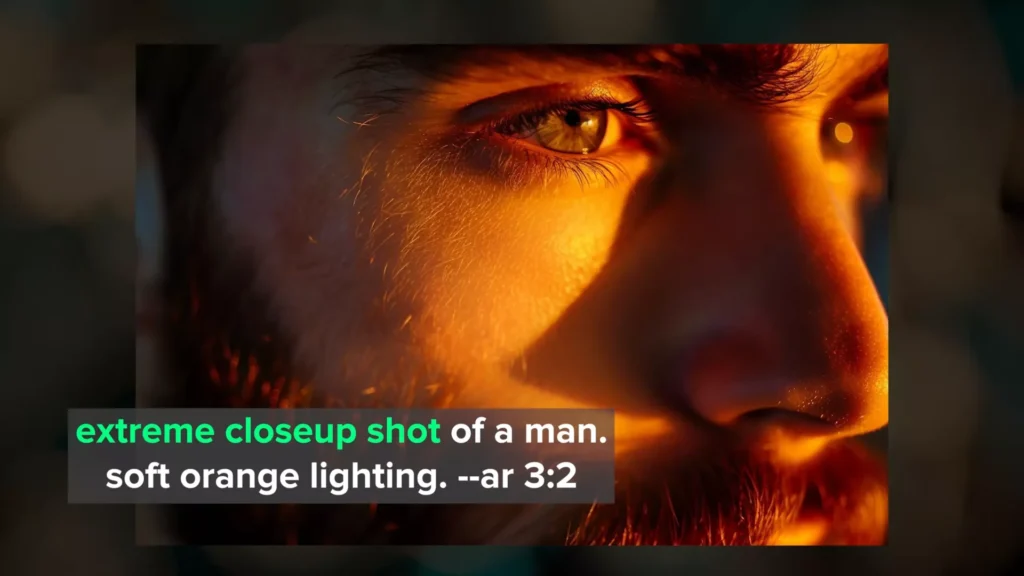
These images typically show the character from the eyebrows down to the nose unless you direct Midjourney to focus on other features.
Including extreme close-up at the beginning of the prompt gives consistent framing for both tall and wide aspect ratios. With tall ratios, you may sometimes get slightly more of the face.
7. Close-Up Shot
Next, I move out slightly to the close-up shot.
A close-up shot frames just the head or face and draws focus to facial expressions.
Using close-up shot or close-up portrait shot usually results in images showing most of the face, from the eyebrows to below the mouth.
If you want a more zoomed-out version, you can use medium close portrait shot.
8. Medium Shot
Now I move into a gray area: the medium shot.
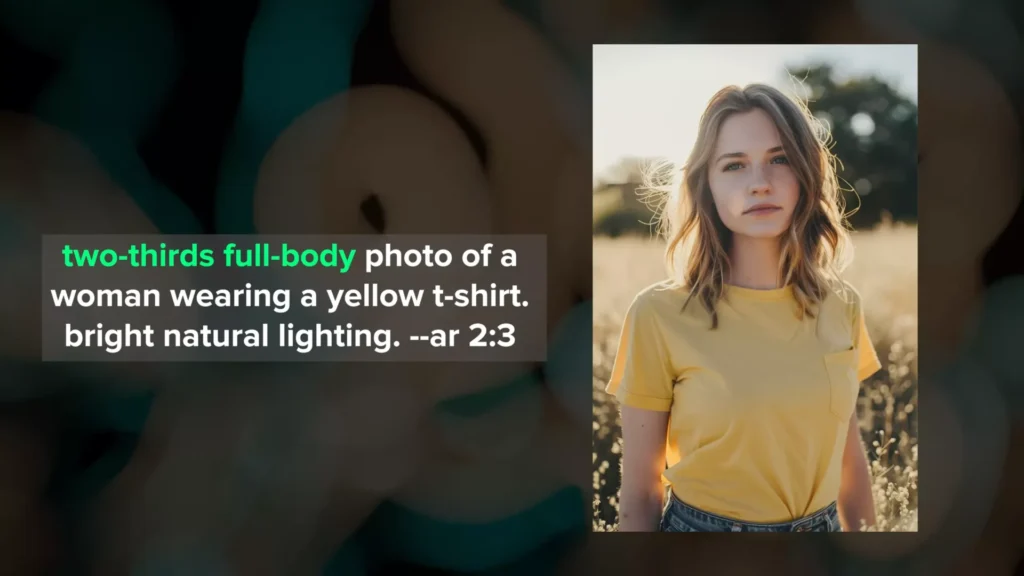
A medium shot usually frames the character from the waist up. This provides more context, such as clothing and part of the environment.
Medium shots are tricky to prompt because there are multiple types. Some are more zoomed in, and others are more zoomed out.
Because of this, Midjourney can struggle to understand exactly what you want.
To get a true waist-up view, I have had the best results using 2/3 body or 2/3 full body.
Using only medium shot often gives more zoomed-in portraits. With tall aspect ratios, detailed phrasing works even better.
9. Full Body Shot
Next is the full body shot.
In this shot, the entire body is visible, along with more background context.
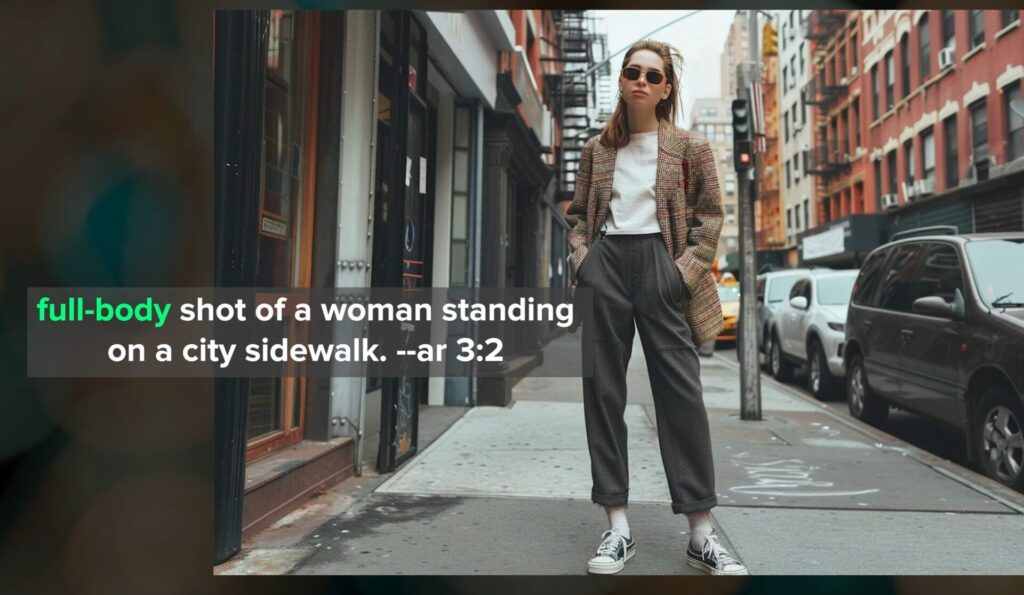
It is often easier to generate full body images using tall aspect ratios because the shapes are similar.
Using full body shot at the beginning of a prompt gives about half of the results as full body images. I have noticed that this works more reliably with male characters.
What works even better is being more descriptive.
I describe what the character is wearing from head to toe and include shoes. I also add more information about the surrounding environment.
This approach forces Midjourney to consider the surroundings instead of focusing only on clothing. As a result, the camera is pushed further away from the character.
From my experience, camera distance is one of the hardest things to control using simple phrases alone.
10. Zoom Out and Pan Features
When you want more of the character visible, it helps to start with a tall aspect ratio.
I also recommend using Midjourney’s zoom out and pan features.
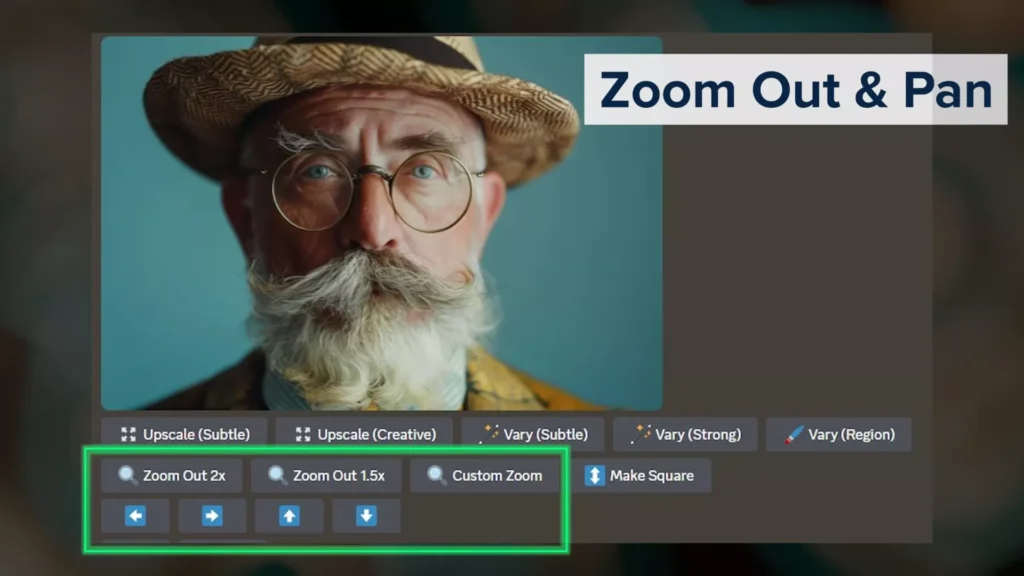
I focus first on subject orientation and camera angle. Then I zoom out or pan based on what I need.
This is a fast way to get full body images without struggling with prompt phrasing.
11. Camera Angle Prompts
In addition to subject orientation and distance, camera angle controls perspective and point of view.
Midjourney usually defaults to eye-level or slightly below eye-level unless you specify otherwise.
Here are several angles that work well.
12. Low Angle Shot
A low angle shot places the camera below the subject, pointing upward.
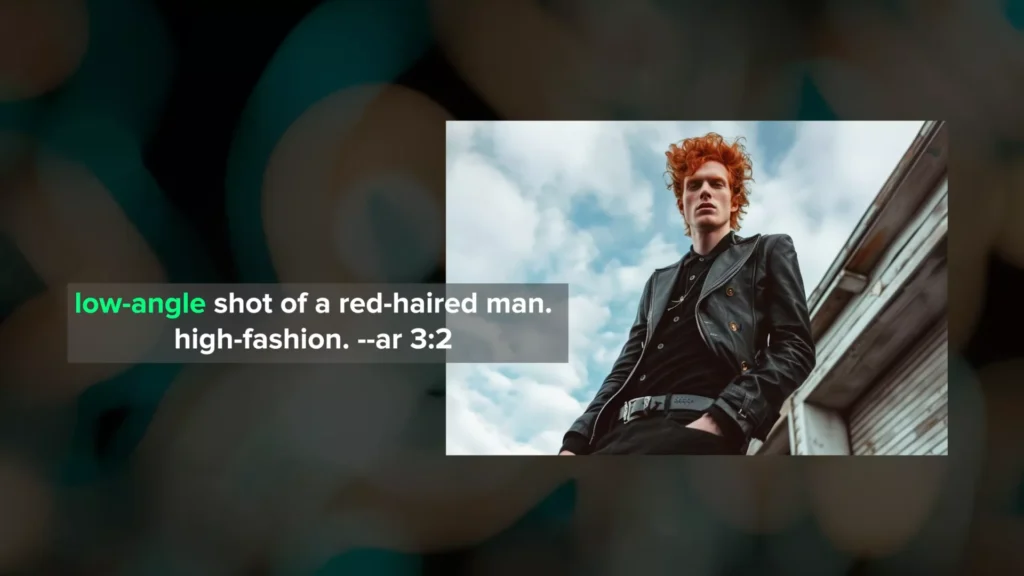
This makes the subject appear larger and more imposing.
Using low angle shot at the beginning of the prompt works well for both tall and wide aspect ratios.
13. Wide Angle Shot
For a more exaggerated perspective, I sometimes use wide angle.
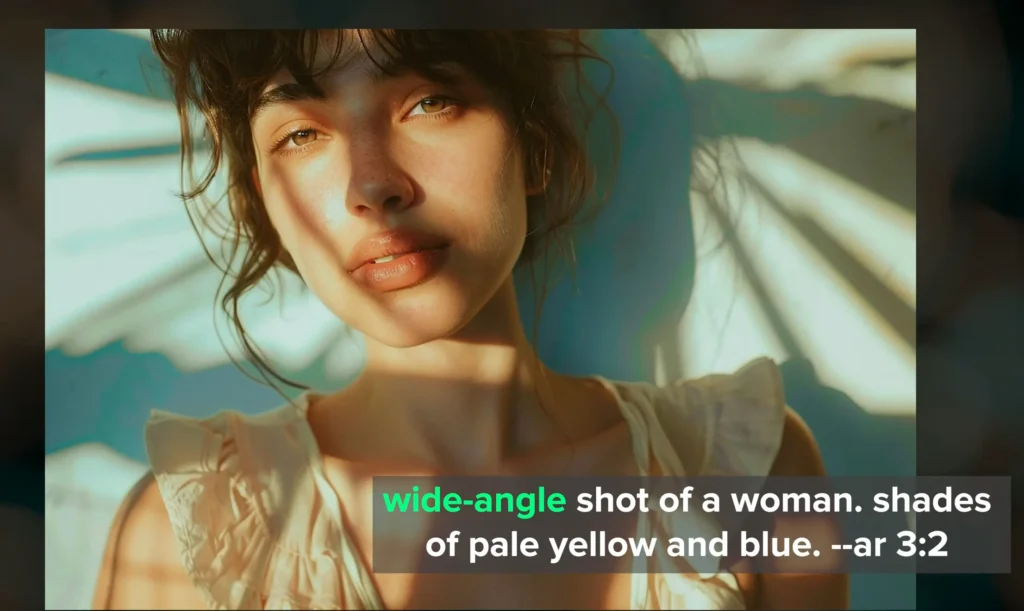
This phrase is context-dependent.
When I prompt for a wide angle shot of a person in a room, I usually get a full body image with some of the room visible.
When I prompt for a wide-angle photo of a person, I often get a medium close-up instead.
Both results make sense because both could be captured using a wide angle lens. This means wide angle relies heavily on surrounding context in the prompt.
14. Fisheye Shot
Next is fisheye.

This refers to a lens that creates strong barrel distortion around the edges.
Midjourney handles this phrase very well. The curvature and warping around the edges are usually clear.
This creates a very distinctive perspective and can produce unique results.
15. High Angle Shot
A high angle shot places the camera above the subject, pointing downward.
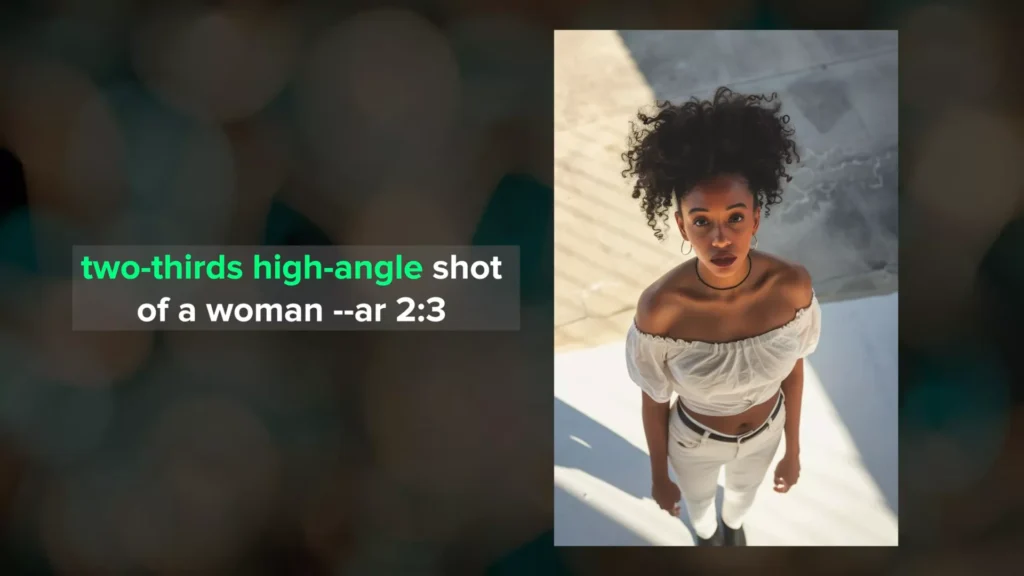
This can make the subject appear smaller and convey vulnerability.
Using high angle shot usually works, but Midjourney sometimes confuses it with an overhead shot.
Using phrases like 2/3 high angle shot or medium high angle shot can help.
In general, it is difficult to position the camera between overhead and eye level without it going too high.
16. Drone Shot
For even higher perspectives, I use drone shot, wide angle drone shot, or extreme long drone shot.
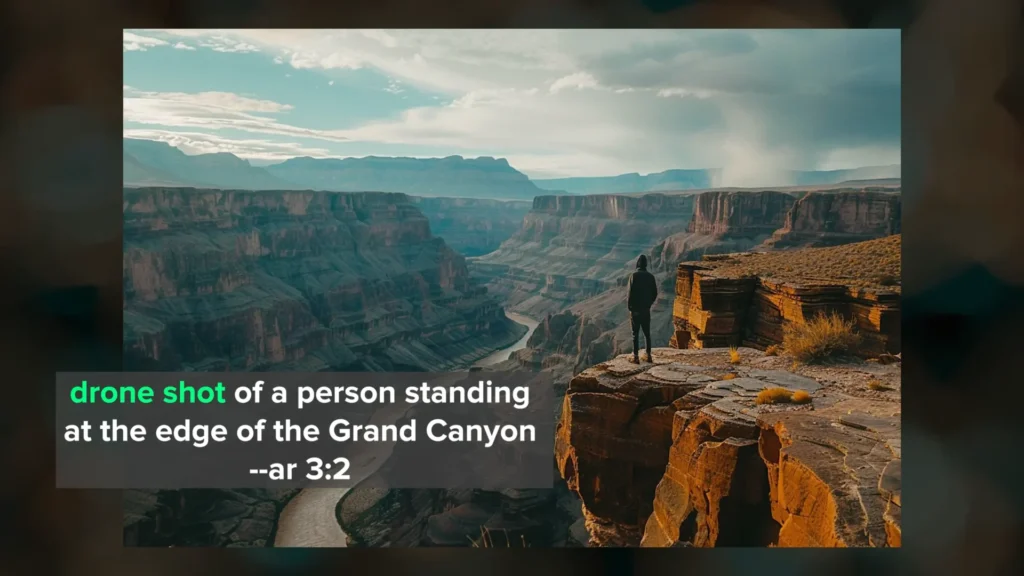
These phrases provide an aerial perspective and show the surrounding environment clearly.
17. Combining Shot Types
I have now covered subject orientation, camera distance, and camera angle.
You can combine multiple shot phrases to get creative results.
Some combinations work better together than others, so experimentation helps.
18. Character Reference in Midjourney
Using Midjourney’s character reference feature allows you to generate the same character from different perspectives.
This helps build a consistent story using multiple shots.
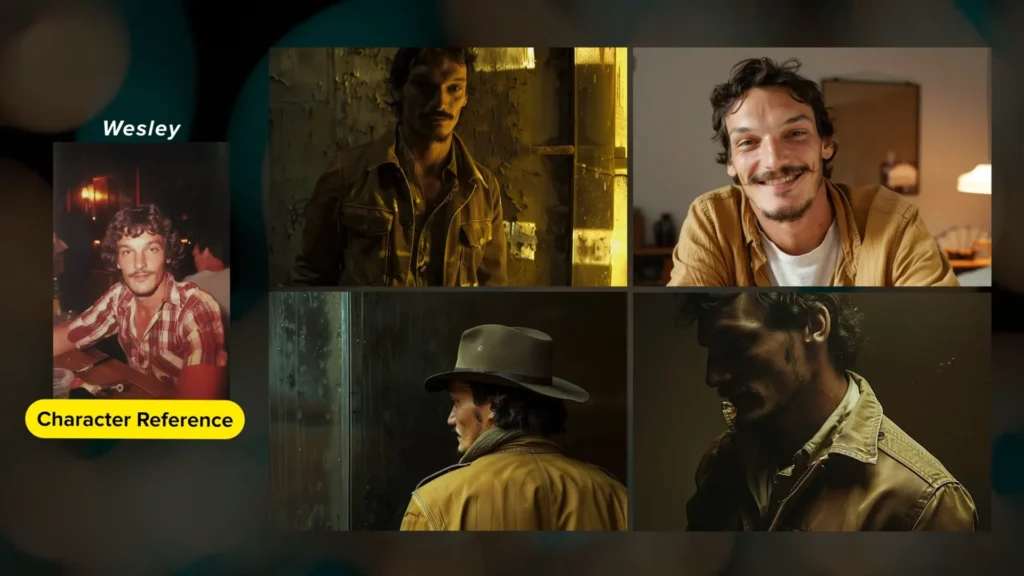
I created several images using the same character and used a 3/4 shot as the character reference.
Depending on the orientation you want, it can help to provide multiple reference images or a single one that matches your target orientation.
19. Using Shot Prompts Beyond Characters
Although I focused on characters, these shot phrases also work for other image types.
They apply to environments, objects, and scenes when used thoughtfully.
For more prompt inspiration, I recommend building a library of tested phrases.
If camera distance becomes difficult, remember that zoom out and pan are helpful tools.
They are especially useful when simple phrases do not give the framing you want.
Conclusion
Mastering camera shot prompts requires understanding how subject orientation, distance, and angle work together.
By combining these techniques and refining prompts step by step, it becomes easier to guide Midjourney toward consistent and controlled results.
Zoom out and pan remain strong tools when framing becomes challenging, and character references help maintain continuity across multiple images.
This structured approach allows you to create images with clearer intent and stronger composition while staying close to your original prompt goals.
Demi Franco, a BTech in AI from CQUniversity, is a passionate writer focused on AI. She crafts insightful articles and blog posts that make complex AI topics accessible and engaging.