Midjourney’s image editor is now available to everyone with a massive upgrade. They’ve added not only a few extra features, but a layer system, which might not seem like a big deal to some, but actually changes the game when it comes to editing images. I’m going to run through the entire process of how this editor works.
I’ve always said that Photoshop skills combined with AI art are kind of like the ultimate combination. This helps to sort of bridge that gap a little bit. I think the level of control it now adds is a big step in the right direction.
Midjourney Image Editor Upgrade: Access and Interface
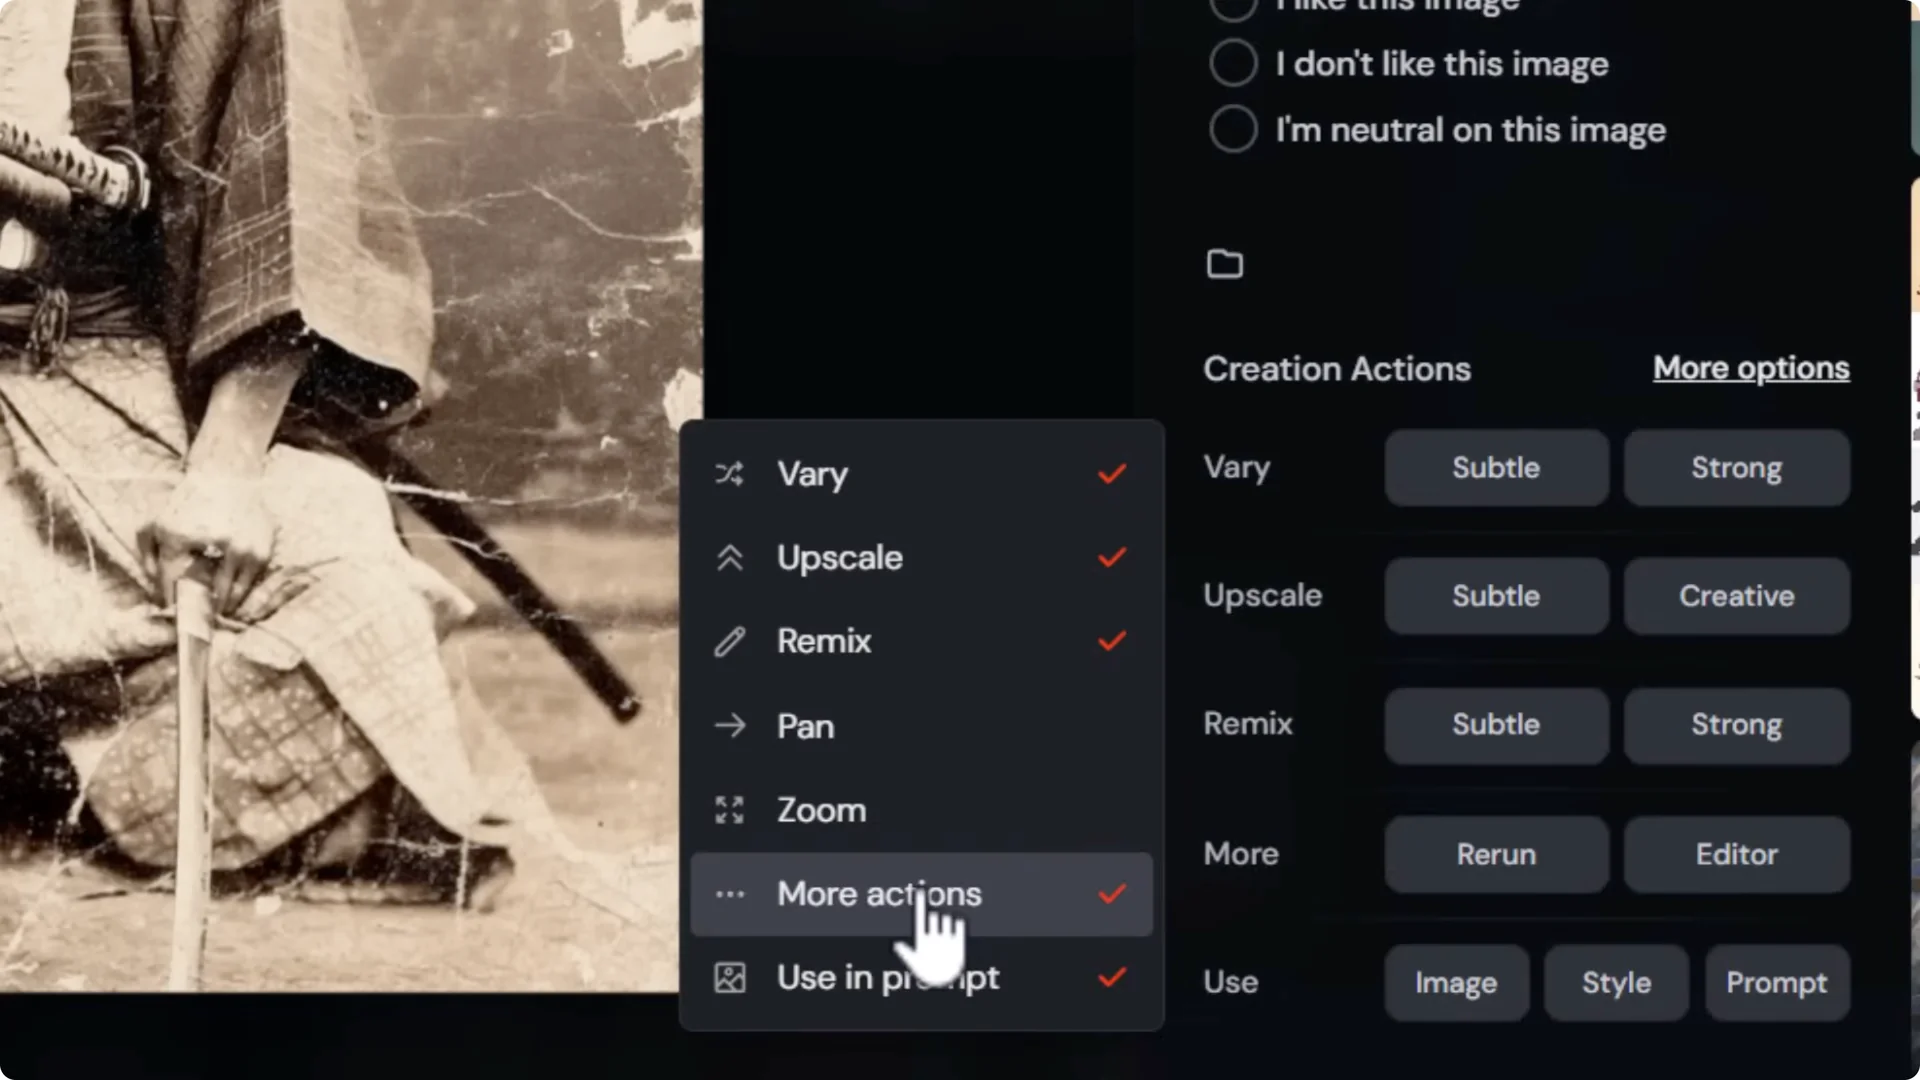
You can access the editor from the edit tab. Another way is to go to your images, click on an image that you want to edit, and down the bottom you’ll notice editor next to more. If you don’t see it, go to more options and tick more actions to get access to the editor.
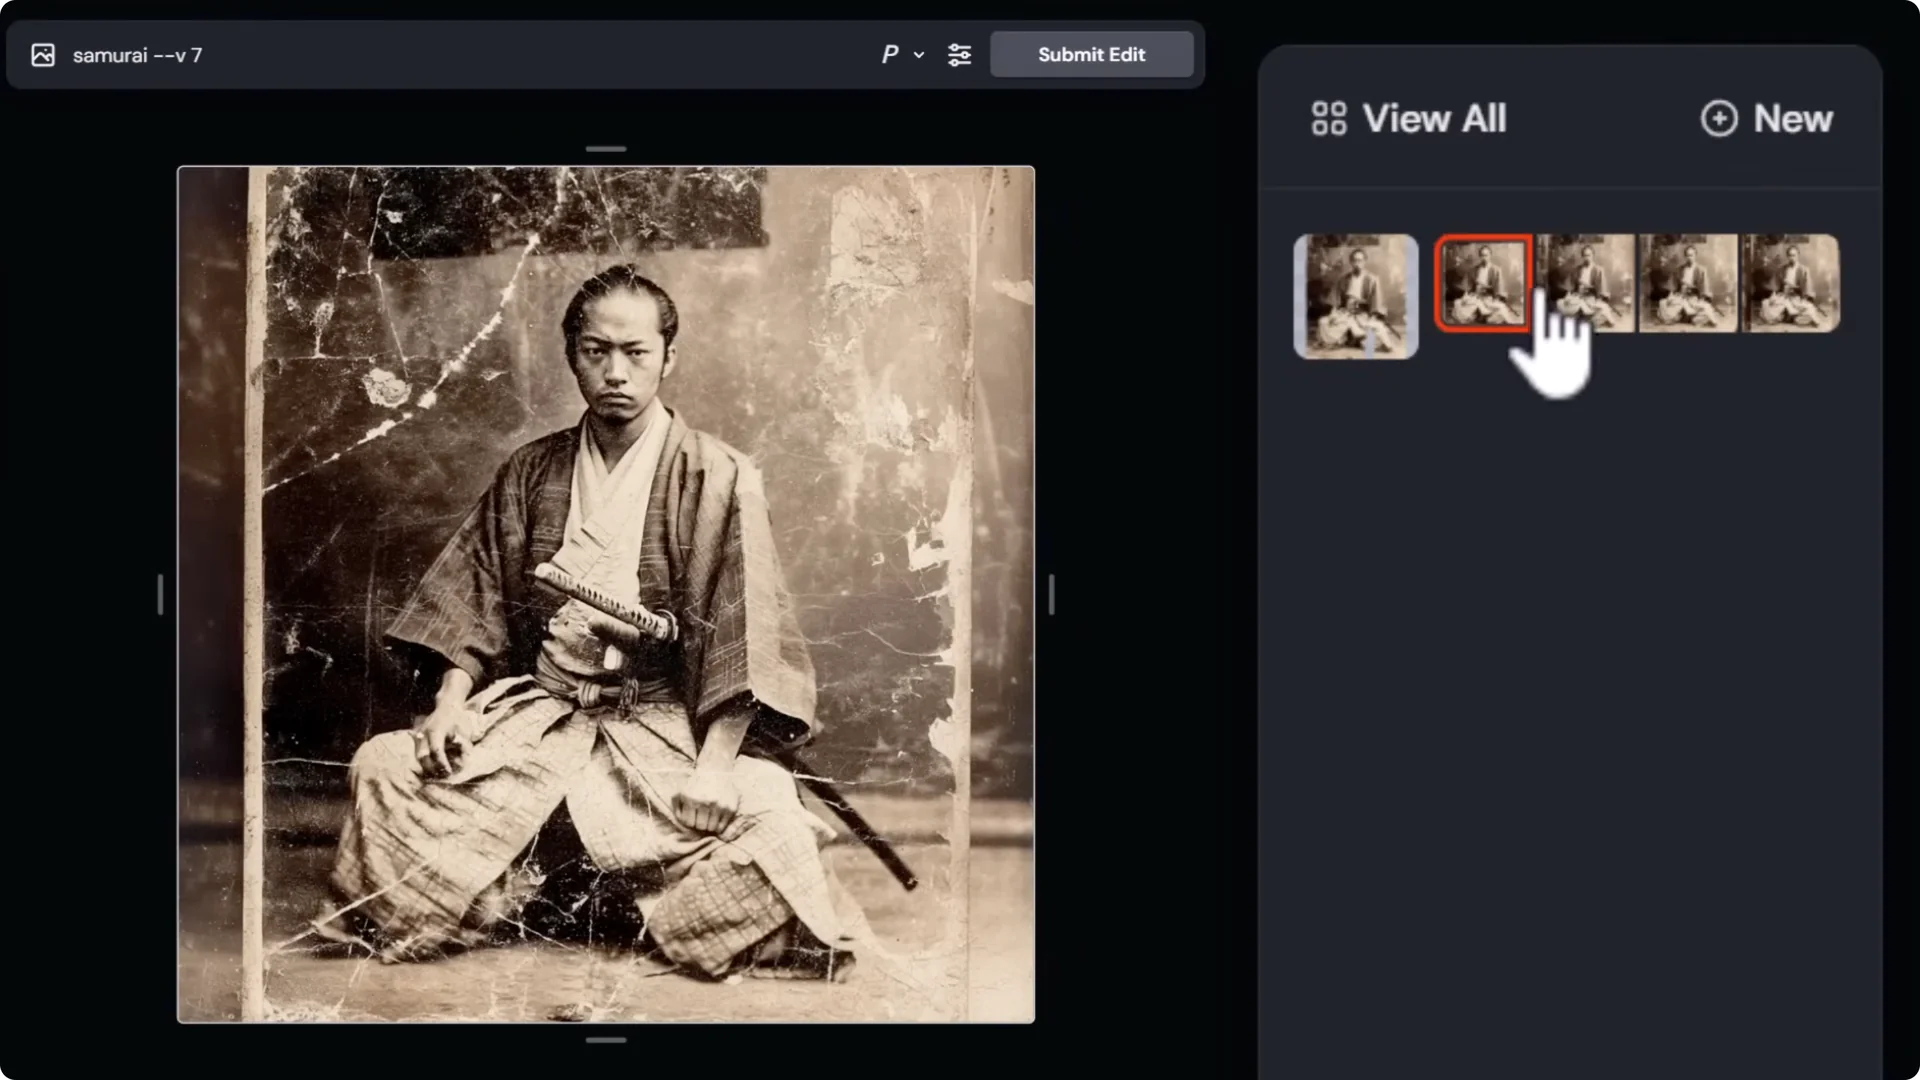
When you click editor, it opens the editor. On the right are your generations, export options, and a stacked history of results for each edit. The prompt bar is at the top. Tools run down the left.

Midjourney Image Editor Upgrade: Move and Resize
I start with move and resize because you can shrink your image and change the aspect ratio.
- Click move and resize.
- Choose a preset like 1:1, 9:16 for a phone, or 16:9 for a thumbnail, or drag the handles to customize.
- Grab the image to position it within the frame.
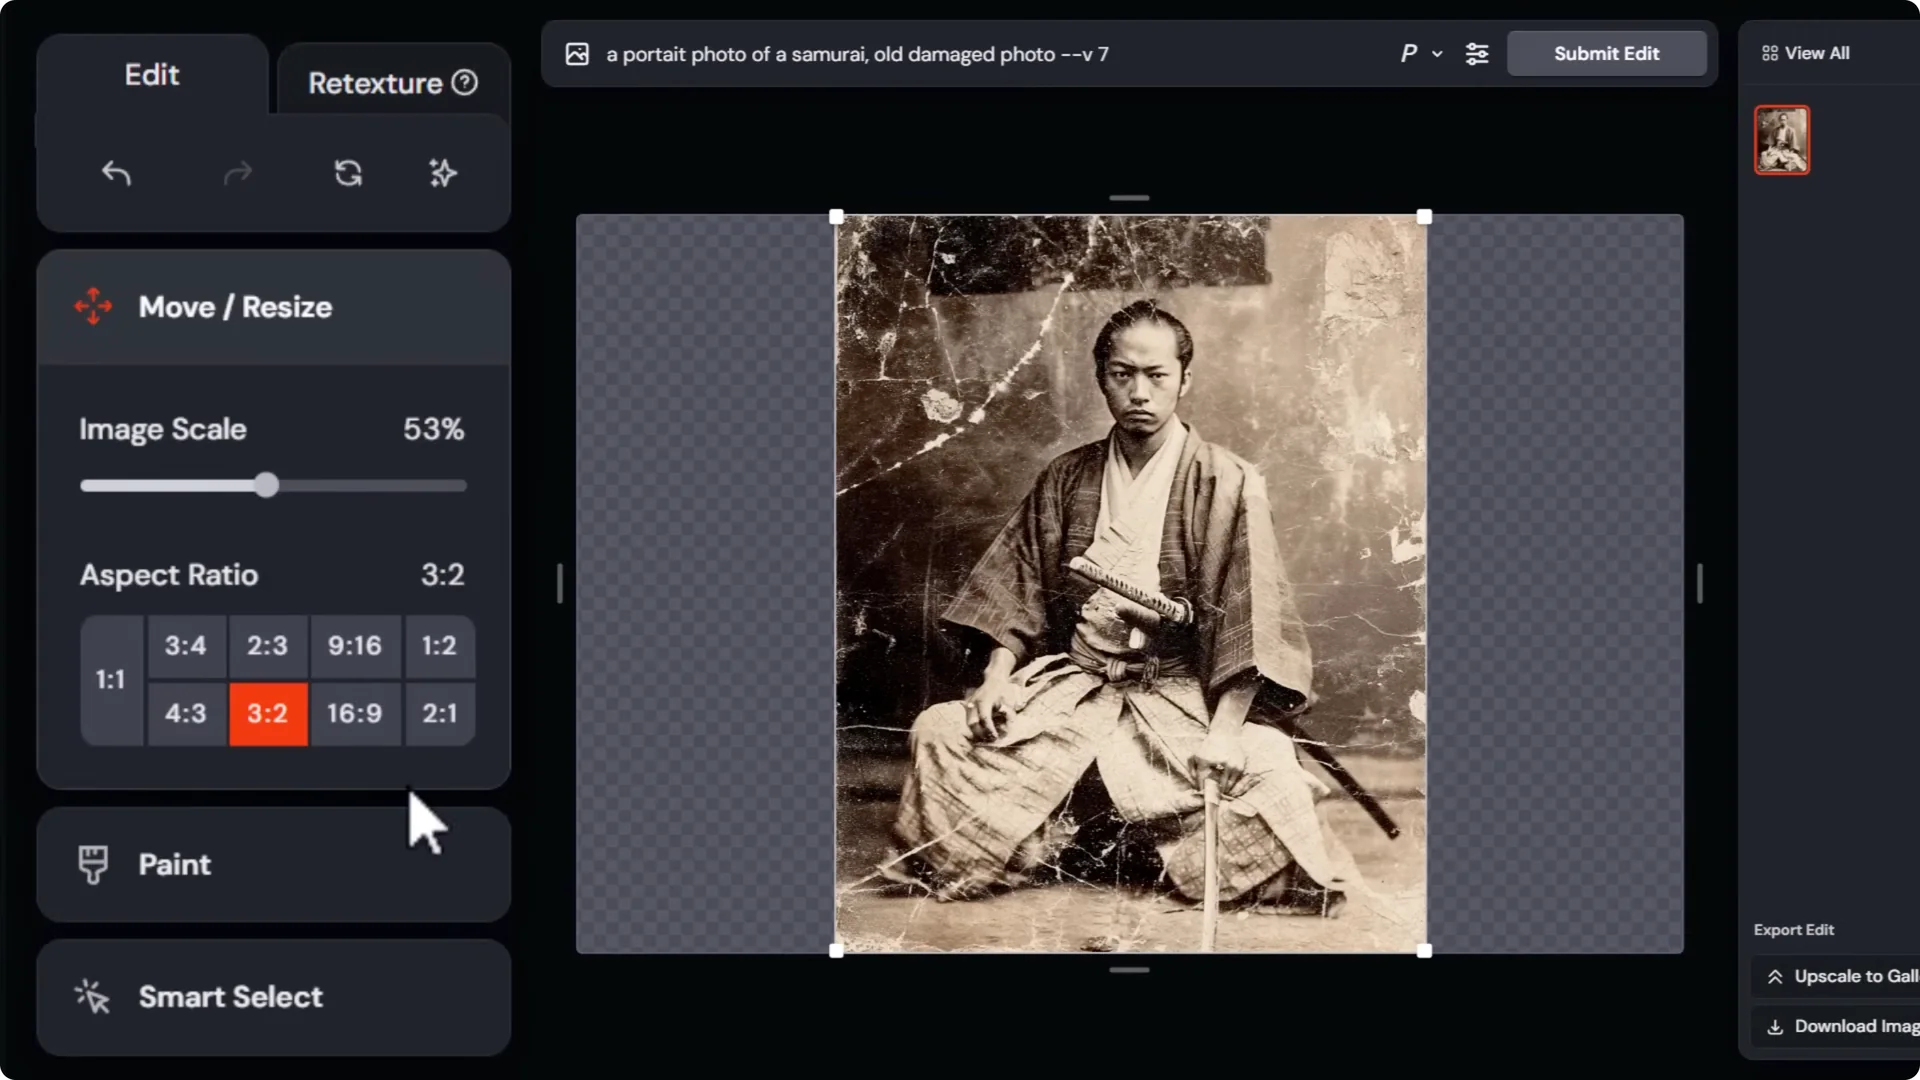
If you size it up too much or crop too heavily, it throws an error. You might notice the aspect ratio readout is not perfectly synced while you are adjusting. If you want to get close, click a preset first, then make your adjustments. If I go back to 1:1 on a non-square image, you’ll see extra space on the sides.
Midjourney Image Editor Upgrade: Paint, Erase, and Restore
Erase and restore basics
To remove something, head to the paint area.
- Click paint, then choose erase or restore.
- Adjust brush size at the bottom.
- Use undo or redo at the top, or click reset layer to reset the entire layer and aspect ratio.
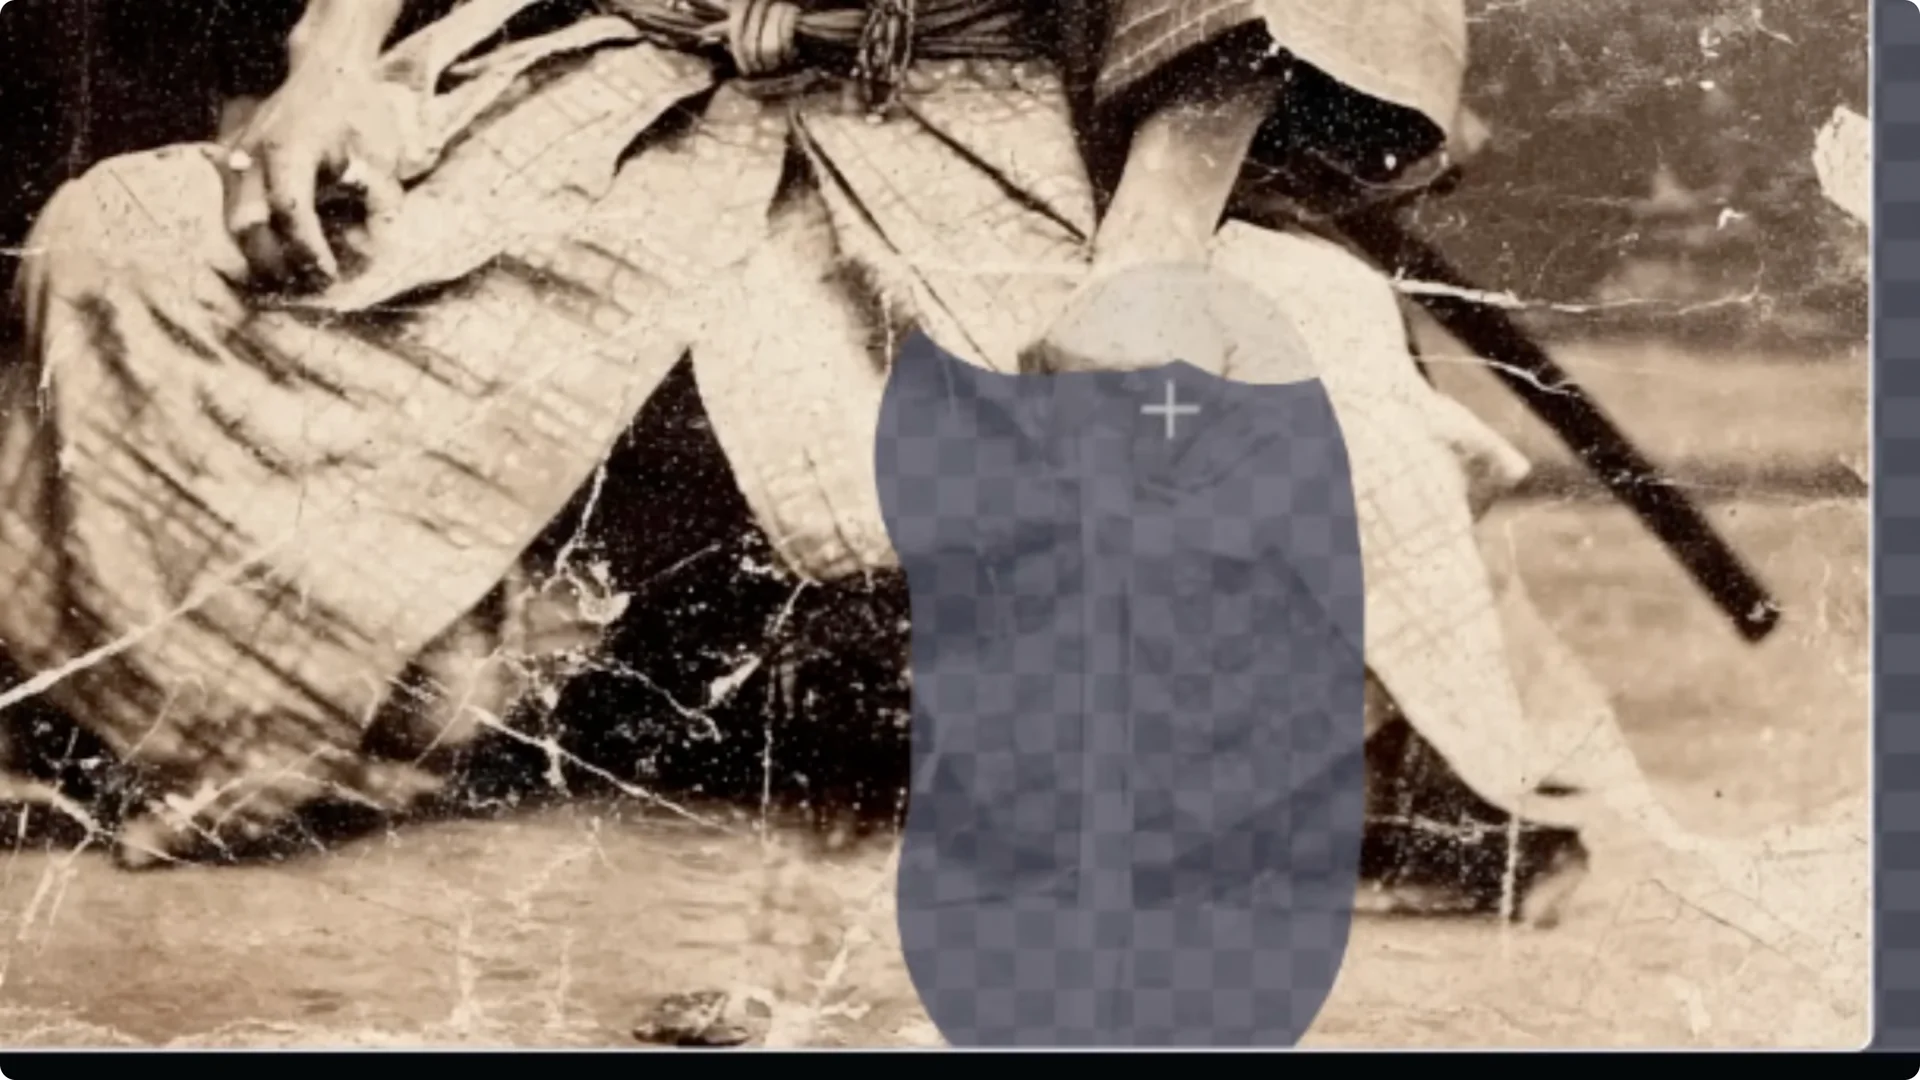
For example, to remove a blade, I bring the brush size down and carefully erase the sword. If I want to be less aggressive, I click restore to see a semi-transparent overlay of the original image and work around details like the blade edge.
Submitting edits and exploring results
When the masked area is ready, type a prompt like samurai and submit the edit. Give it 10 to 20 seconds. It fills in the masked areas and gives four options on the right. Pick the one you like, or go back to the previous state and keep editing.
You can move and resize again to fix edges. If there are white edges or noisy corners, erase just those areas and submit again for a cleaner border.
Undo does not work after you switch to a generated option. To go back, click the earlier image on the left or the prior entry in the right-side history.
Personalization and model versions
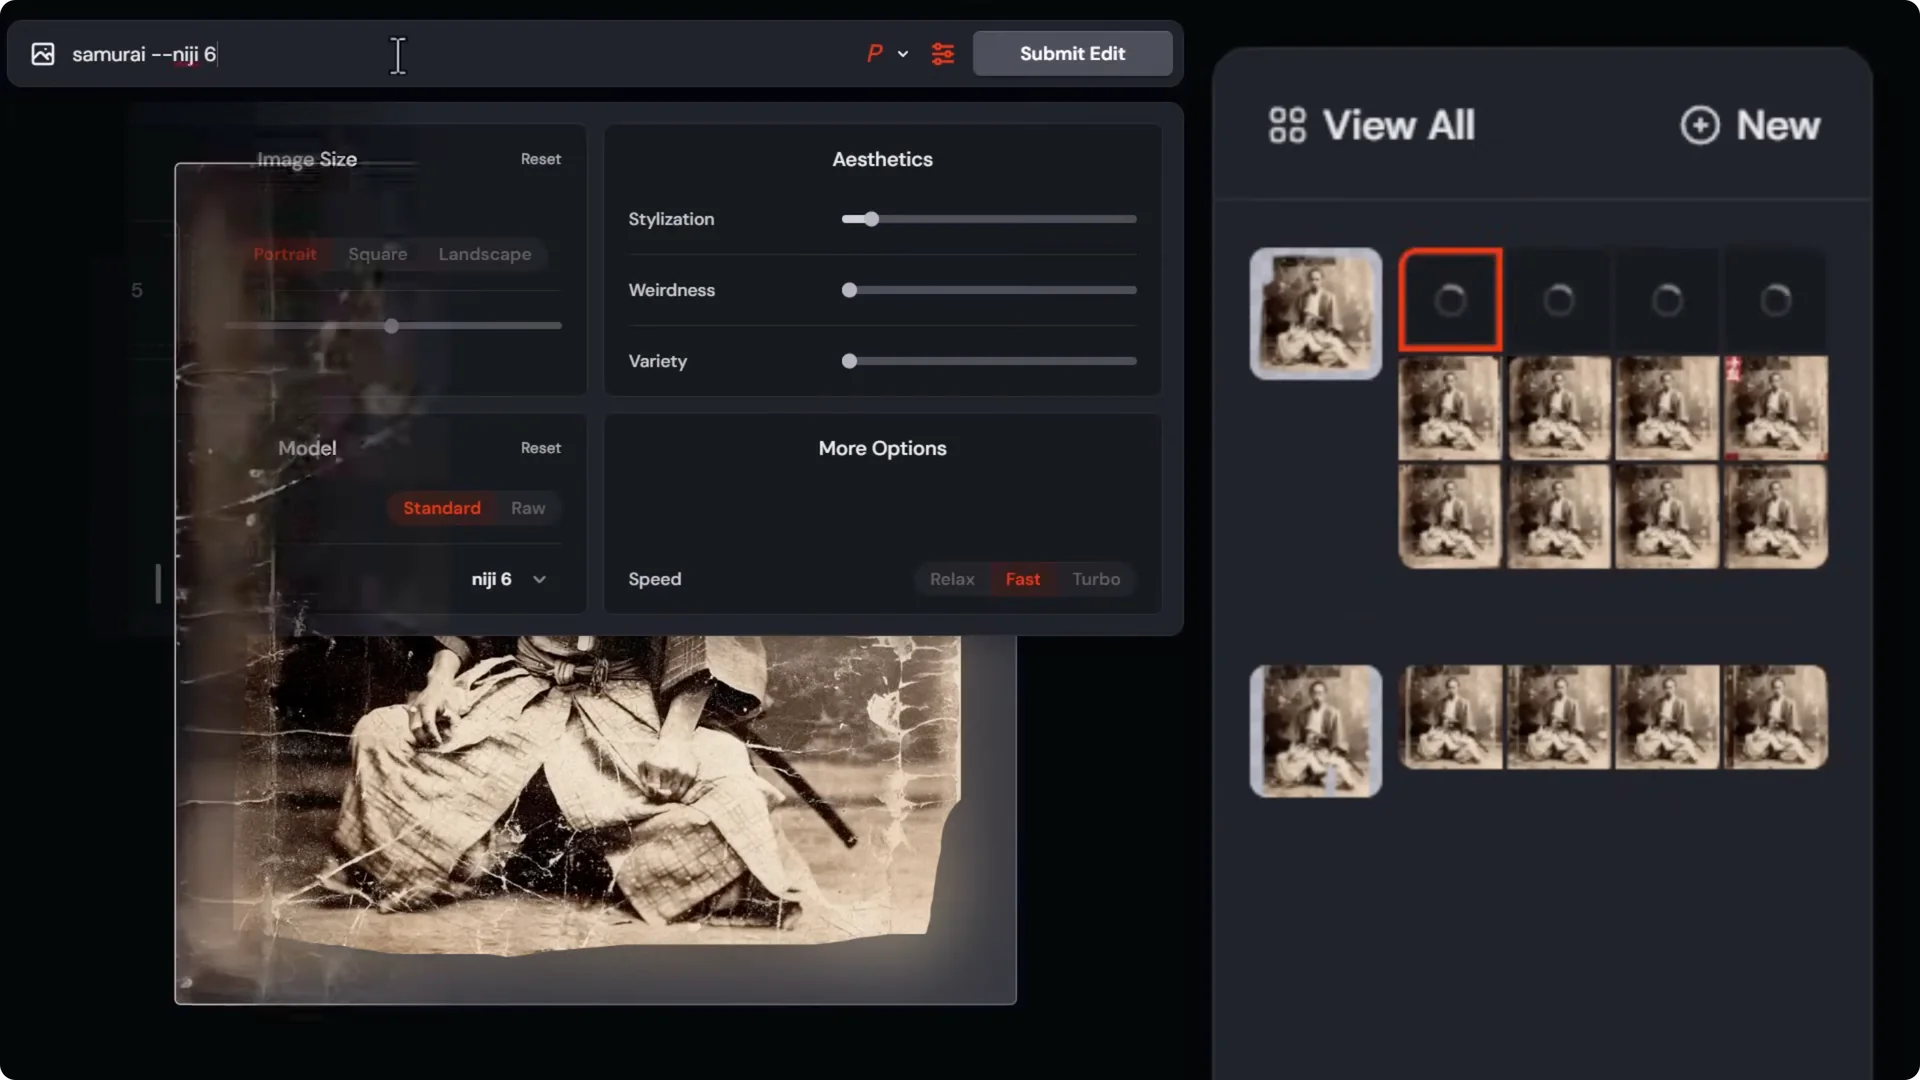
Using version 7, I can turn personalization on and pick something like old film, dust, and scratch. I can adjust prompt settings like stylization and weirdness. Submit, then review the new personalized results. Each edit you submit stacks its results on the right for easy exploration.
You can also switch the model. For instance, switching from version 7 to Niji 6 gives different looks. Remove model tags from the end of the prompt if needed, then hit enter to generate with the selected model.
Midjourney Image Editor Upgrade: Smart Select
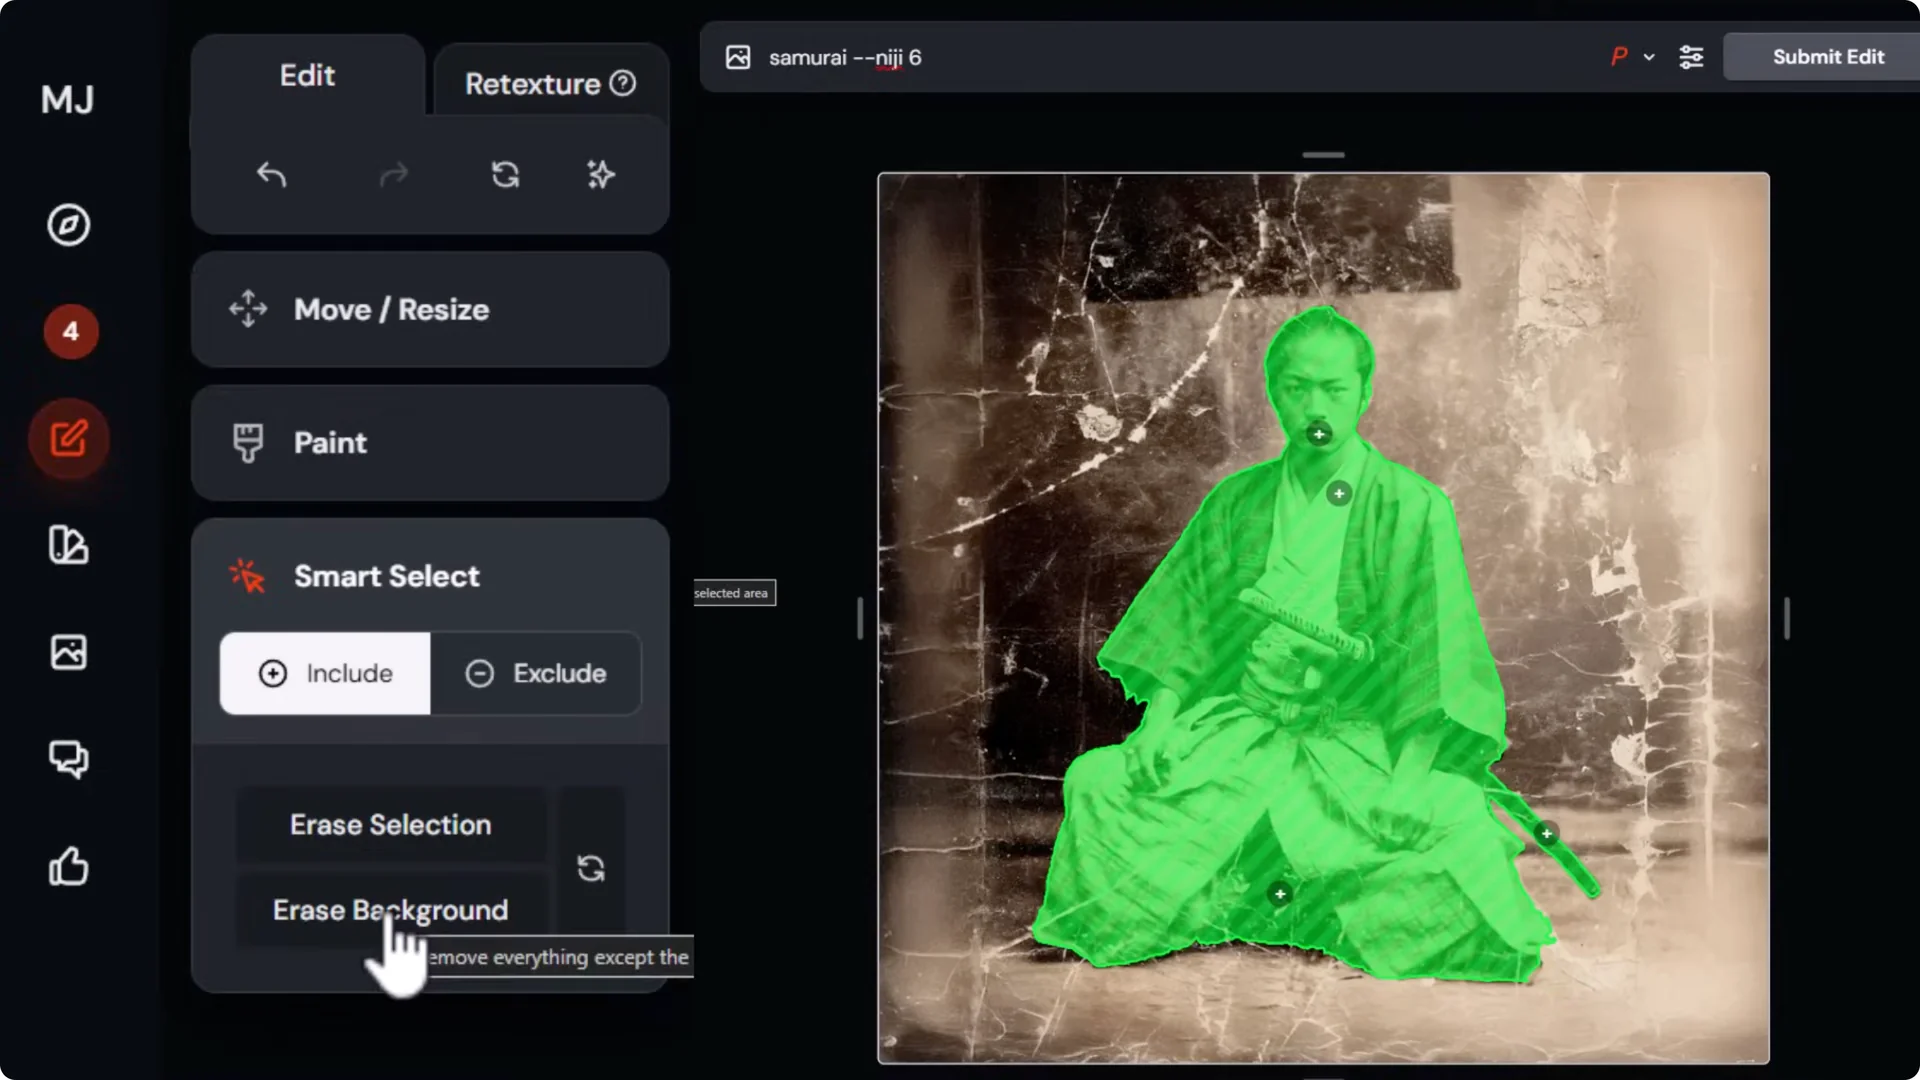
Smart select is a powerful tool for quickly isolating subjects.
- Click smart select.
- Click to build a selection around your subject. It may take a few clicks in detailed areas.
- Choose erase background to cut the subject out, or erase selection to remove the subject itself.
To change the background, type something like New York City street old damaged photo, switch back to version 7, turn personalization off if needed, and submit. You can then browse the four options and select the one that fits best.
Accessing past edits and the external editor
Your edits appear in recent jobs. You can leave the editor and come back later. In the edit tab, choose edit new image to upload or paste a URL and start a fresh edit in the external image editor, which has the same tools. Or click back into a recent edit to resume with your previous options intact.
Midjourney Image Editor Upgrade: Layers
Layers let you combine multiple generations or sources.
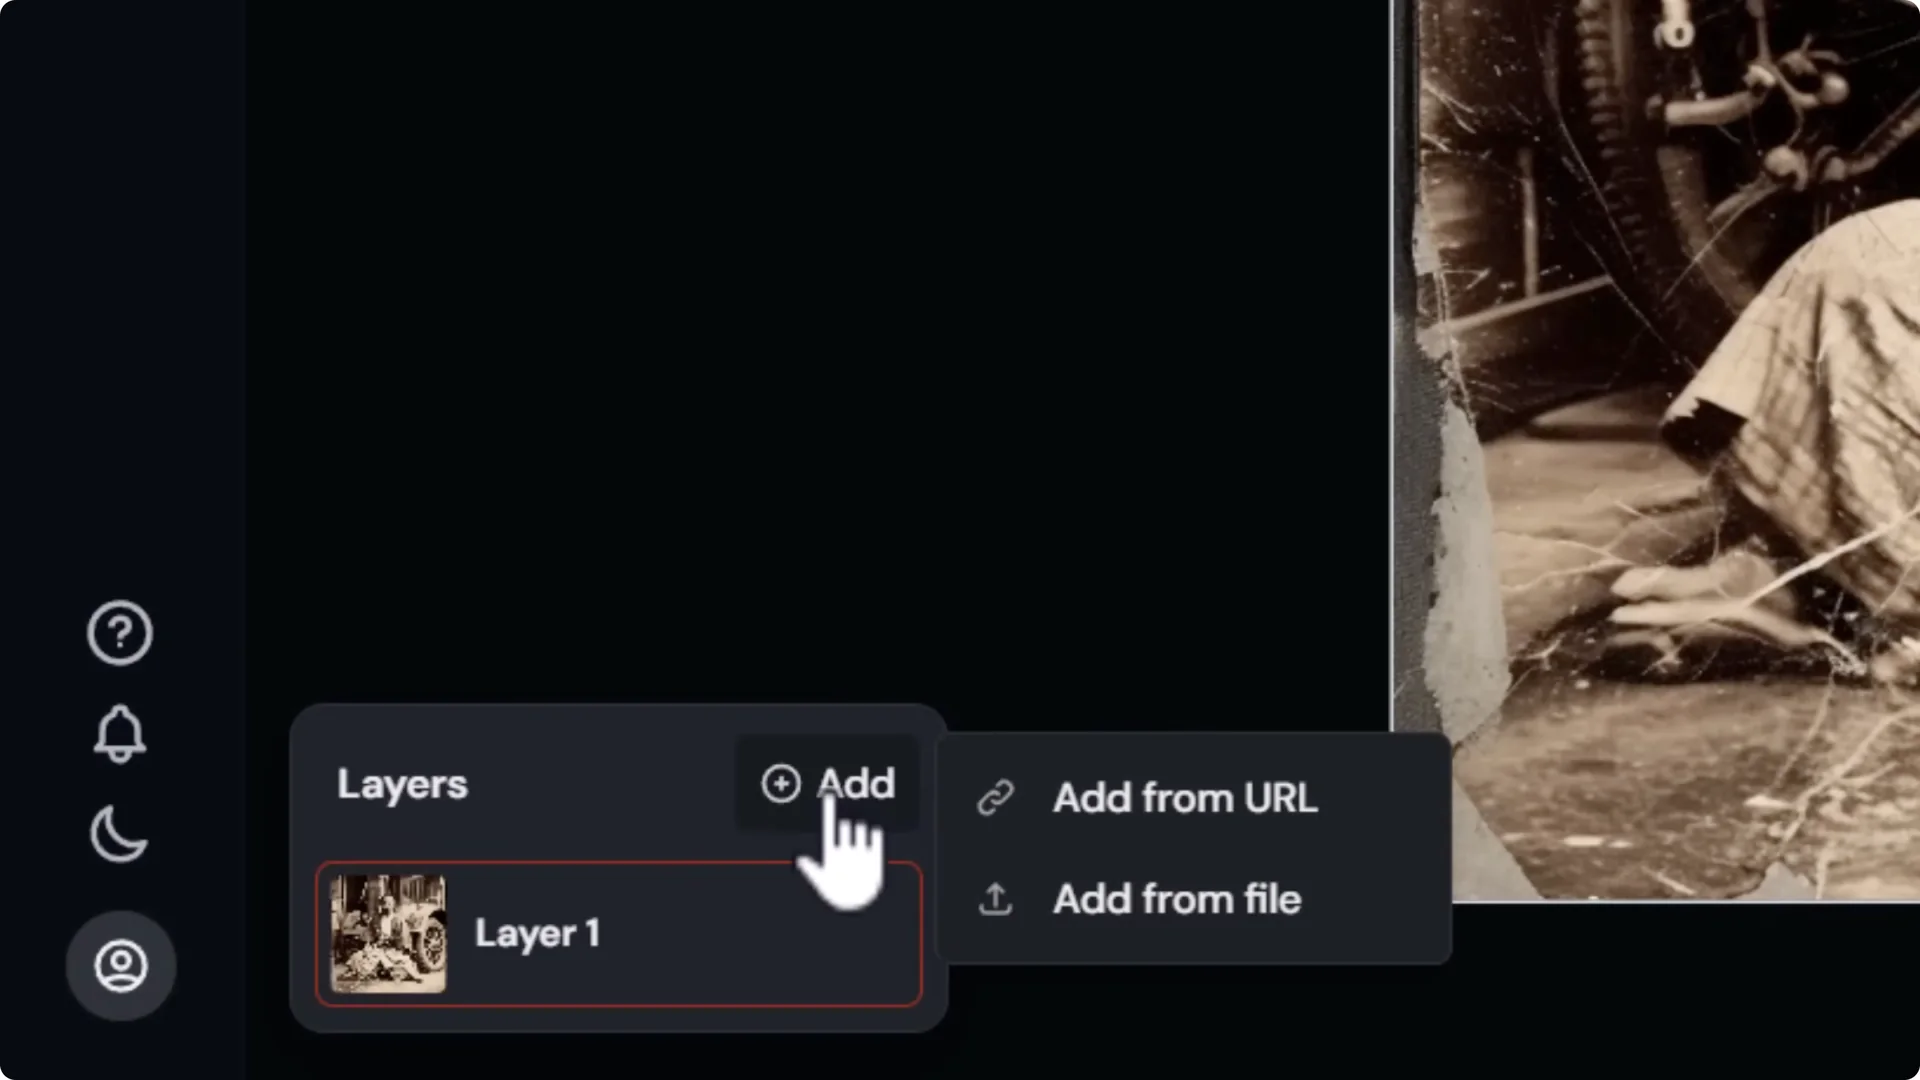
- Open layers in the bottom left and click add.
- Add from URL or add from file to stack images.
- Use the eraser to reveal content from layers below.
For example, download a generated image or the current edit, add it as a new layer on top, then erase parts of the top layer to reveal specific elements from the layer beneath. You can move elements into view and blend them by erasing around their edges before submitting.
Each generation has its own layer stack. When you generate, you are effectively flattening that stack into a new image with its own new stack, so you work per generation. You can photo bash elements and then submit to blend them into a single coherent image.
Midjourney Image Editor Upgrade: Example – Adding elements to a car scene
If I want to add a figure in front of a car:
- Copy the image URL of the figure.
- In the car image’s editor, go to layers, add from URL, and paste the URL.
- Use smart select to select the character and click erase background to cut them out.
- Go to move and resize to position the subject.
If smart select misses parts, go to paint, choose restore, reduce the brush size, and paint back details like a staff. To help Midjourney add a shadow, erase some ground around the subject on the base layer so the model can infer where a shadow should fall in the next generation.
To add another object, like a clock:
- Add from file and bring the clock in.
- If smart select fails, paint a simple mask by hand, then move and resize it into place.
- Erase around the edges of the base layer to blend the object into the environment before submitting.
For tricky cutouts, Adobe’s free background remover is handy. Remove the background externally, download the PNG, then drag and drop it into the editor to add it as a new layer. Transparent PNGs can be a bit problematic for blending if you are placing things like logos over backgrounds, but objects often work well.
Type a prompt like Samurai looks at a futuristic car with a dog sitting beside him and submit. The editor blends the added elements into the scene. If the elements do not match stylistically, use retexture.
Midjourney Image Editor Upgrade: Retexture
Retexture uses your current layout and elements to generate a new image.
- Click retexture at the top.
- You can suggest a prompt or write your own. Make sure your chosen model matches your intent, such as version 7.
- Submit retexture to restyle the composition while respecting the layout.
If a recommended prompt doesn’t work, write your own in the context of the scene you built. Use retexture to take more control over what you want to see. You can iterate to keep color or style, for example by prompting samurai looks at a red futuristic car and adding a style like clock punk style. If you want a different aesthetic, remove style tags like painted by Thomas Concaid and prompt cinematic movie screen cap photo realism.
I recommend generating your edit first, then retexturing. If the retexture misses a detail like the dog’s face, go back to edit, erase around the area, prompt dog’s face, and submit to touch it up.
Midjourney Image Editor Upgrade: Transforming Drawings
You can transform a drawing with retexture.
- Edit new image and drag in a drawing you created.
- Click retexture, paste your prompt, and submit.
- When you find a result you like, upscale to gallery.
You can get a more photorealistic version of your drawing while preserving your composition.
Final Thoughts
The Midjourney Image Editor Upgrade adds a layer system, smart select, retexture, and a practical workflow to mask, blend, and restyle images with more control. You can:
- Change aspect ratios, crop, and reposition quickly.
- Erase and restore with a live overlay to refine masks.
- Switch models and adjust personalization, stylization, and weirdness.
- Stack layers from files or URLs and blend by erasing to reveal what you want.
- Use retexture to restyle a composed scene, then touch up problem areas.
It is already useful for AI art and photo editing. The more you work with masks, layers, and retexture, the more control you gain over your final image.