Once you have your image laid out, you can go to retexture, type in a prompt, and use that as a way to compose the layout and style of your image in order to get more control over your end result. A few people reached out with comments mentioning this concept.
I took that as a prompt and thought I should go a little bit deeper because it seems like something you’re interested in learning. I’ve got a few tips and tricks to help you get a bit more control of your Midjourney images whilst using the Midjourney editor.
How to Import and Photobash Your Layout in the Editor?
Build a Base Background
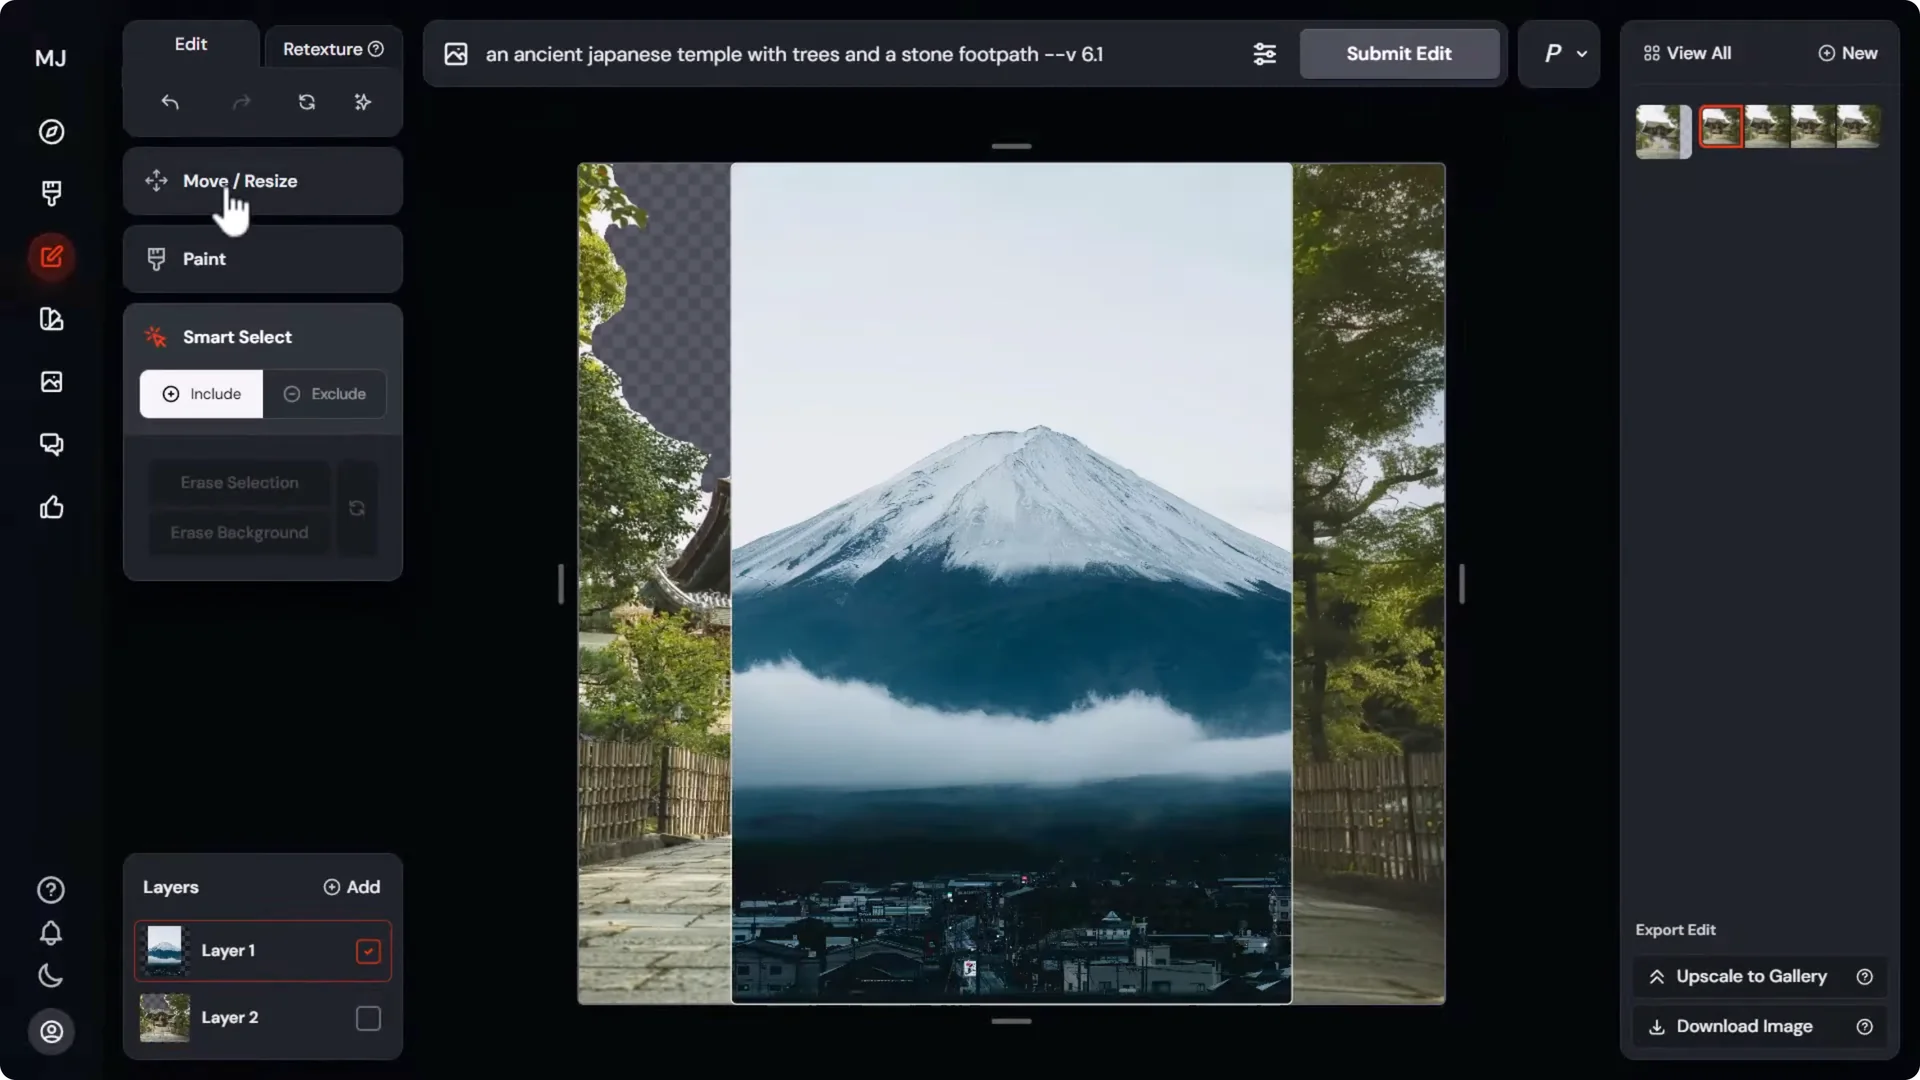
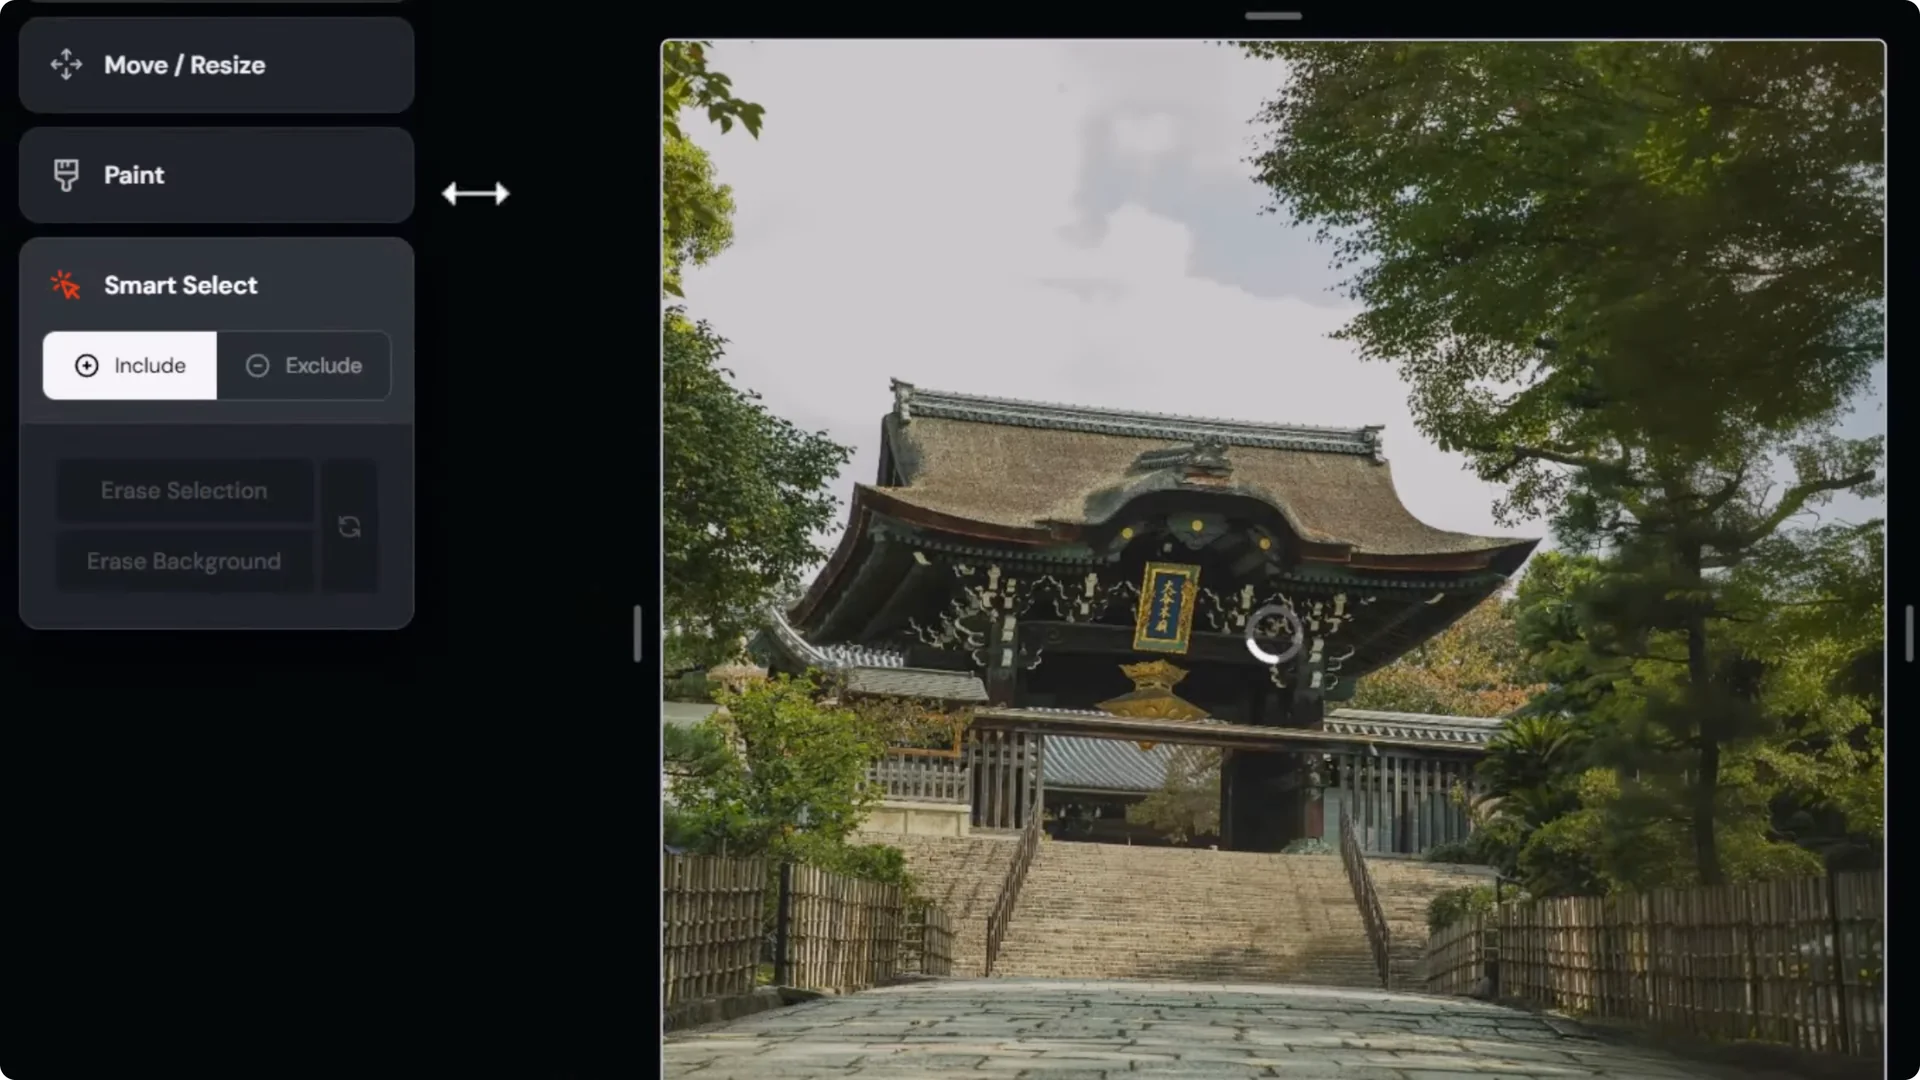
- Drag in your first image to get started. Extend it a little if needed so a character can sit off to the side of the temple.
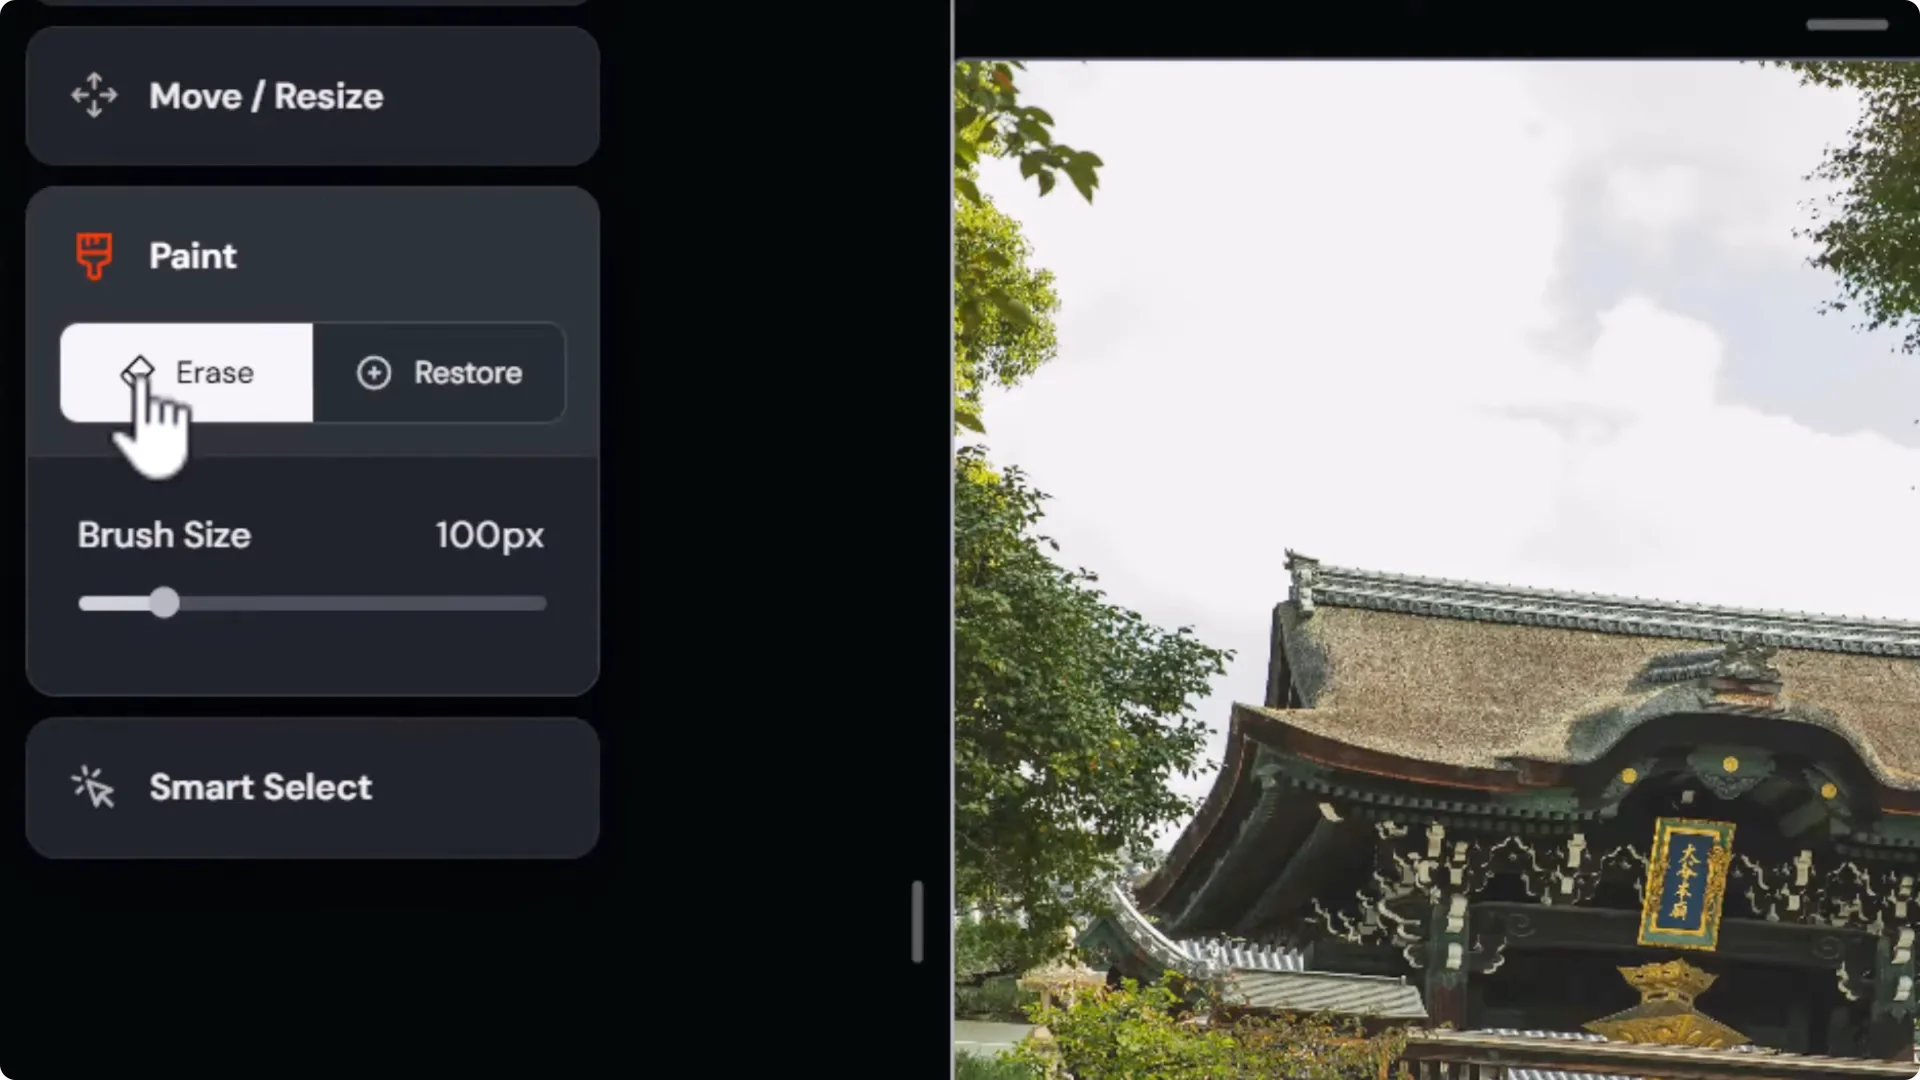
- Remove distractions:
– Use the paint eraser to remove people.
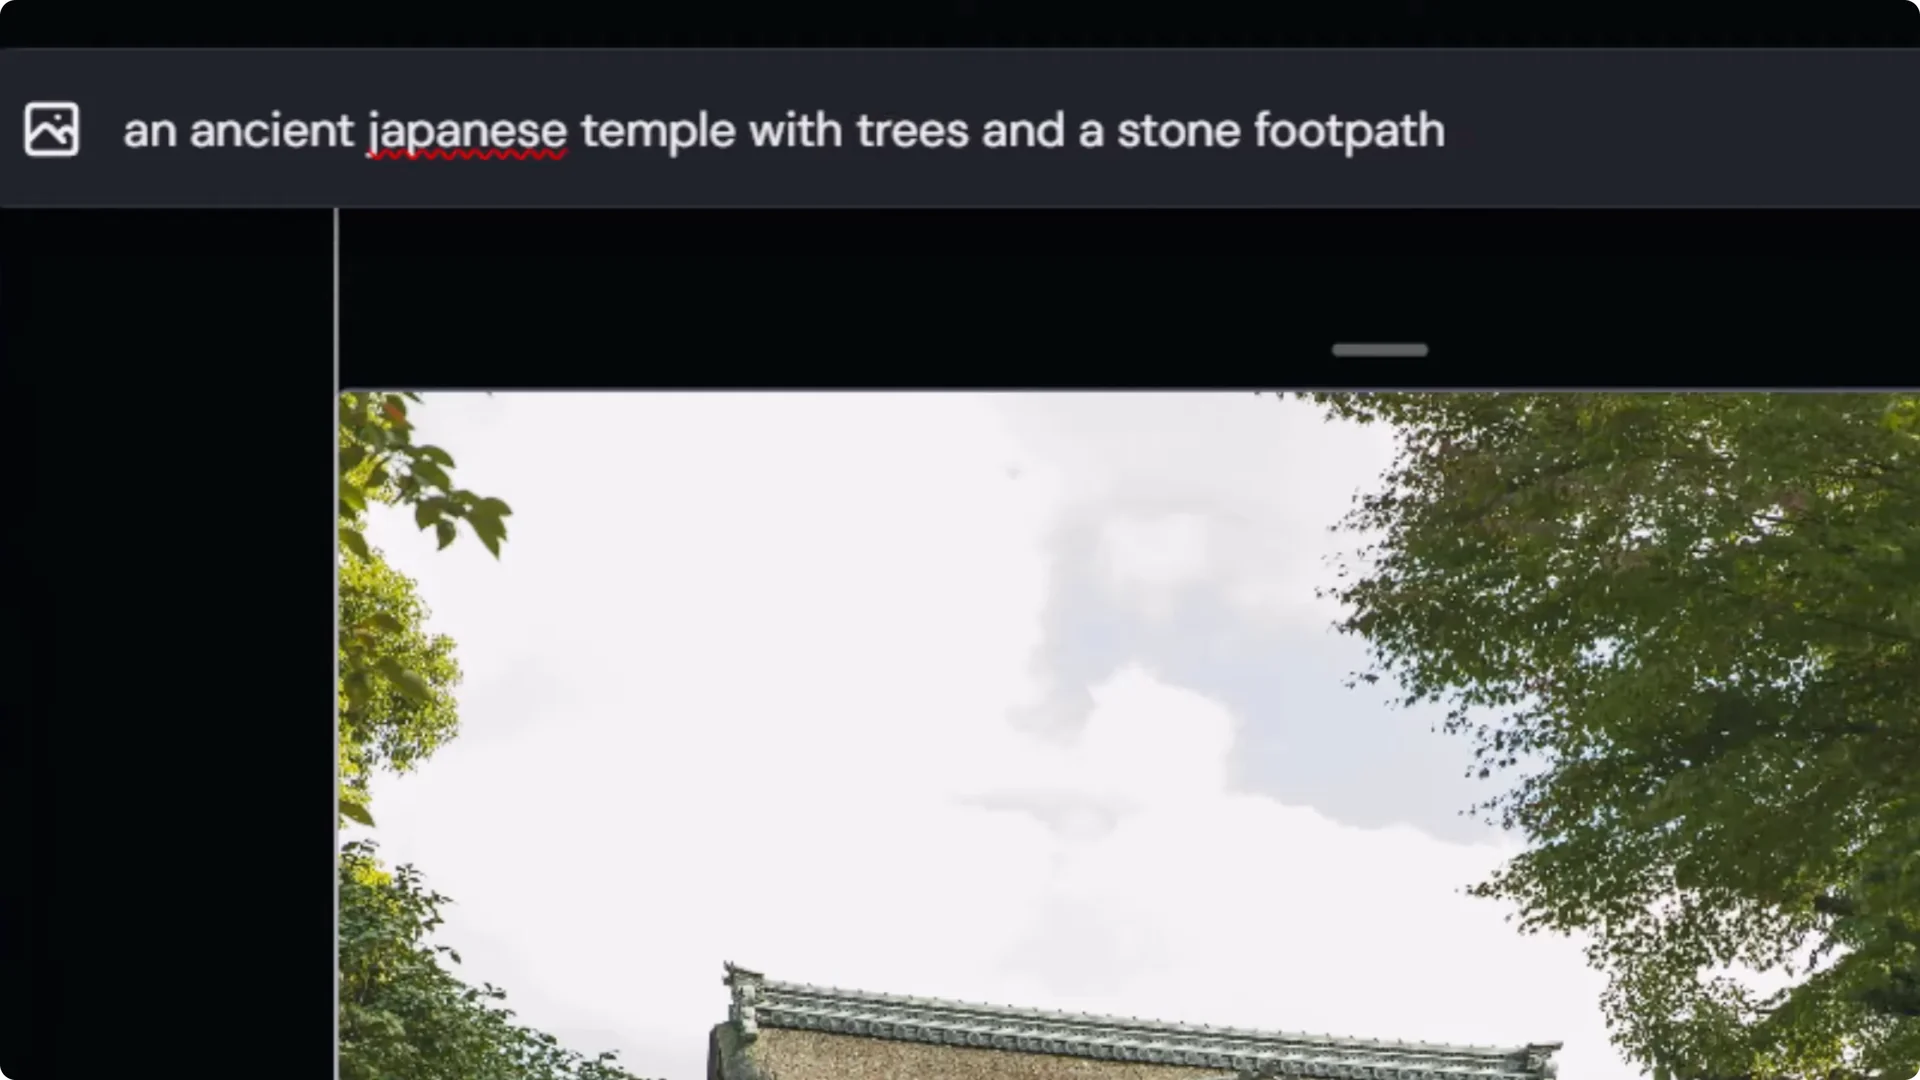
– Enter a prompt like: ancient Japanese temple with trees and a stone footpath.
– Submit that edit to form a clean base background to build on or manipulate.

Add Background Elements With Layers
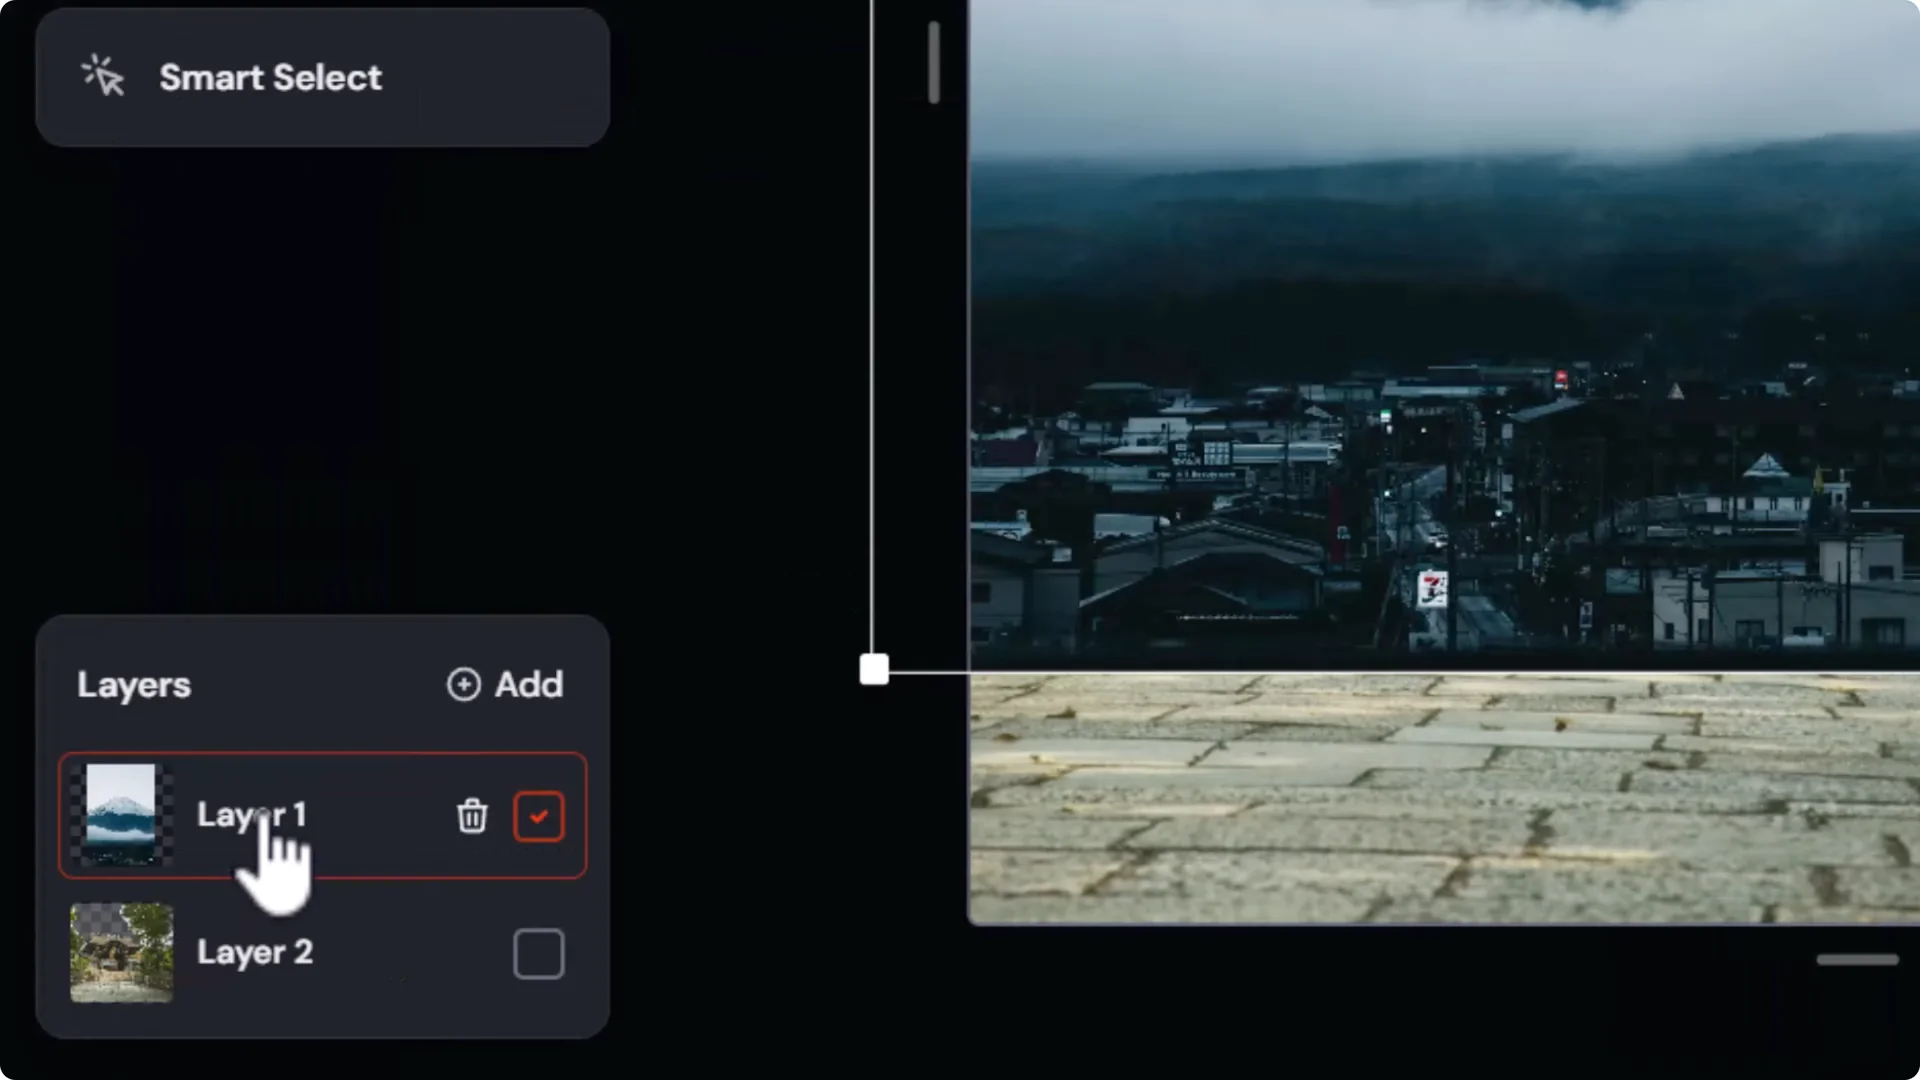
- Add Mount Fuji in the background:
– Use smart select to select the sky with a rough selection and erase it.
– Drag in a Mount Fuji image and use move and resize to position it behind the scene.
– Place the mountain layer below the foreground layer. Touch up edges with the eraser if trees or edges look odd.
- Optional quick render:
– Add to your prompt with something like: Mount Fuji in the background.
– Go to retexture and submit for a quick cinematic take that often works well.
Tip: You can render each step as you go so you don’t end up with a pile of layers to sift through, or keep stacking layers and render later. It depends on how you like to work.
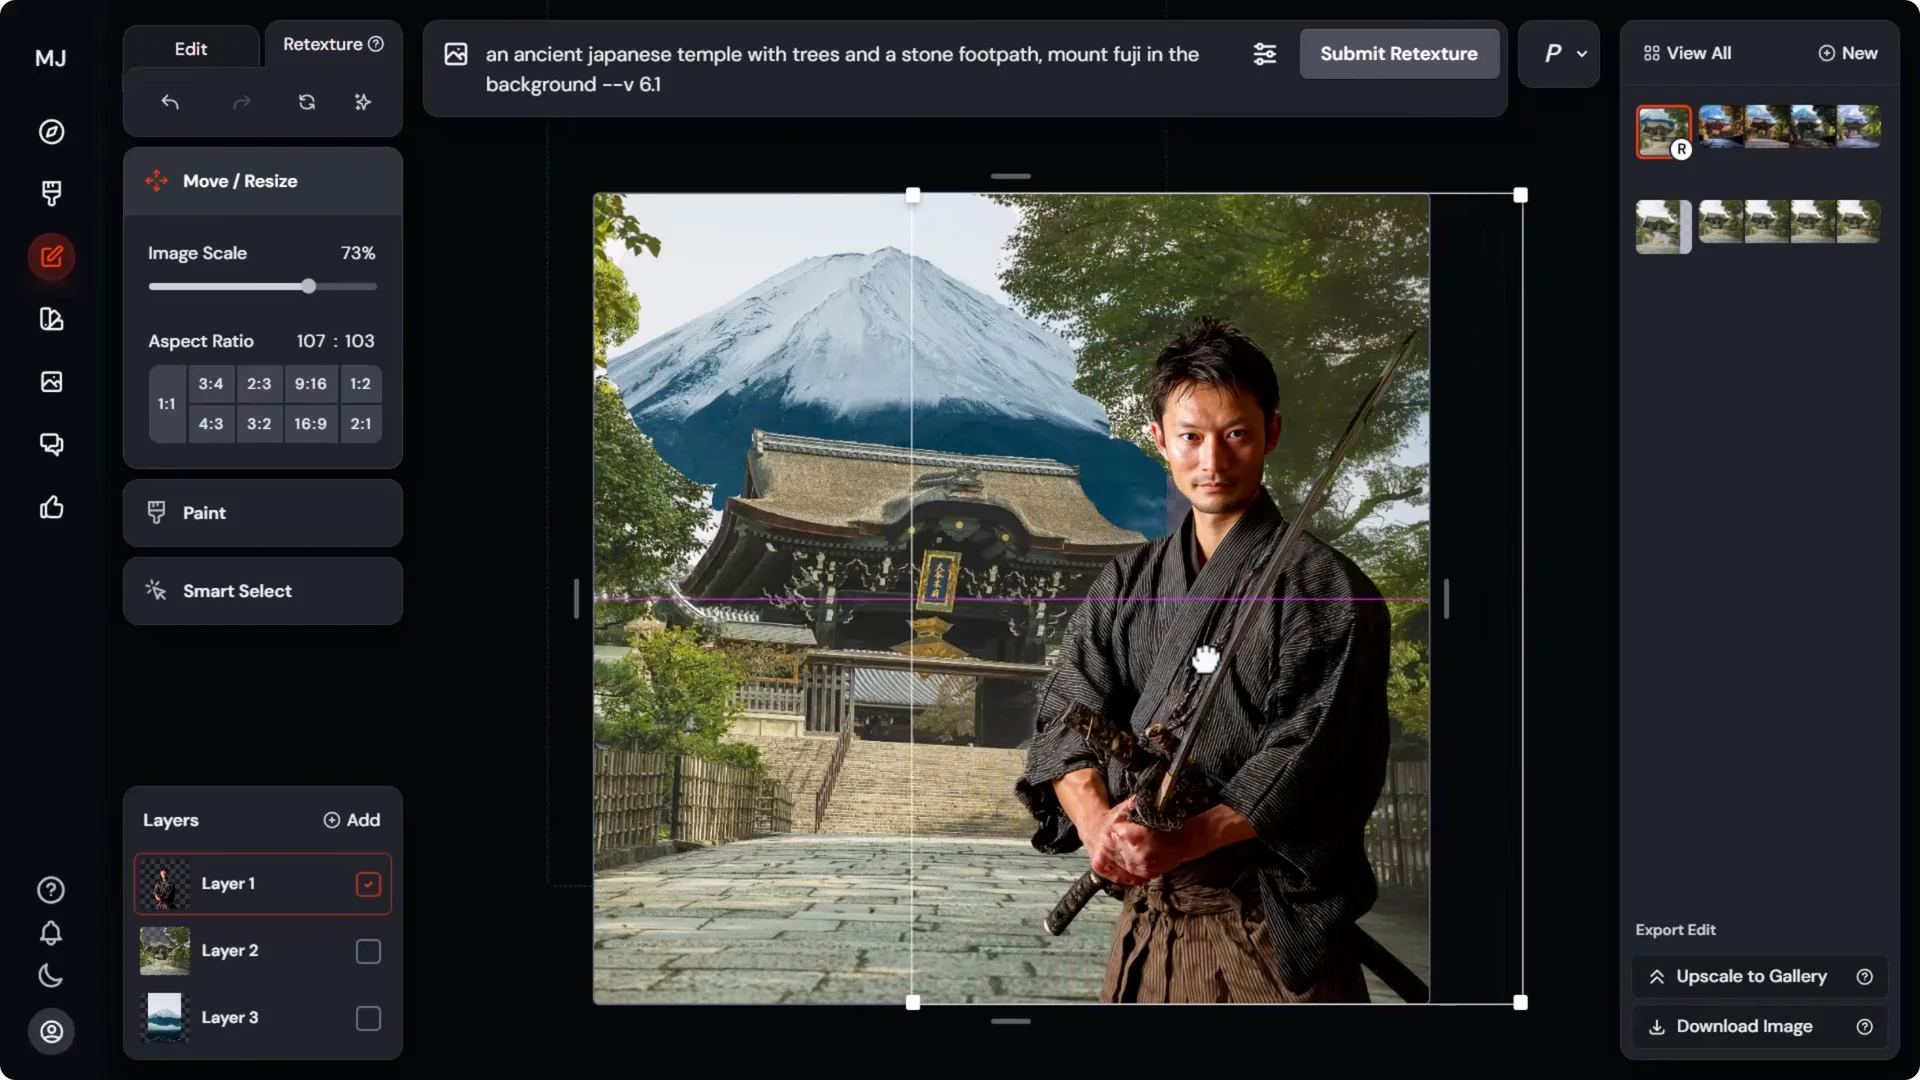
Bring In a Character Cleanly
Extract the Character With a Transparent PNG
- If smart select leaves lots of space around the character, use a background remover:
– Use a free image background remover to cut the subject cleanly.
– Download a transparent PNG and drag it into the editor.
- Position your character where you want them relative to the temple and background.
- If you like a previously rendered background, you can simply pop the PNG character onto it. You don’t need to re-render the human if the background is already how you want it.
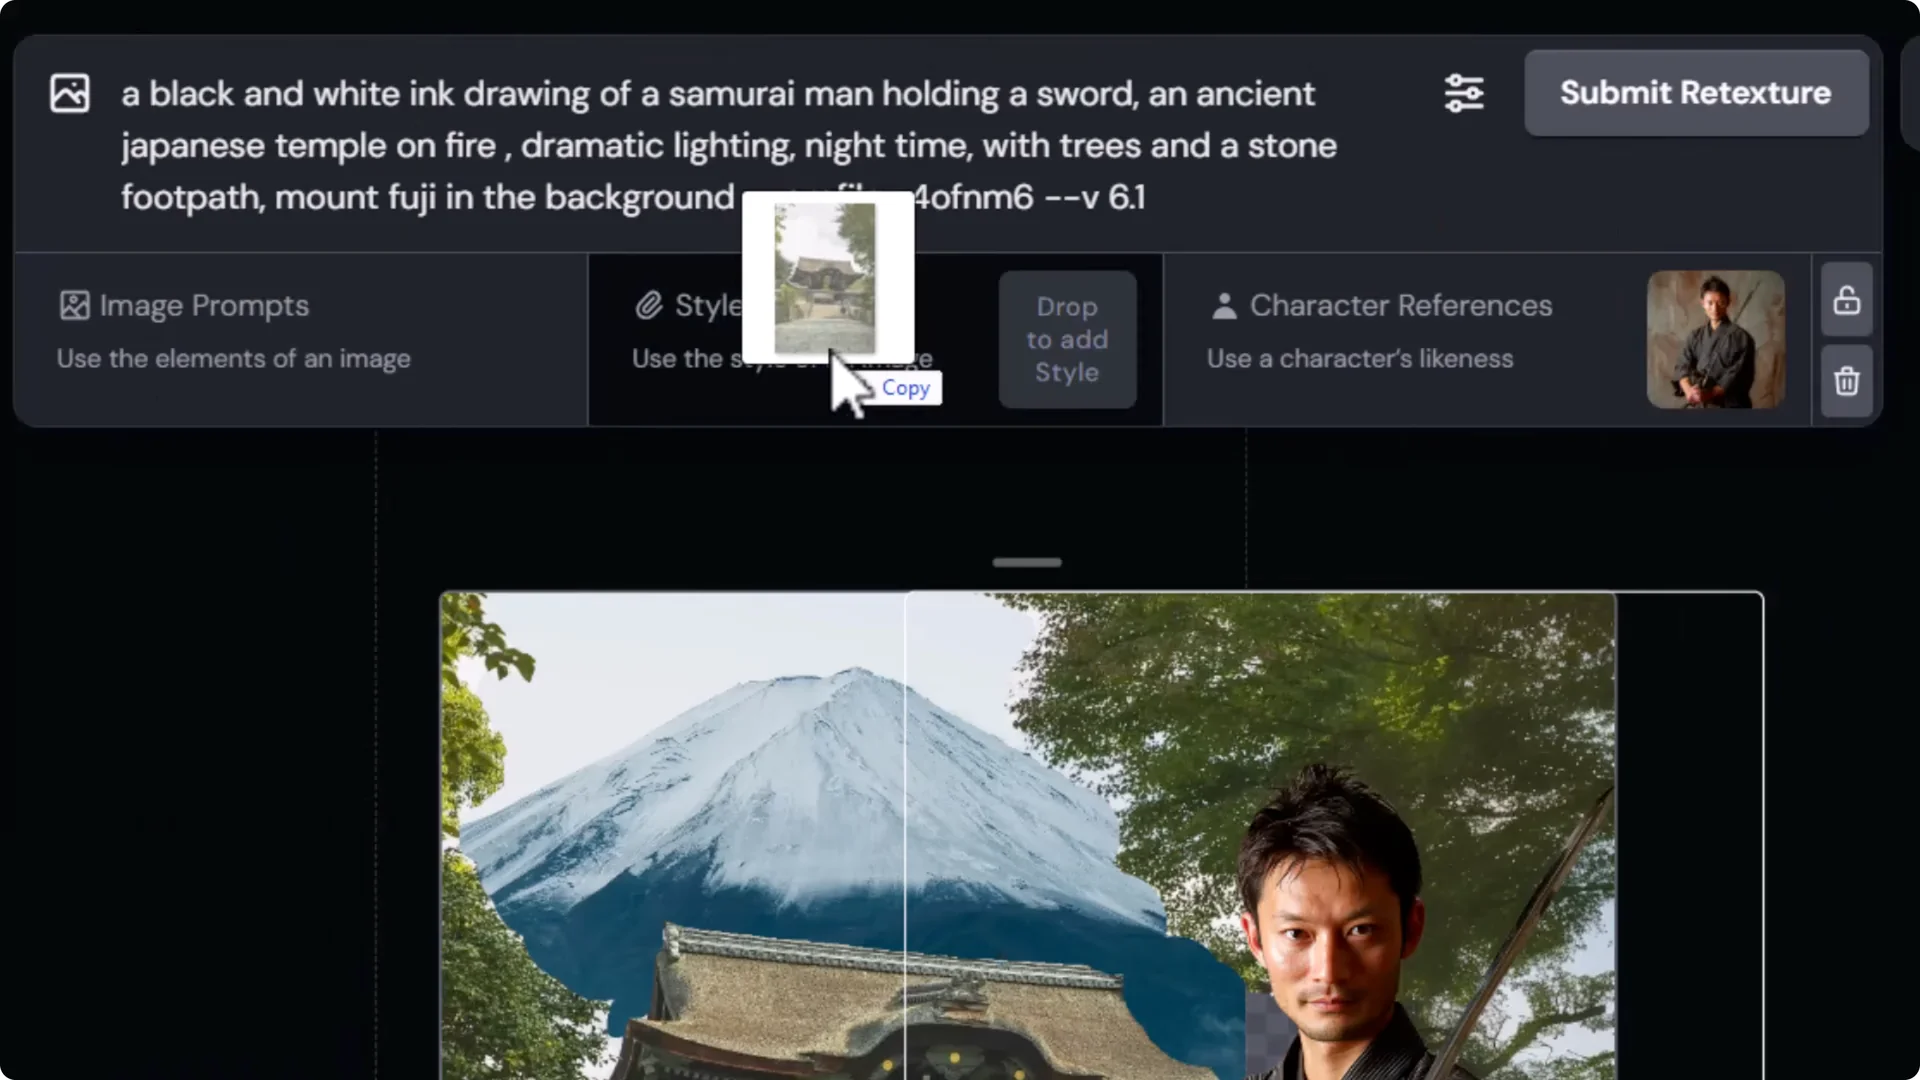
Using Retexture to Render Your Photobash Into AI Art
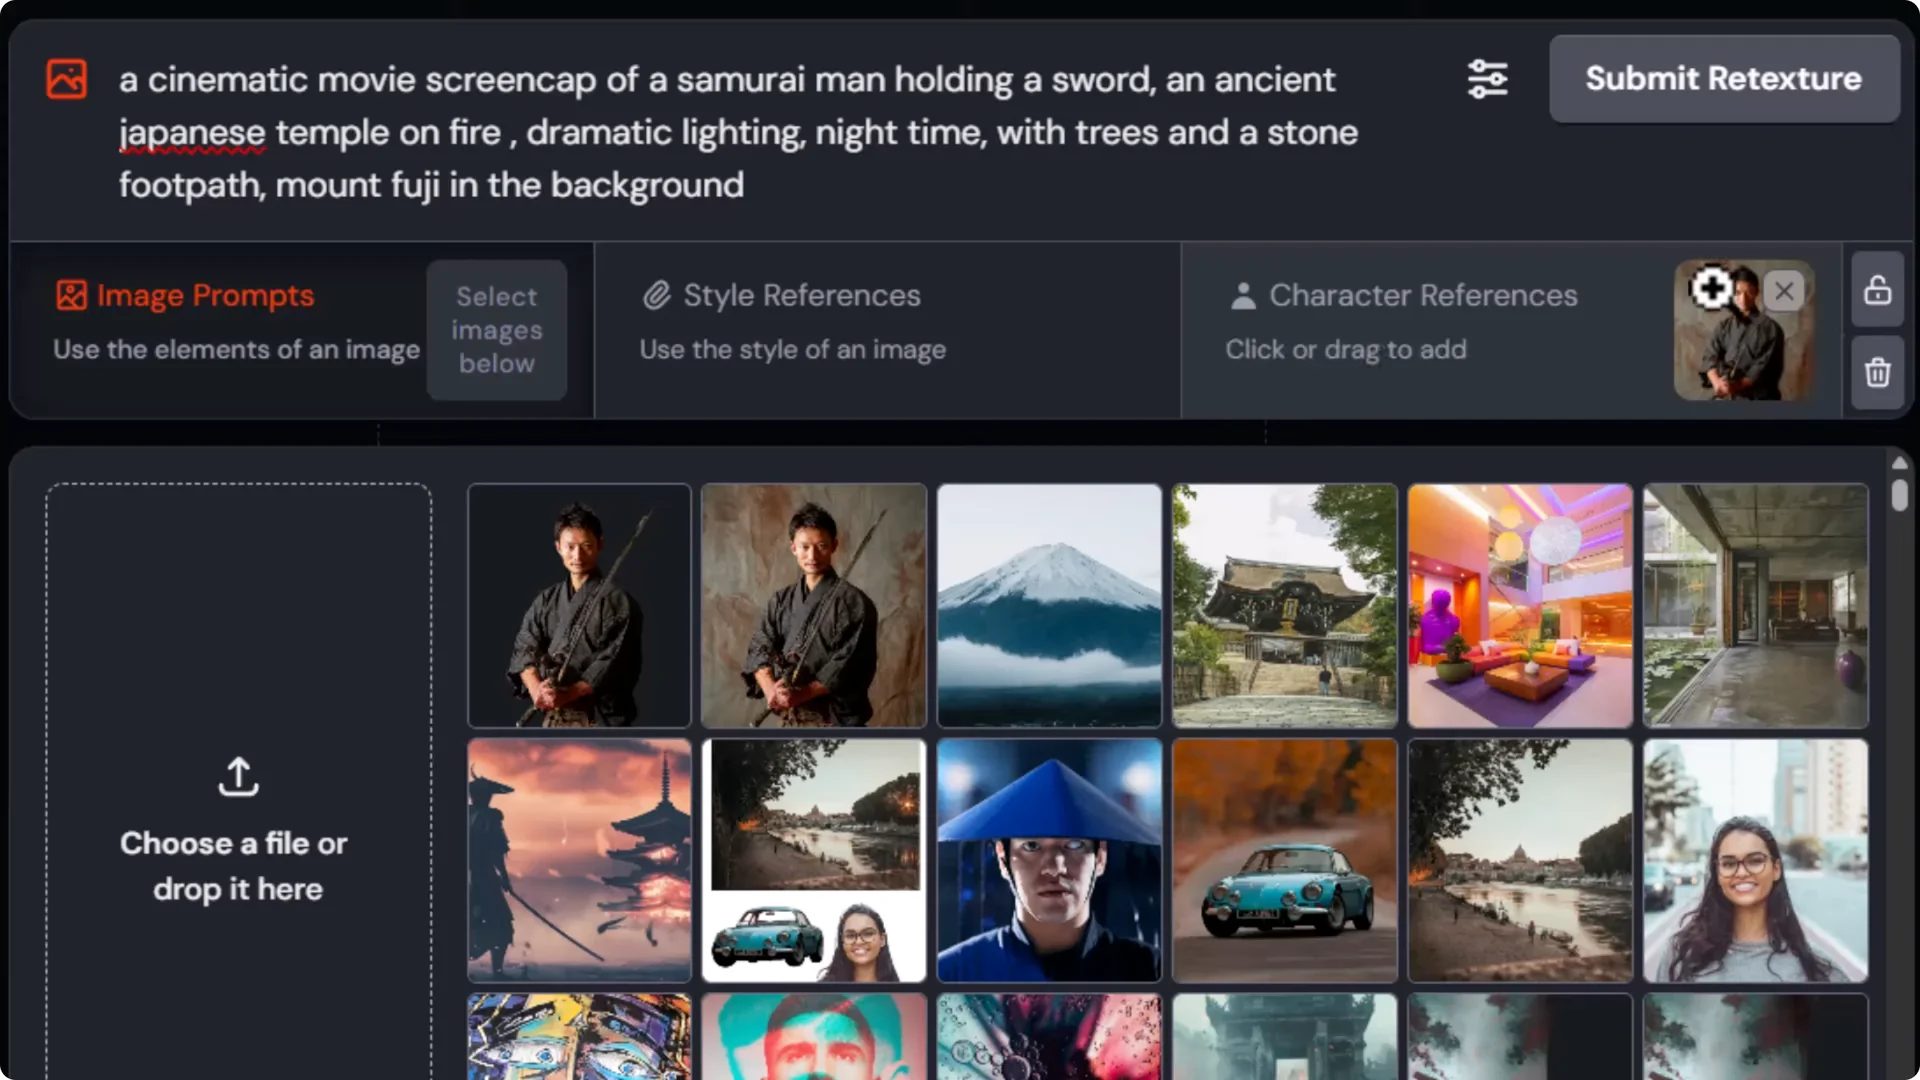
- Enter a prompt like:
– Samurai man holding a sword. An ancient Japanese temple with trees and stone footpath. Mount Fuji in the background.
- Submit retexture. You’ll get a few options. The character may shift away from your exact character, but the layout usually stays coherent and can look great.
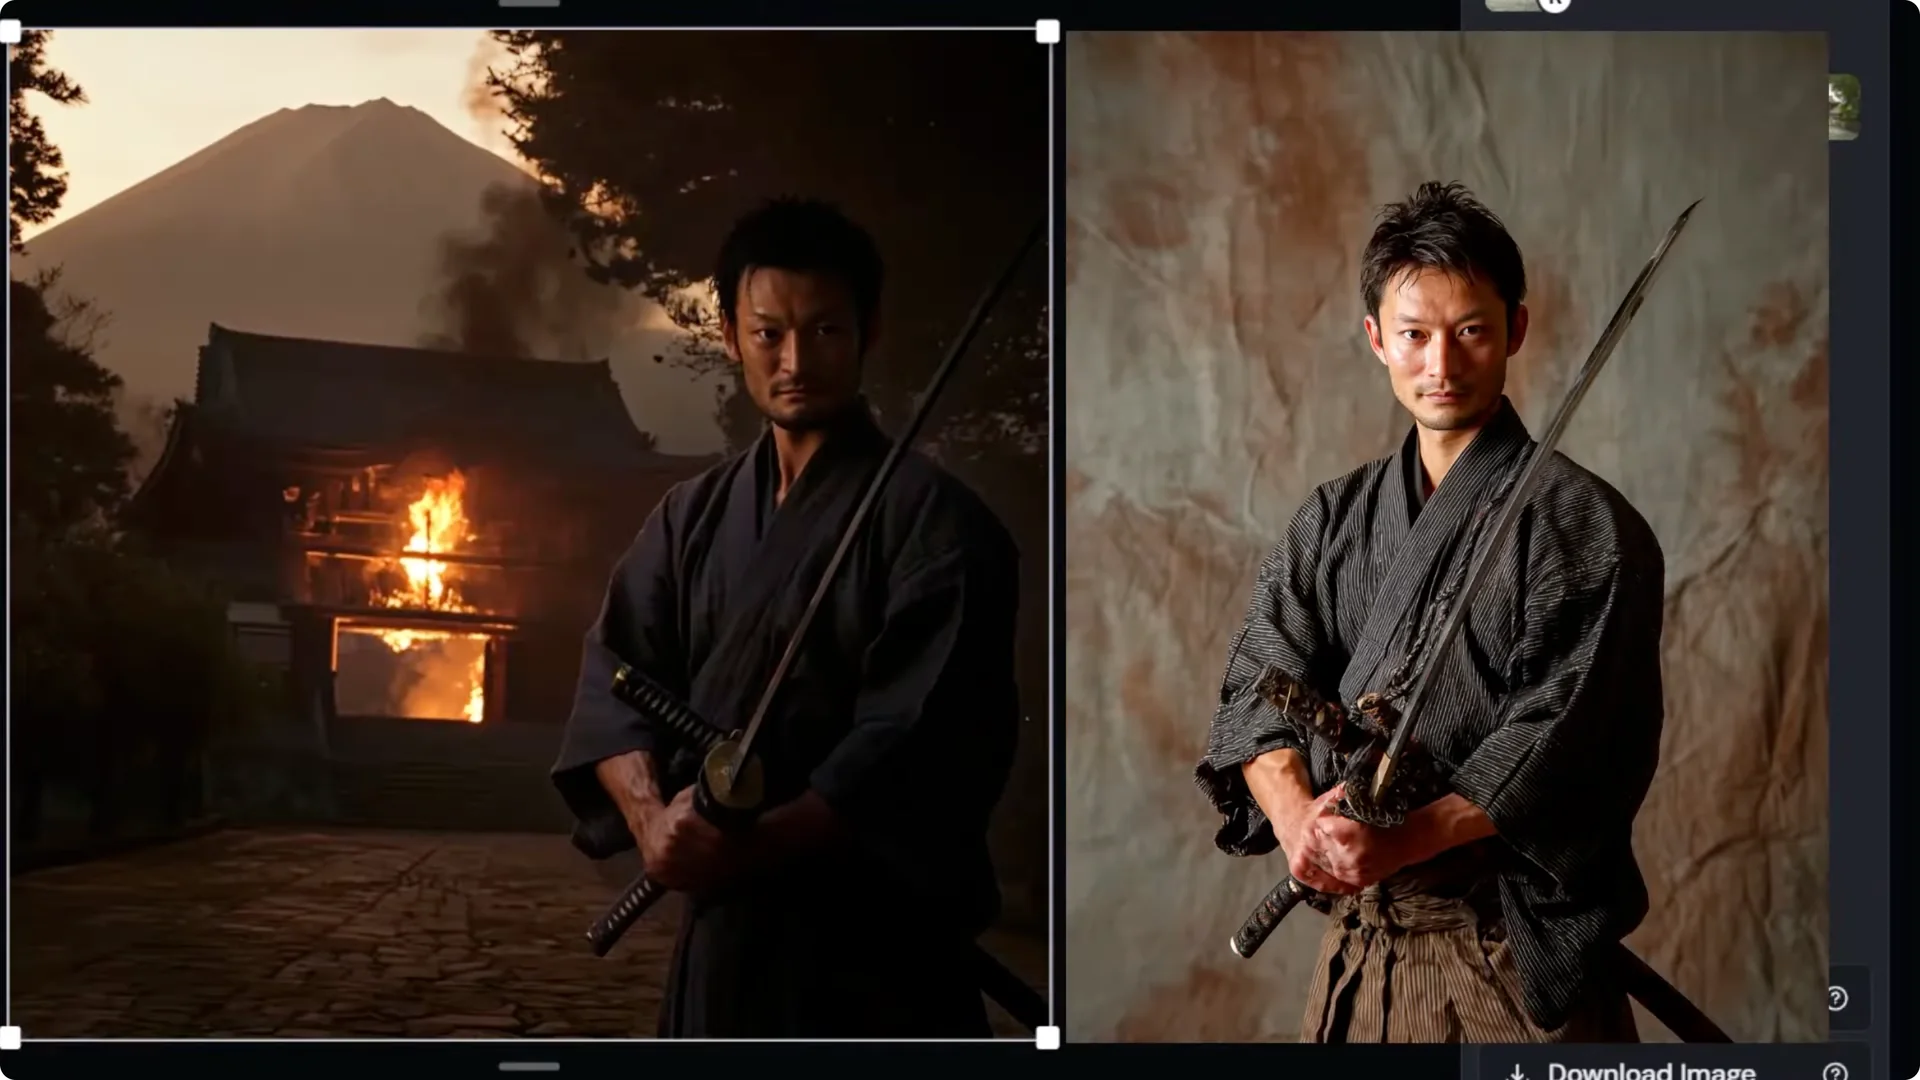
- You can push a more dramatic scene, for example:
– cinematic movie screen cap of a samurai man, ancient temple on fire, dramatic lighting, nighttime
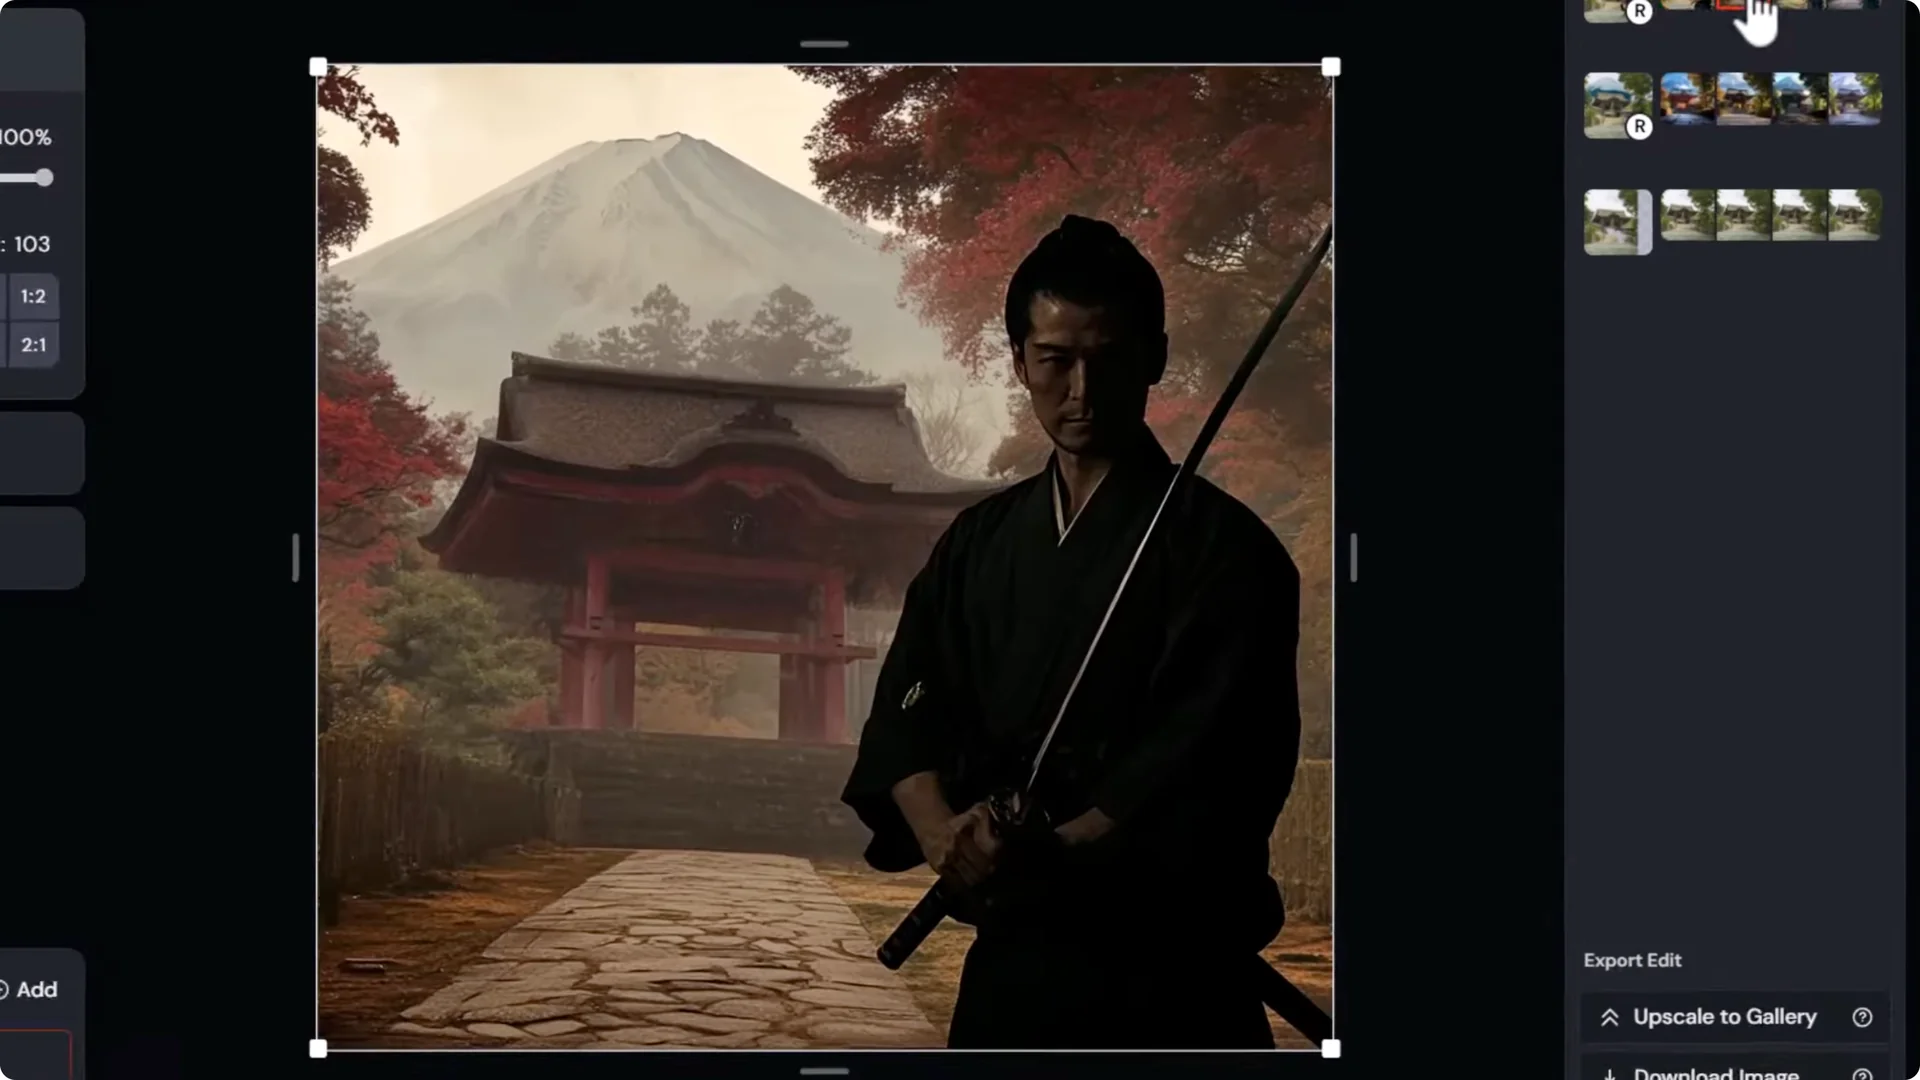
- This can produce a strong image that combines your layout with cinematic lighting and cohesive re-rendering, though the character may still deviate.

Fixing Retexture With Image Prompts
- Version 7 has omni reference, but it isn’t usable in the editor right now.
- Switch to version 6.1 for character control:
– Add an image prompt of your character as a reference.
– Submit retexture. It won’t be exact, but it often pulls the face and outfit closer to your original.
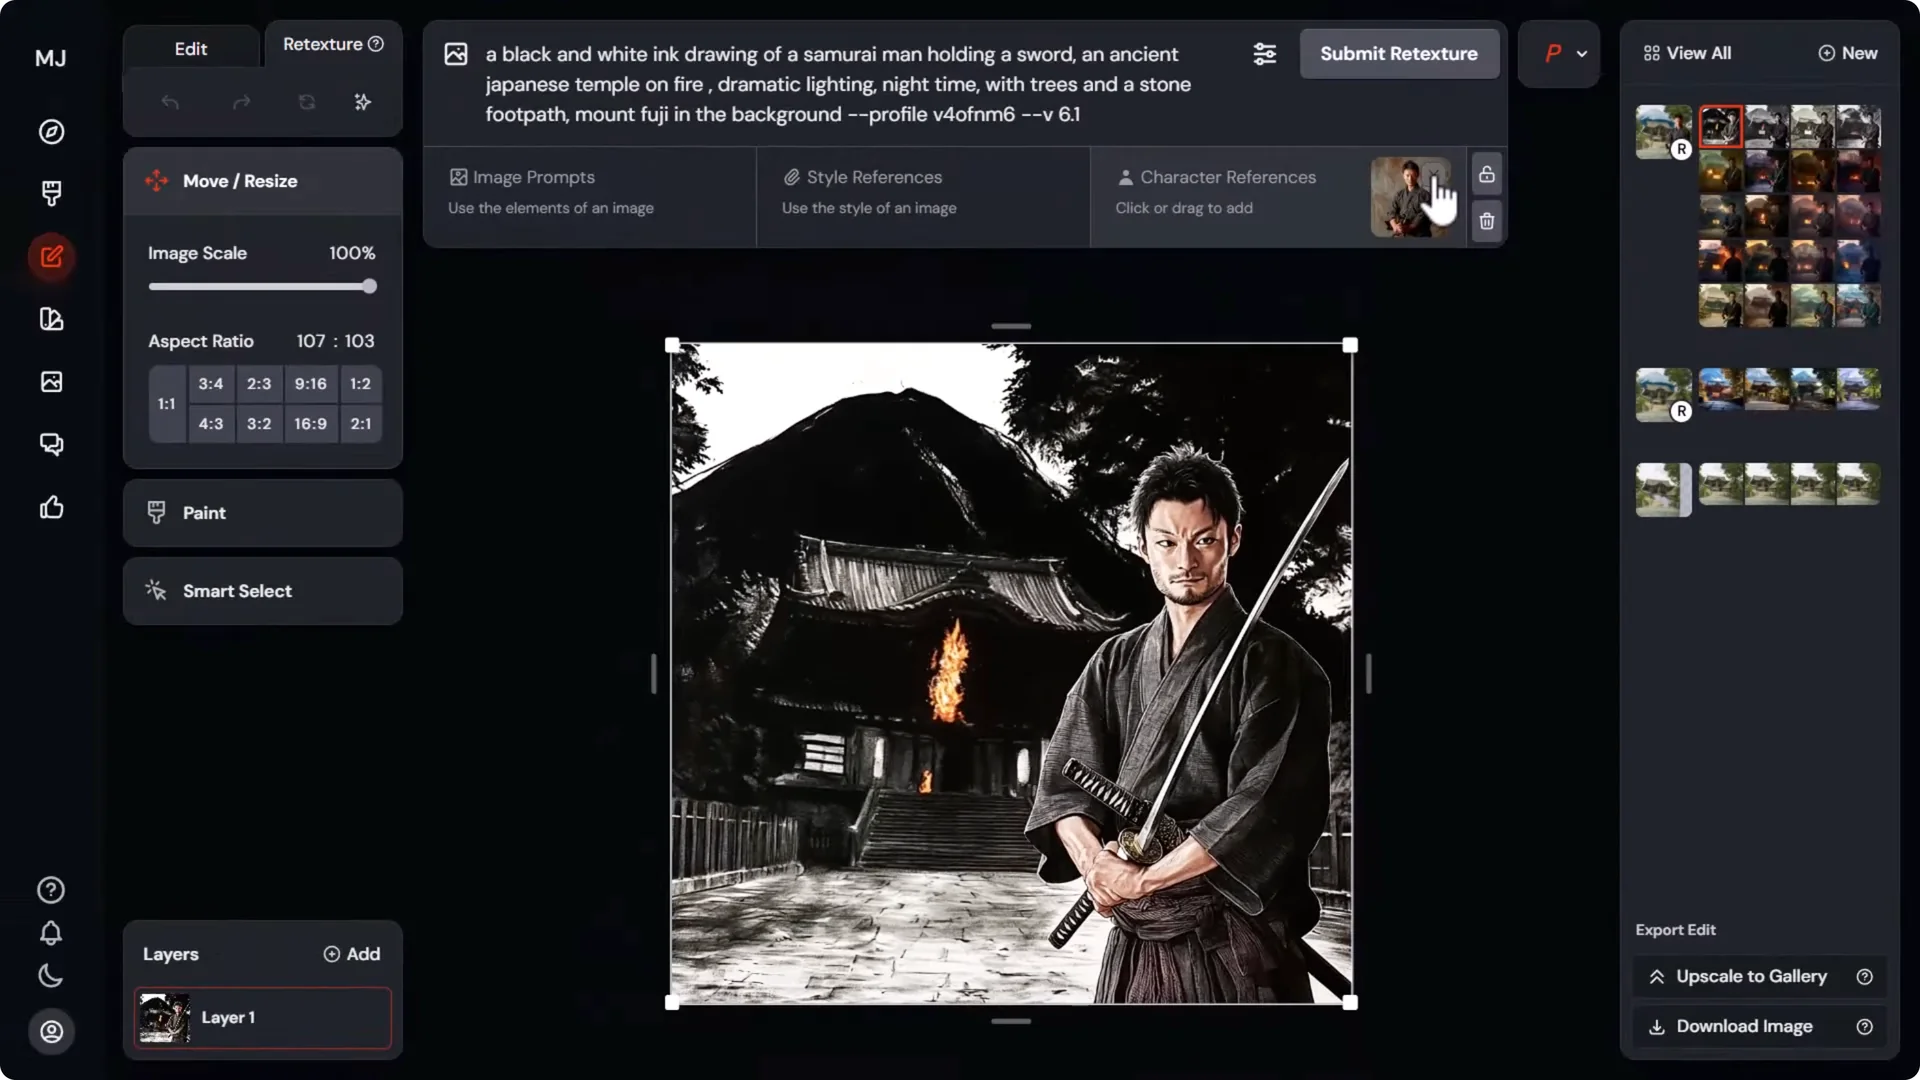
Personalization, Mood Boards, and Stylization
- Try a prompt like: black and white ink drawing of…
- Add a personalization profile, like an ink dripper profile, to push the style.
- Use mood boards to steer color, mood, and design language further.
- If you like a retextured result, reiterate:
– Remove the character reference.
– Use the eraser to remove a tiny portion of the image so the editor retextures the current image, not the original.
– Submit to iterate on the new look.
Key idea: you can combine prompt bar tools, personalization, and mood boards to increase control over outputs when composing with layers.
Midjourney V7 Composition Control: Style Reference for Color and Mood
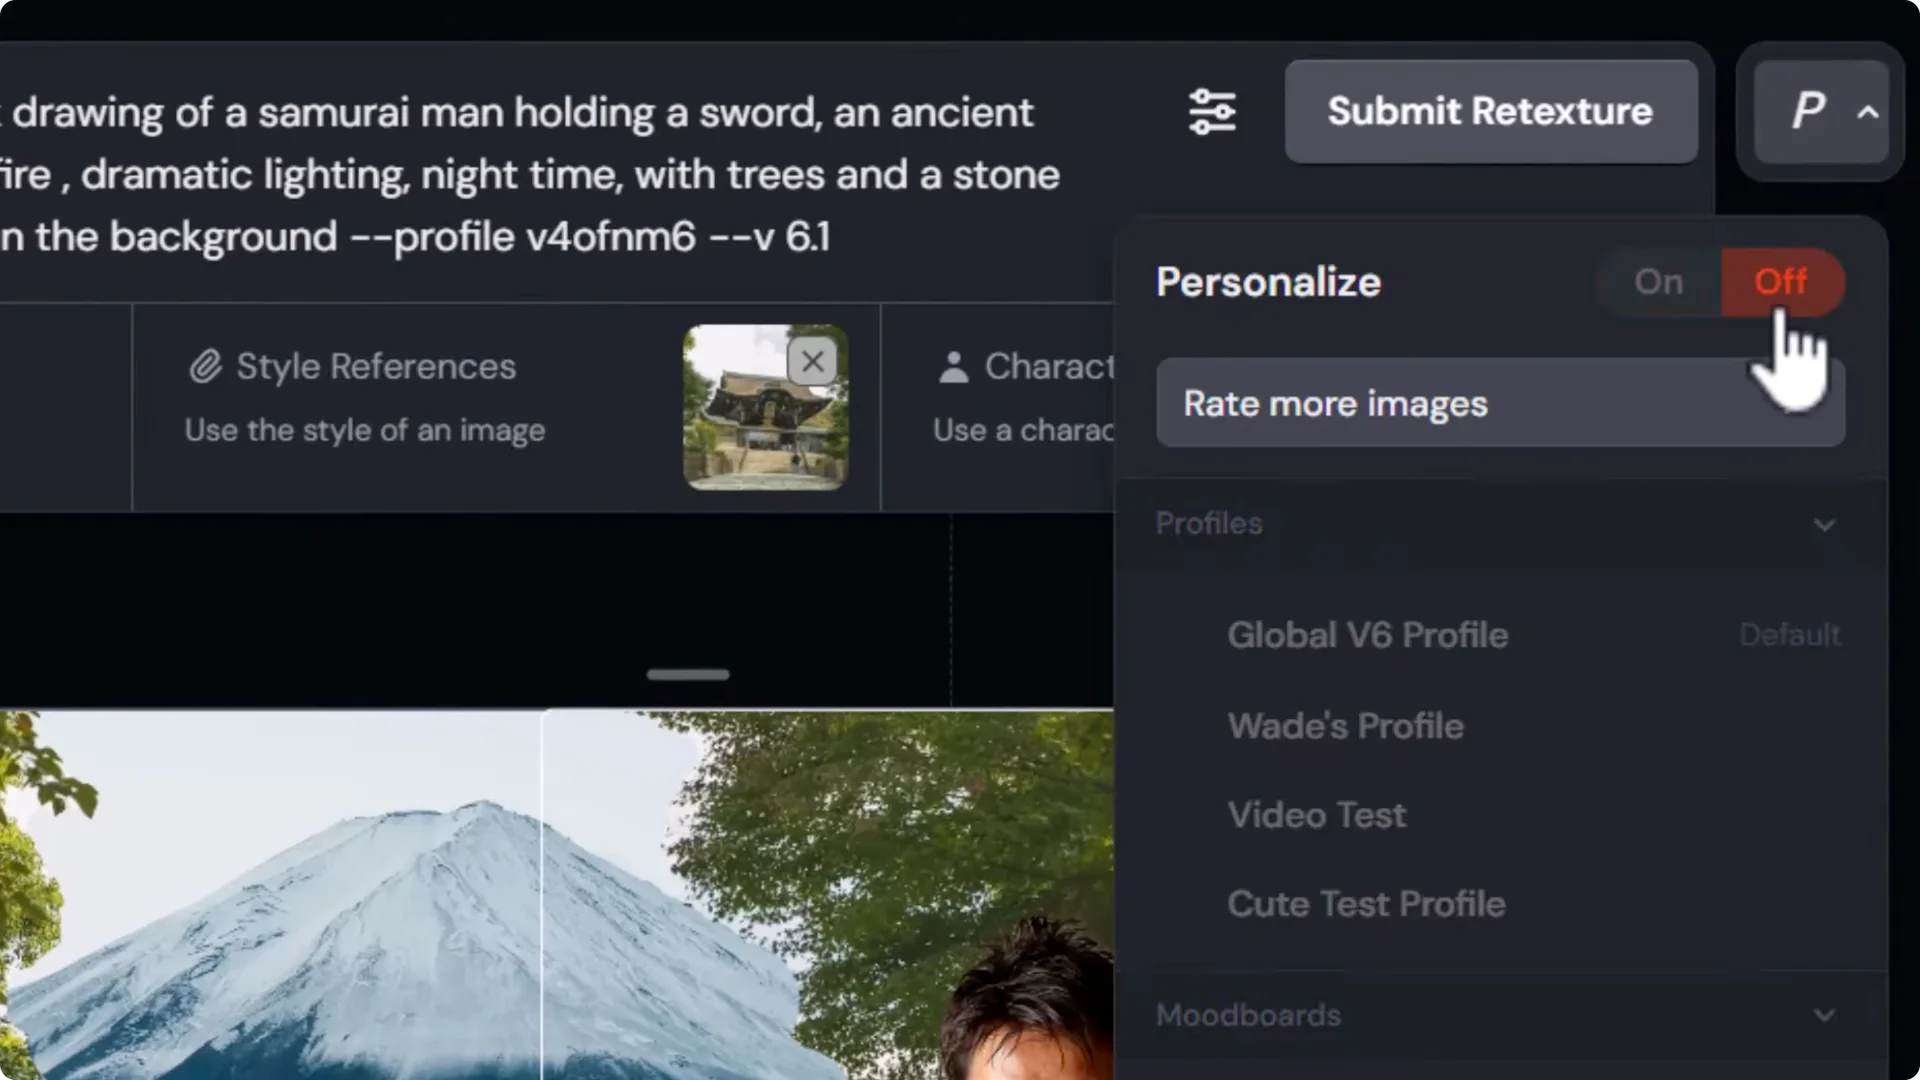
- Drag a photo in as a style reference to set the color and overall look of the scene.
- Turn off personalization and remove those mentions from your prompt when testing a pure style reference.
- Clean up your prompt if you left earlier descriptors like black and white ink drawing in by accident.
- A straightforward prompt example:
– a photo of a samurai holding a sword, Japanese temple, trees and stone footpath, Mount Fuji in the background
- Results can land closer to the input images, though Mount Fuji may drop occasionally. Using 6.1 plus consistent character references increases your chances.
Targeted fixes:
- Try erasing the character’s head and retexturing just that portion with references off. Sometimes it helps, sometimes it doesn’t, but it can be a quick way to refine the face without shifting the rest of the image.
Midjourney V7 Composition Control: SREF and Double-Step Iterations
- Try an SREF code:
– Add SREF with a number to nudge style direction.
– Submit retexture. You’ll often see the image move toward that style.
- Useful workflow:
– Generate one image with the desired style cue.
– Then generate again from that new image to fully lock in the style. This double-step iteration often gives a stronger final result.
Even as you iterate, the layout remains consistent. You control where the character stands, where the temple sits, and how the mountain frames the background. It takes work to get everything dialed in, but each layer of control helps.
Face Fixes Outside Midjourney
- If the face still isn’t right:
– Download the image.
– Use a face swapper like Pixie AI or Design AI to swap in the face from your source character.
– This can lock the likeness while keeping the Midjourney composition and style.
Pose to Image and Sketch to Image
Use a Photo for Layout and Pose
- A simple option is to find or take a photo that matches the layout and pose you want, then compose your image from that. It’s straightforward and often produces solid results.
Sketch to Image, Plus Quick Pose Edits
- Upload a sketch and use the same tools:
– If you need a pose tweak, prompt an edit on the sketch itself. For example:
– sketch of Batman with his arm up in the air forming a fist
– Submit to adjust the pose before retexturing.
Style a Sketch With Image and Mood References
- Keep the prompt simple, like Batman.
- Add a style reference by uploading a comic panel image of Batman.
- Go to retexture to combine the sketch composition with the color and style of the reference.
- Push personalization:
– Add a mood board like Inca Tripper and increase styliz to intensify the style.
– Or try a different mood board like a Gigaresque dystopia set. Remove the style reference if you want the mood board to dominate.
Version and Iteration Tips for Stylized Sketches
- Bump to version 7 with your personalization profile for a unique style.
- Add descriptors like cinematic action film for a stronger look.
- Reiterate:
– Submit another edit based on the new image to sharpen and stabilize the style.
– Feed the second image back in as a reference for a more realistic, cinematic look.
Final Thoughts on Midjourney V7 Composition Control
You can photobash and create layouts in the editor, then use retexture to render them into cohesive images. Combine image prompts for character consistency, personalization profiles, style references, mood boards, SREF codes, and small erase-and-resubmit iterations to steer style and detail. When the face still isn’t landing, a quick external face swap can lock the likeness. Sketches and photos both work as strong composition bases, and small pose edits on sketches before retexturing can save time. Experiment, iterate, and keep blending these tools to steer Midjourney toward the image you have in mind.