You can remove objects from images using the Midjourney editor. Highlight an area and describe what you want to see to add an object.
If you select an object but leave the shadow behind, you can replace the object pretty easily. Combine selections to redecorate a room piece by piece.
Midjourney Image Editing: Object Removal, Addition, and Retexture
It’s not perfect and you may need to readjust your prompt or rerun if you’re not getting the results you want or even adjust the object further to get a better result.
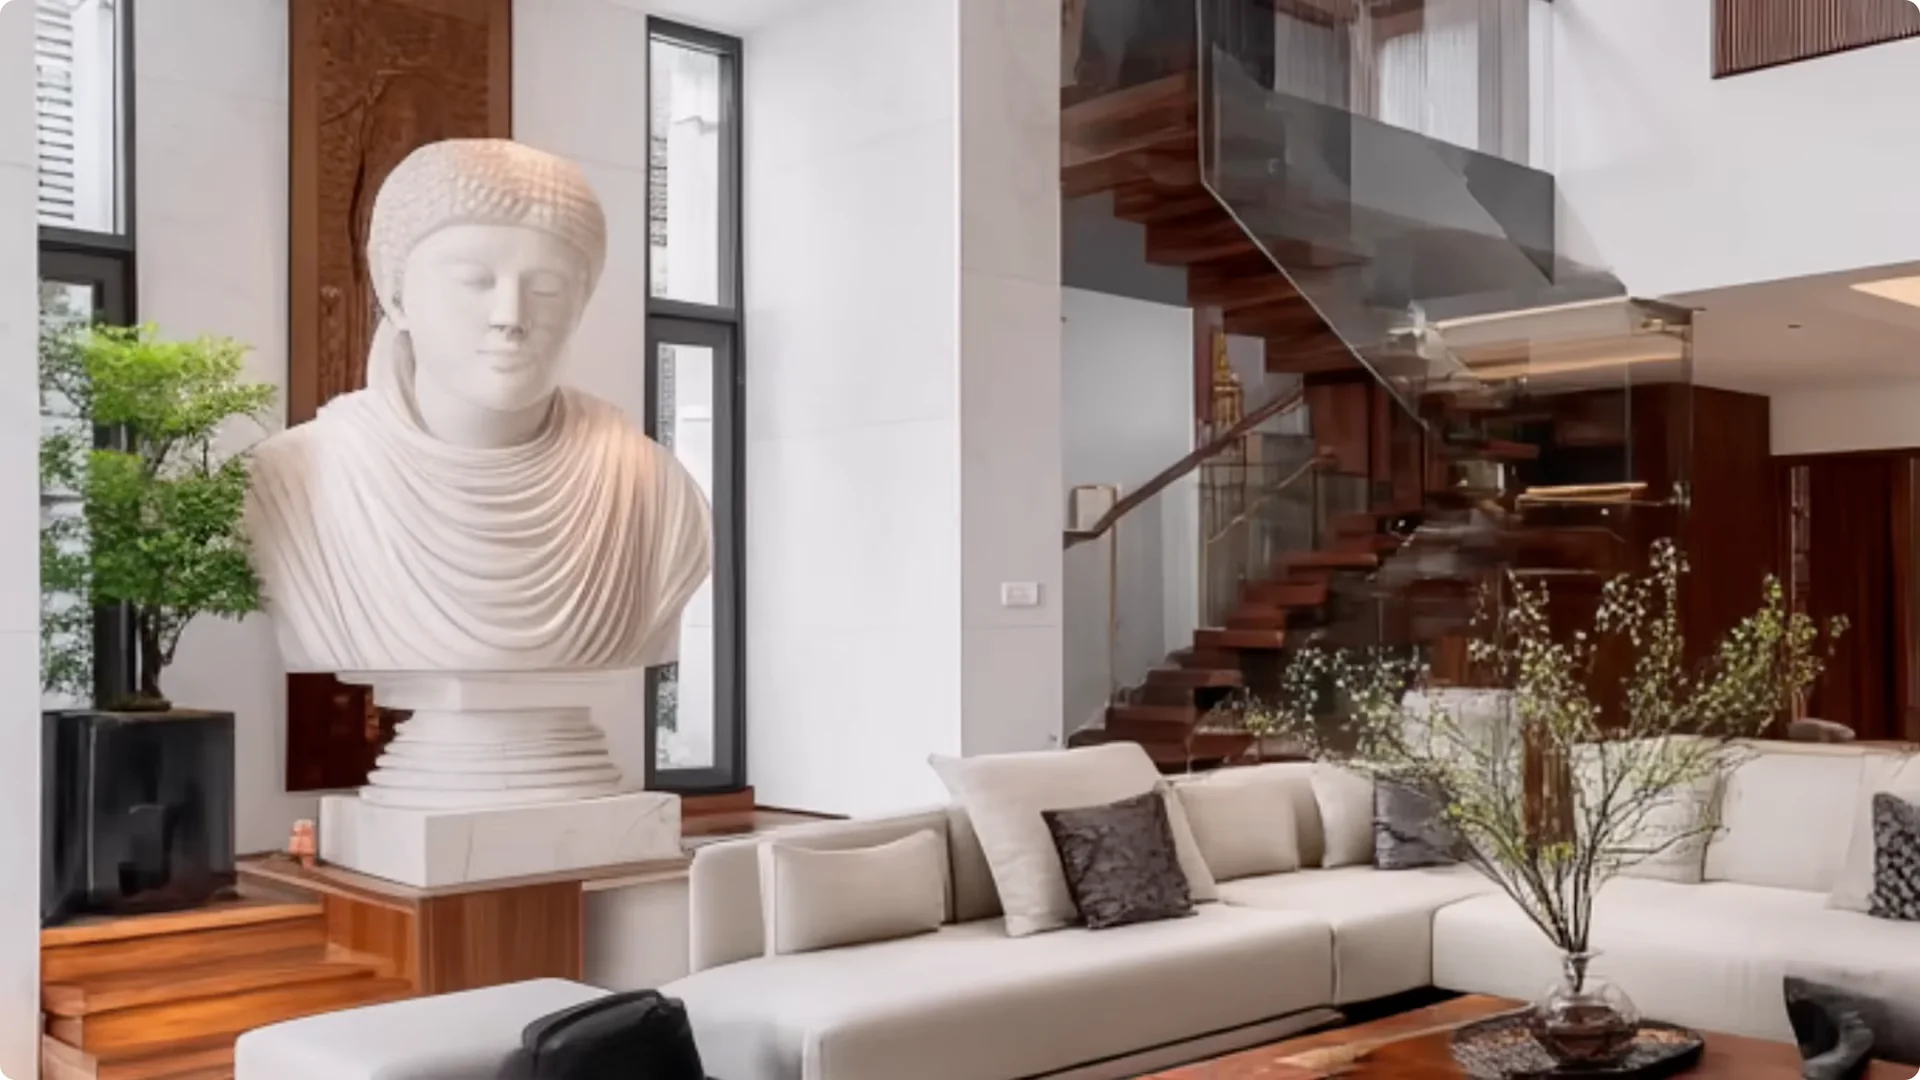
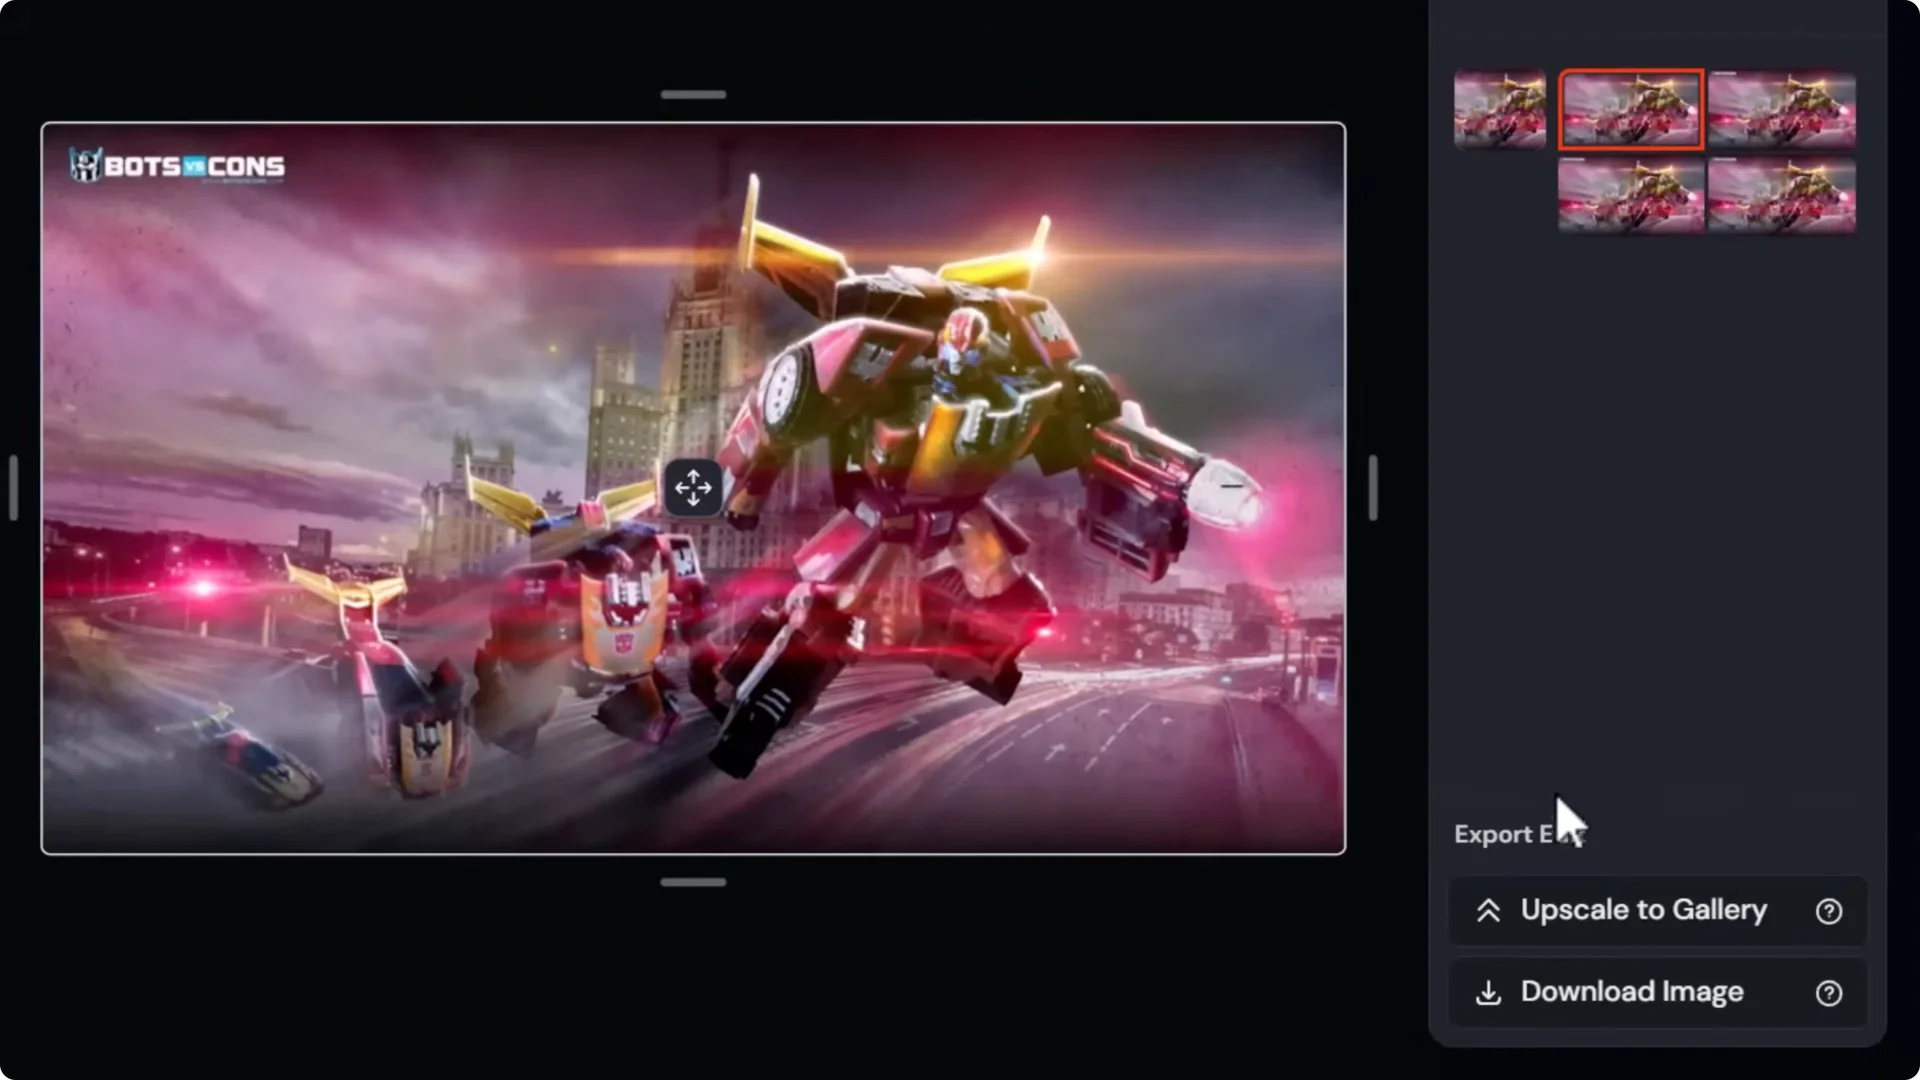
By coming down to editor actions, you can open any images made in Midjourney in the external image editor and use Retexture to reimagine a room in different ways.
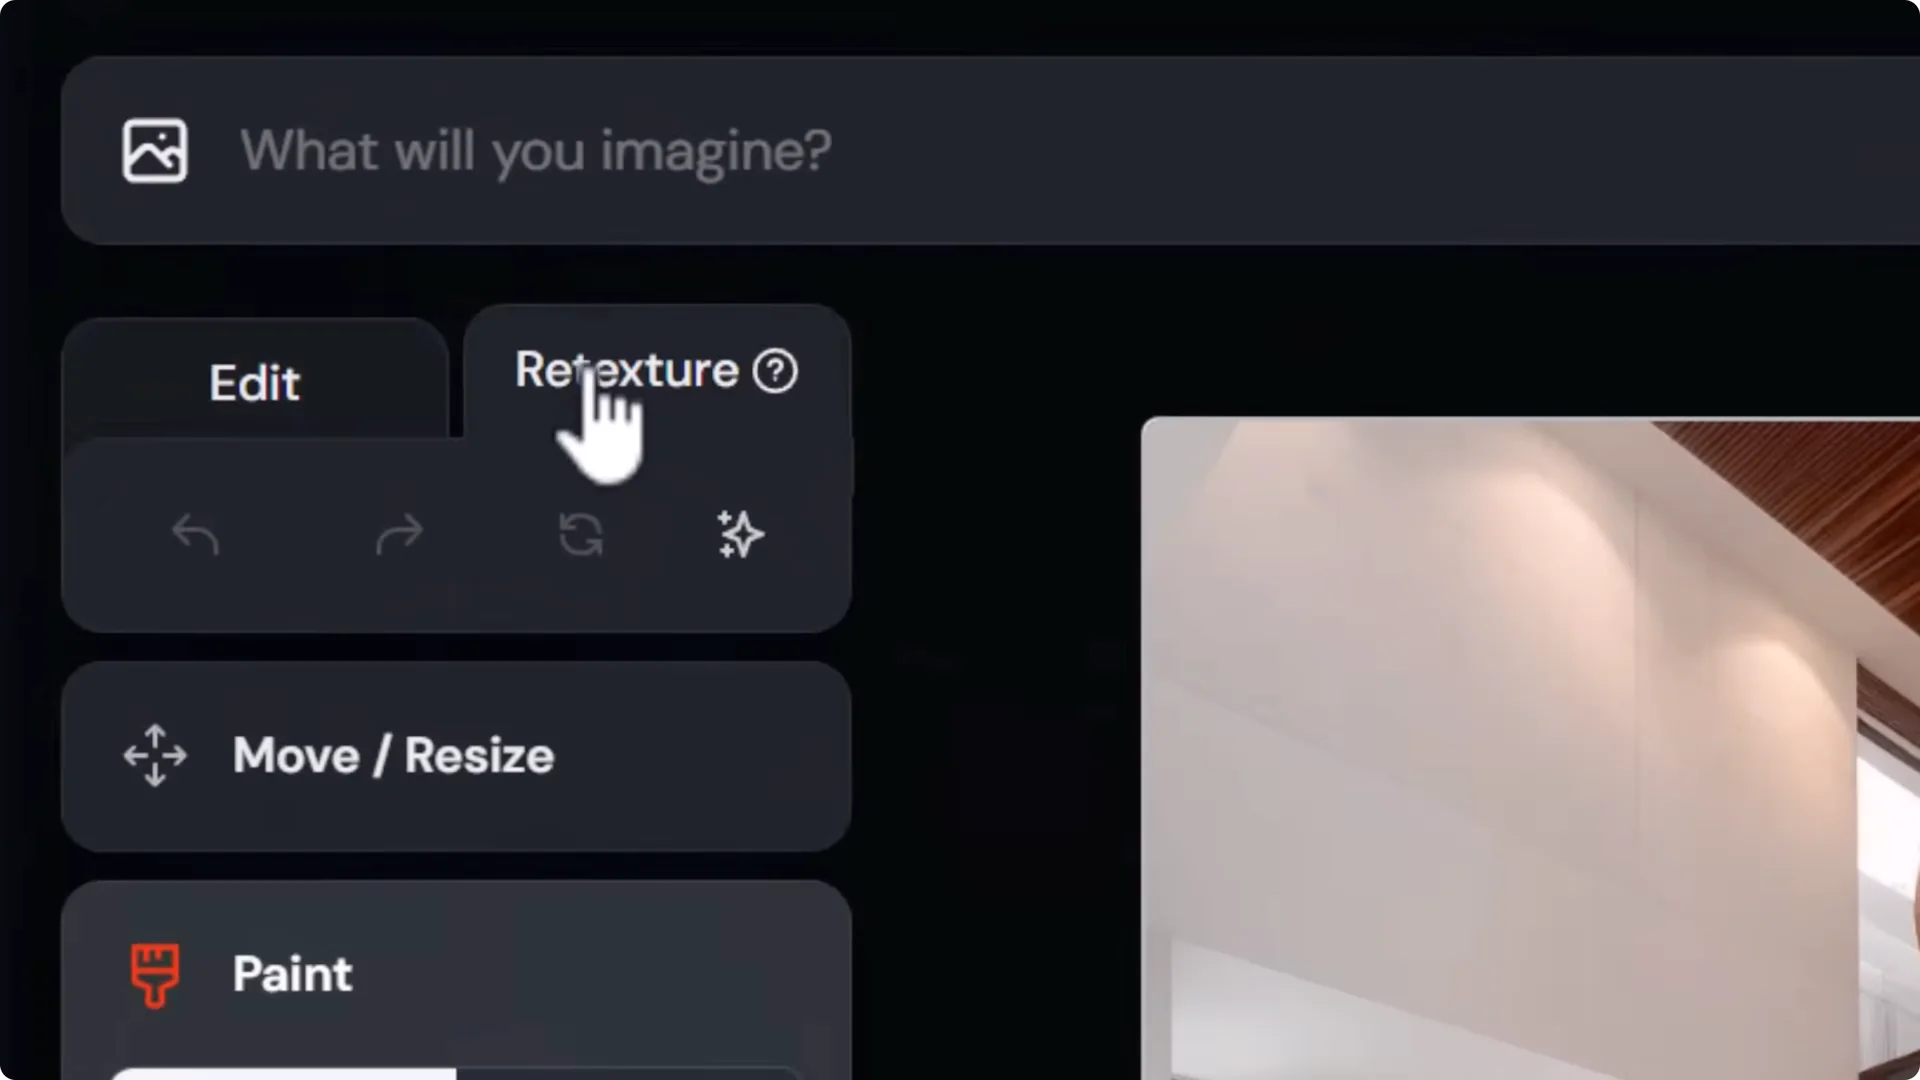
This is a very powerful way to make simple drastic changes and see variations with a simple text prompt.
Midjourney Image Editing: Change and Expand Backgrounds
Go directly into the external editor, upload a photo of a person, use Smart Select to select them, erase the background, and then type a simple prompt of what you’d like to see so you can take a real photo of a person and change the background.
You can also extend the background of an image by going to Move and Resize, choosing a new aspect ratio, or moving the handles around and resizing the image itself.
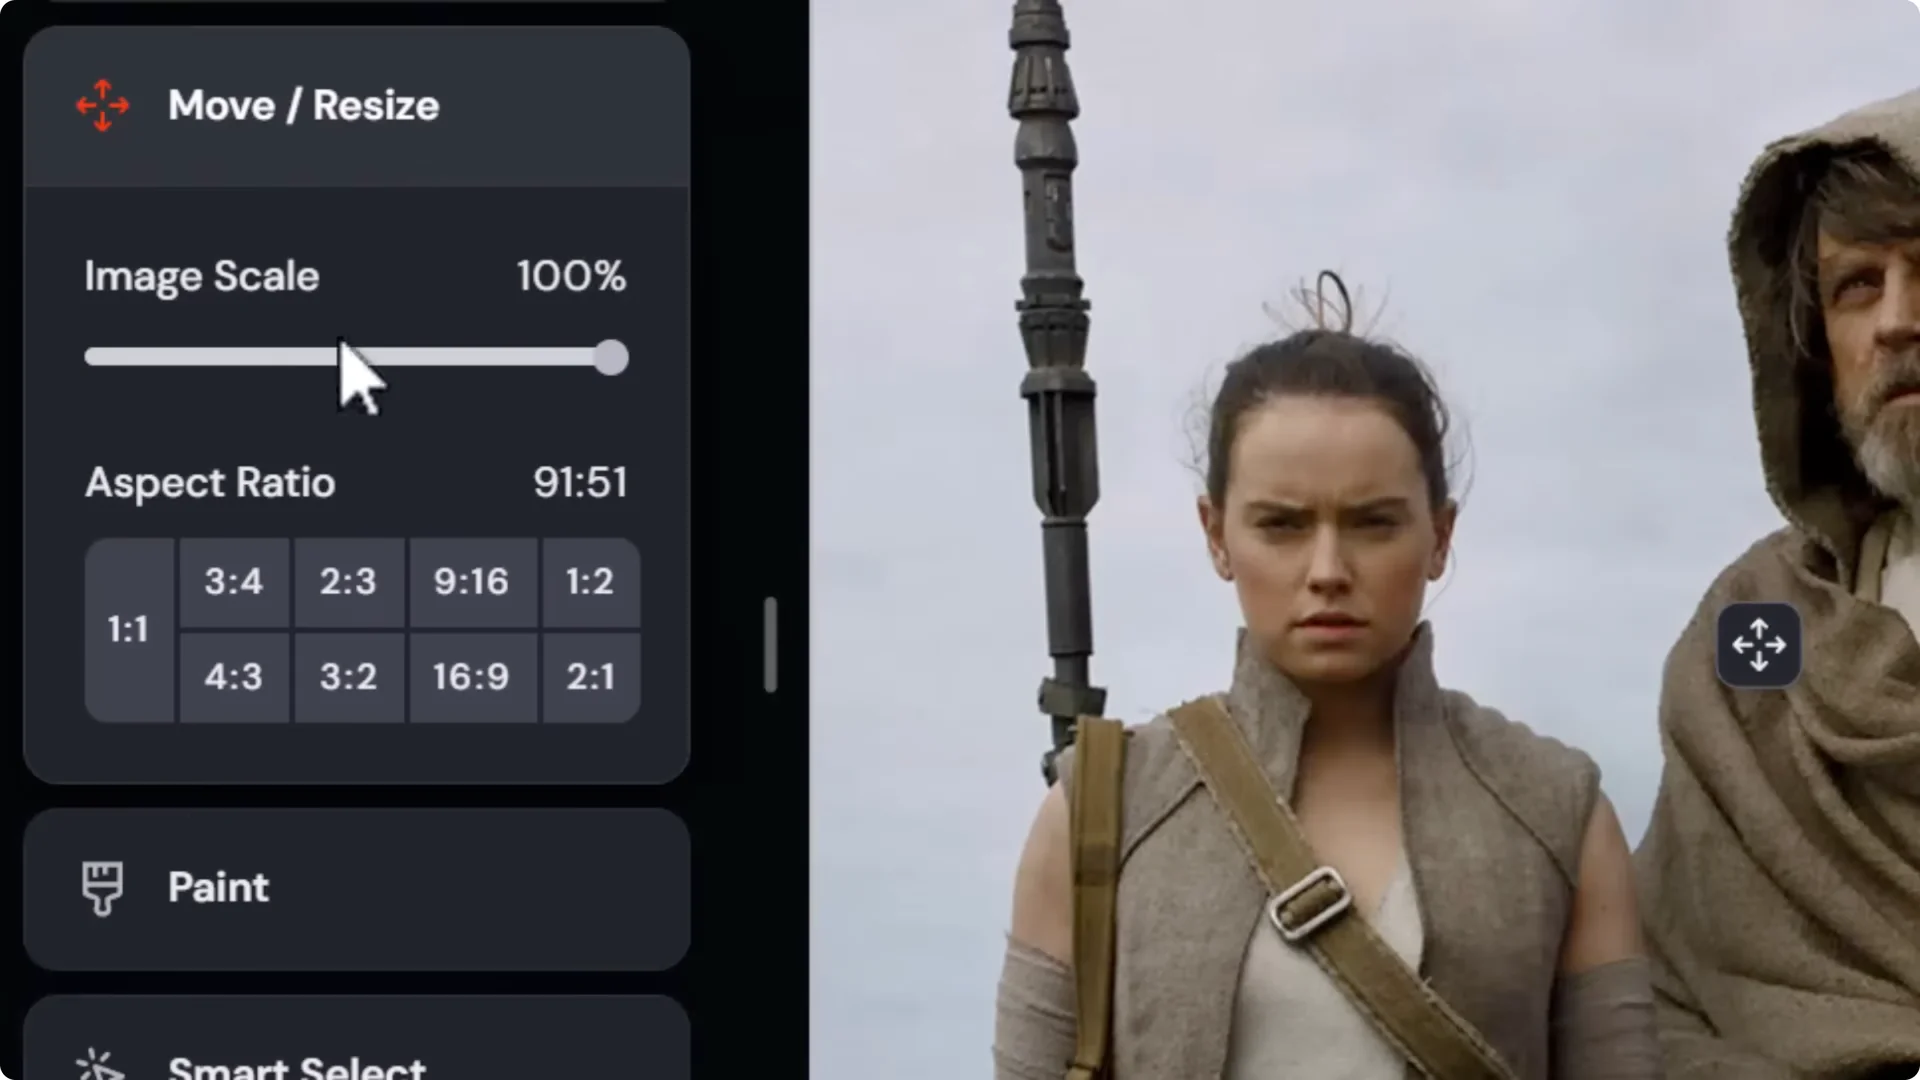
Then add your prompt and expand the background of that image.
Midjourney Image Editing: Sketch to Image and Photo to Art
If you drag in a drawing you’ve made, head to Retexture, then give it a prompt describing what you want to see, like a cinematic Unreal Engine render of a man with spiky hair wearing headphones. Hit submit and convert that sketch into a completely rendered image.
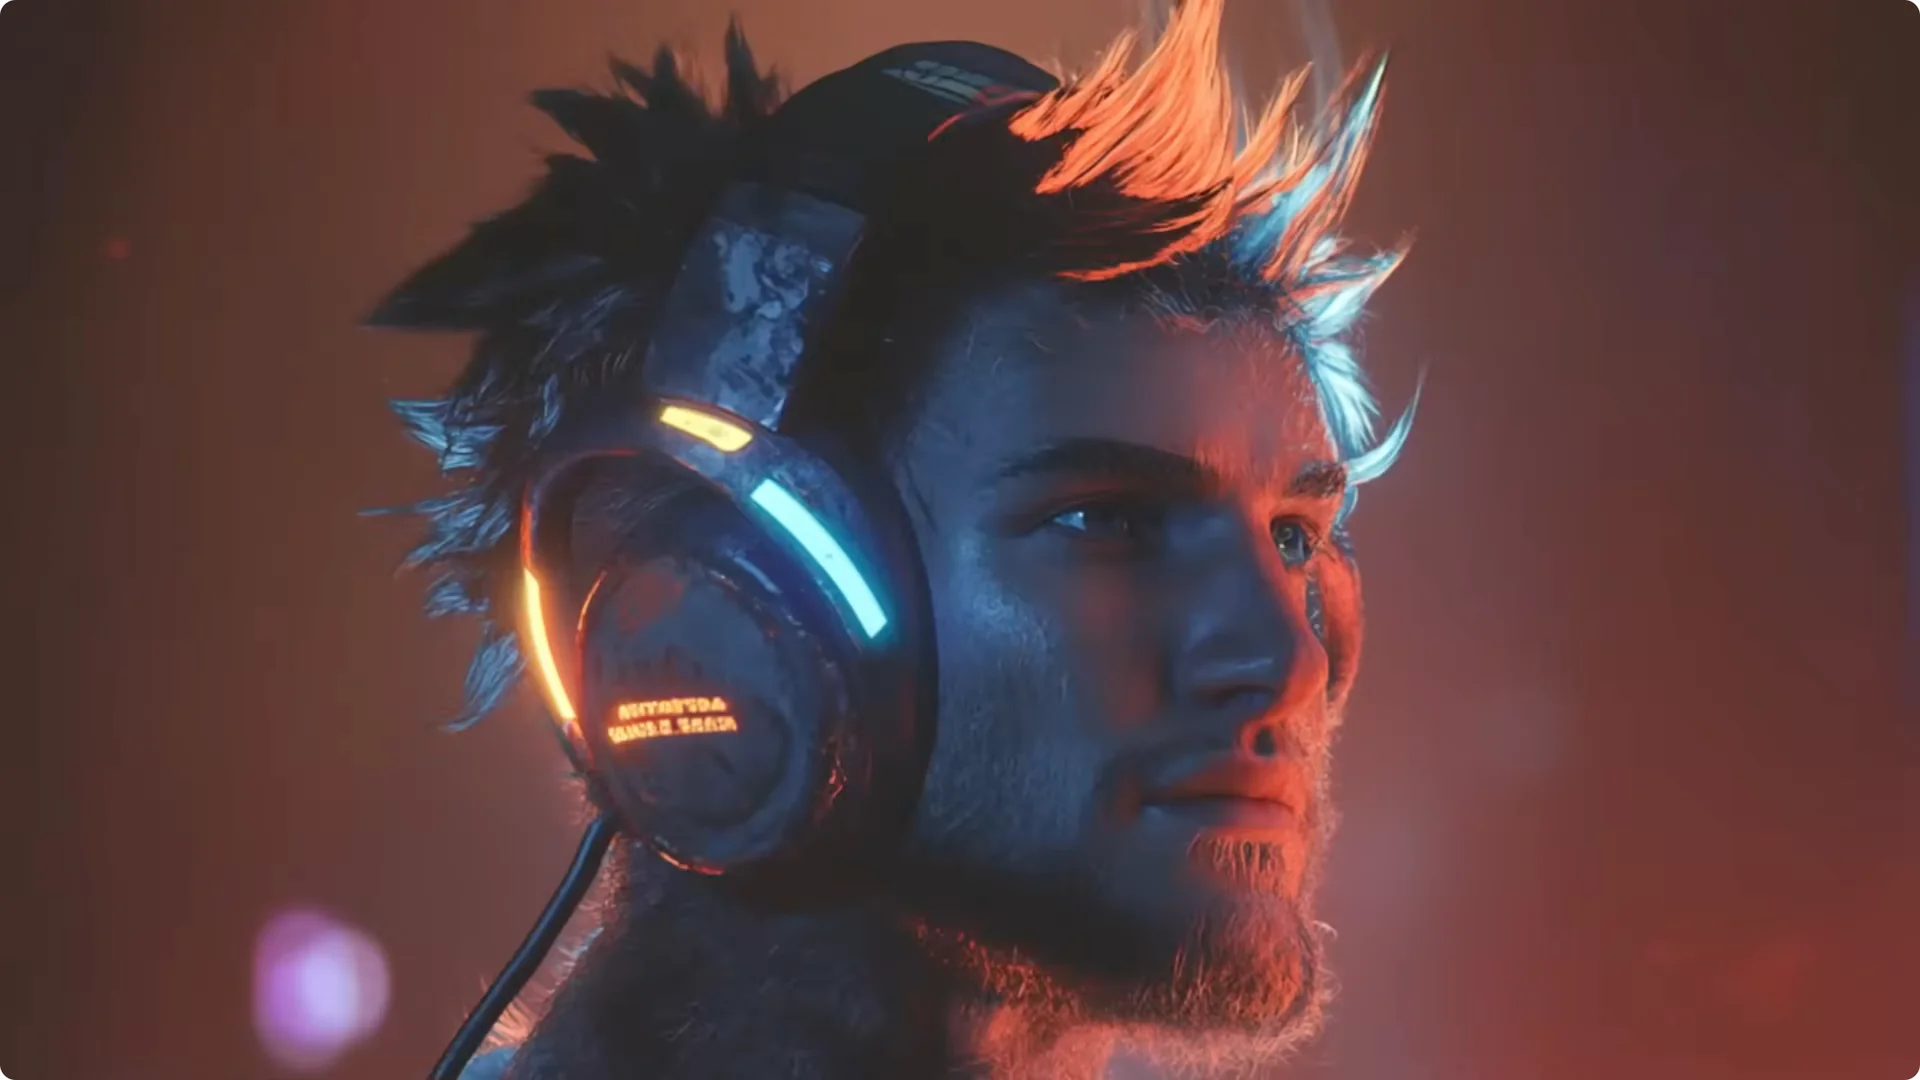
You can throw black and white drawings in here, but it’s really any image at all, even basic 3D renders. Anything that has color in it turns out exceptionally well as long as you describe the style, the subject, and any particular colors you want.
This also means the reverse. Upload a photo and type a prompt to convert it into a sketch or art and restyle any photo into a piece of artwork.
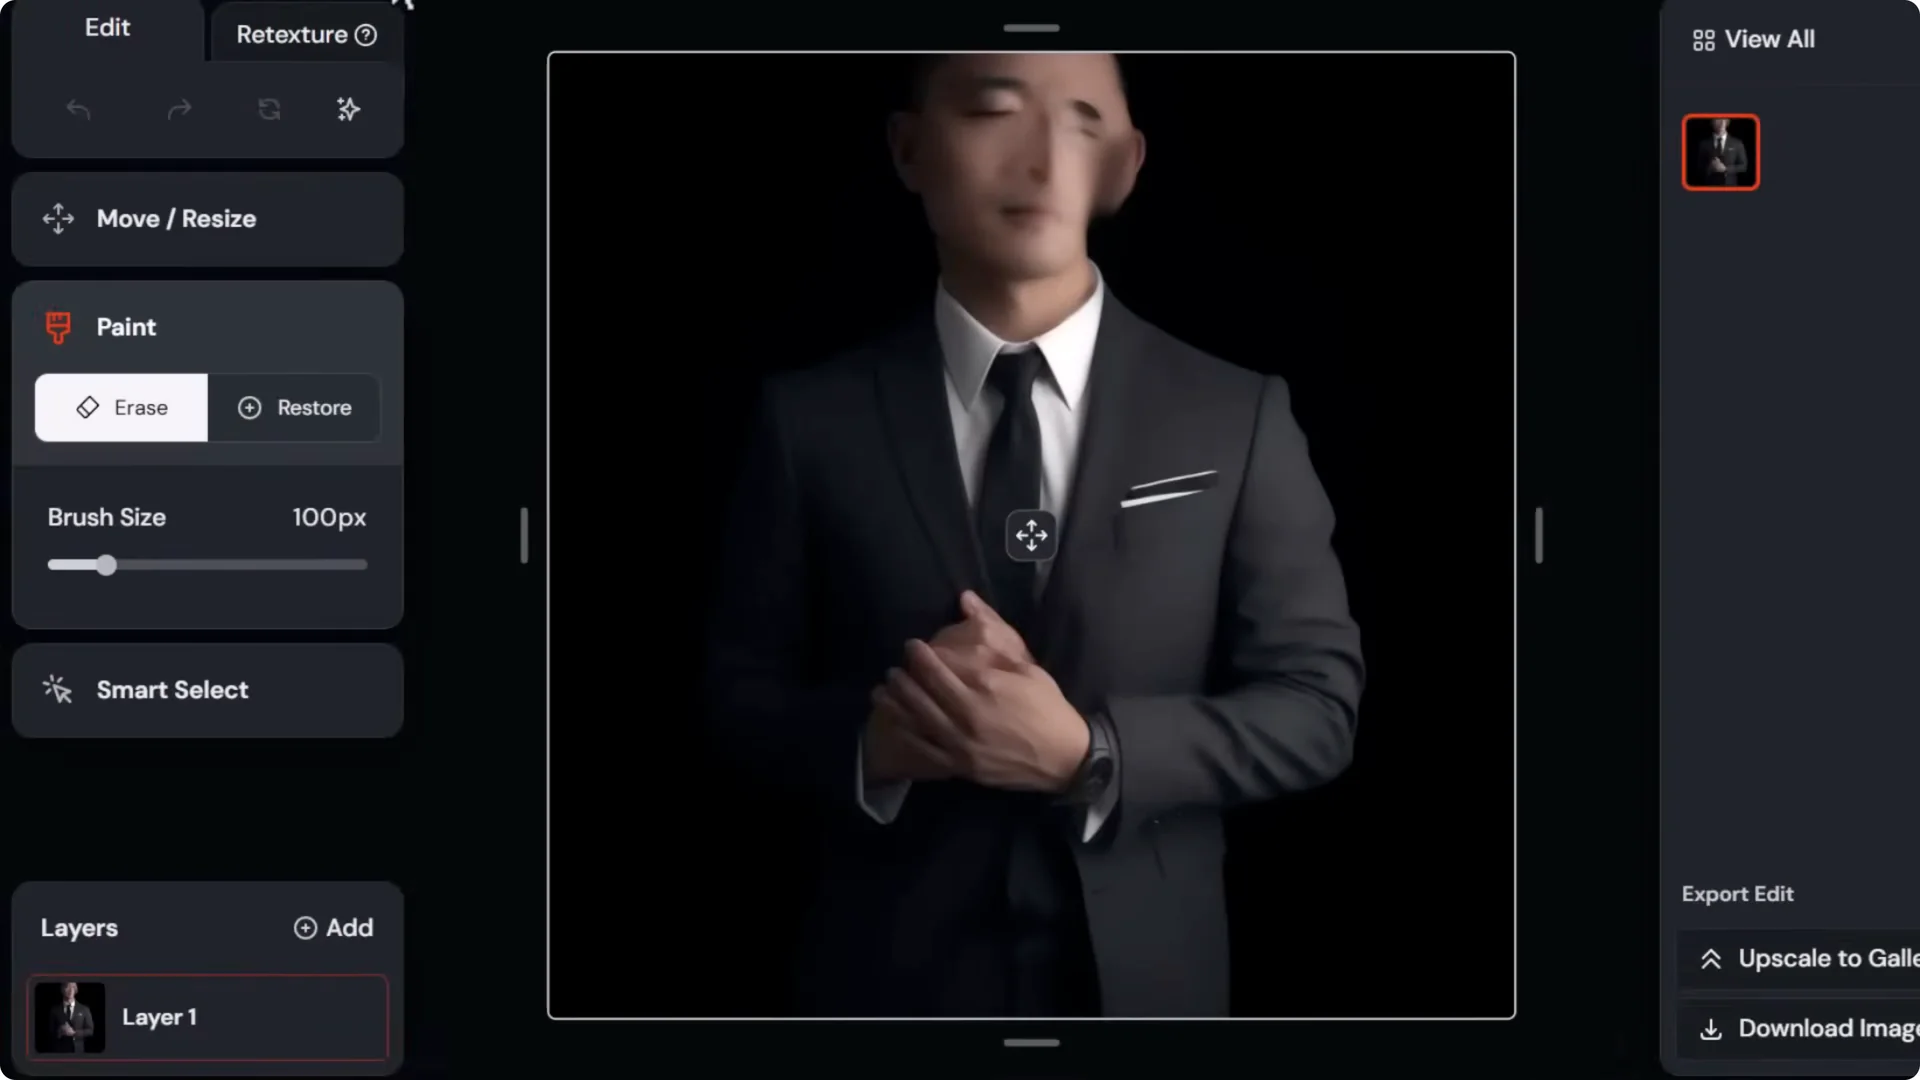
Midjourney Image Editing: Fix Faces and Hands
Take old images made with AI. Add a simple prompt, highlight the area you want to fix like the face, and fix that face. Fix hands in the same way by highlighting the hand and prompting for hands. It may take a few attempts, but you can fix the hands of your old images.
Midjourney Image Editing: Replace Someone With a Consistent Character
If you have a consistent character you’d like to use, download the image, go back to the editor, and remove the part of the character you want to replace.
Type a simple prompt describing the scene and switch to version 6.1 to use character reference, as Omni Reference currently doesn’t work in the editor. Drag the downloaded image into Character Reference and it appears there.
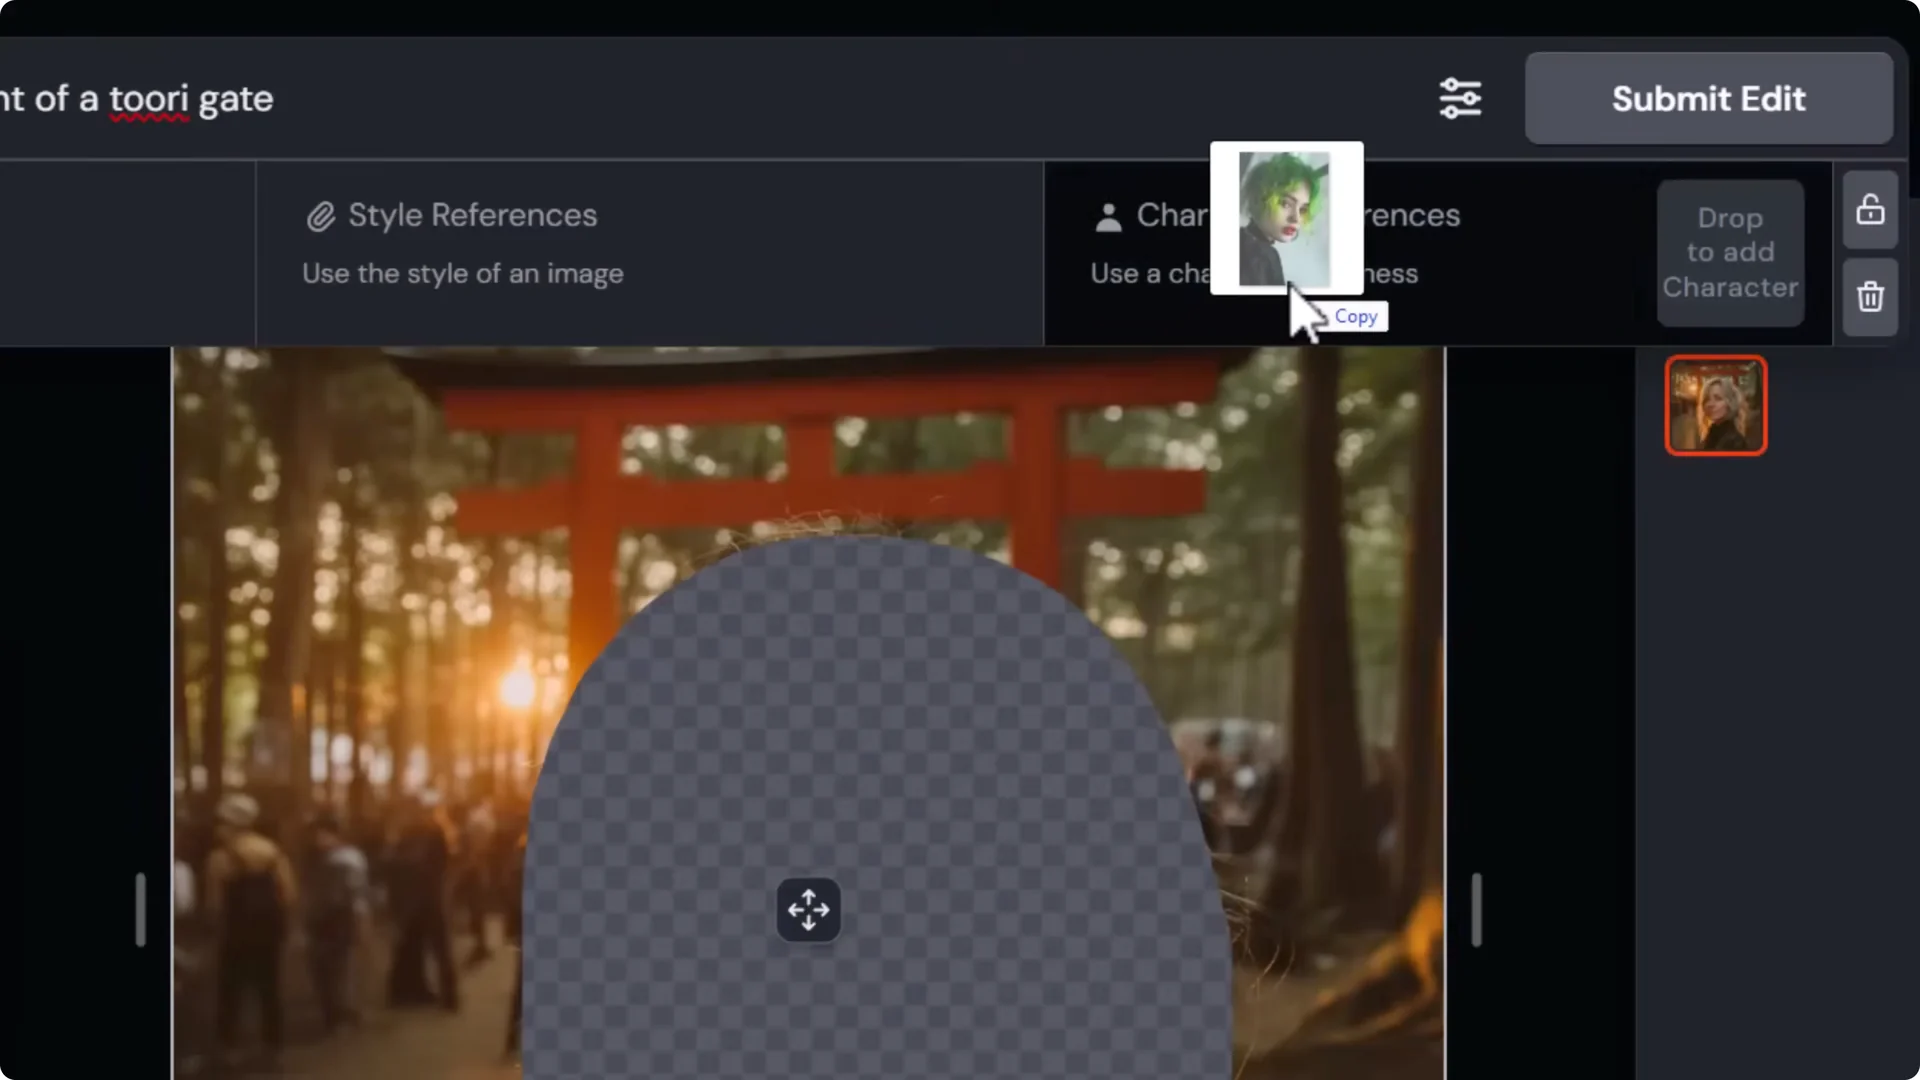
Add a character weight by adding d-cw. Go with 100 for maximum. Submit the edit and replace one of the characters with a consistent AI character.
Midjourney Image Editing: Add an AI Character to a Photo and Use Multiple Consistent Characters
Use the same process with a real photo by masking a blank area and inserting your character into the scene. The process is repeatable. For multiple consistent characters, follow the process again with a different character.
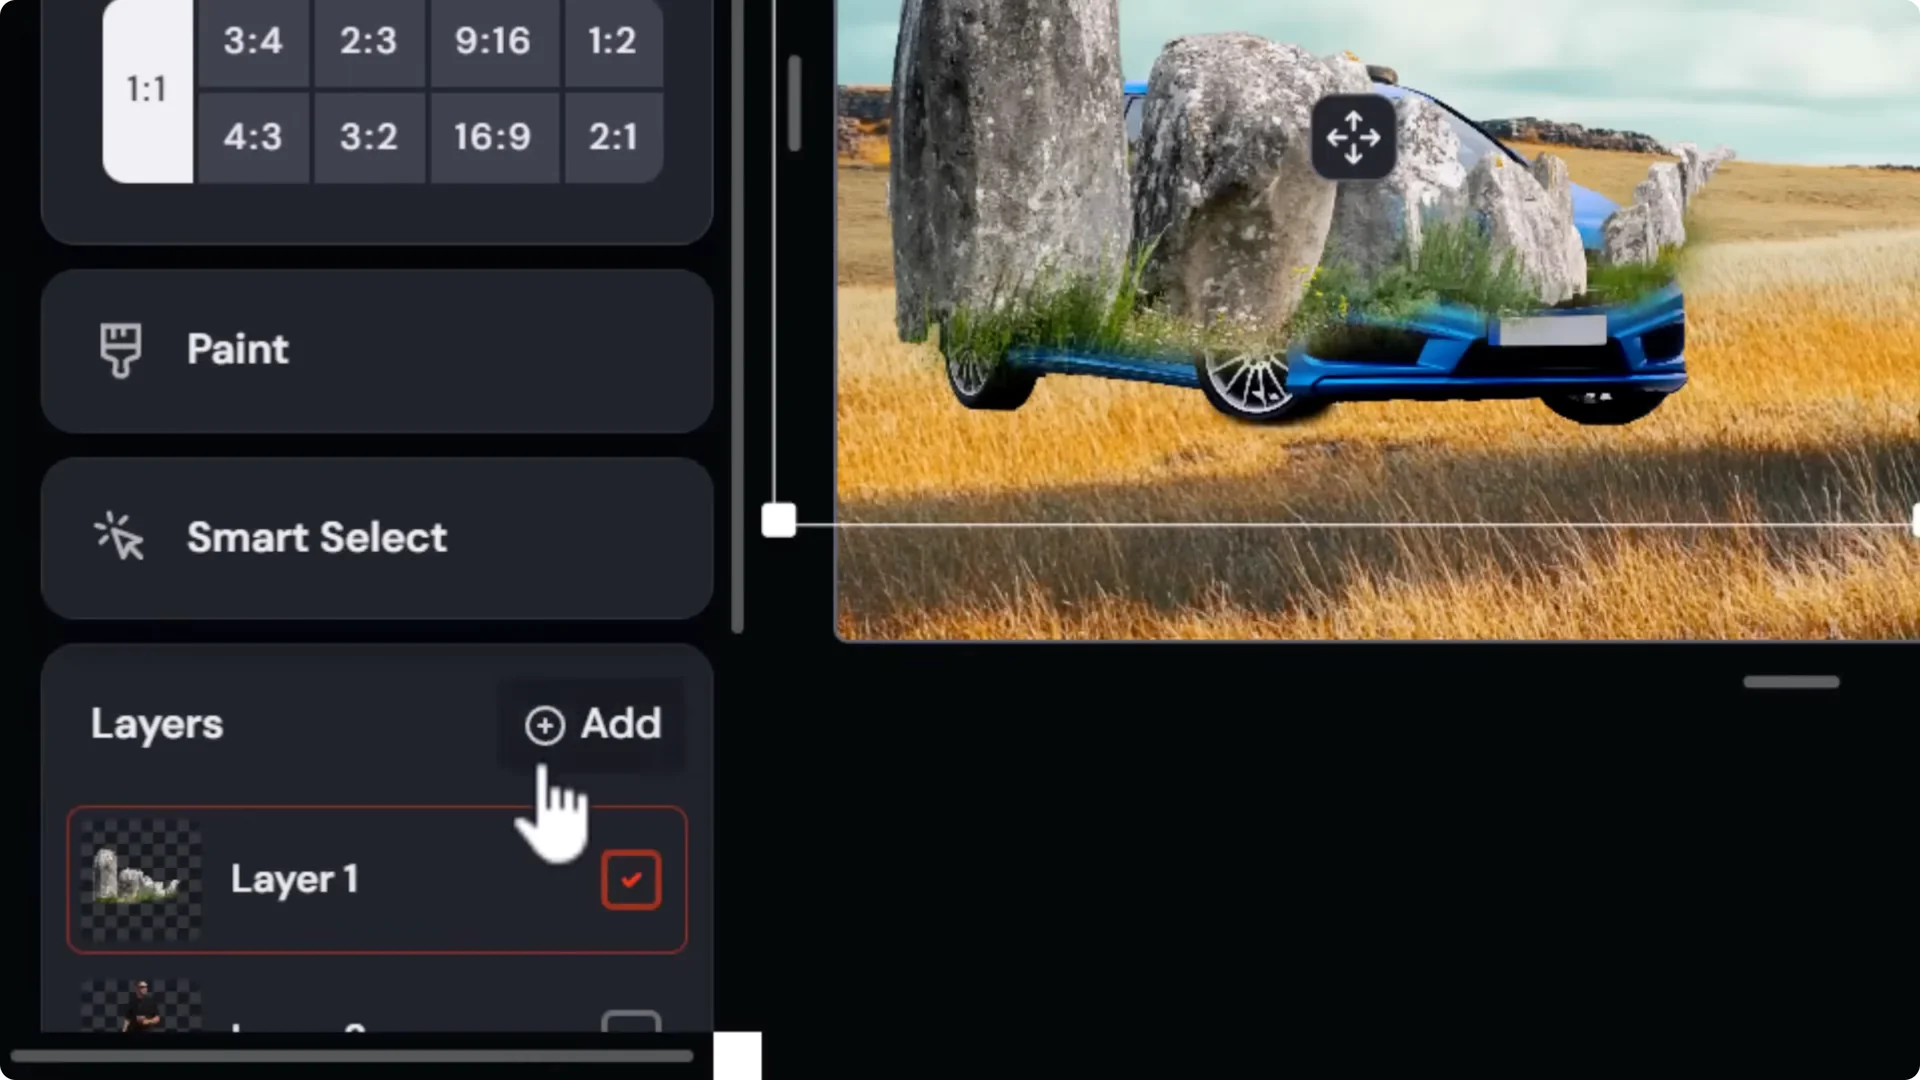
Midjourney Image Editing: Photobashing With Layers
With the layer system in the editor, drag and drop transparent PNGs, resize them, and place them where you want. Because they’re PNGs, they’re already cut out, but they may not blend into the scene. Reorder layers to control depth. For example, move rocks below a car layer to place them behind the car.
To blend objects:
- Click the layer you want to work on.
- Go to Paint – Erase, bring the brush size down, and create some space around the objects and where shadows will fall so the editor can blend them.
- If you want grass to overlap wheels, switch to the wheels’ layer and erase parts of the wheels.
- Do the same with a person’s feet to blend them into the ground.
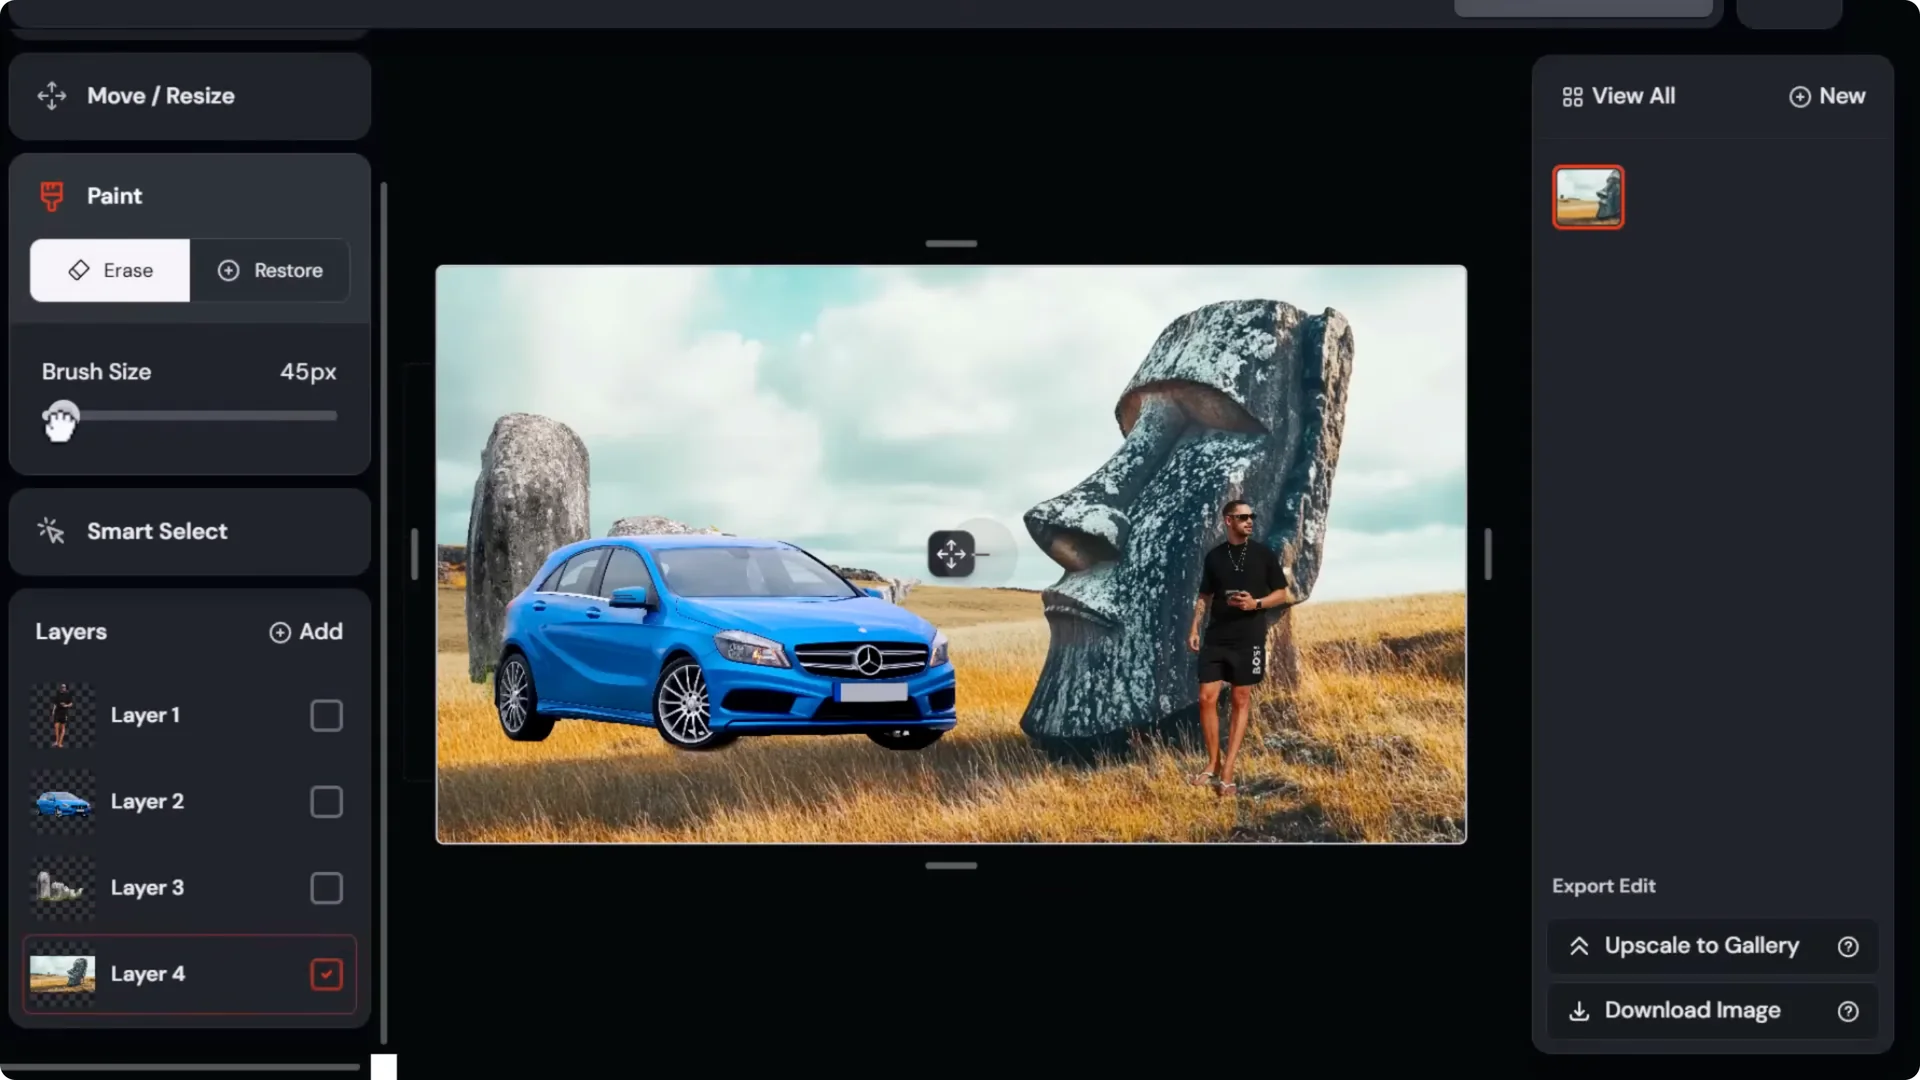
Type a prompt describing the scene, submit the edit, and perform basic AI photobashing.
Midjourney Image Editing: Hair, Expressions, and Facial Hair
Take an image of someone who is bald. Select around the head and into the head a little bit, then describe the hairstyle you’d like to see. You can give someone a specific haircut.
Select the area around the mouth and cheeks and prompt for an expression like a smile. Select around the mouth, chin, and cheeks to add a beard.
Midjourney Image Editing: Make People Bald, Change Clothes, and Adjust Build
Take someone with long hair, select all visible hair on and around their head including just above the eyebrows, and prompt for a bald person to make that character look bald. If you don’t like the clothing, select the clothing area and a bit of space around it, and change both build and clothing type. Including both in your prompt helps nail the look.
Midjourney Image Editing: Eye Color, Lipstick, and Retexturing Faces
Edit faces by selecting the pupils of someone’s eyes and prompting for a specific eye color. Select lips to change lipstick color.
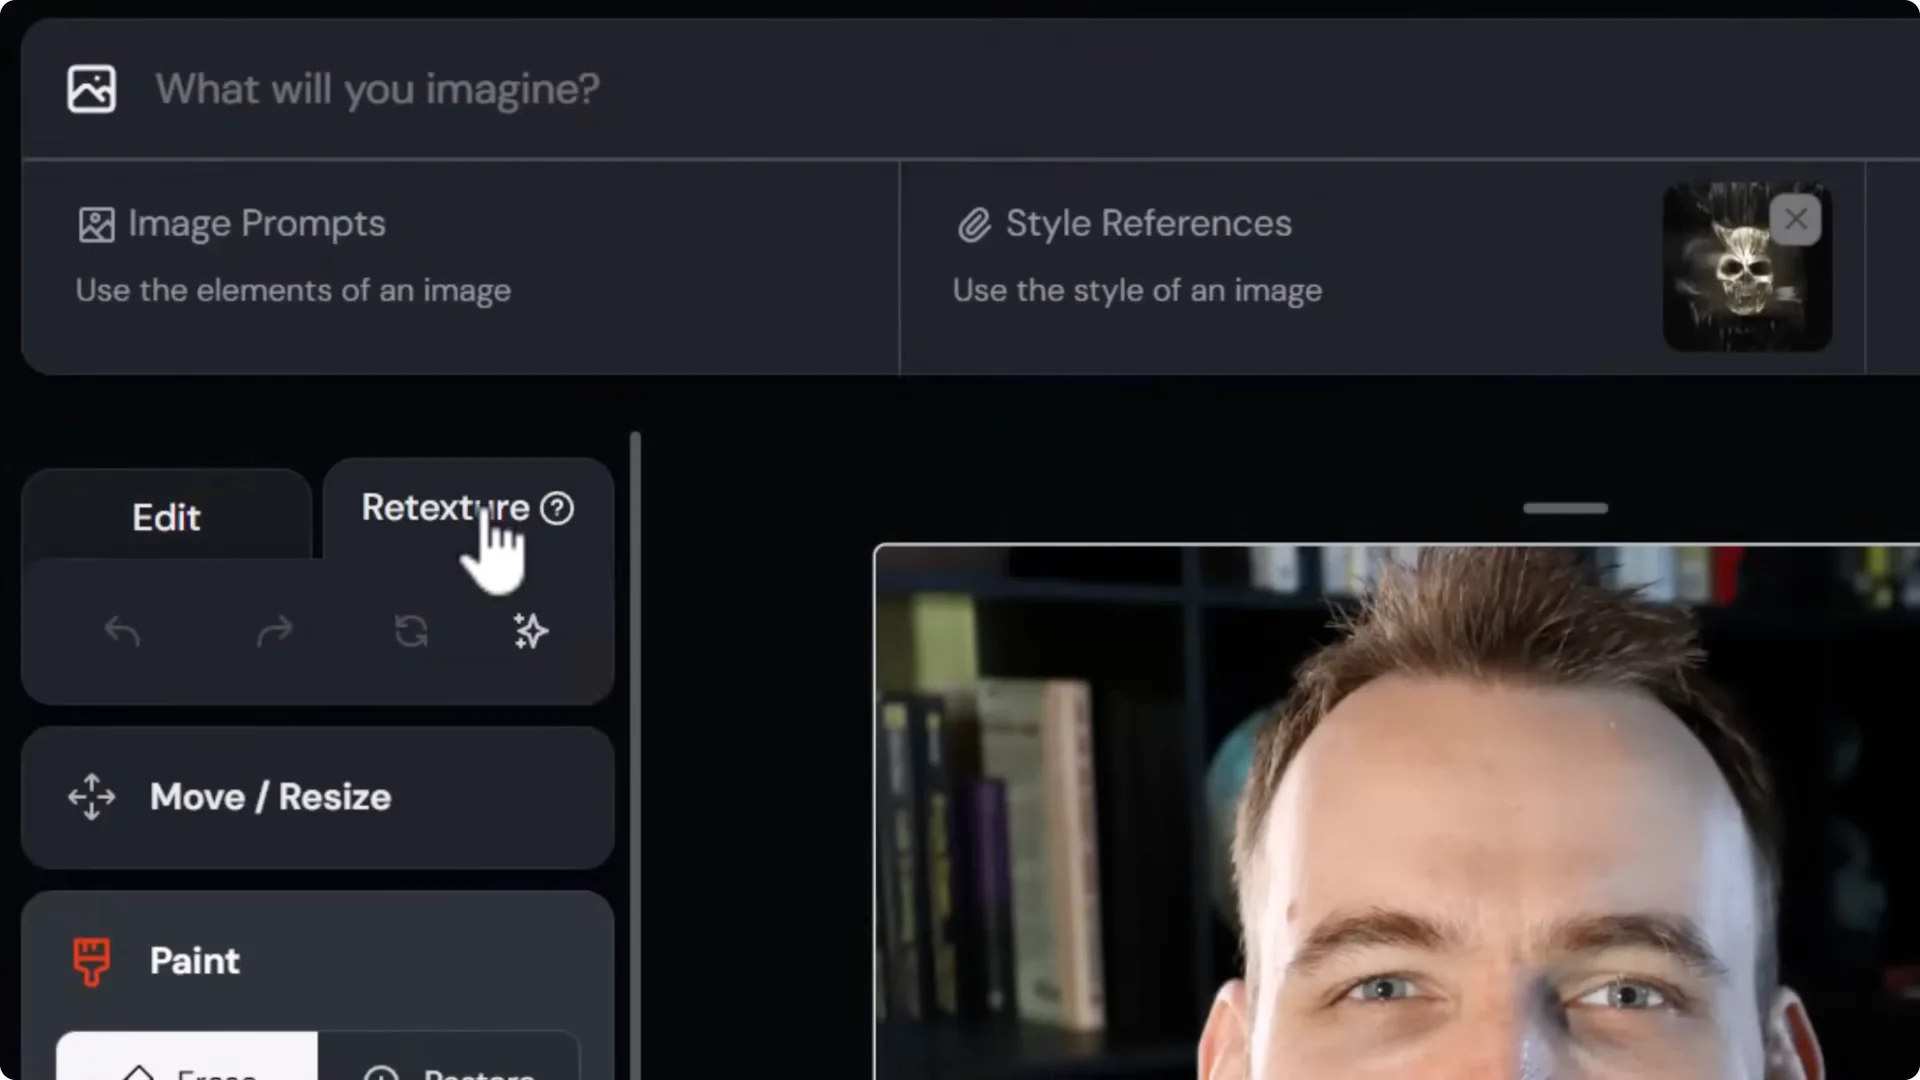
Switch to Retexture, take any face photo or portrait, add a prompt to describe what you want to transform it into, and use that as a base for creating images laid out in a similar fashion.
Midjourney Image Editing: Clean Up Skin and Add Objects With Reflections
Select skin blemishes, prompt for a face with clean, smooth skin, submit the edit, and use Midjourney’s AI to convincingly remove blemishes and replace them with realistic skin texture.
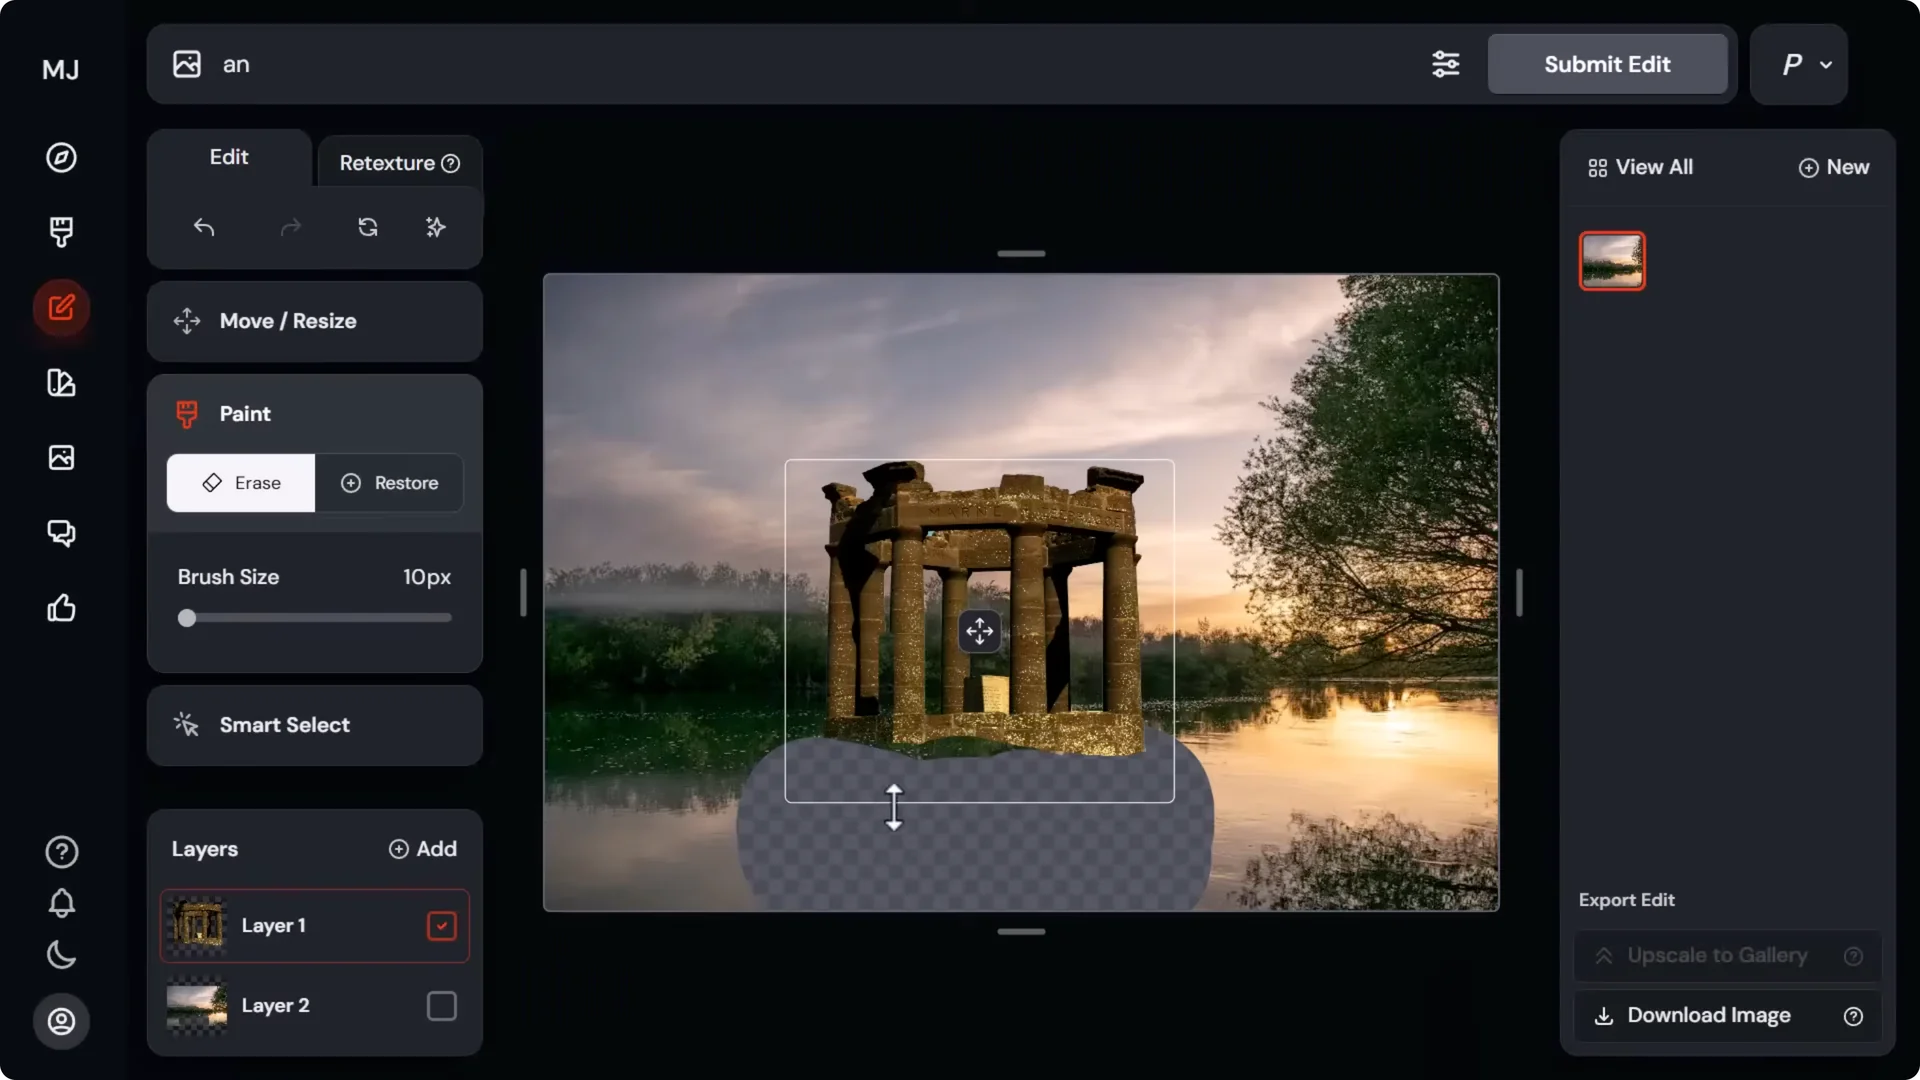
Bring in buildings and objects. Remove space around and beneath them for the reflection. Click to the top layer, remove some of the object itself, and submerge parts of it into water that already exists. It does a convincing job of adding the reflection underneath.
Midjourney Image Editing: Upscale External Images
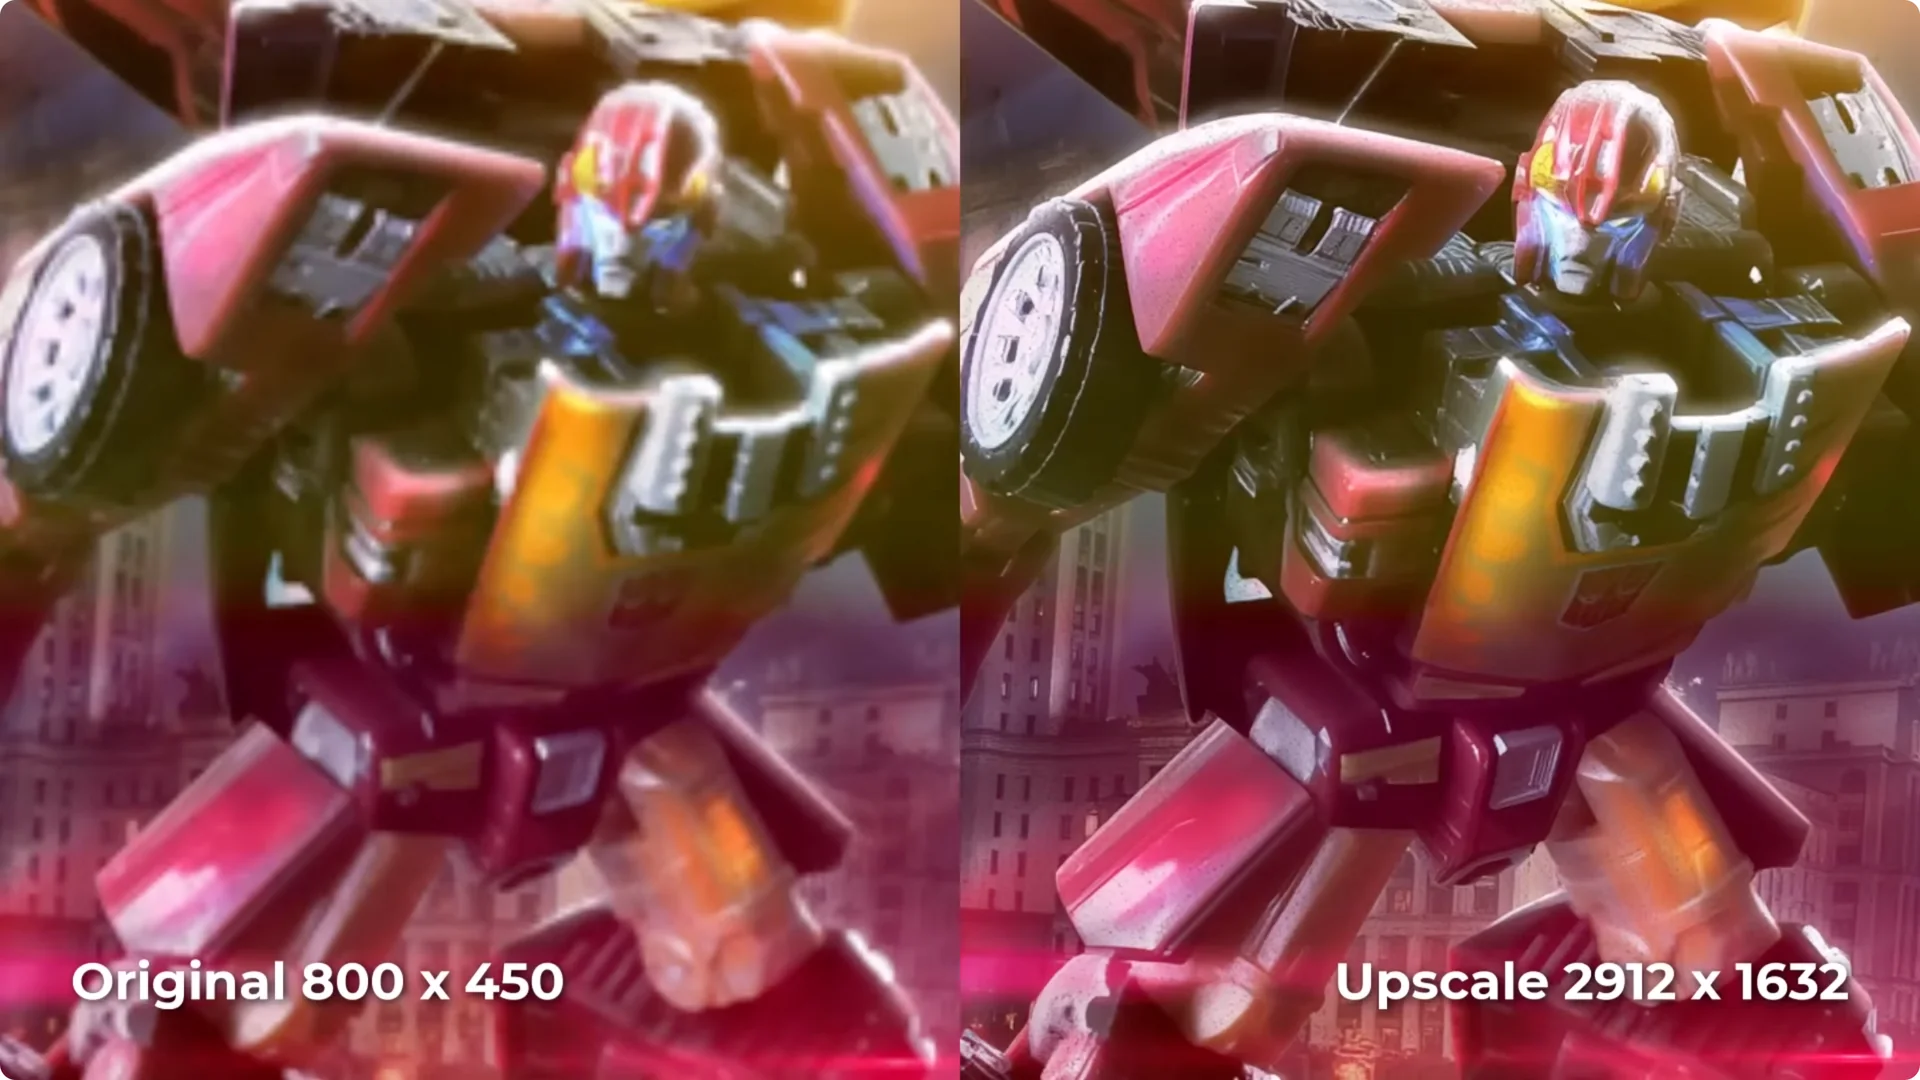
Drag and drop a small image in, like artwork at 800x 450 pixels. Take the erase tool and remove a small portion. Generate a prompt and submit the edit so it fills that spot. Then go to Upscale to Gallery to upscale the image.
Example: an original at 800x 450 pixels becomes 2912x 1632 pixels. Details increase and it resizes to the size of an upscaled AI art image. This works particularly well with photos of faces and other more organic elements.
Change Image Style With Prompts, Style Reference, and Mood Boards
Use Retexture and a style reference. Drag in an image to use as a style reference, then switch to Retexture, write a prompt that matches the style, and submit to get styled versions based on your reference.
You can also remove the style reference and use Personalize. Turn personalization on and use your global profile to get outputs that match your tastes. Choose mood boards such as:
- Gigaresque dystopia for an HR Giger inspired biomechanical style
- Gustavvesque black and white
- Ghost in the Shell 93 for an anime cyberpunk style
- Vapor wave for strong color
- Glitchesque for glitchy effects
- Old film dust and scratch for a vintage look
Midjourney Image Editing: Zoom, Crop, and Upscale
If you drag the handles in the editor to crop and submit with the same prompt, you may get an error in both the simple and full advanced editor. Use this workaround.
Step-by-step:
1) Close the editor and download your image.
2) Use an external image cropper. Drag the image in, crop by dragging the handles, and download the cropped result.
3) Back in Midjourney, open the editor and upload the cropped image.
4) Remove a small portion with the erase tool, type a prompt, and submit the edit.
5) Upscale to Gallery to increase resolution on the cropped area.
You can squeeze more resolution out of the area you’re looking to upscale in particular. The upscaled detail is impressive, and the external crop lets you target the region you want.
Midjourney Image Editing: Flood Effects and Removing Distractions
Surround objects with water to create a cool flooded effect. The editor does a good job with reflections and making it look believable.
Remove borders and distractions from images by selecting them and prompting for what you’d like to see instead. This is good for getting rid of things like pencils or classical borders on images.
Midjourney Image Editing: Fix AI Generated Text
If you have AI generated text that doesn’t look correct:
- Select the text you want to repair.
- Type the full correct text in the prompt area.
- Submit the edit.
It often works better if you enter the entire text block. It may take a few attempts and you may need to fix it letter by letter.
Midjourney Image Editing: Change Weather and Create Start and End Frames for AI Video
Take a sunny image, head into Retexture, and change the weather to something like a violent storm. Describe the scene, submit, and get similar scenes with different weather options.
One of my favorite things is to generate an image, then use the editor to compose a start frame for an AI video. You can take control over layout and add items. Then alter that start frame and move things around to create an end frame that you can upload into an AI video platform. Create both a start and an end frame from the same image.
Example workflow:
- Drop the first image in as a start frame.
- Add the second image as the end frame. In this example, the warrior is close up in the start frame, the camera zooms out and pans up, and he’s closer to the building in the end frame.
- Use a prompt like “a warrior runs into a temple that is engulfed in flames and fire cinematic scene” and set duration, then create the video.
Final Thoughts
Midjourney Image Editing lets you remove, add, and replace objects, restyle entire scenes with Retexture, fix faces and hands, manage consistent characters, photobash with layers, change hair and expressions, adjust clothing and build, tweak eyes and lipstick, clean up skin, add reflections in water, upscale external images, restyle with references and mood boards, crop and upscale for targeted resolution, remove distractions, repair text, change weather, and build start and end frames for AI video. It’s a flexible editor tied to Midjourney’s AI that rewards iteration and thoughtful prompting.