I’m going to show you how to create a Multiverse image in Midjourney. This is where you take a character from a popular show or series and pop them into another universe, reimagined as a character from that universe.
I’ll also touch on video creation. There’s no solid one way to do it, so I’m going to give you a few different avenues you can try.
I’m going to start with prompt formulas and principles to help you nail down that image. Sometimes this is all you need to get the image you want.
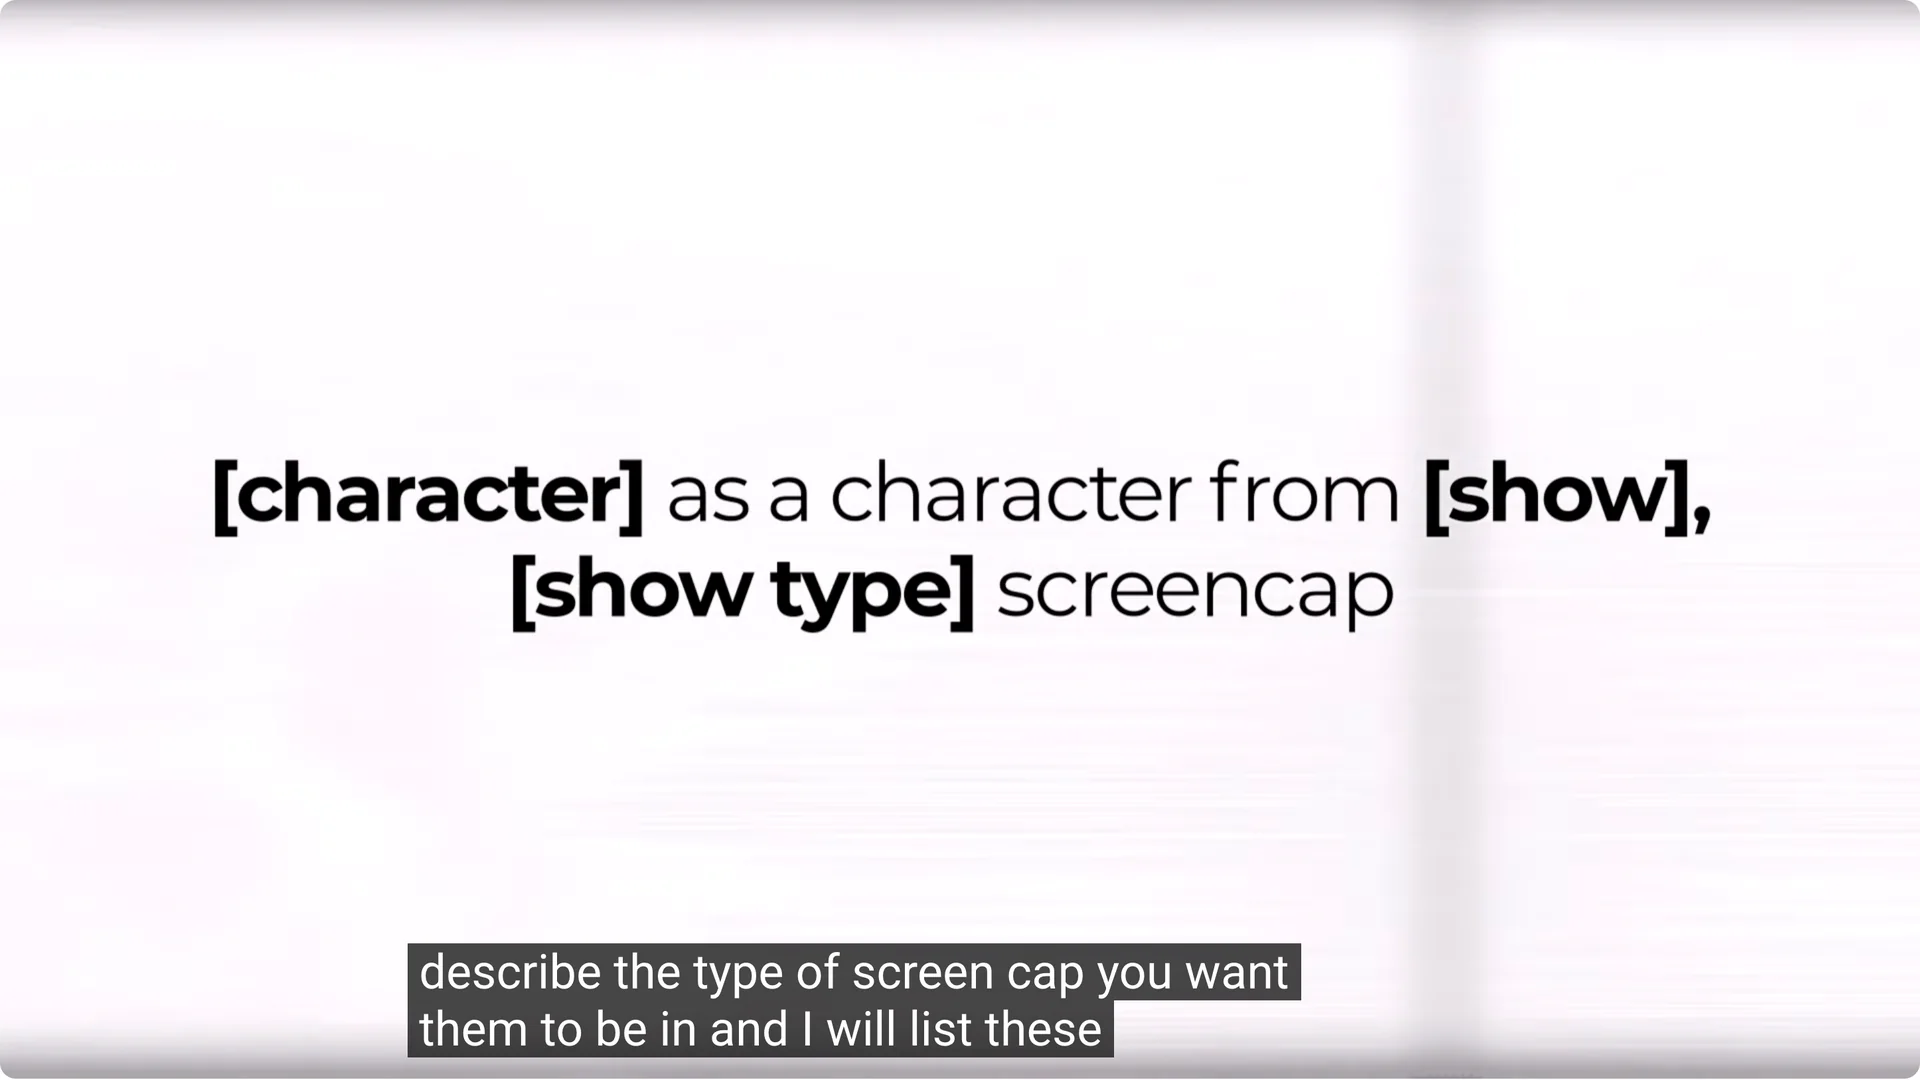
Prompt Formula #1: Simple Screencap Multiverse Formula
Take the character, reimagine them as a character from a certain show, then describe the type of screen cap you want them to be in.
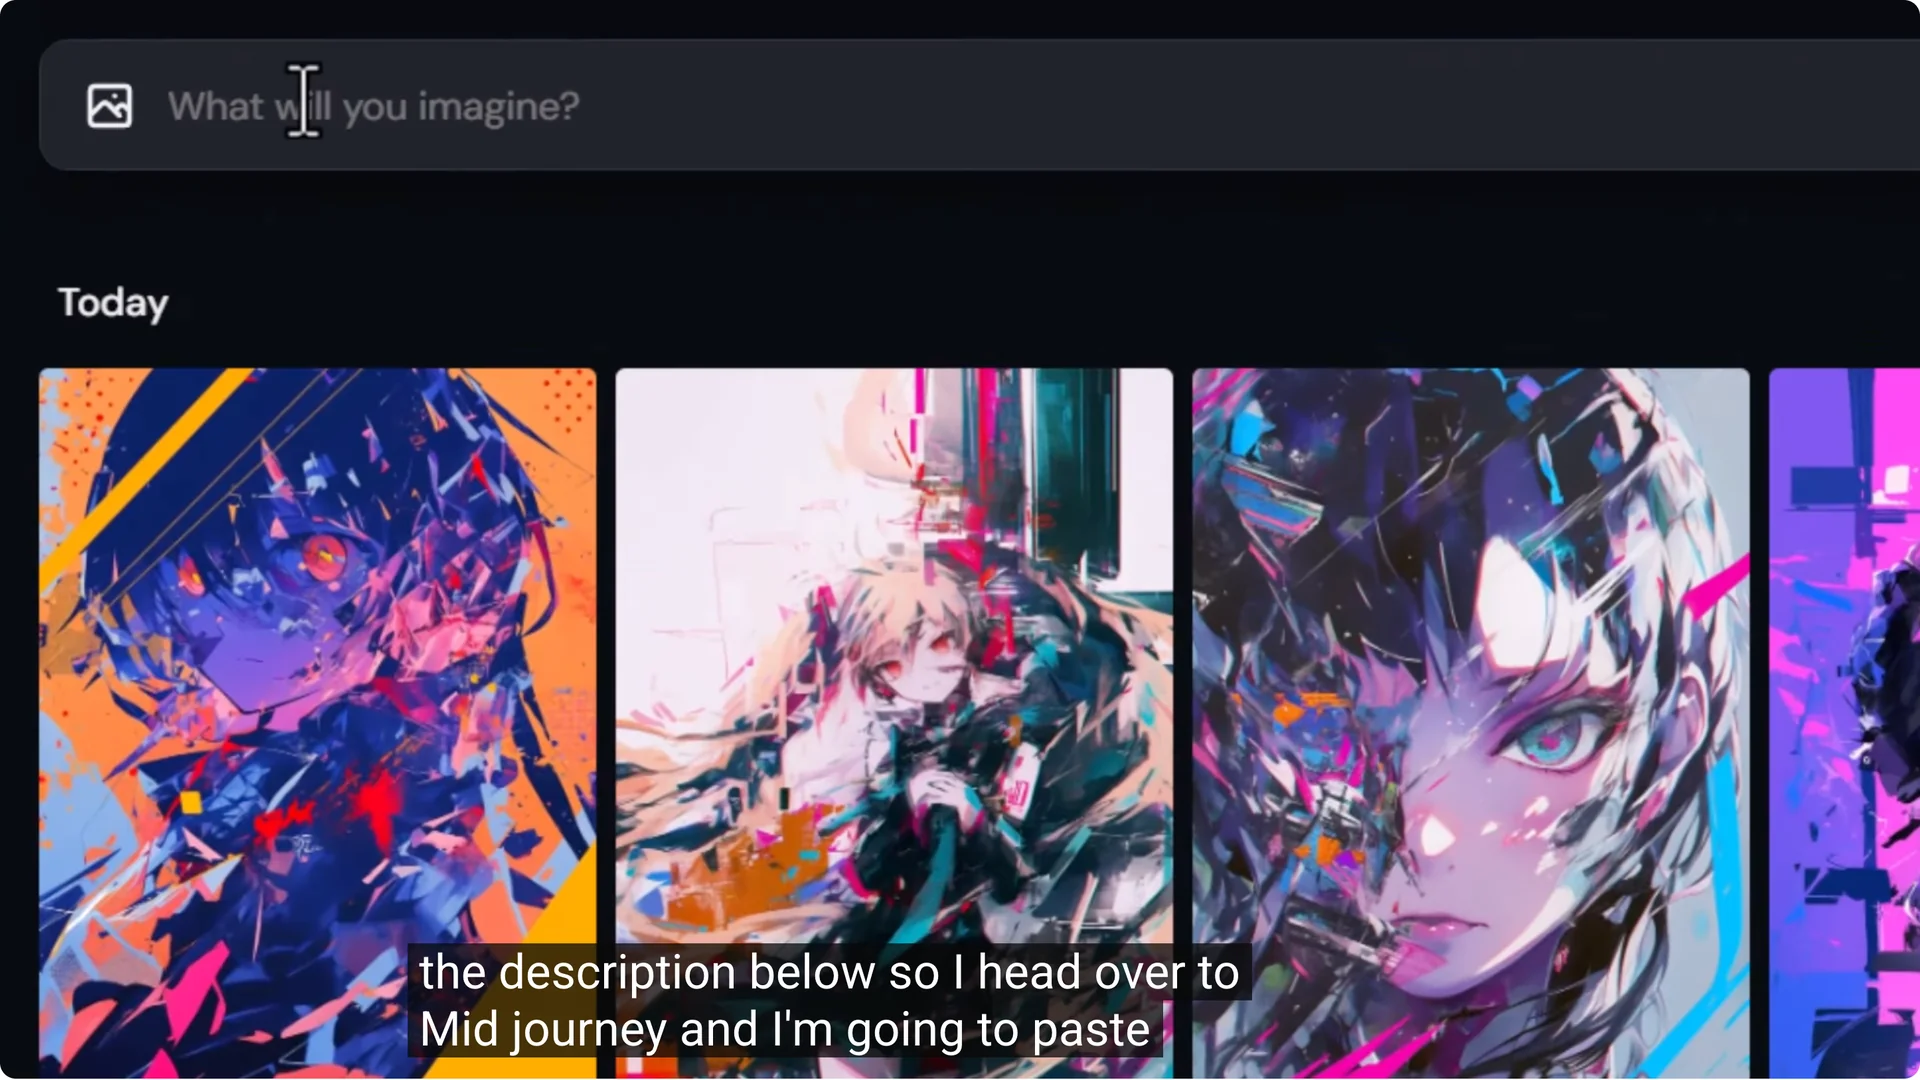
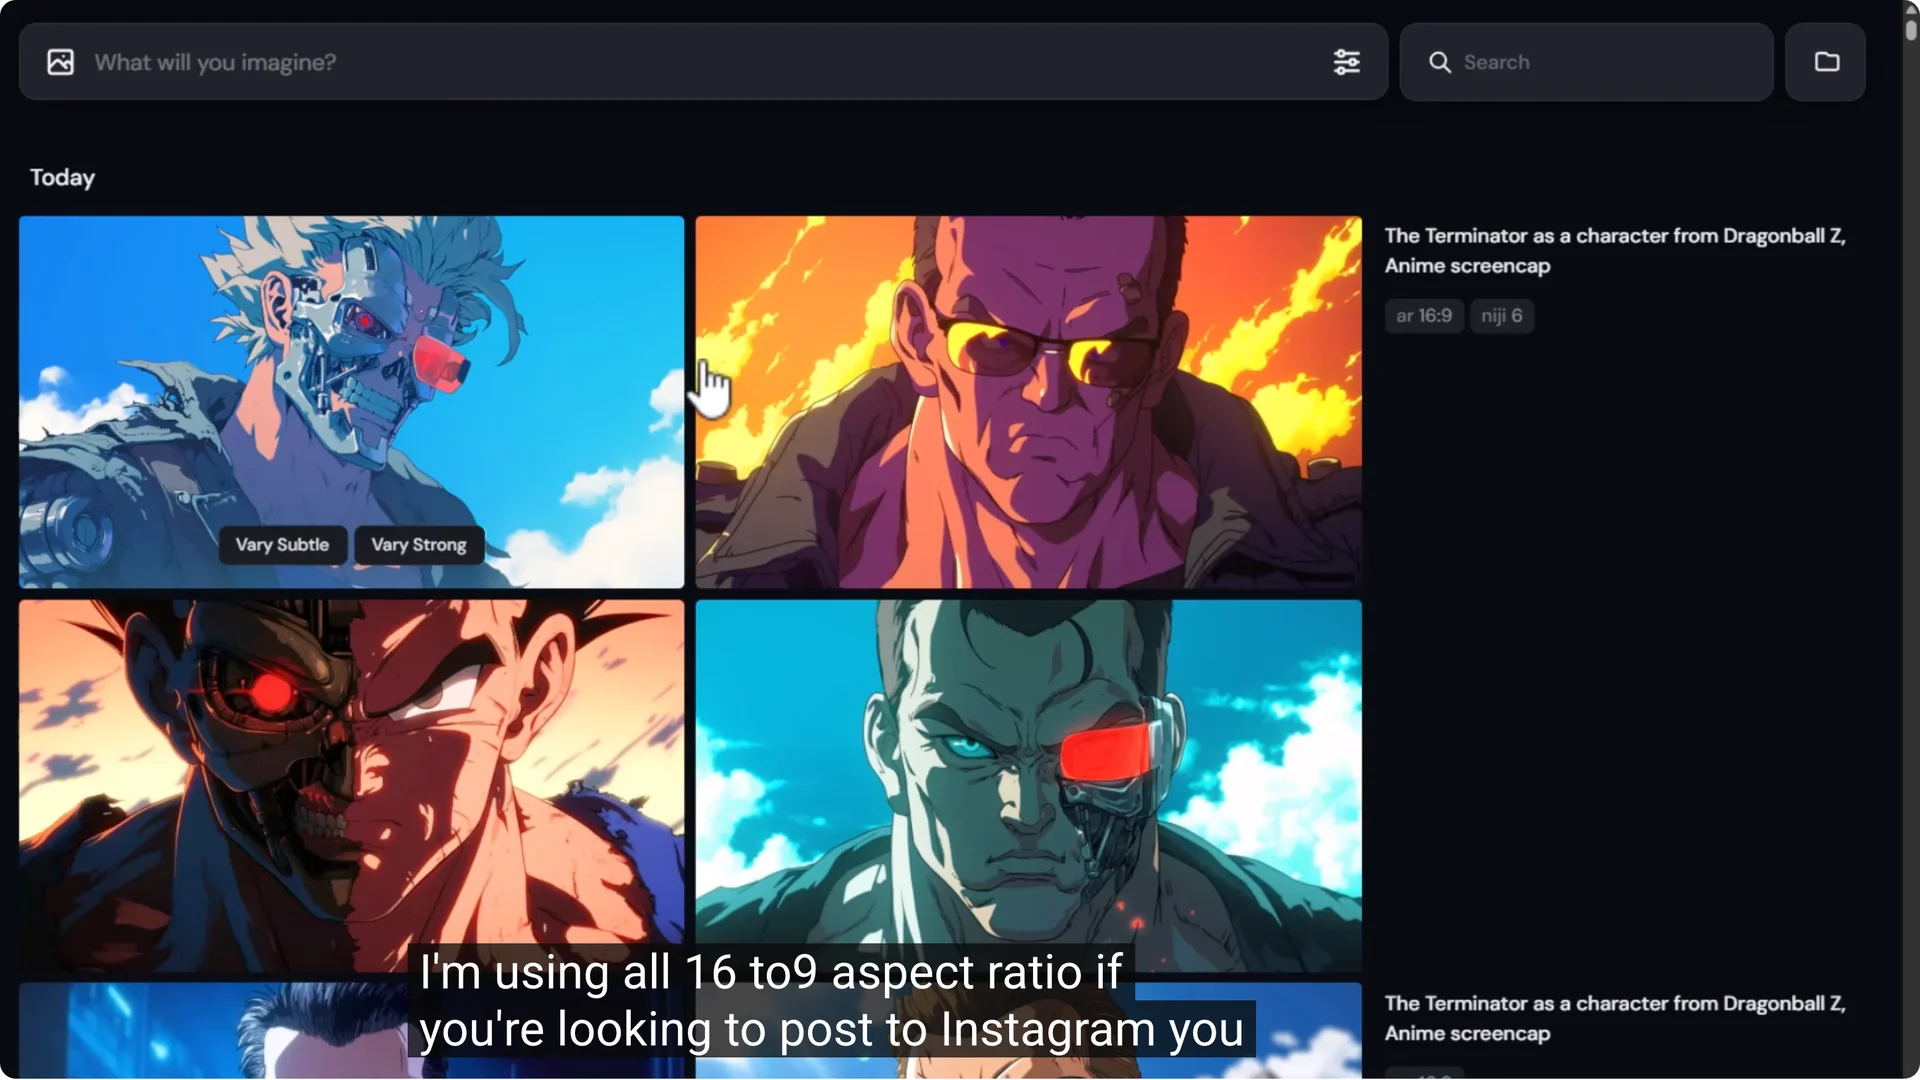
I head over to Midjourney and paste that formula into the prompt bar. You need to change out character, show, and show type.
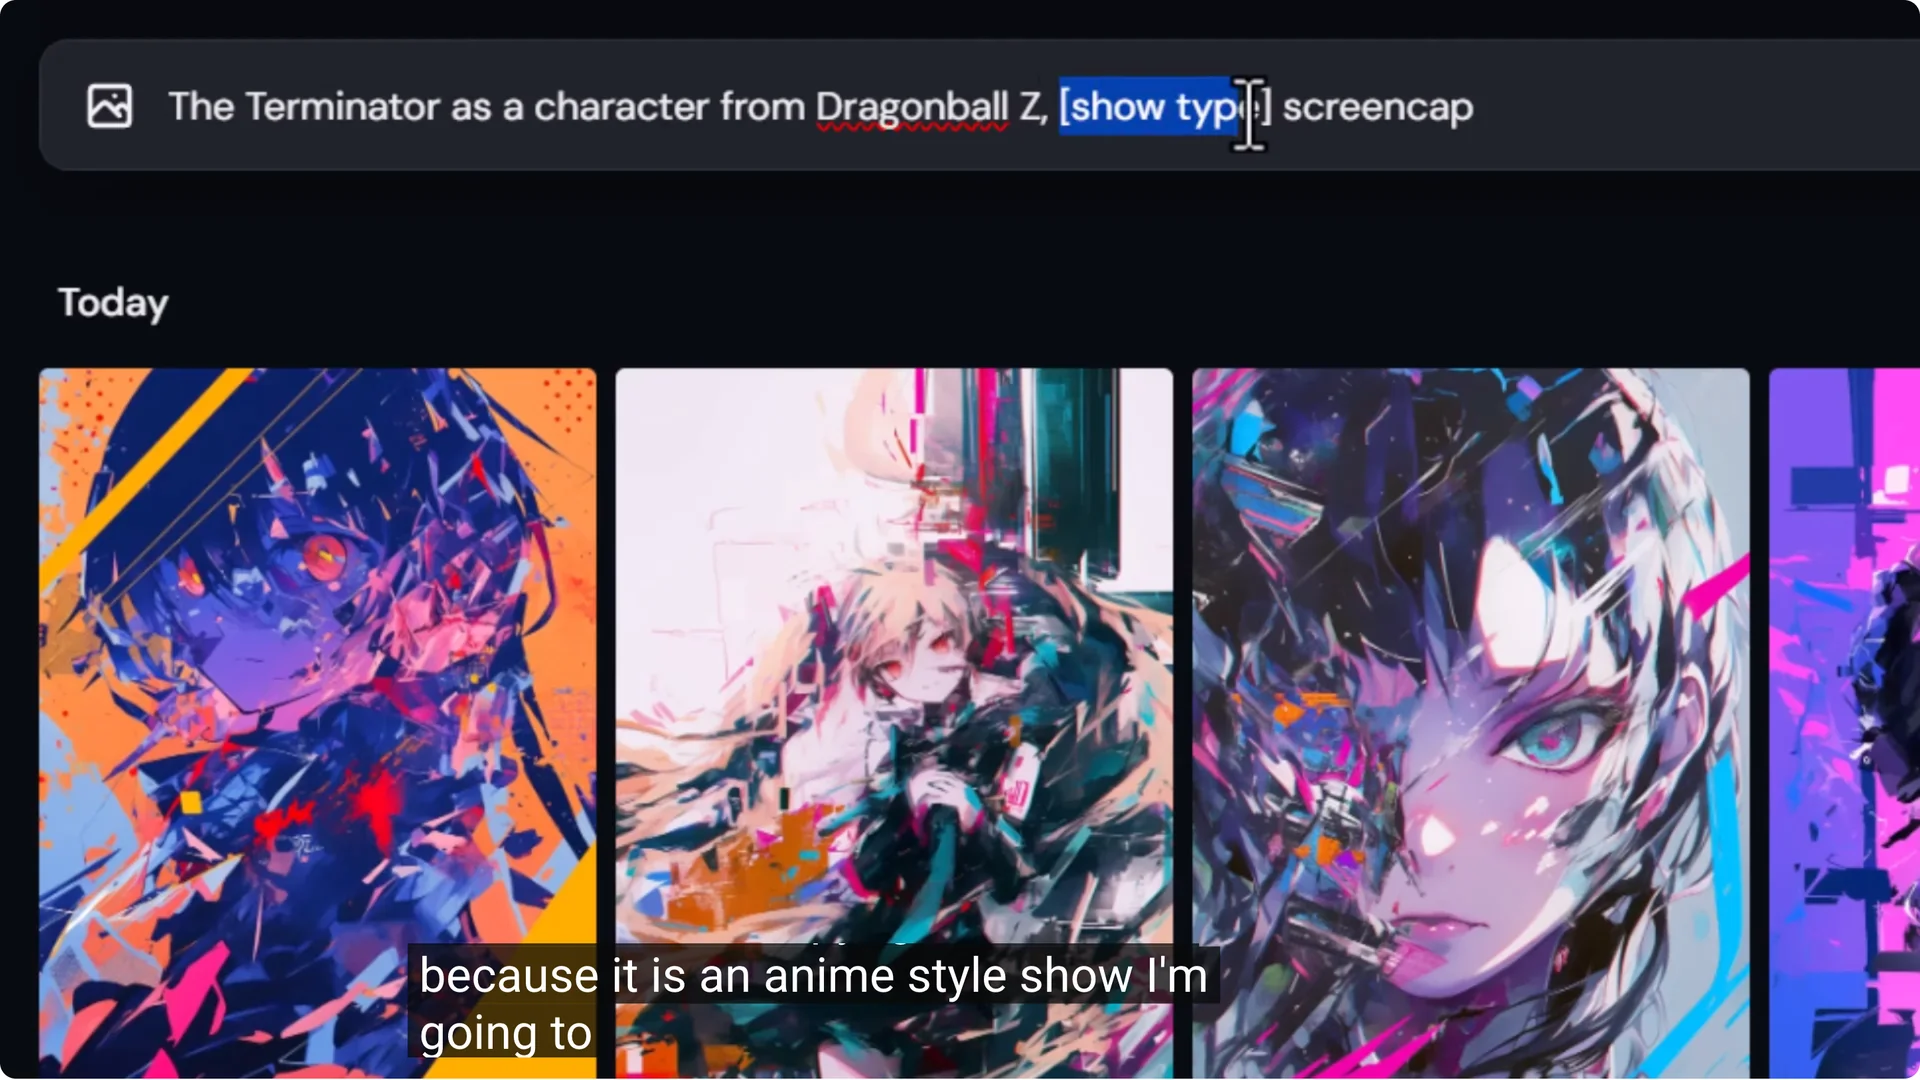
I’m starting with the Terminator as a character from Dragon Ball Z. This doesn’t have to be an anime show. Anime is very popular for this format, and obviously we want to use this just for fun.
This is not something you want to make money from due to copyright issues.
Because it is an anime style show, I’m going to go anime – show type – screen cap. If you were doing something like a video game you’d say video game screen cap. For a movie, you’d go movie screen cap.
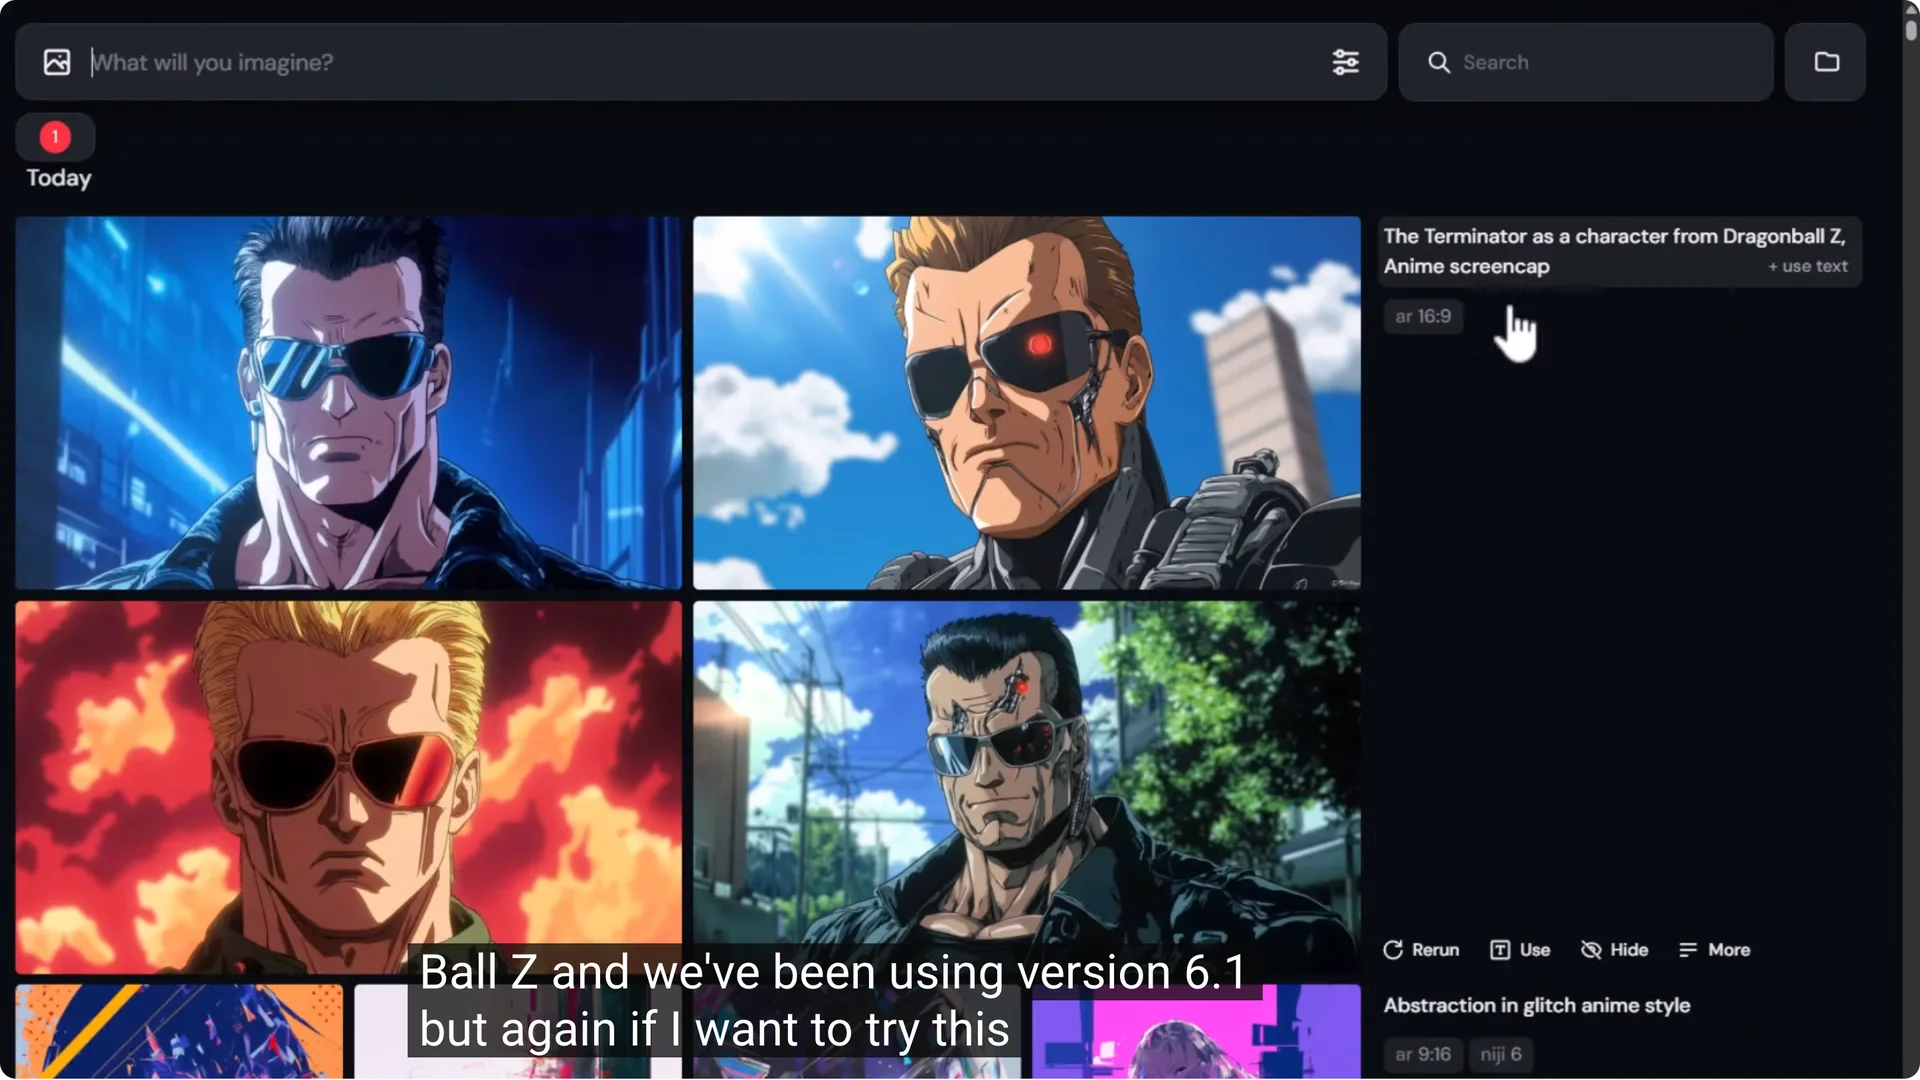
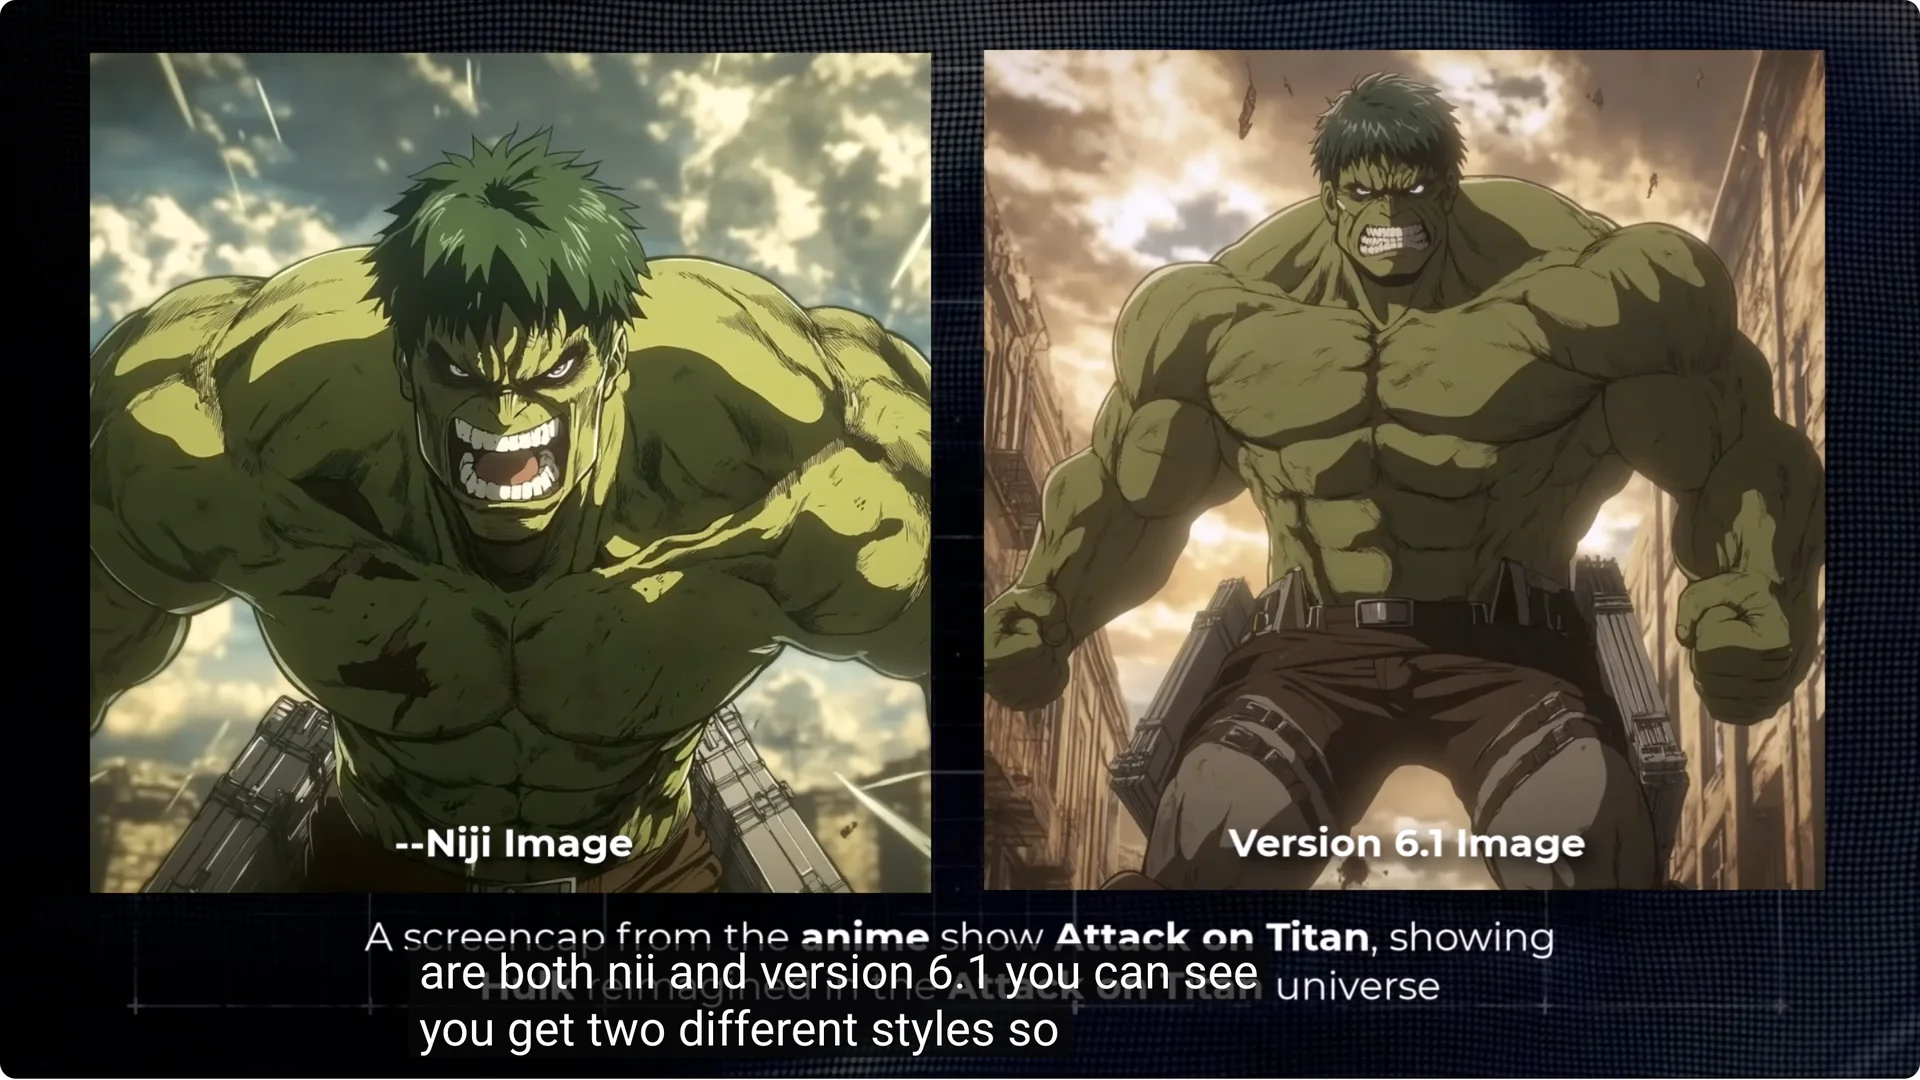
If I’m going to create an anime screen cap, I’m actually better off using nii, but I can still get pretty good results with version 6.1. If you’re testing this after the release of version 7, try version 7.

I try version 6.1. It looks very much like the Terminator, but everything down to the mouth shape, the nose, the eye shape – it’s all very Dragon Ball Z.
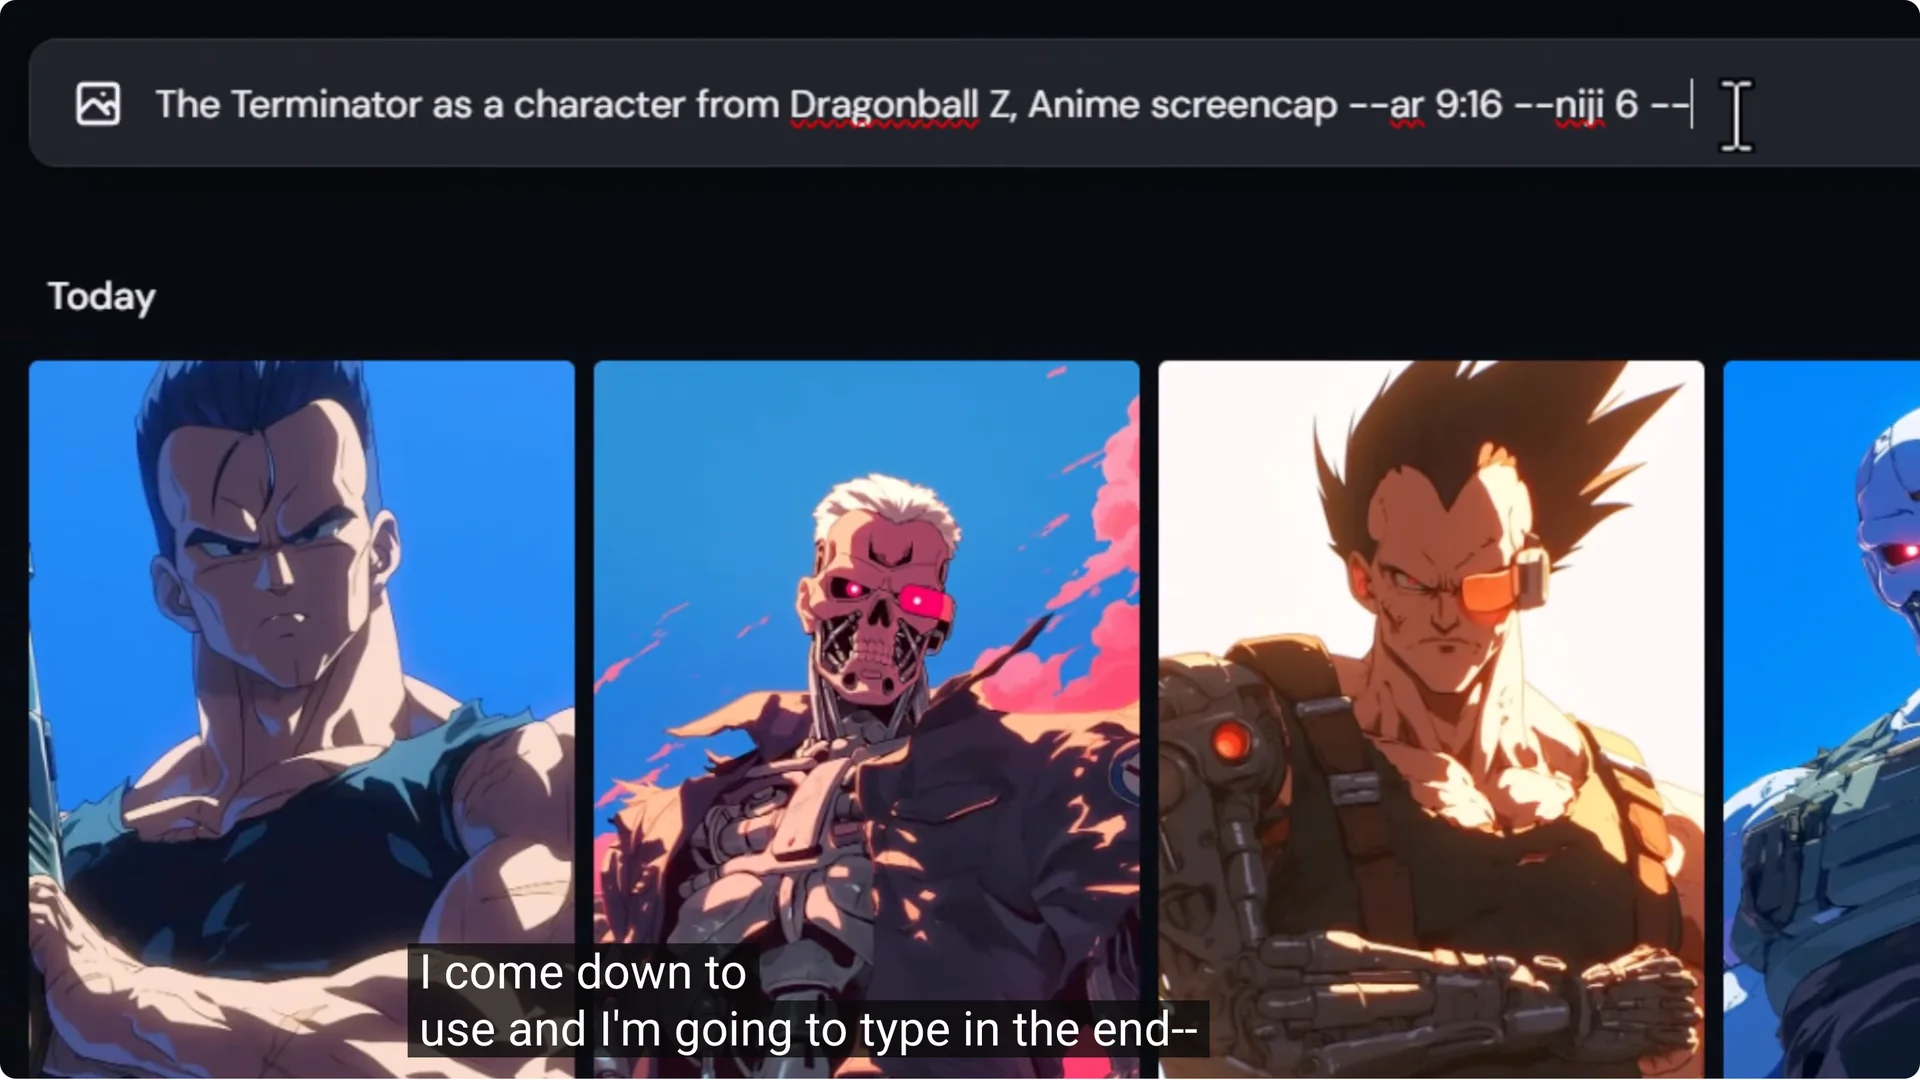
If I want to try this with nii, I come down to use again and simply type in –nii so I can compare the two. Now it’s a little more anime like.
I really like this image. It does a great job. It almost converts Goku into a Terminator.
Consider aspect ratios. I’m using 16 to 9. If you’re looking to post to Instagram, change the aspect ratio to 9 to 16, which is a vertical phone aspect ratio.
If I want it to rely on this aspect ratio, I remove any explicit aspect ratio in the prompt, then submit.
A few things to consider with this method:
- The character needs to be part of the Midjourney data set.
- The style of show you’re trying to get needs to be part of the data set as well.
- People tend to generate many images and pick the best from the bunch.
If I take four images and I’m not satisfied, I come down to use and type in –repeat 5 to get five lots of that image. Then I can sift through and pick the one that suits best.
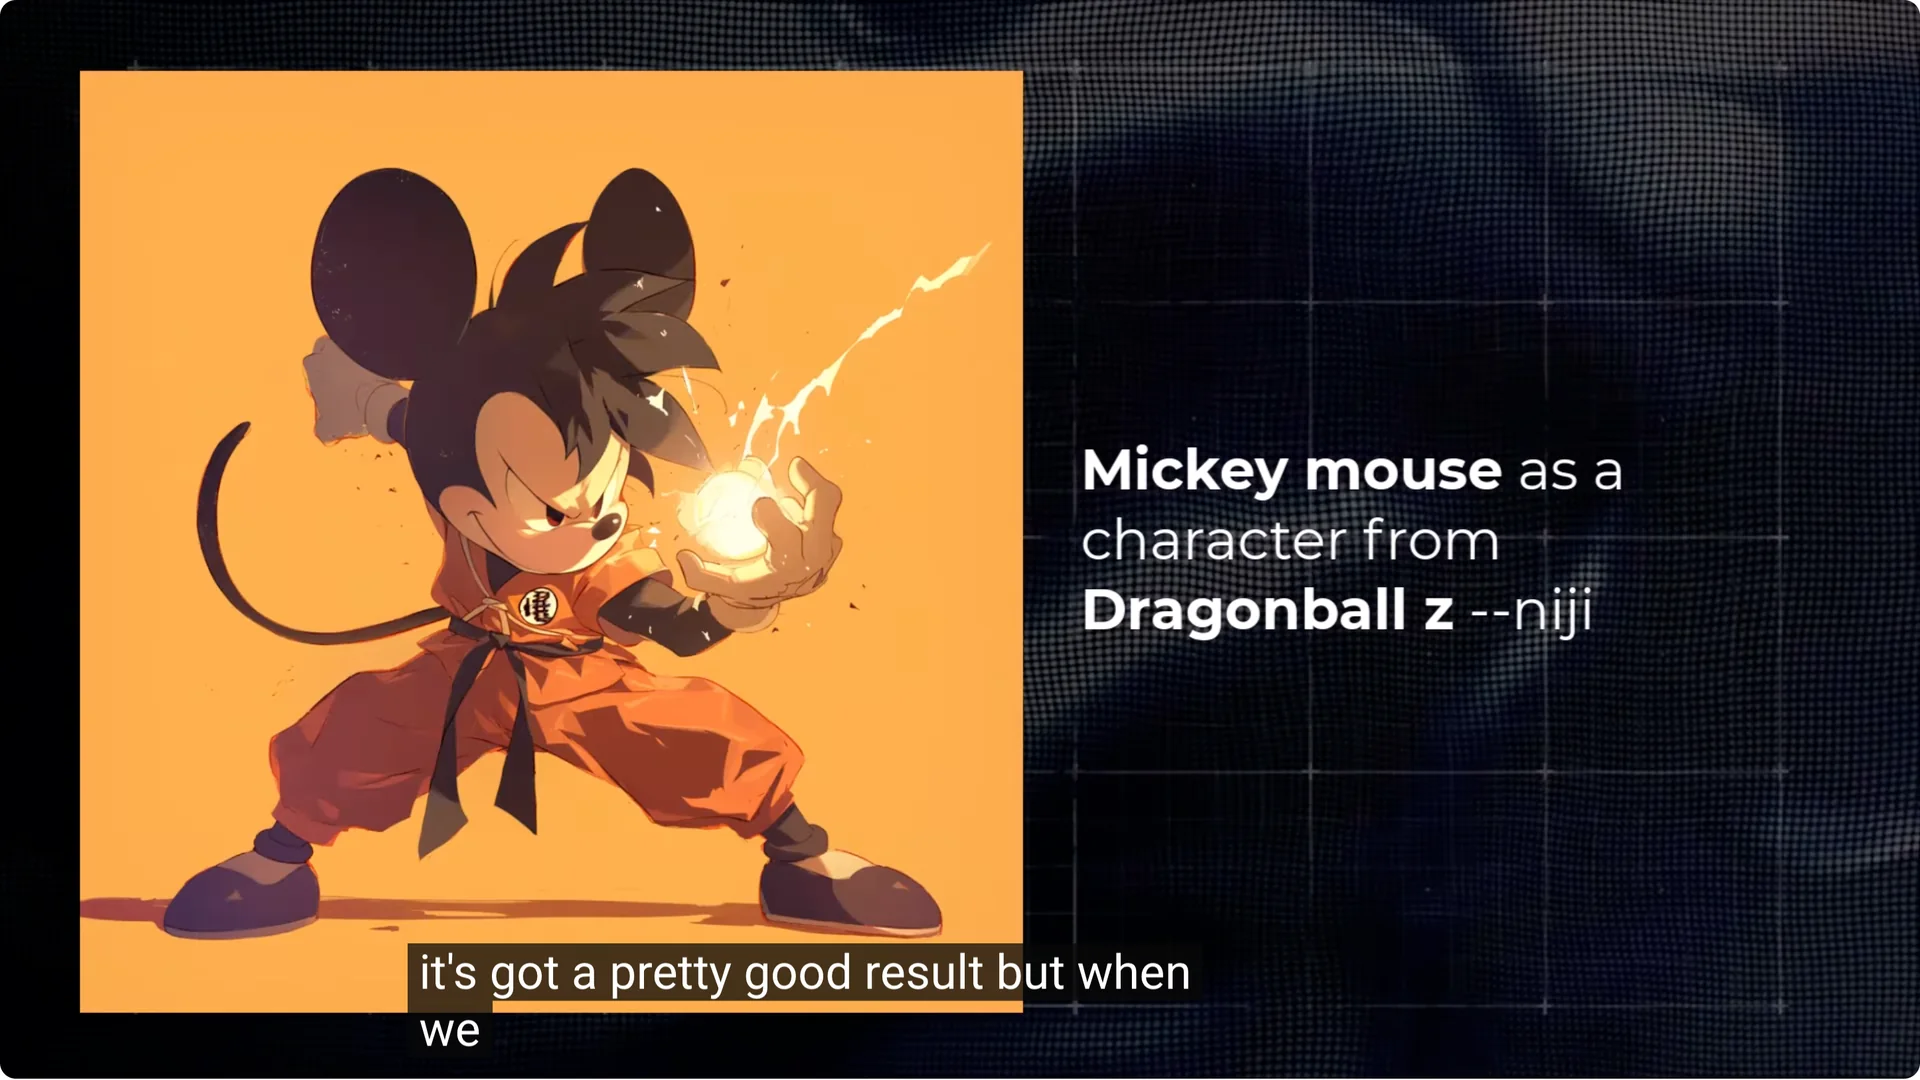
Examples that worked well with screen cap wording:
- Mickey Mouse as a character from Dragon Ball Z – anime cartoon screen cap.
- Terminator with cartoon screen cap and a wider aspect ratio.
- Batman as a character from JoJo’s Bizarre Adventure.
- Batman as an Attack on Titan character.
- Naruto Shippuden style applied to Batman.
- Hulk as a JoJo’s Bizarre Adventure character.
- Mario in the Simpsons universe.
- Mario as a Mortal Kombat character.
- Adding just screen cap at the end can still get pretty good results.
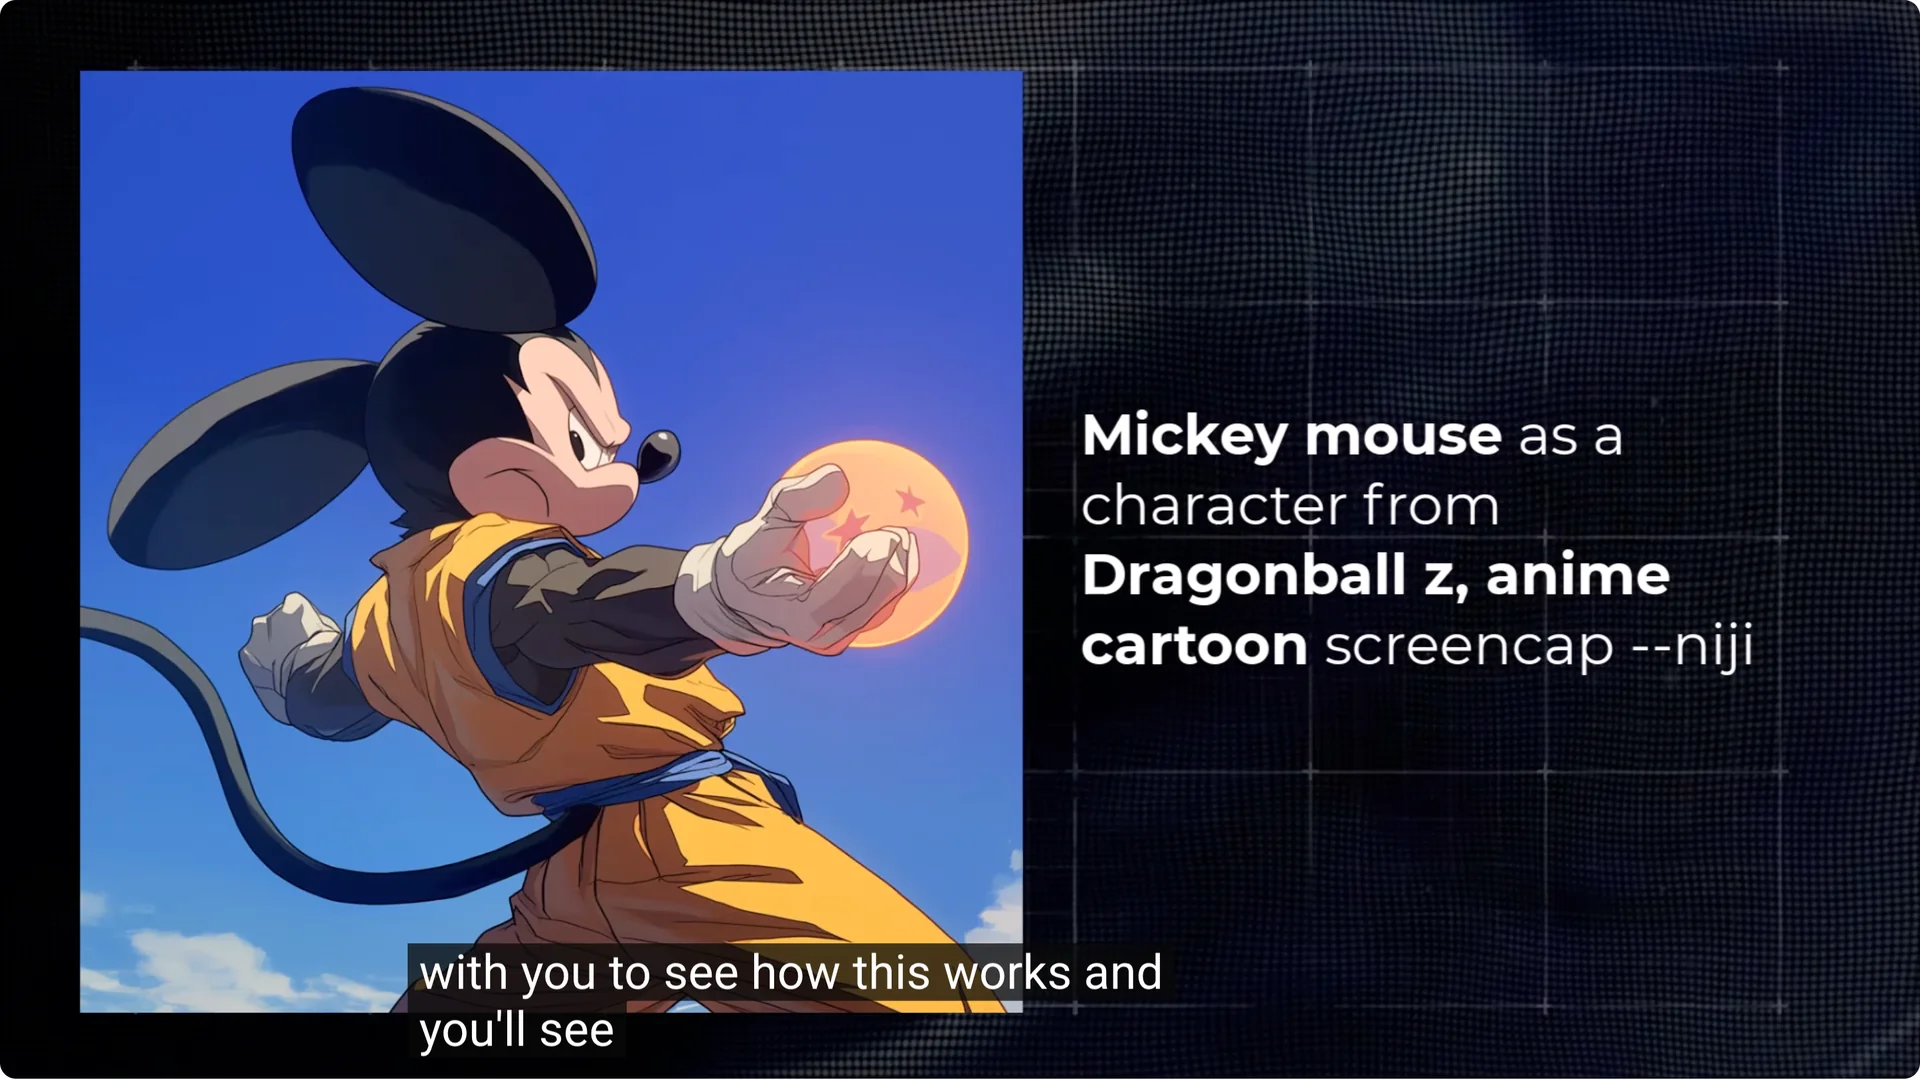
Screen cap really helps to nail down the look and style of the image. Removing it keeps the style of the character but loses the style of the cartoon.
Midjourney Multiverse Image Creation – Prompt Formula #2: Character as Character Type
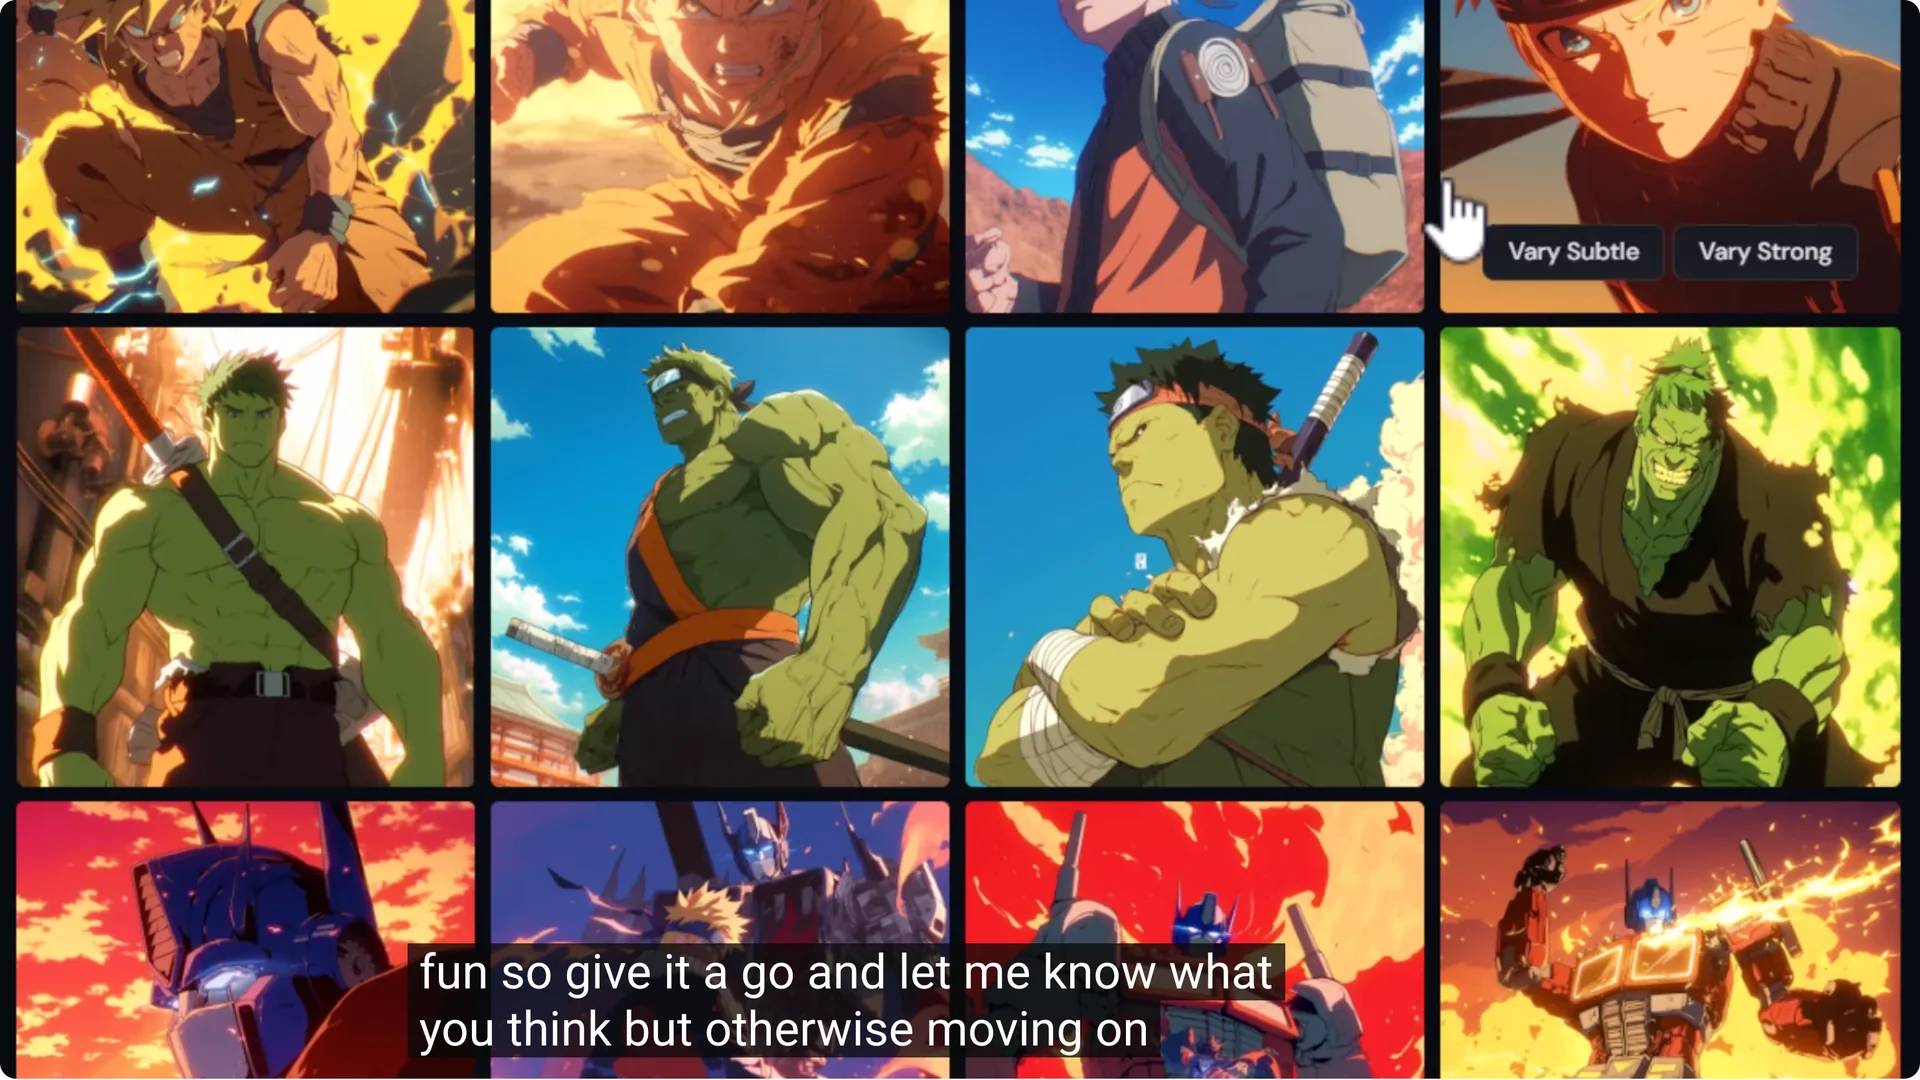
This tends to revolve more around the type of character you’re trying to create. I ran with Transformers for this example, because putting something in the Transformer universe doesn’t necessarily turn them into Transformers.
Using character as Transformers makes a big difference.
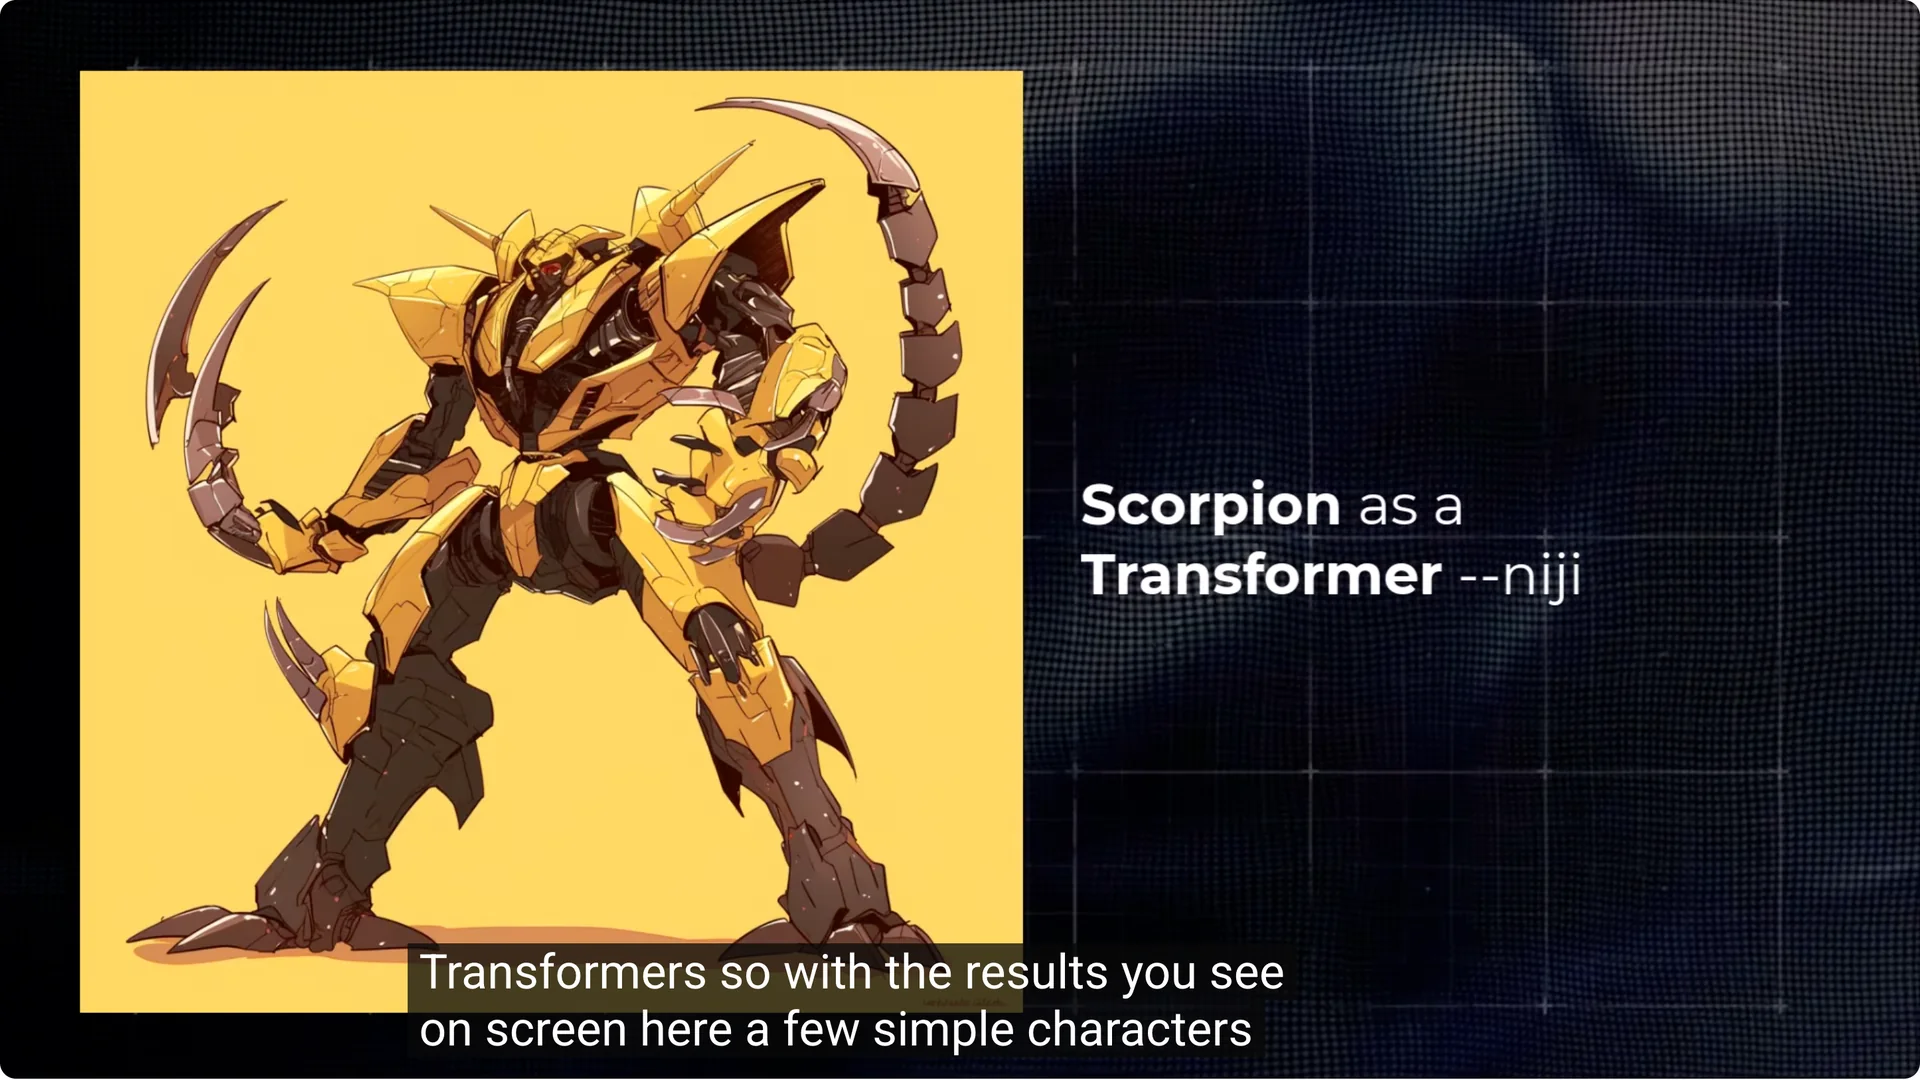
- Most of these used nii, since nii mode tends to handle Transformers pretty well.
- I turned it off for the Terminator to get a little more realism.
- You can still add screen cap on the end if you want to nail it down.
Swap and change these prompt formulas, add and subtract, and problem solve by adding to the prompt.
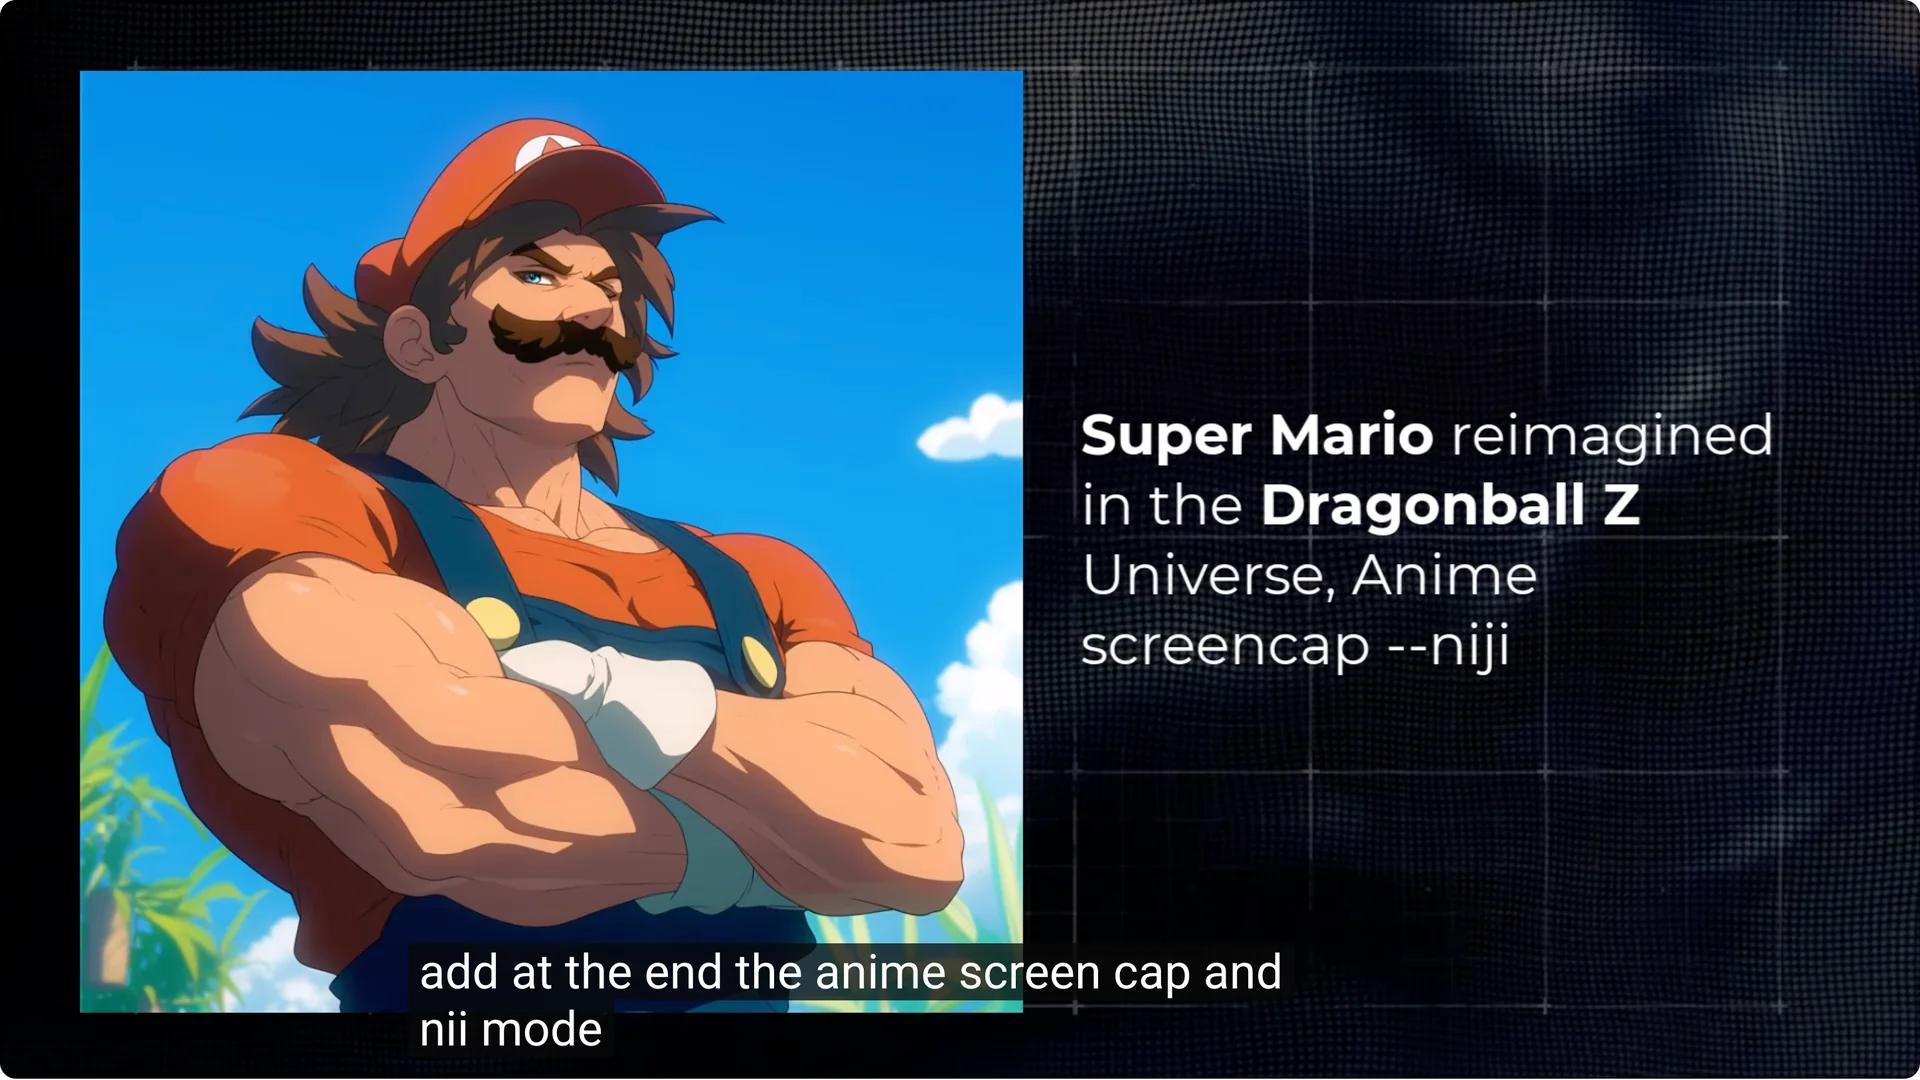
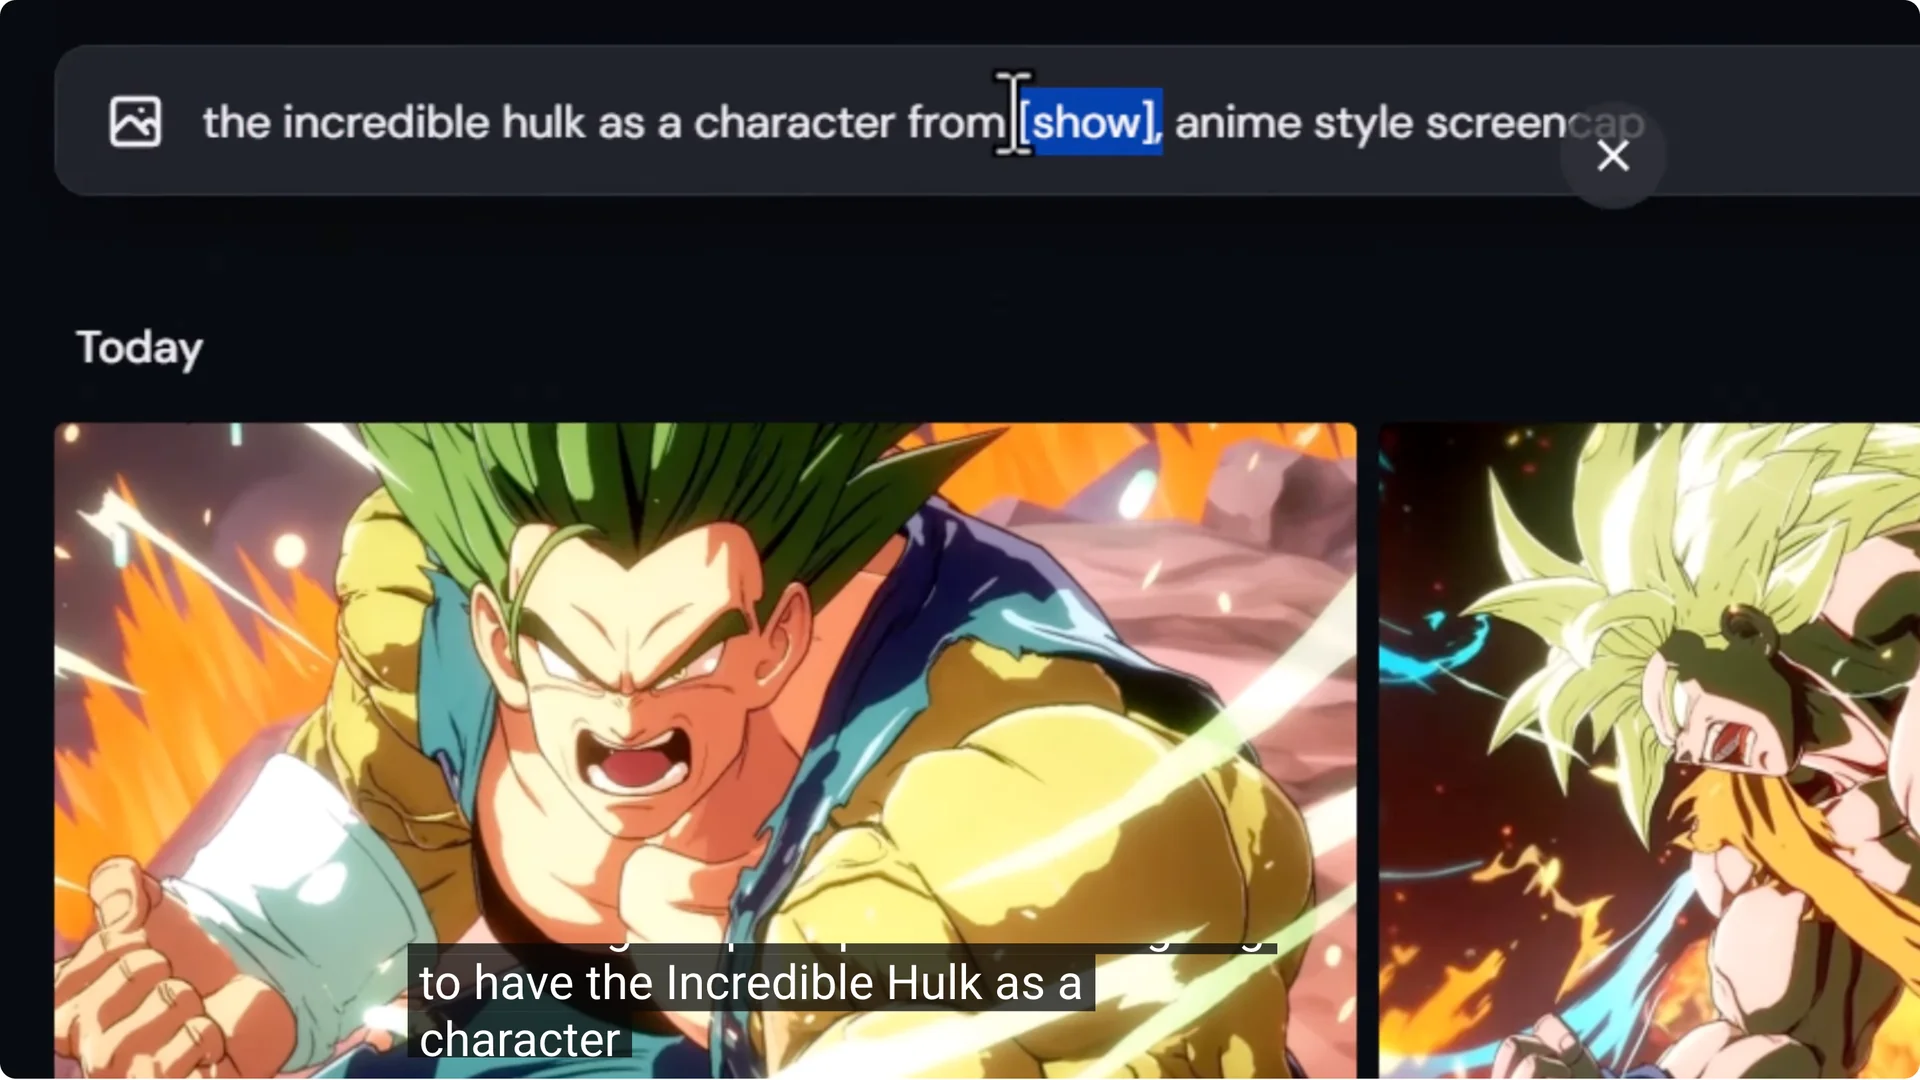
Prompt Formula #3: Character Reimagined in the Show Universe
Character reimagined in the show universe can get a different result again. Examples:
- Mario in the Marvel Cinematic Universe.
- Mario in the Mortal Kombat universe.
- Dragon Ball Z with quite a plain background – add anime screen cap and nii mode to finish it off.
Add anything to these prompt formulas. It’s a great way to start using the right wording.
Prompt Formula #4: Higher Style Complex Formula
If you have trouble getting the style to apply, move the style to the front and also name it at the end of the prompt. This helps reinforce it and gets Midjourney to prioritize it a bit more.
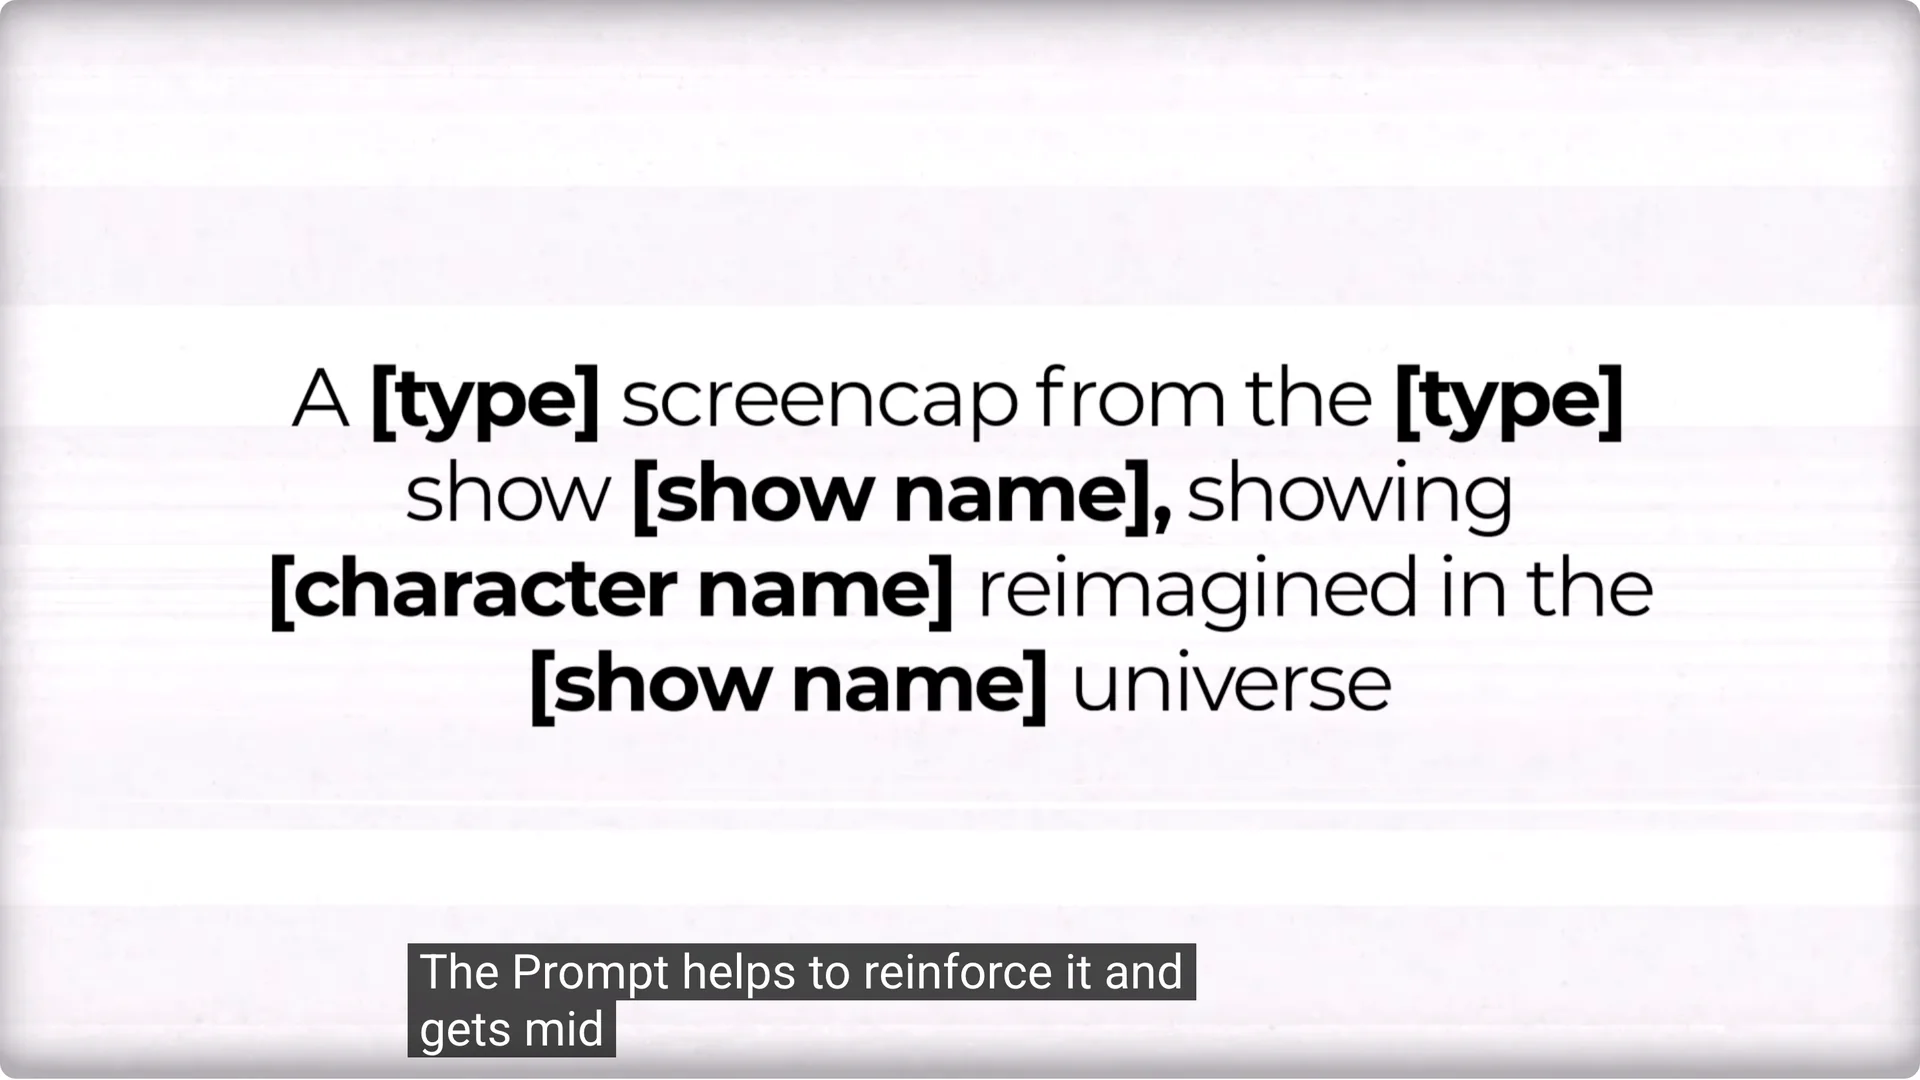
- Start by describing the type of screen cap or the type of show, the show name, then in the middle add the character name reimagined in the show name universe.
- The order of your prompt counts. When you put the character first, it prioritizes that. If you don’t quite get the style you’re after, move that style to the front and have the character later to prioritize the style.
- I like to end it with the style as well just to cap it off.
Examples:
- Star Wars style – nii looks pretty good.
- Attack on Titan – nii also looks good.
- Mario switched over to the Naruto universe – looks cool.
- I got a better result with version 6.1 when adding Goku to the Naruto universe.
- nii and version 6.1 produce two different styles, so pick which one suits best.
- Marvel Cinematic Universe – an Iron Man or Ultron version of the Terminator.
- Goku looks like he’s at the Avengers Endgame battle.
- Naruto dressed as Captain America looks very much like the Endgame battle.
Midjourney Multiverse Image Creation – Important Tips for Quality Control
You’re not always going to get the results you want. For example, a cartoon screen cap might not turn out like a cartoon screen cap. Some images won’t align to the prompt as well as you’d like. Sometimes it looks like Goku wearing Mario’s clothing, not Mario.

- Produce many images.
- Choose the best ones.
- Try different prompts and formulas.
- Make adjustments and add details to further refine it.
- Do this for fun due to copyright. There isn’t really a way to legally make money from this process.
Midjourney Multiverse Image Creation – Using Style References for Hard-to-get Styles
If a style isn’t sticking, start using the tools available to nail down what you’re after.
Quick style reference via paperclip
I have a prompt for the Incredible Hulk as a character from The Flintstones – 1970s cartoon screen cap. It looks like it’s from the 70s and it looks like the Hulk, but there’s nothing really Flintstones animation about it.
- Upload three Flintstones images as style references.
- Drag and drop them to the image icon on the prompt bar.
- Select the paperclip icon on all three to mark them as style references.
- Submit the same prompt.
Now the cartoon style is a lot more like The Flintstones. This is a powerful way to grab a few images and really nail down the look.
Personalized mood board for further control
Mood boards allow you to style with far more images for more flexibility in that style. I have the Hulk as a character from Ghost in the Shell – anime screen cap. Apart from one image, they look like a guy in green lighting. I want it to look more like a screen cap from the 1993 movie, and these look a little too polished.
Steps:
1. Go to Personalize.
2. Create a new mood board and give it a name like Ghost in the Shell 93.
3. Upload a series of Ghost in the Shell screen caps.
4. Give it a few minutes for the images to upload.
5. Copy the personalization code.
6. Use the same prompt as before and paste the code at the end, then submit.
Now the images look more like screen caps from the actual film, but this time featuring the Hulk. It has a real Ghost in the Shell look to the images, the color grading, and even some of the elements.
Switch out names in the prompt for Mario, Ryu from Street Fighter, Goku, Darth Maul, or Darth Vader to get some cool Ghost in the Shell type images.
Midjourney Multiverse Image Creation – The Power of Conflicting Character References
Another fun thing is to combine character references. Using nii mode, I have James Bond as a Titan from Attack on Titan. They don’t look like James Bond. They just look like Attack on Titan characters.
Change this by:
- Prompting for a Titan from Attack on Titan.
- Prompting for James Bond.
- Drag the James Bond image up into the image area and click the head-and-shoulders icon to make it a character reference.
- Do the same with the Titan.
- Submit.
By having conflicting character references, it tries to combine the two into one character. Now he has the bow tie, the haircut – it looks like a James Bond version of a Titan.
I did the same thing with the Hulk and a Titan. I also tried Darth Maul and Batman together, and Mario and Goku. Adjust the prompt to match those characters.
Midjourney Multiverse Image Creation – Adding the Final Touches to Your Image
Before you share an image, a couple of tips:
- Upscale both subtle and creative. Open them up and compare to see which you prefer.
- Use the Midjourney editor. If there are any funny little errors you want to fix on an otherwise good image, make those changes to get that extra level of control.
Midjourney Multiverse Image Creation – Creating AI Video
Here’s how you can convert these to a video you can share.
Prepare the still in Midjourney
- Type a prompt using one of the methods above.
- Set the right aspect ratio:
– 16 to 9 for TV or horizontal viewing.
– 9 to 16 for vertical phone viewing.
- Submit and pick your best image.
- For video, you don’t necessarily have to upscale. Download the chosen image.
Animate with cling Ai
- Go to cling Ai.
- Under AI generation, go to Video, then Image to Video.
- Drop your image in. You can add an end frame if you want to, but a start frame is enough.
- Add a prompt. Example: a large green hulk beats his chest with his fists while the man in front looks up ready to fight, subtle movements, dust clouds moving, fluid anime style animation.
- Leave most options as default, or pick standard on a free plan, 5 seconds, one output.
- Generate.
You might need to submit a few times to get the video you’re after. I also made a few with Halo AI.
Final Thoughts
- Start with simple screencap prompts and add the show type to lock in style.
- Try nii for anime or Transformers, and compare with version 6.1.
- Use –repeat to generate batches and pick the best.
- Move style wording to the front and end of the prompt if the look isn’t sticking.
- Bring in style references or create a mood board for stubborn styles.
- Combine conflicting character references to merge identities.
- Upscale, edit, and then animate with an image-to-video tool if you want motion.
Have a bit of a play with these techniques, find something that works for you, and don’t be afraid to experiment.