In this guide, I will show you how to take more control over your Midjourney videos by using their image editor. Midjourney’s video engine works by taking a single image and converting it into a video. You have start frames, end frames, and, by using the editor, you can take control over how your video begins and ends.
This extra control allows you to:
- Improve camera motion.
- Set up different camera angles.
- Use consistency tools to create a sequence of videos that can be edited together into a small story.
In this article, I will cover how to work with these tools step-by-step and create professional-quality Midjourney AI videos.
What is Midjourney Camera Control?
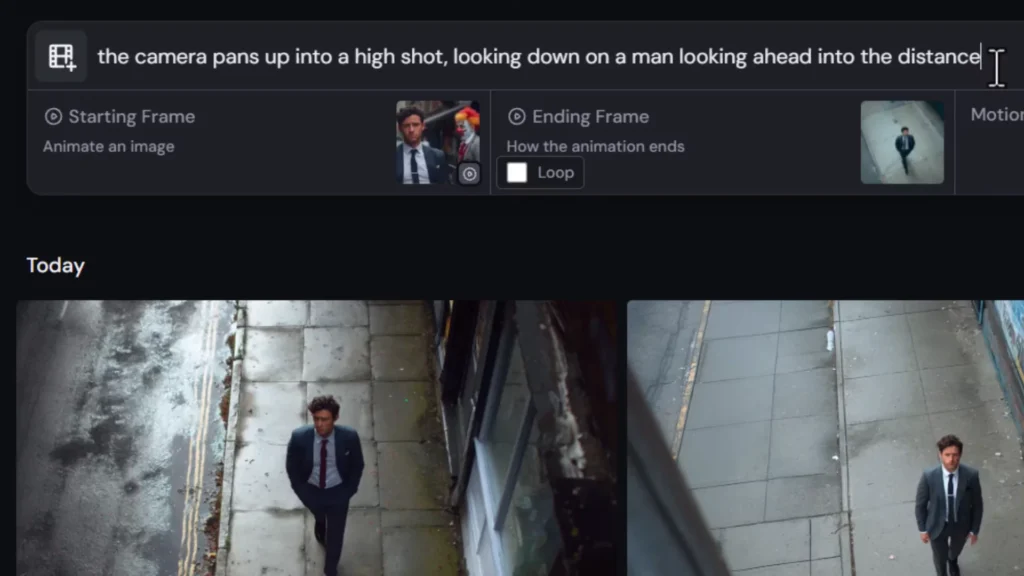
Midjourney camera control involves setting up start and end frames and using the image editor to dictate how the AI-generated camera moves through your video.
It allows you to:
- Adjust framing for both start and end frames.
- Create controlled zoom, pan, and static shots.
- Generate consistent characters and objects across multiple shots.
- Build a full sequence of connected videos instead of isolated clips.
This is especially useful when you want to tell a story visually through a series of connected AI videos.
Overview
| Feature | Description |
|---|---|
| Start & End Frames | Define where the video begins and ends. |
| Zoom Control | Create slow or fast zoom in/out effects by describing them in the prompt. |
| Static Shots | Maintain a fixed camera position without motion. |
| Layer Editing | Add, move, or remove elements within a frame using layers. |
| HD Video Output | Create 720p HD videos with smaller batch sizes. |
| Character Consistency | Keep characters consistent across shots for storytelling. |
| Extend Tool | Extend existing videos to add new actions or narrative. |
Recent Midjourney Video Updates
Midjourney has introduced updates that give more control over video creation:
- Animate Manually
- Create videos by adding start and end frames.
- Choose between low motion or high motion modes.
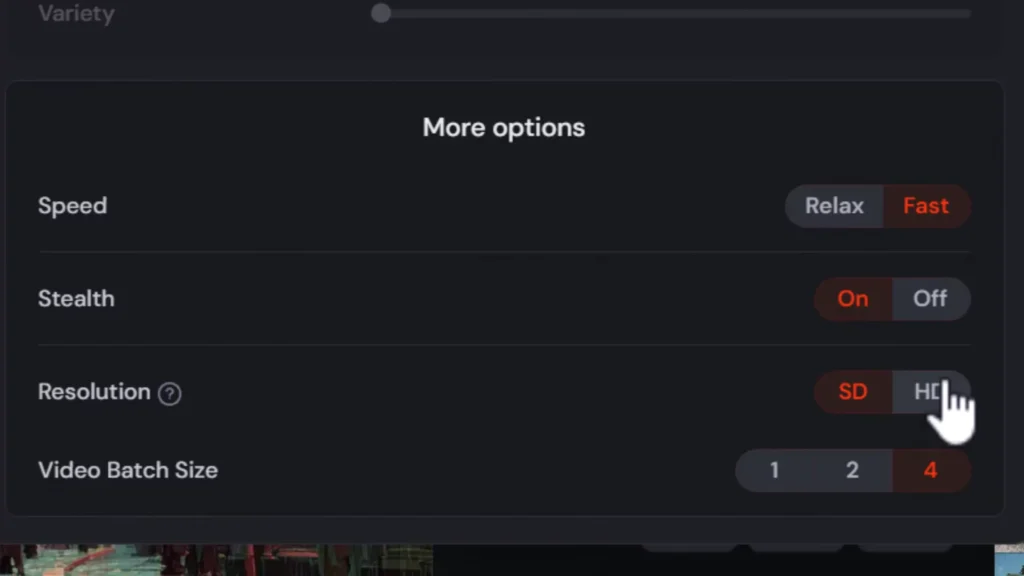
- HD Video Mode
- Generate videos at 720p resolution.
- Batch sizes can be reduced from four videos to two or even one, as HD consumes more credits.
- Relax mode is not available for HD videos.
- Looping Videos
- Loop videos by having the end frame match the start frame.
- Works well for static shots or repetitive motion.
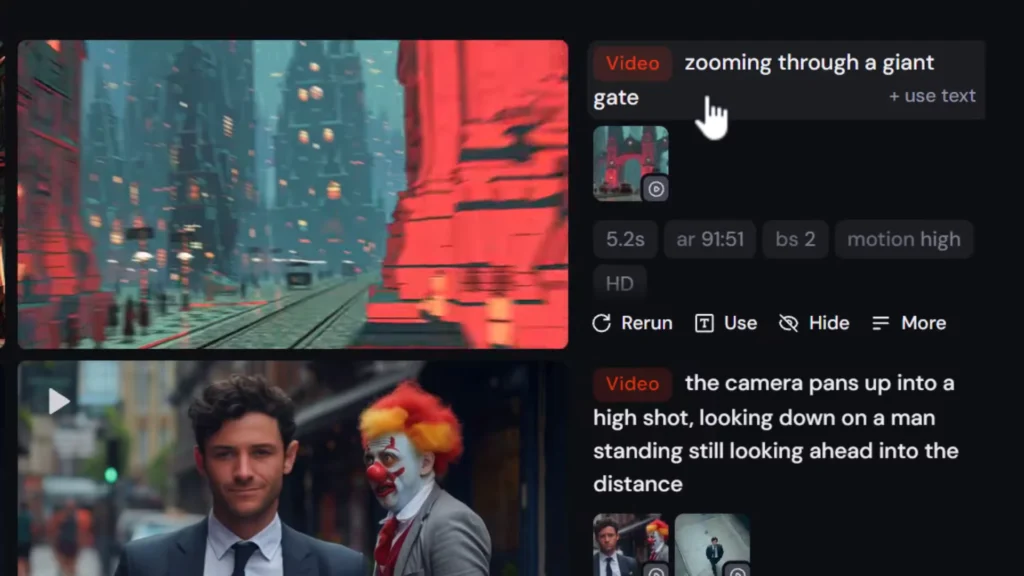
Step 1: Building a Prompt for Better Camera Control
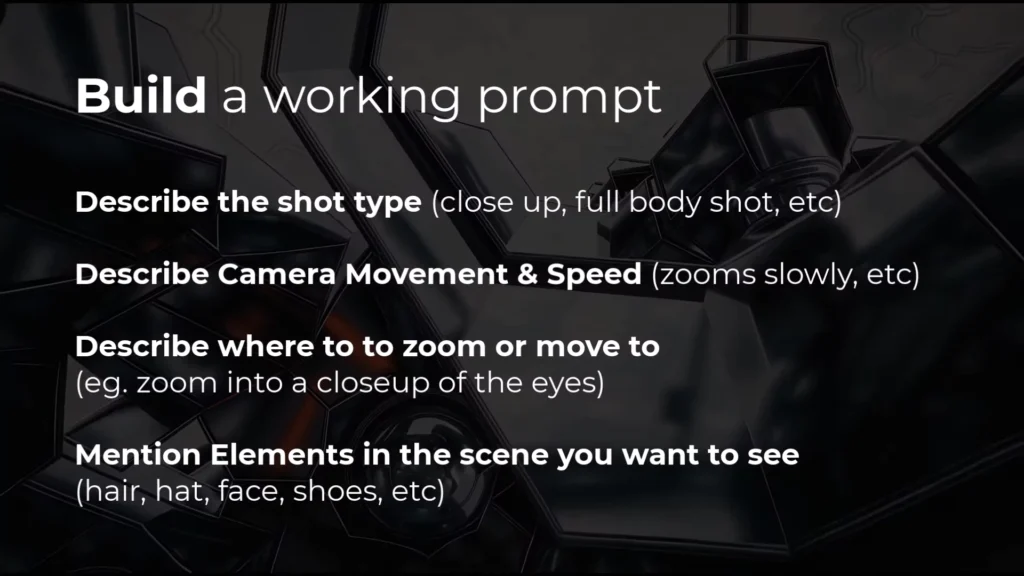
The first step in controlling your Midjourney video is creating a strong prompt. A well-structured prompt defines the type of shot, camera movement, and elements in the scene.
Prompt Structure
Include the following details in your prompt:
- Shot Type: e.g., close-up, wide shot, full-body shot.
- Camera Movement & Speed: zooms in slowly, pans left quickly, etc.
- End Goal: Describe where the camera should move or what it should reveal.
- Key Elements: List details like clothing, objects, or features to ensure they appear.
Example Prompt Structure:
A close-up shot of a woman smiling, camera zooms out slowly to a full body shot, showing her white pants and high heels.
Important Notes:
- Zooming in and out works reliably.
- Panning left or right is less reliable, but improvements can be made using the editor later.
- If you’re having trouble, describe visible elements clearly to force Midjourney to include them.
Step 2: Creating a Static Shot (No Camera Movement)
A common problem is creating static shots where the camera does not move. Here’s how to achieve it:
- Start with Manual Animation
- Go to Animate Manually.
- Turn on Looping so the end frame matches the start frame.
- Prompt for Stillness
- At the start of your prompt, mention “still static shot.”
- Example:
A still static shot of people walking around town.
- Set Motion to Low
- Use Low Motion to reduce unnecessary camera movement.
- Submit and Adjust
- Try multiple variations until you achieve the desired result.
Tip:
Midjourney struggles with static shots, so you may need to experiment.
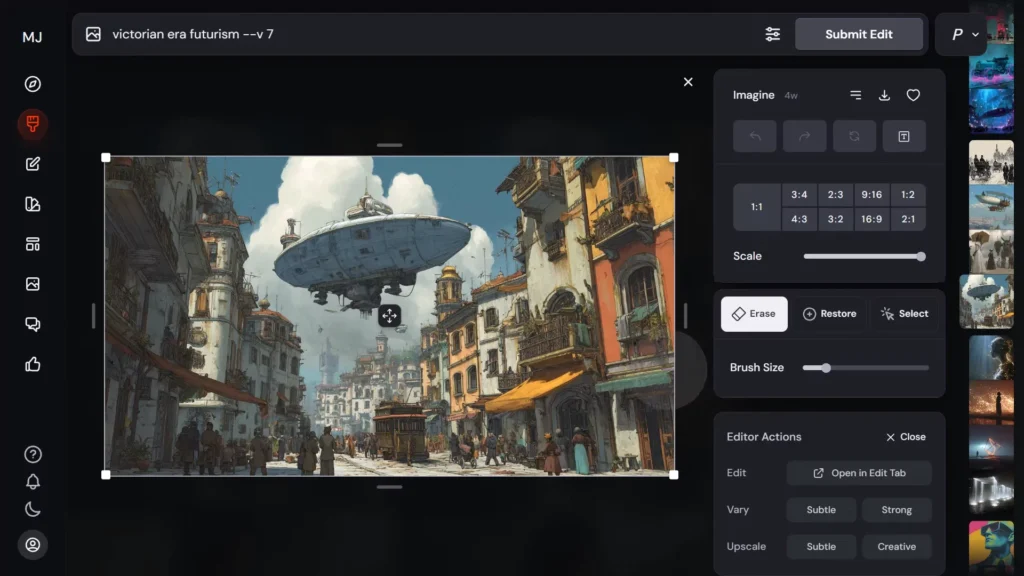
Step 3: Using the Editor to Refine Frames
The editor allows you to manually adjust your start and end frames.
Here’s how to use it step-by-step:
- Copy Image URL
- Right-click on the generated image and copy the URL.
- Open in Edit Tab
- Go to the editor and select Open in Edit Tab.
- Work with Layers
- Add layers to edit specific parts of the image without affecting others.
- Regenerate or Remove Objects
- Example tasks:
- Remove people and regenerate the background.
- Add new objects or move existing ones like cars or buildings.
- Example tasks:
- Final Adjustments
- Upscale to gallery for the final, high-quality frame.
Example: Moving a Blimp and Cart
- Select the object (e.g., a blimp) using Smart Select.
- Erase its background and move it to a new position.
- Use the paint tool to blend it naturally into the background.
- Repeat for other objects like carts or characters.
This creates subtle but effective motion between start and end frames.
Step 4: Creating a Sequence of Shots
To build a story, you need multiple connected shots. Here’s the process:
- Create Start Frame
- Generate the first frame as usual.
- Edit for End Frame
- Modify the image to create a logical next step in the scene.
- Animate Between Frames
- Go to Animate Manually and drag the edited image into the Ending Frame slot.
- Set Motion Type
- Use High Motion for dynamic scenes, Low Motion for subtle changes.
- Review and Choose Best Result
- Midjourney generates multiple versions.
- Select the smoothest video for editing.
Using Character Consistency
Keeping characters consistent across shots makes storytelling much easier.
Here’s how to maintain consistency:
Use character reference images by dragging them into the editor.
Crop or resize characters externally before reimporting for proper scaling.
Replace facial expressions or body positions using smart selection and small edits.
Example:
- Start with a man walking downtown.
- Edit the next shot to have him turn and confront a clown while keeping his appearance consistent.
Step 5: Extending Existing Videos
The Extend Tool allows you to add new actions to an existing video without starting over.
Example prompt:
A clown turns and runs away quickly.
The man in the business suit stands looking confused.
This builds on the previous sequence, creating a natural narrative progression.
Additional Tips
Zooming In on Details
- Crop and upscale images to create close-up shots.
- Maintain the same aspect ratio for consistency.
Fixing Timing Issues
- If characters move too quickly or slowly:
- Adjust the prompt, e.g., “walking slowly downtown.”
- Resubmit and refine.
Looping Facial Expressions
- Loop animations to return characters to a default expression.
Key Features Recap
| Feature | Benefit |
|---|---|
| Start & End Frames | Full control over video flow. |
| HD Output | Higher quality at 720p resolution. |
| Layer Editing | Precise control over individual objects. |
| Static Shots | Fixed camera position for stable footage. |
| Character Consistency | Consistent storytelling with recurring characters. |
| Extend Tool | Expand videos without starting over. |
FAQs
Q1. Why is my camera movement random?
A: Be very descriptive in your prompt about the type and speed of movement. For example:
“Camera zooms in slowly on the character.”
Q2. How do I stop the camera from moving?
A:
- Add “still static shot” to your prompt.
- Use Looping and Low Motion settings.
Q3. What resolution is HD video in Midjourney?
A: Approximately 720p.
Q4. How can I maintain character consistency across shots?
A: Use character references in the editor and carefully crop or resize images before importing.
Final Thoughts
By following these steps, you can create professional-quality Midjourney videos with complete control over:
- Camera motion
- Static shots
- Character consistency
- Narrative storytelling
The key is to plan your prompts, use the editor strategically, and build sequences step-by-step. With practice, you can transform Midjourney’s raw AI-generated clips into polished video stories ready for sharing or further editing.