I’m going to share my main workflow for using AI art to create a finalized design or image using Midjourney, with a process that applies to pretty much any AI art platform.
As an example, we’ll create a movie poster for a film that doesn’t exist called Blind Rage. I’ll run through it step by step, and you can apply this process to any AI art platform.
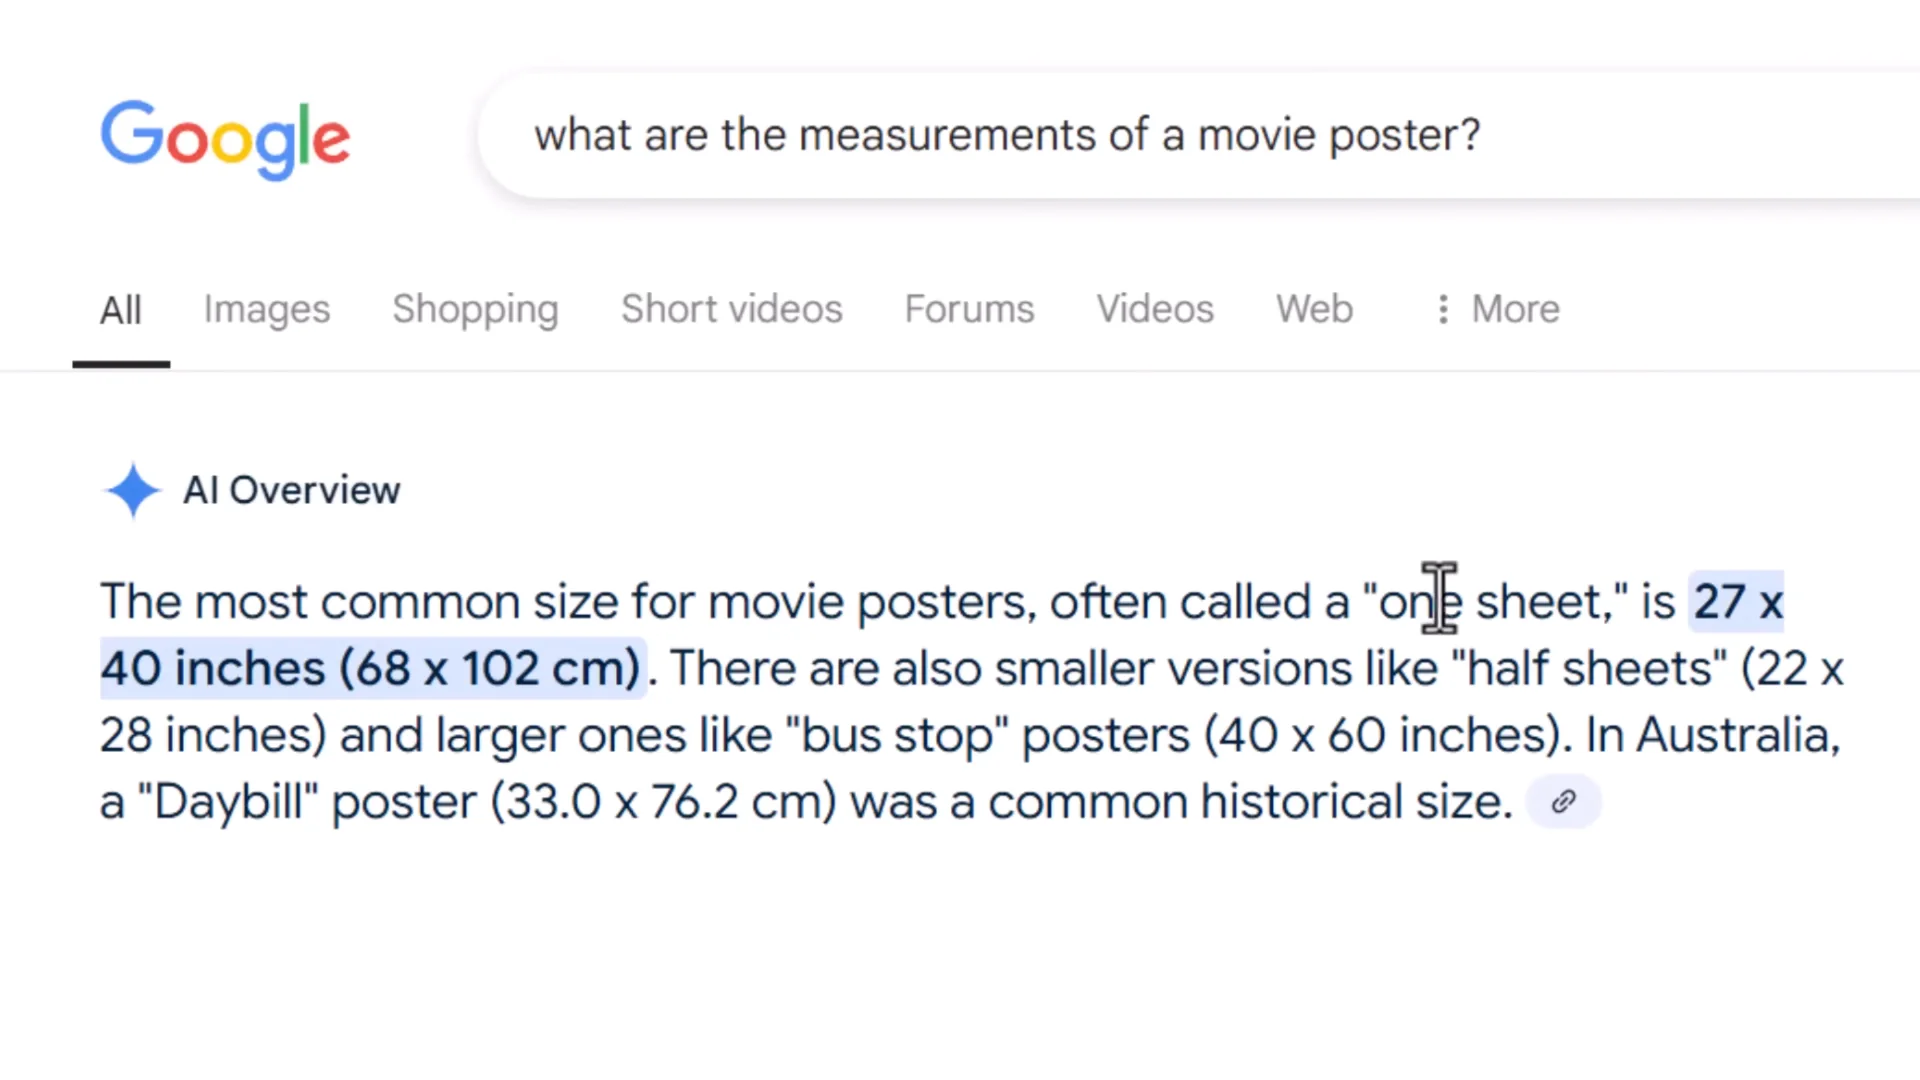
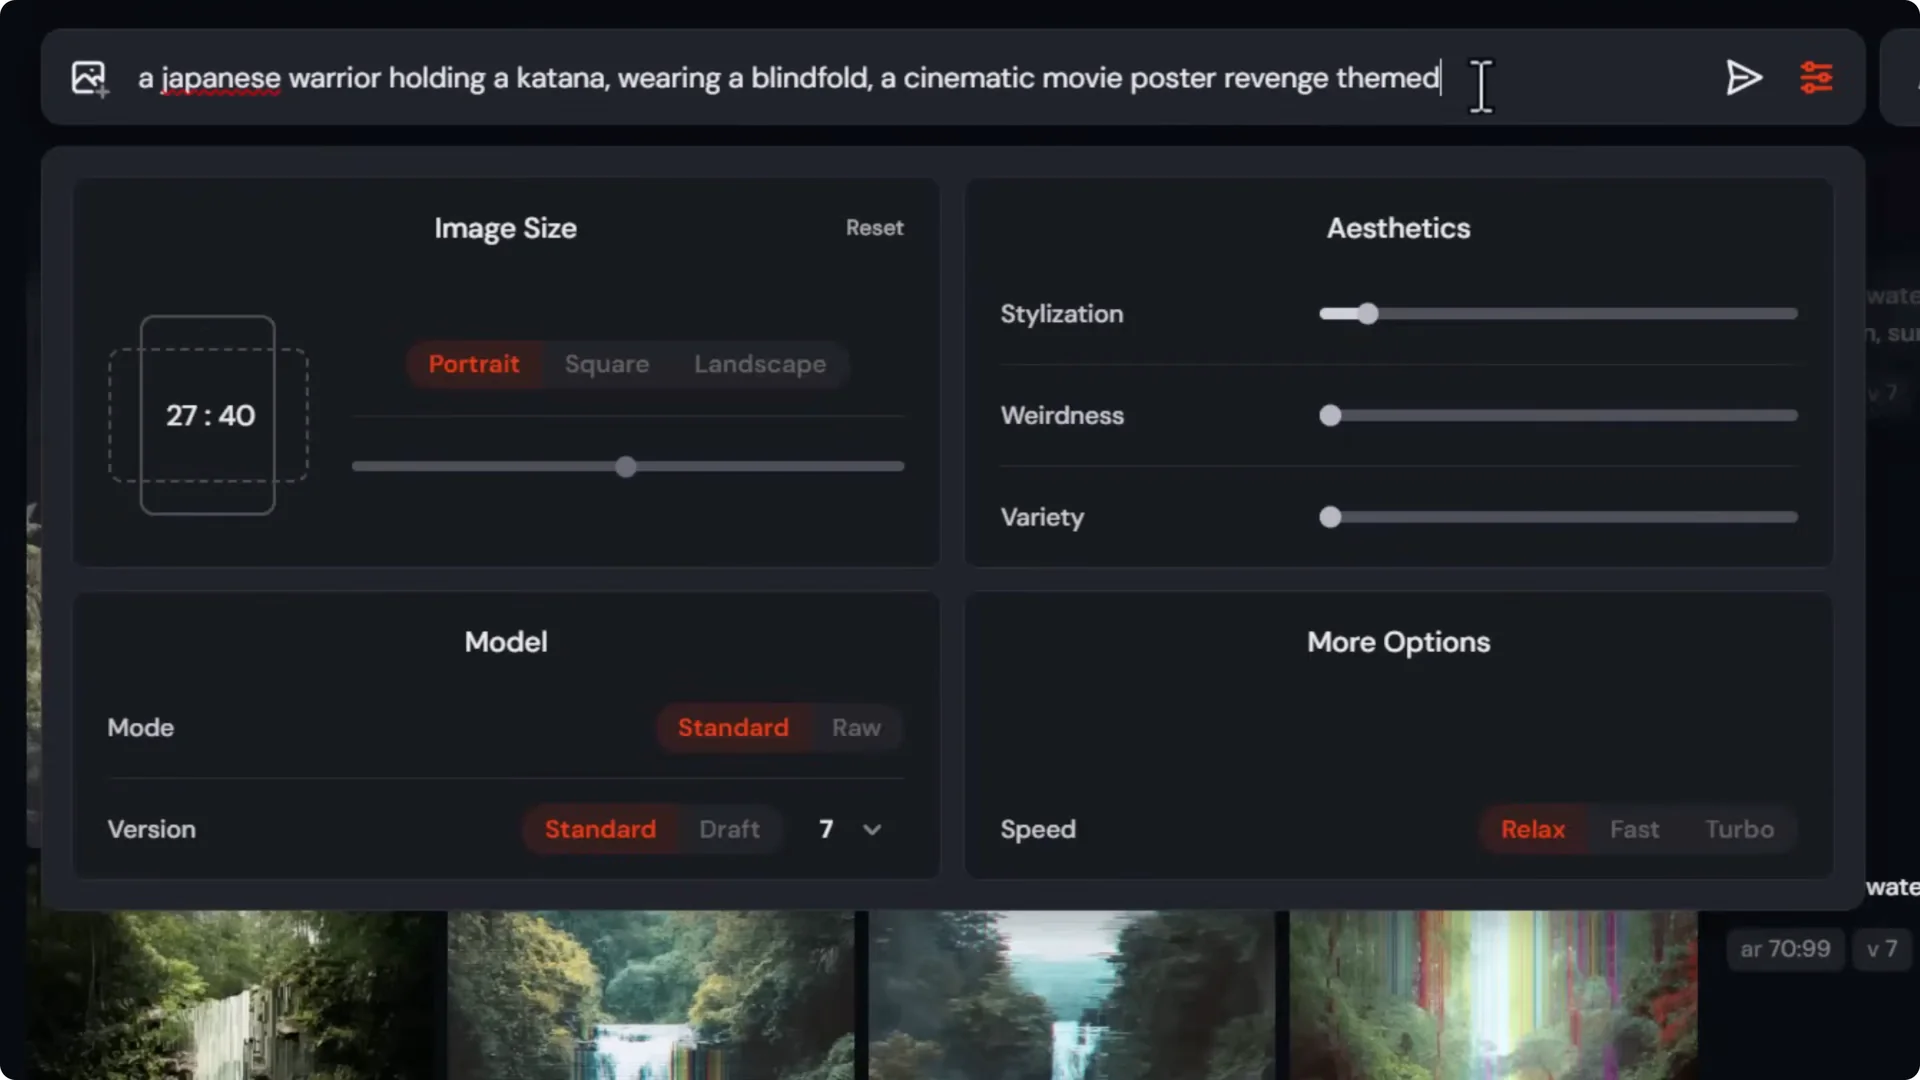
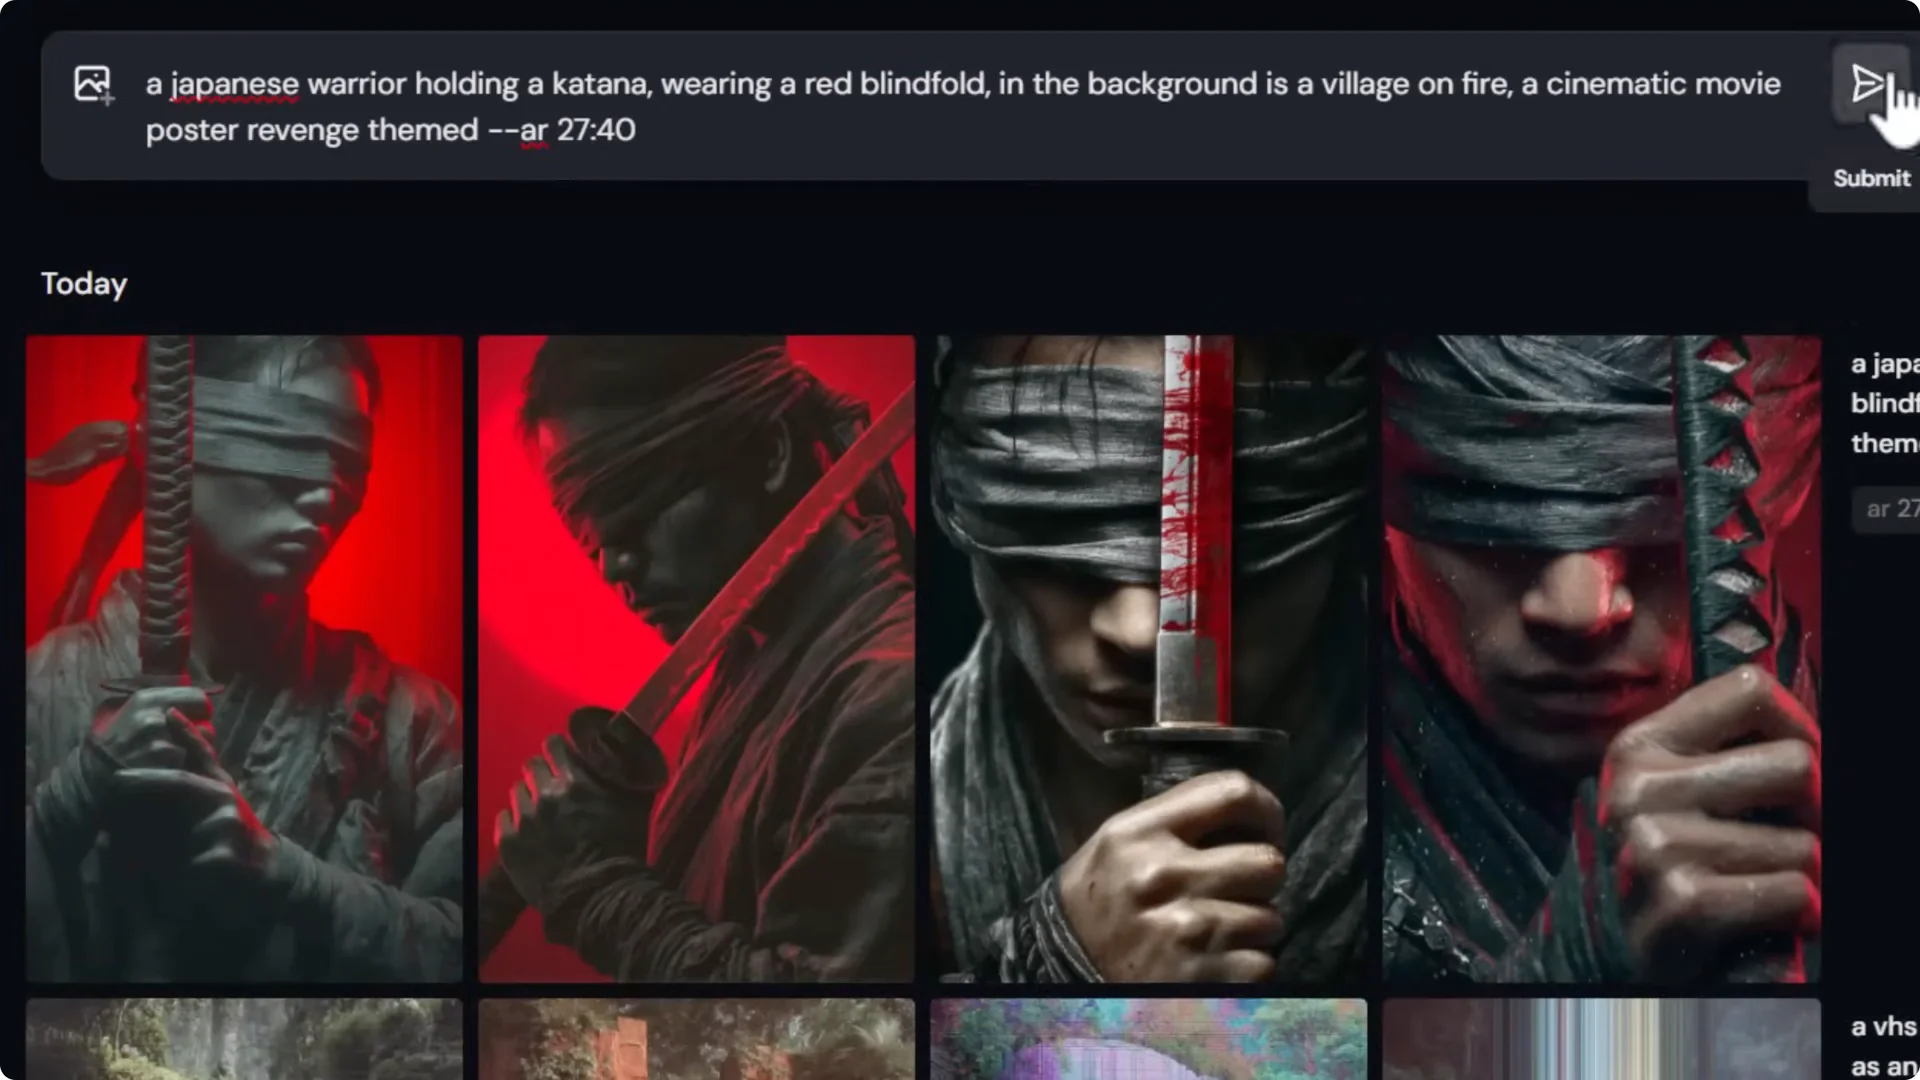
Before starting, I need the aspect ratio of the image. The first step is to find out the size of a movie poster. A common one is a one sheet, which is 27 x 40 in.
I can use that in Midjourney for the aspect ratio. In the prompt bar dropdown, I set the aspect ratio to 27 x 40. You can use any measurement you want here to get an exact result.
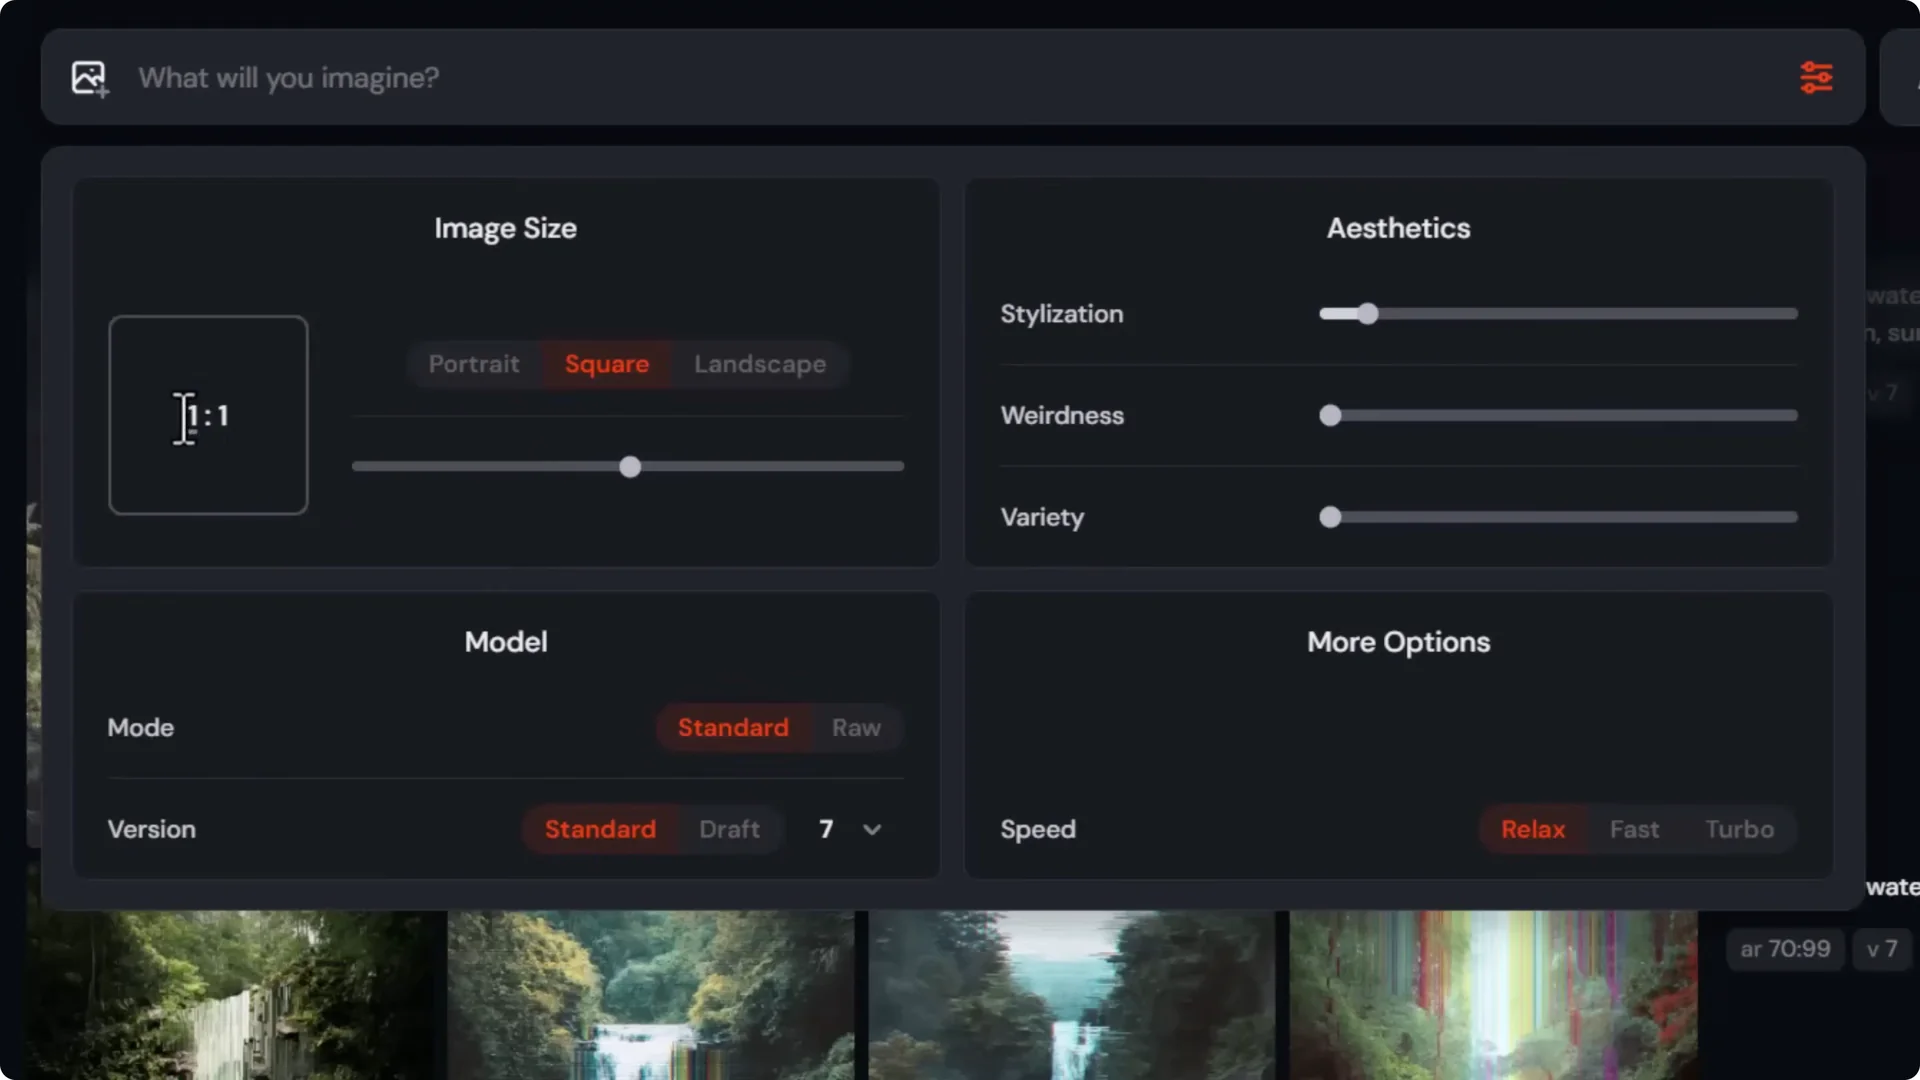
Midjourney AI Art Workflow: Step 1 – Build the Base Prompt
Midjourney and other AI art platforms can be a bit of a roll of the dice. Start with a simple prompt, then adjust and fine-tune it to nail down the result before moving on.
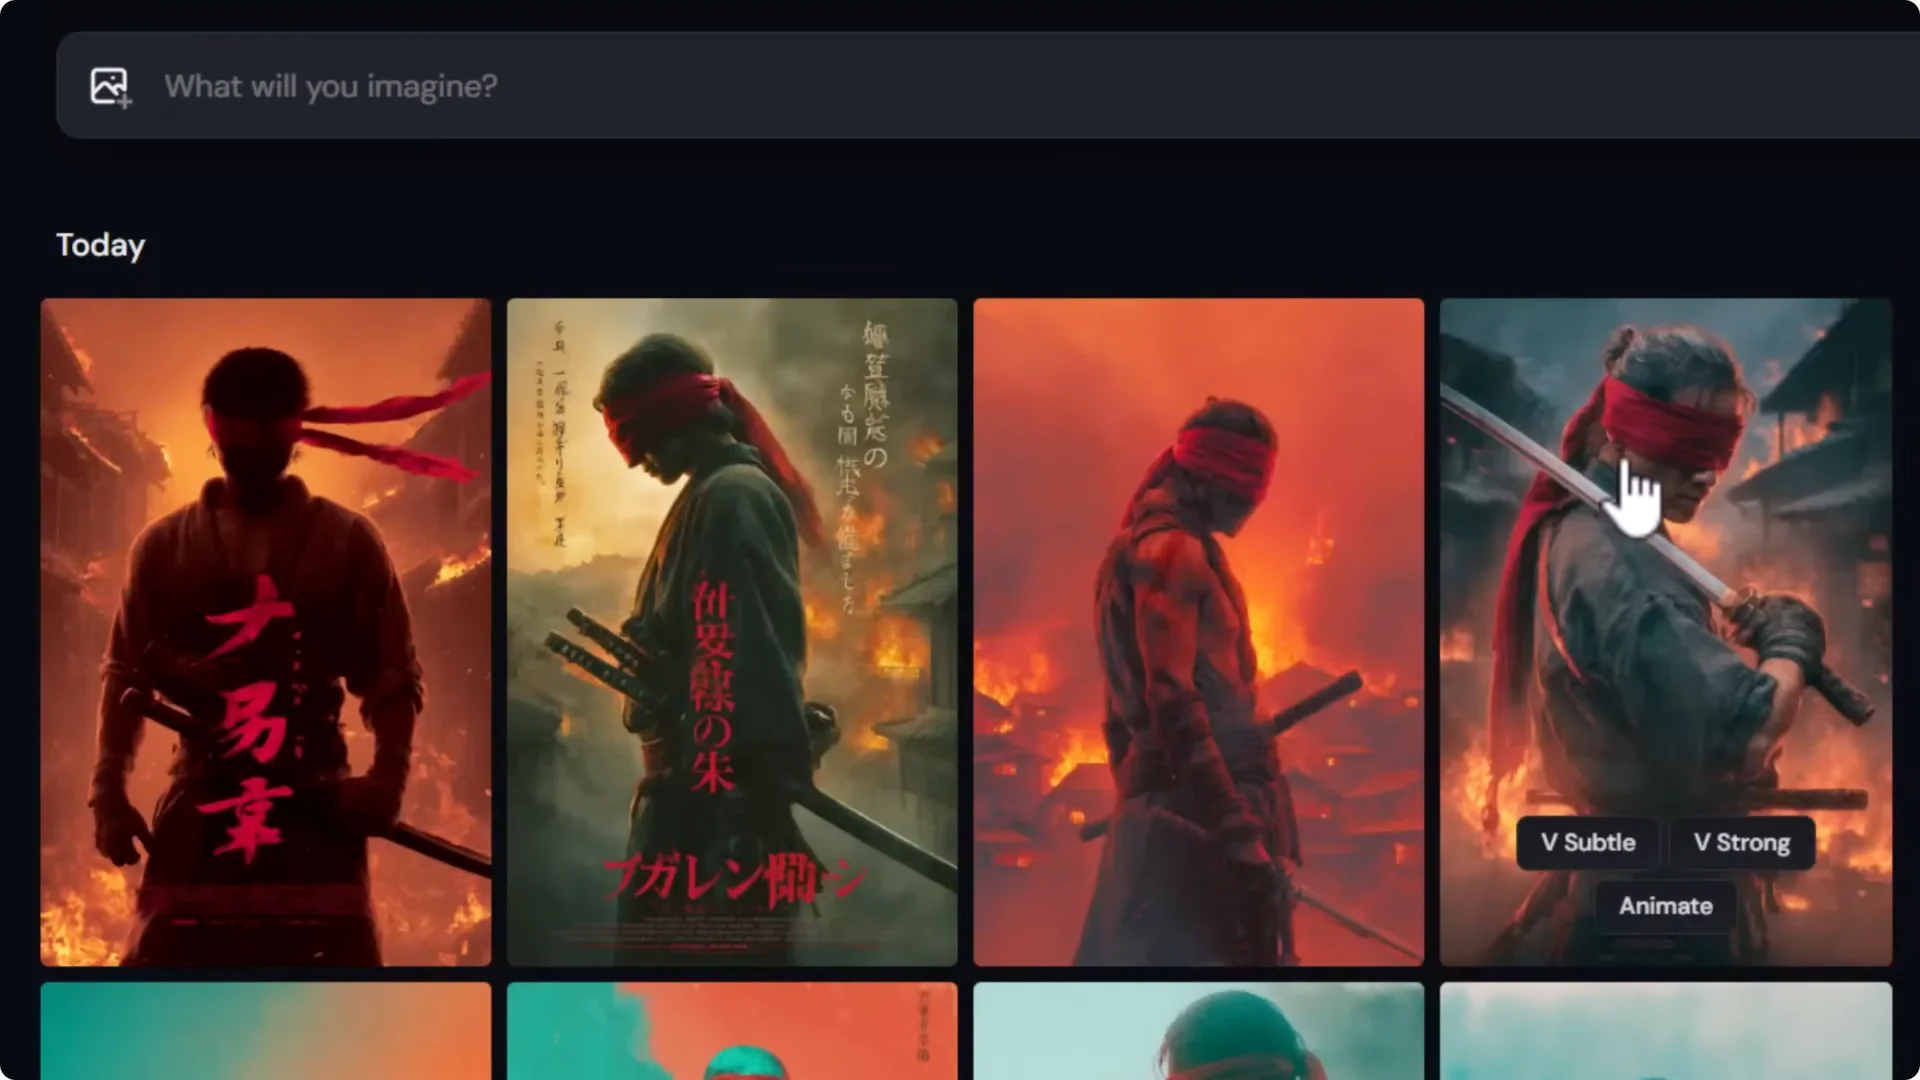
I want a blind Japanese warrior with a centralized poster layout and a lot of carnage around him. To keep it straightforward, I start with:
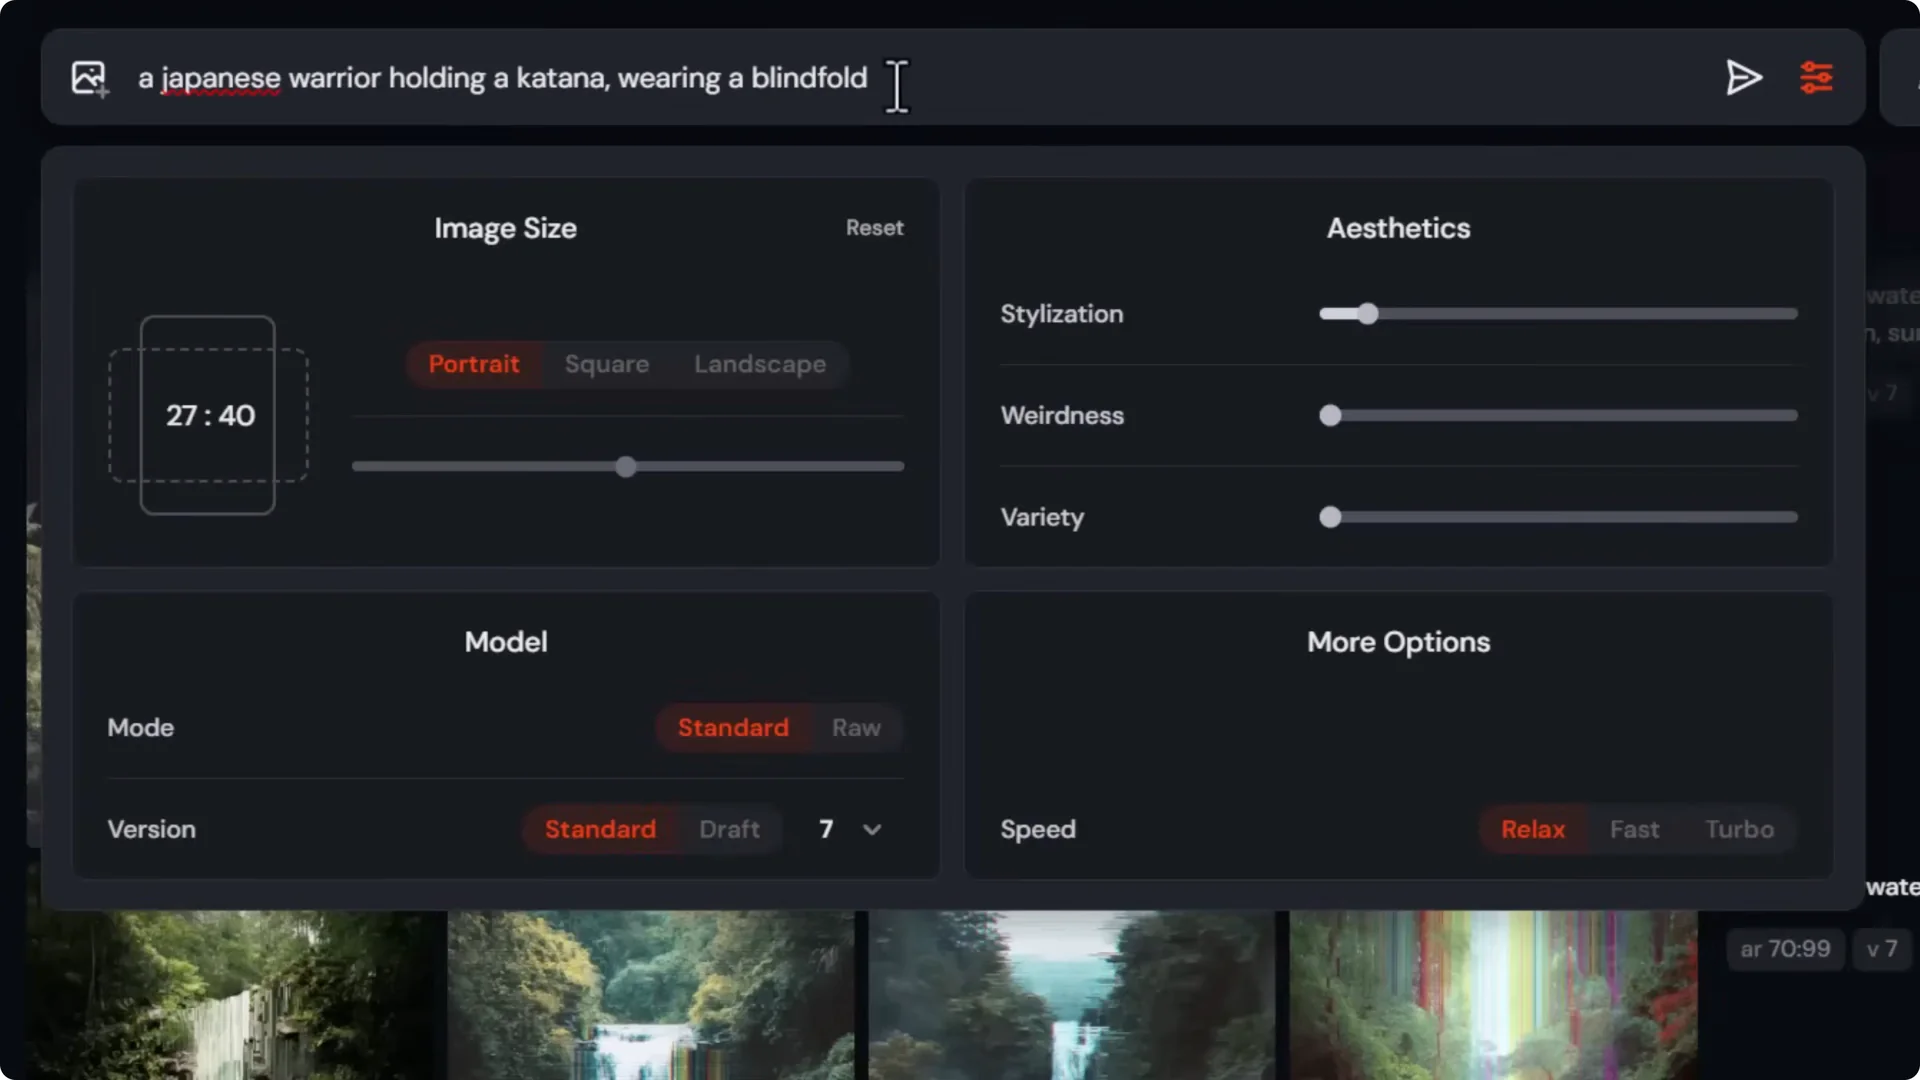
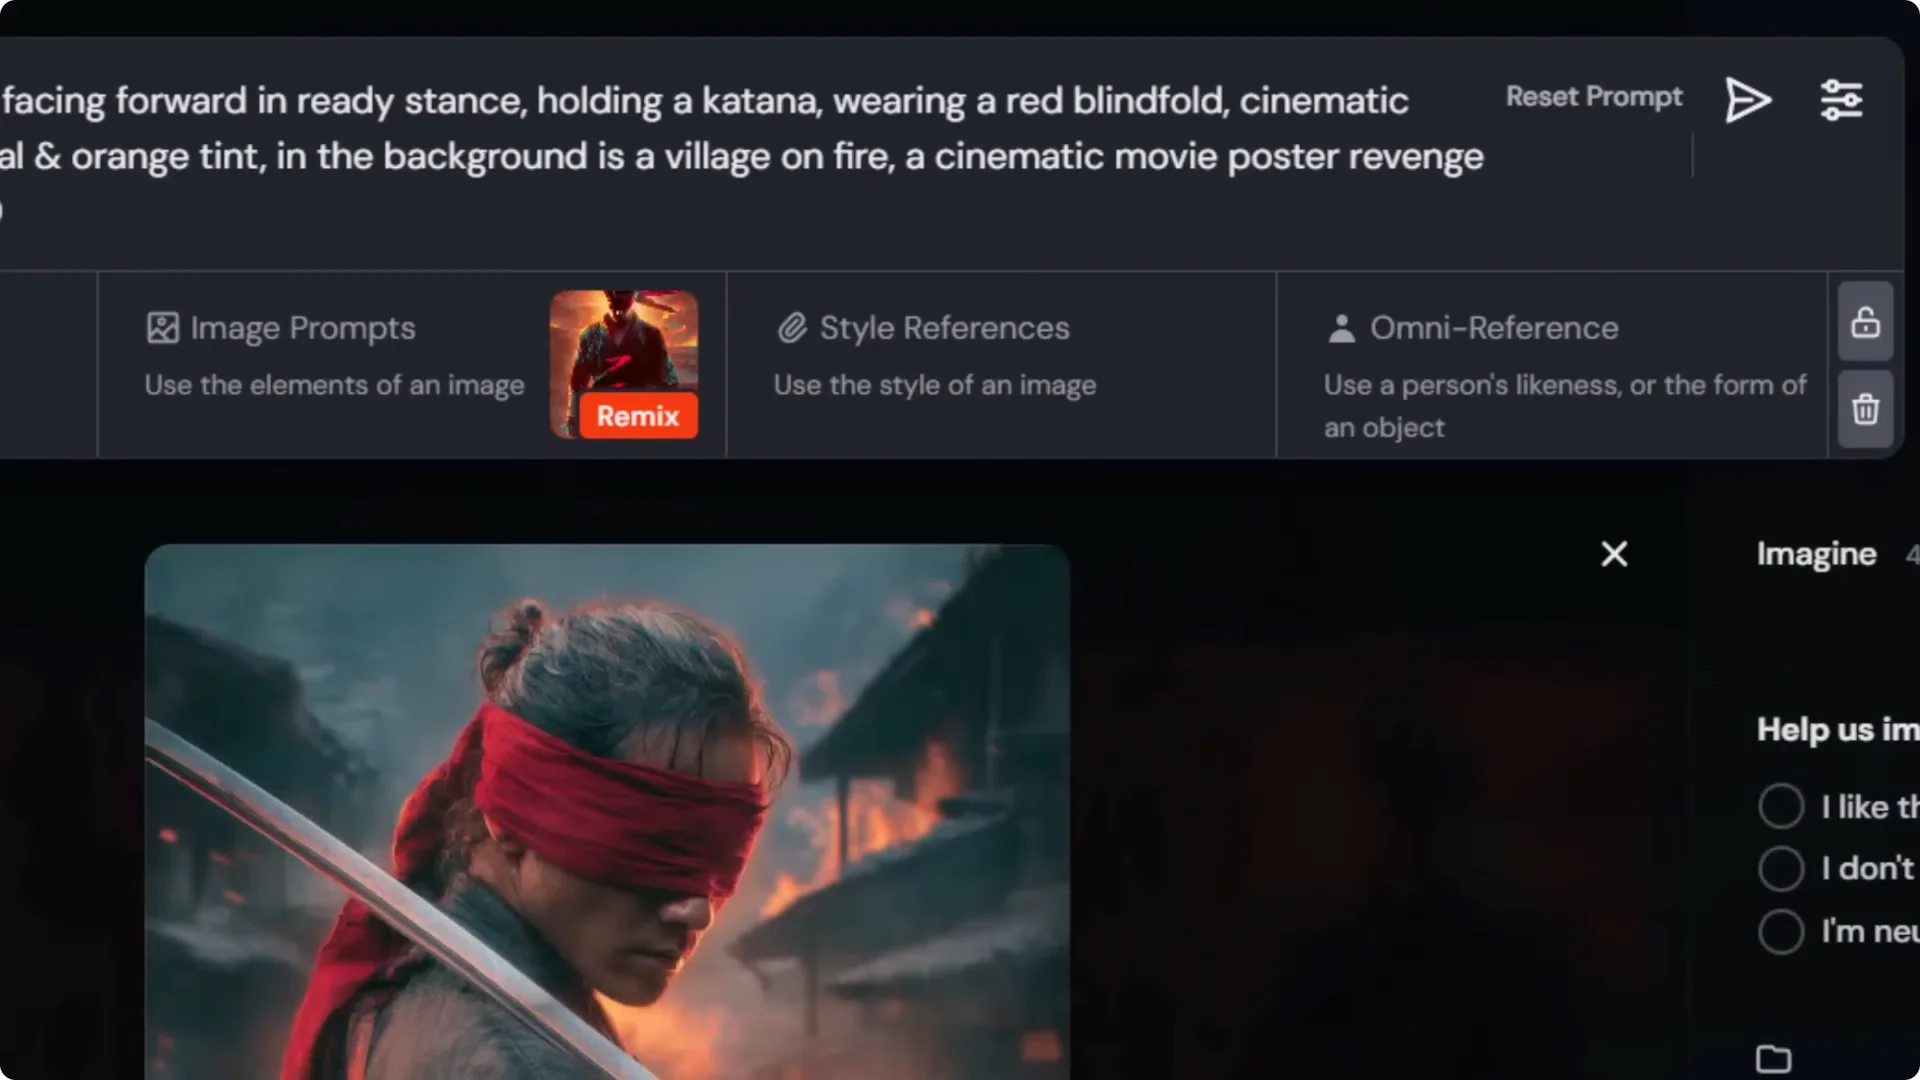
- A Japanese warrior holding a katana wearing a blindfold, cinematic movie poster, revenge themed.
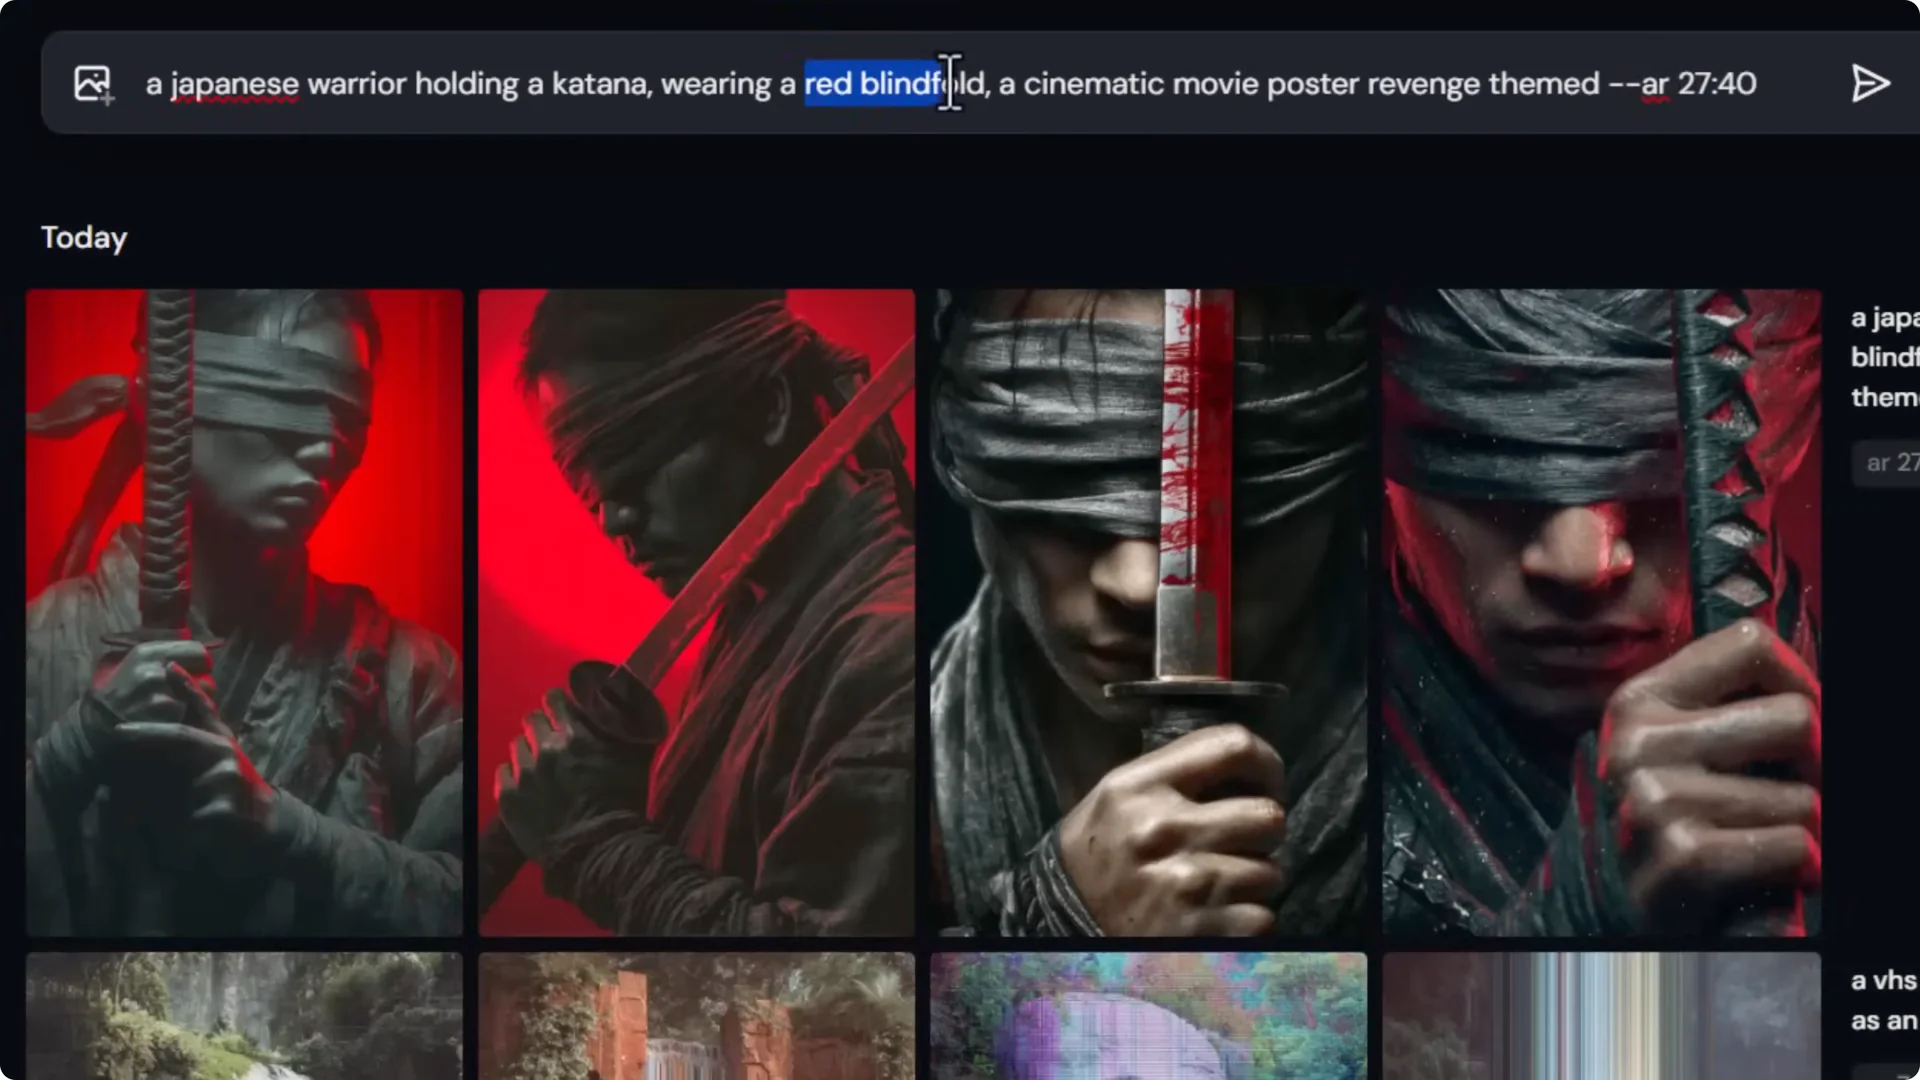
These first images look usable, but I have a very specific vision. With a base prompt, look at the images and figure out what is missing. Add those into the prompt to steer the image in the right direction.
I add:
- A red blindfold.
- A village on fire in the background.
The next results look good, but I want a teal and orange cinematic color grade and a full-body shot. I add those to the prompt and submit again.
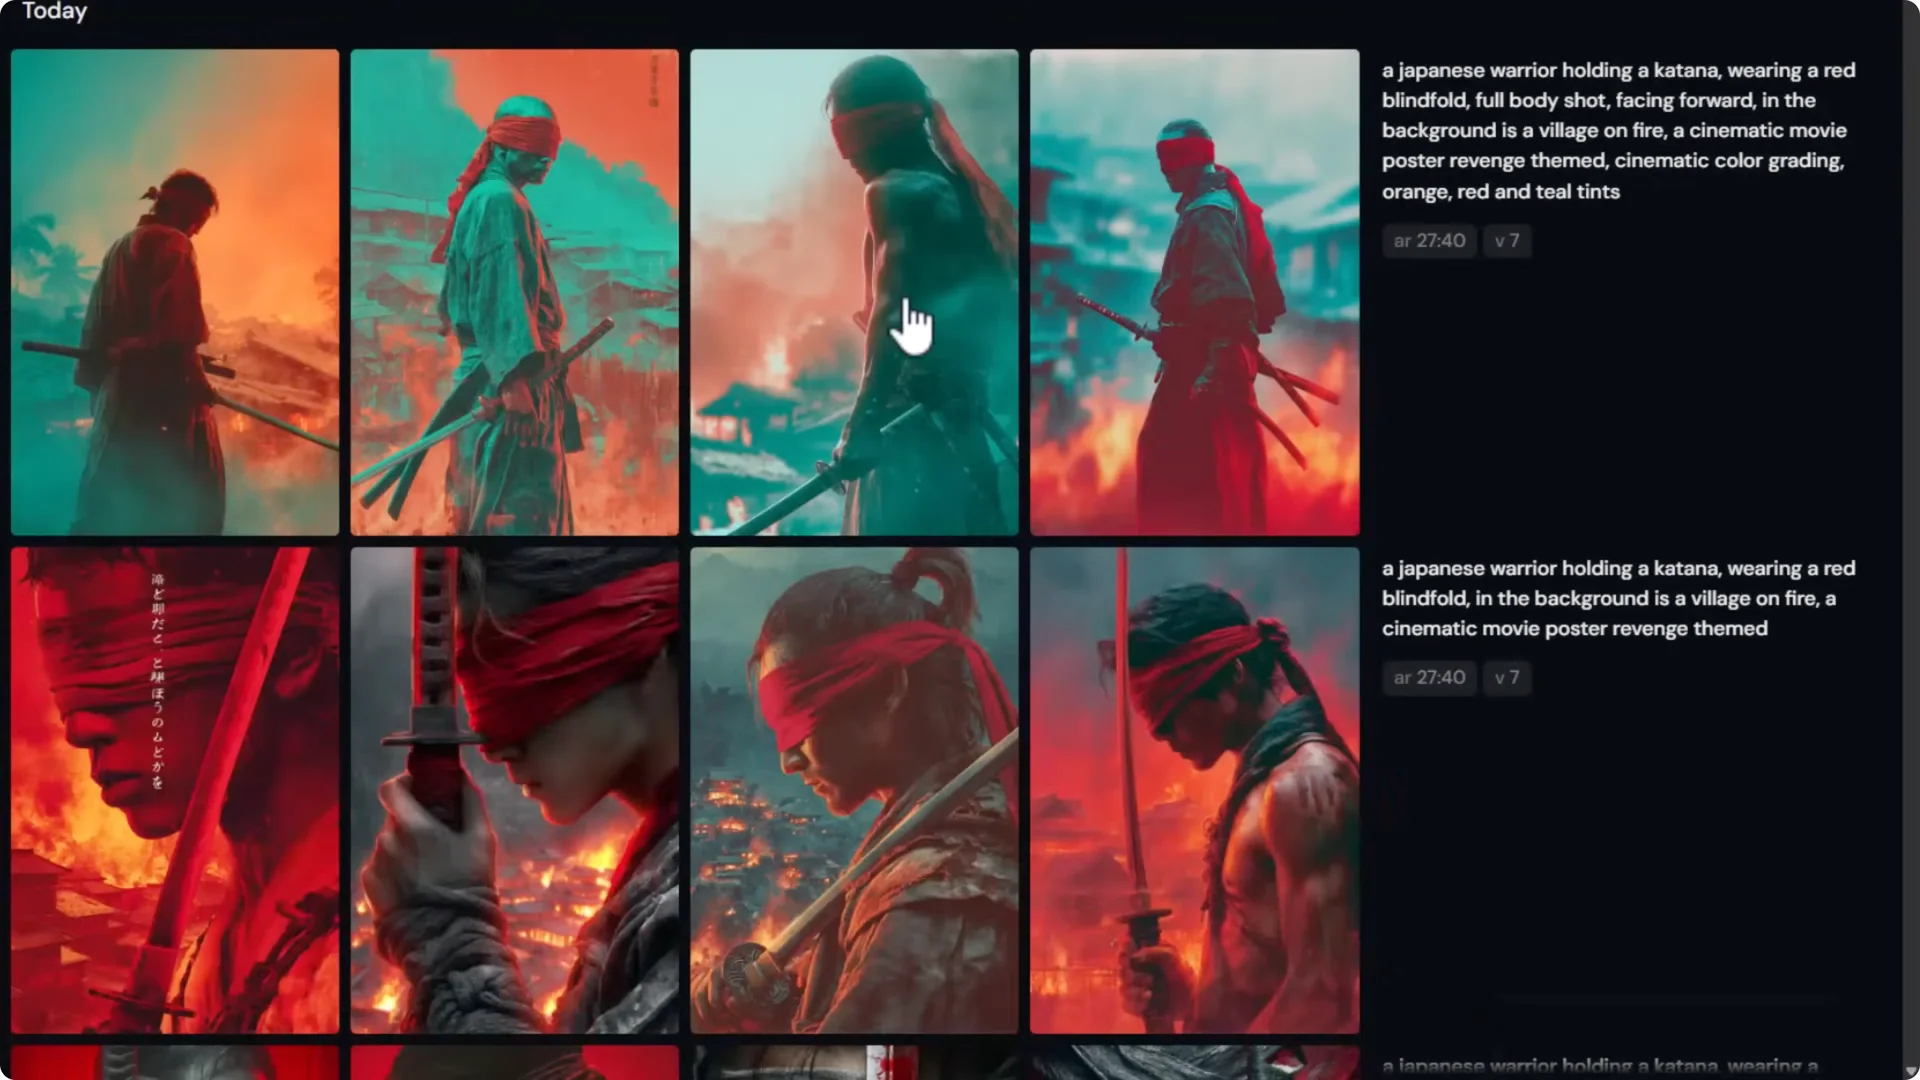
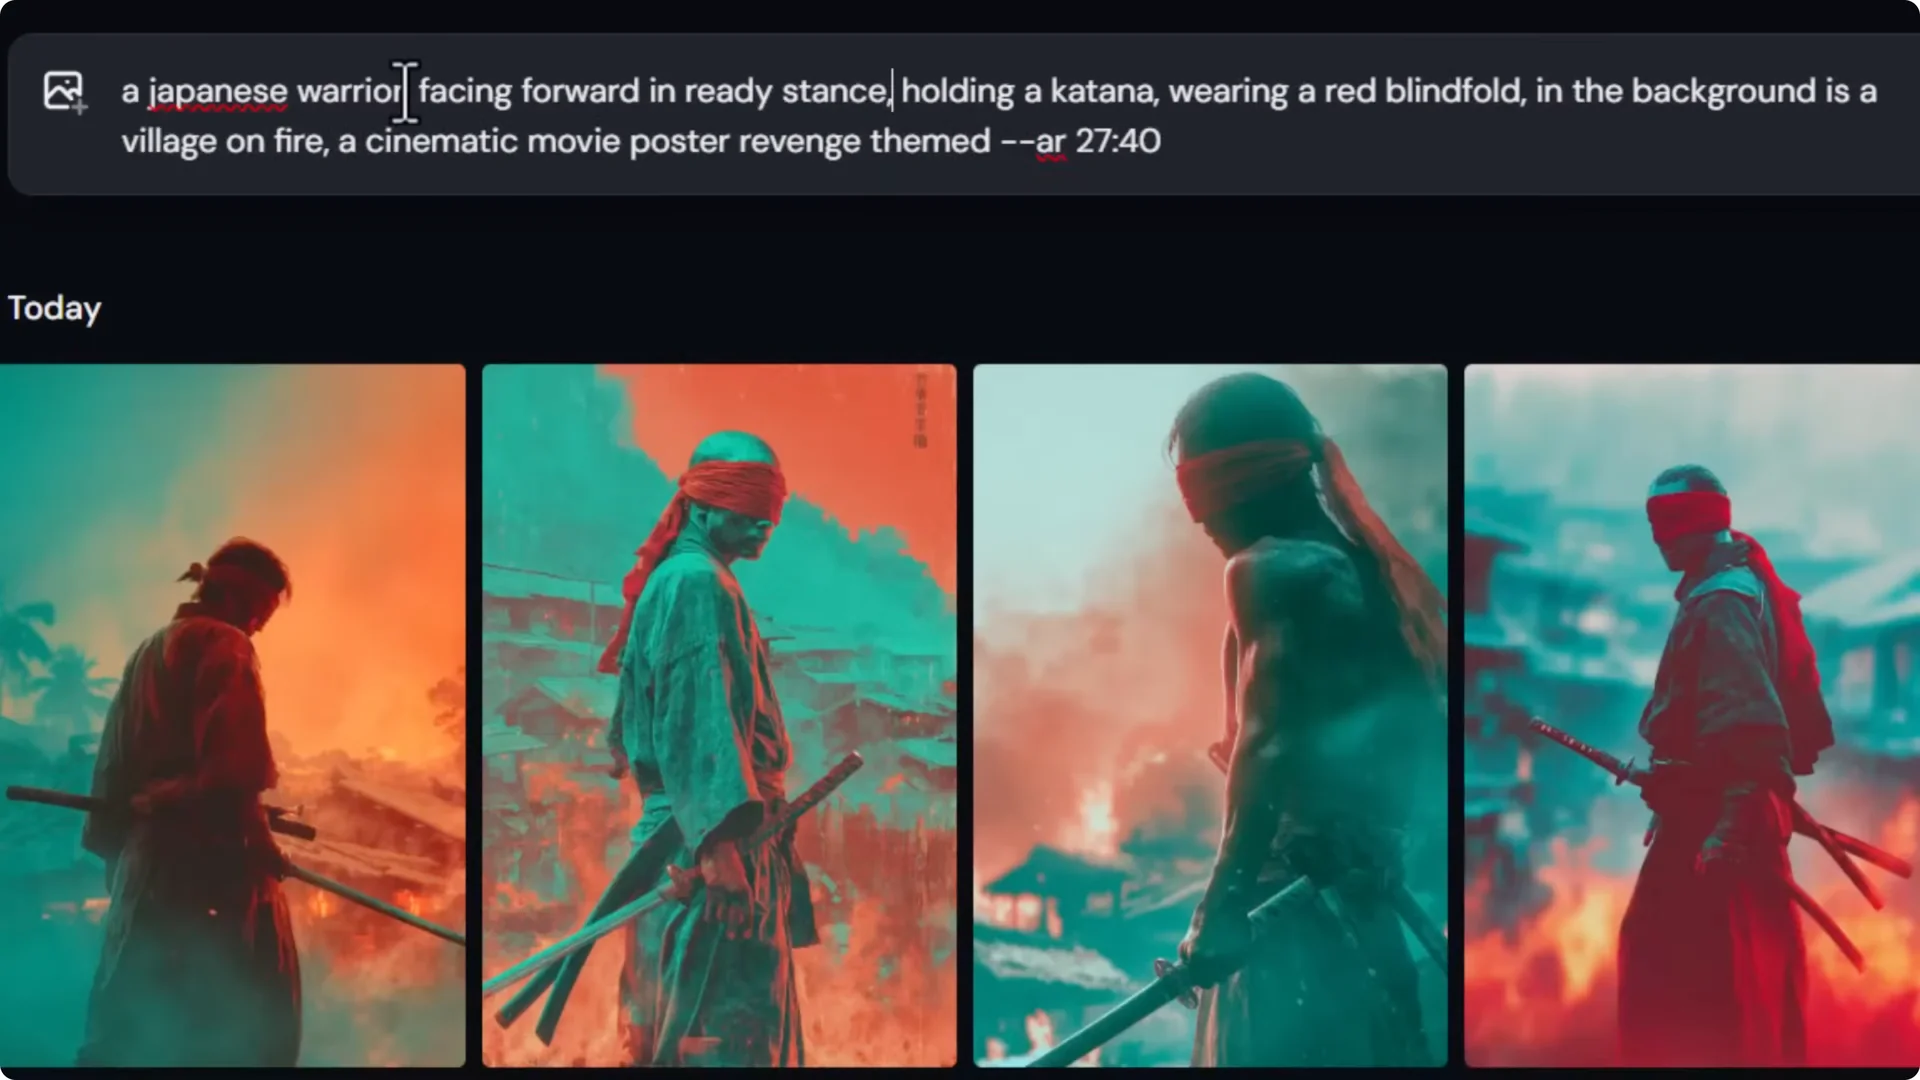
The man isn’t facing forward and the color is overdone. I roll back the orange and teal mention and add “facing forward, ready stance” to frame the subject better, then submit.
Prompt Editing Tips
- Don’t make the prompt too long. It can water down the main points.
- Focus primarily on what you want to see, then make adjustments using other tools.
- Move important phrases to the start of your prompt to prioritize them. For example, place “facing forward, ready stance” near the beginning.
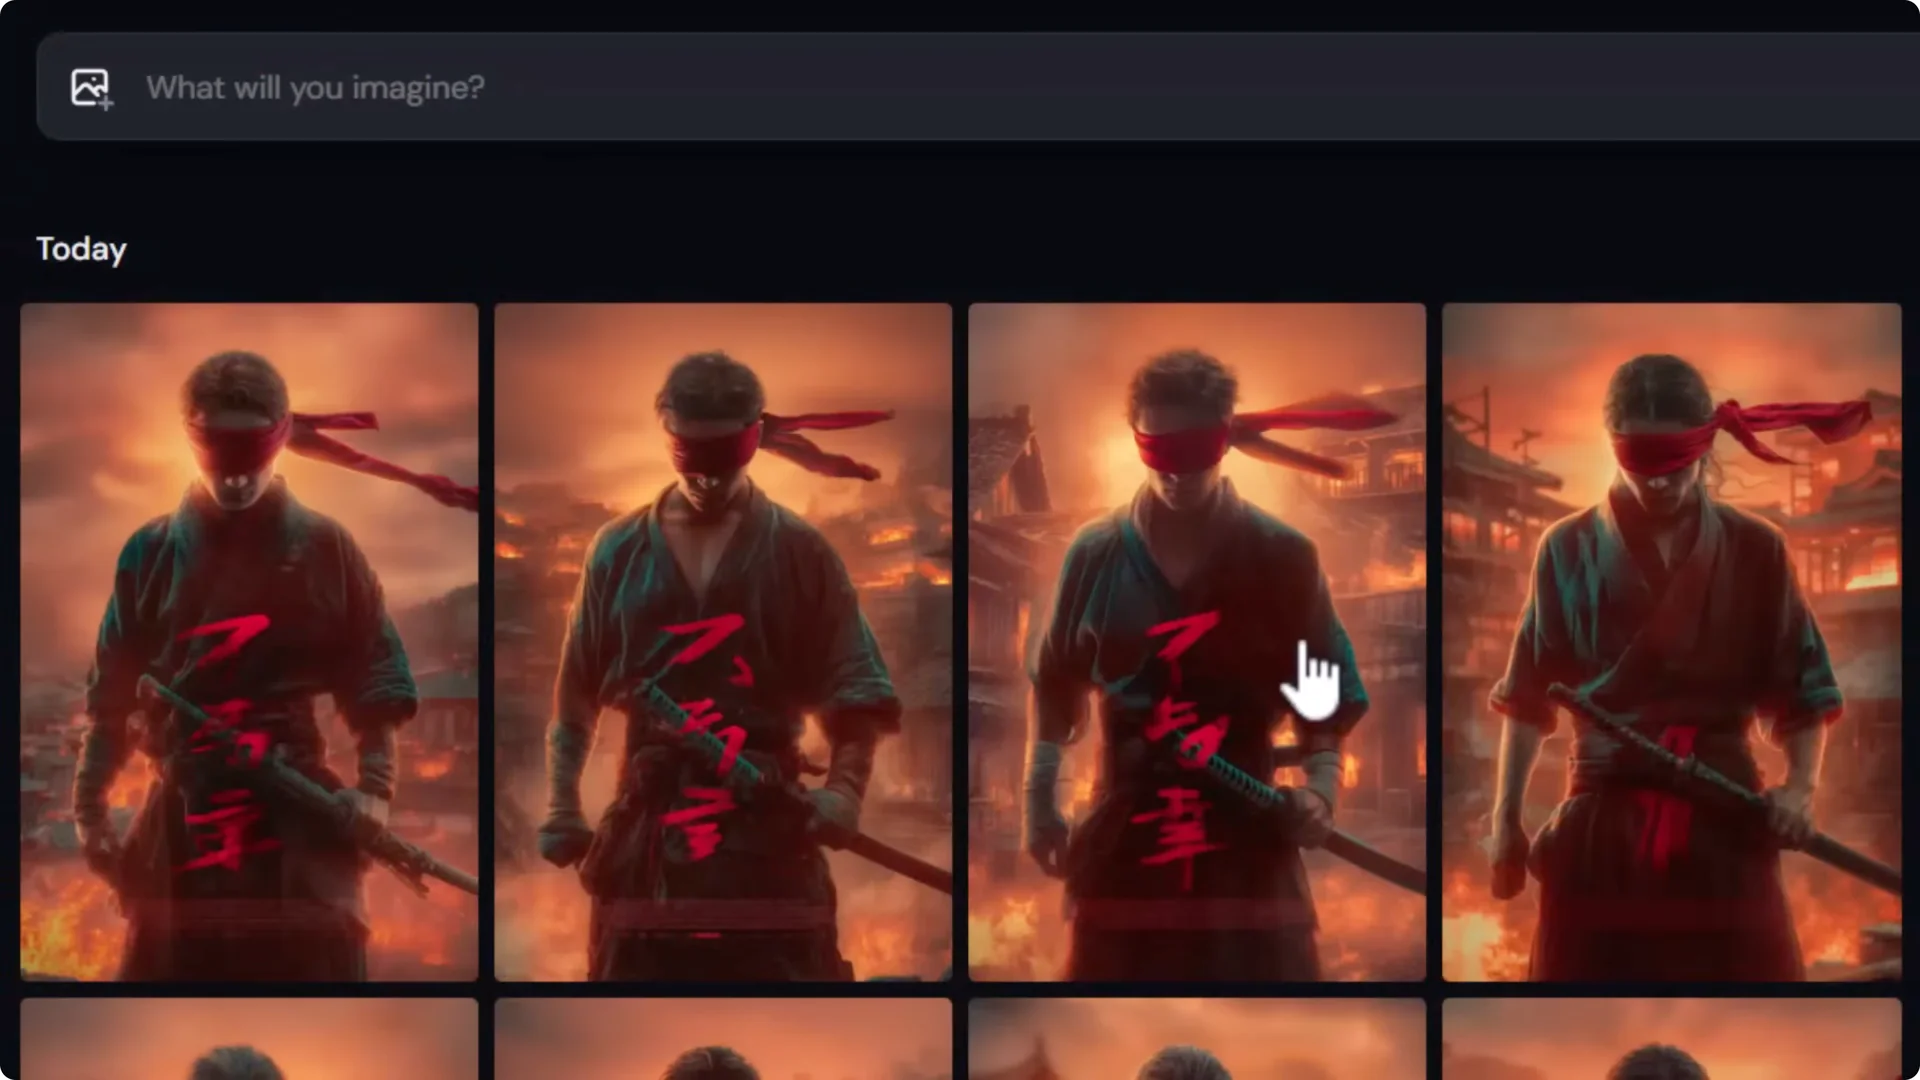
Now I’m closer to what I’m after. One image is framed how I like, another has the colors I like. It’s close enough to move on.
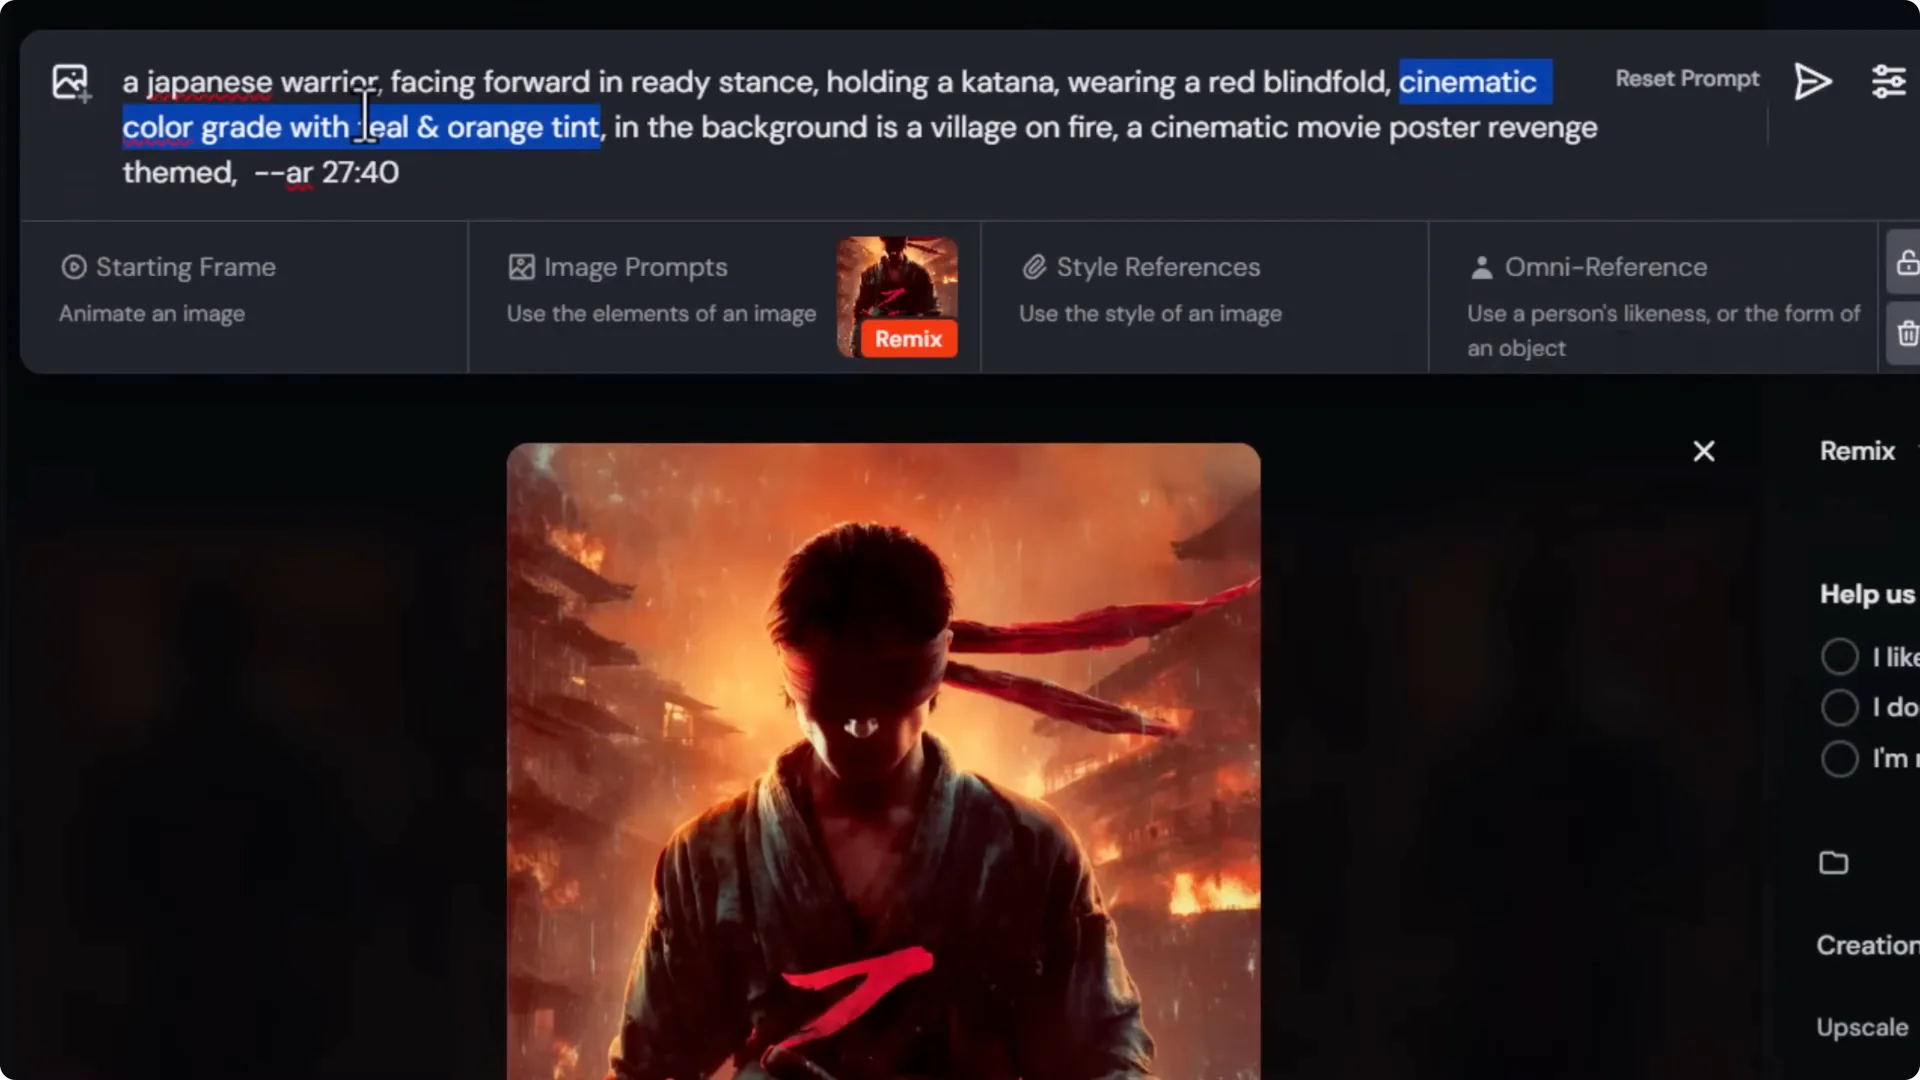
Midjourney AI Art Workflow: Step 2 – Refine With Remix and Style Reference
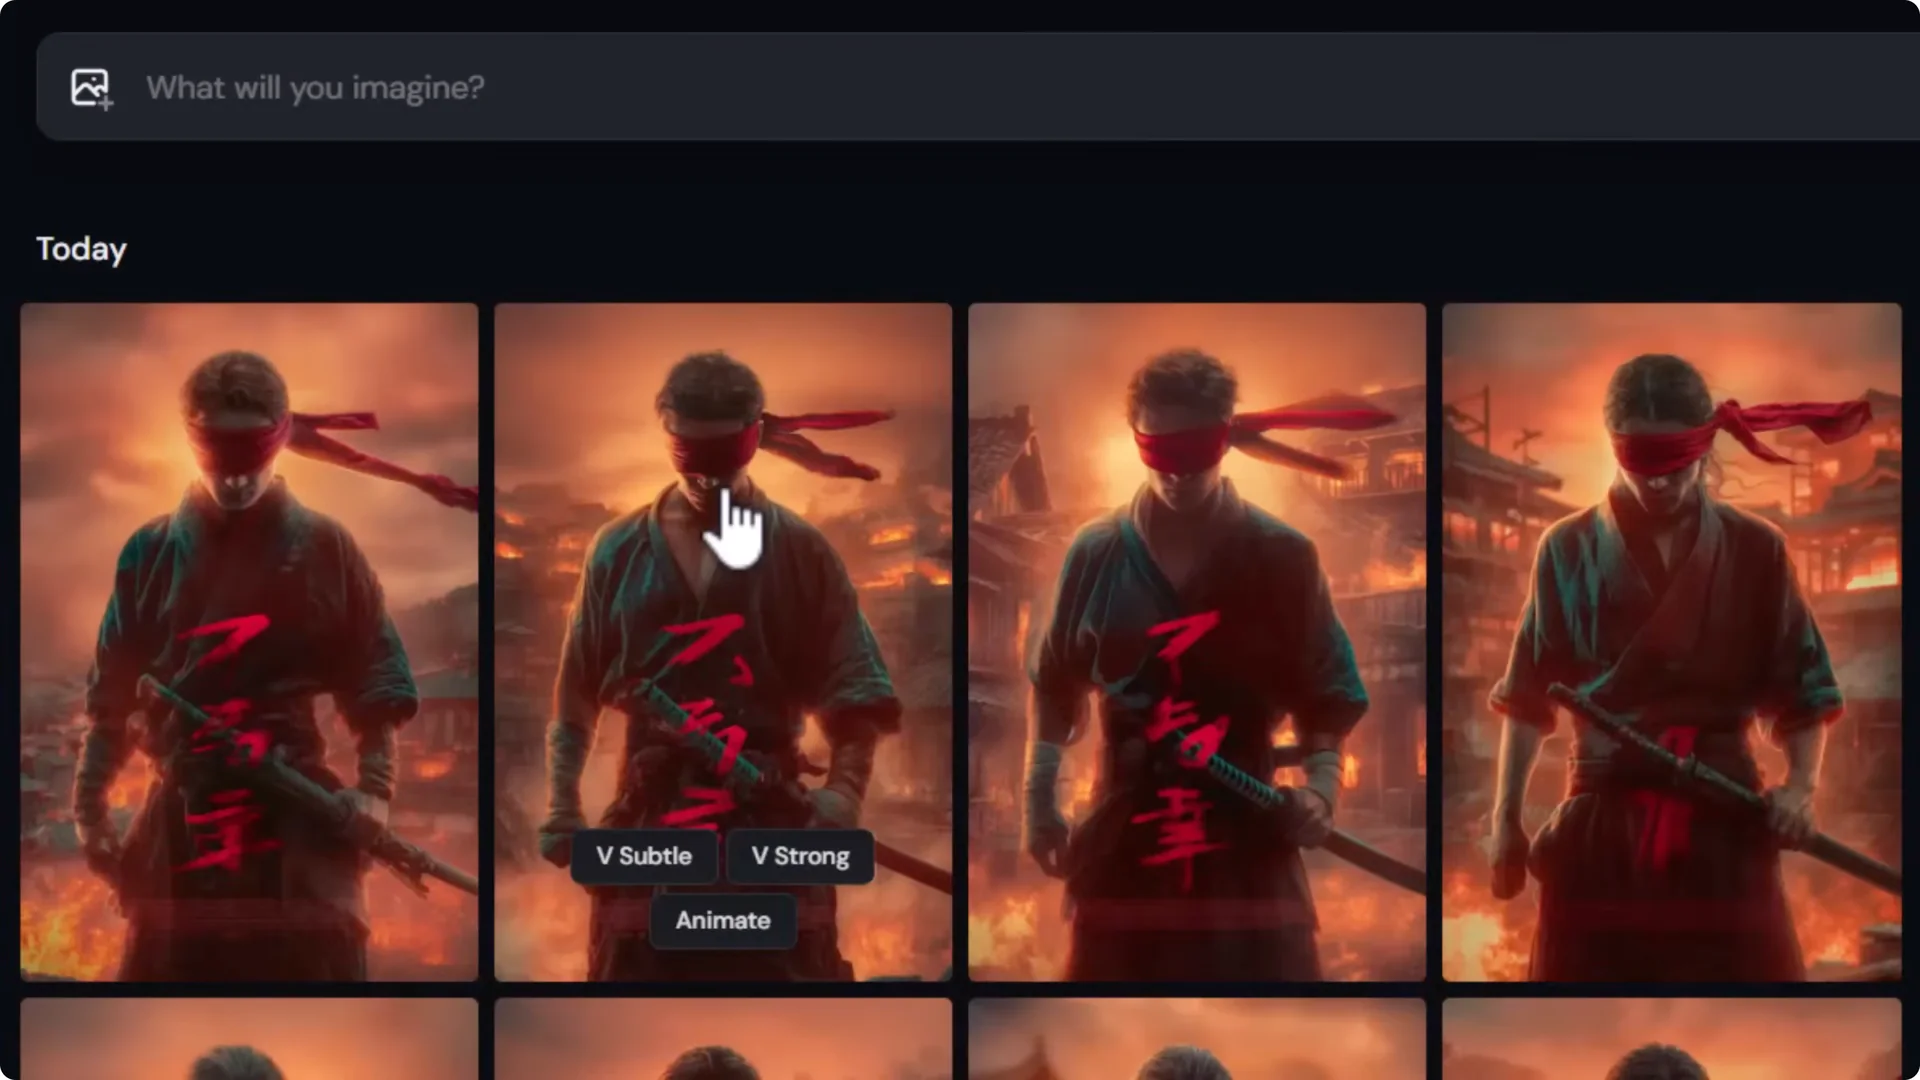
Instead of resubmitting raw prompts, refine the result using Remix so you can preserve the layout you like while adjusting details.

- Click the image and choose Remix – Subtle.
- Add “teal tint, cinematic color grade” so the layout stays, and the color adjusts.
Remix uses an image reference to hold the composition while you tweak details. On other platforms, use features like image prompting or image-to-image to maintain layout.
I remove the word “slight” from teal tint and move “cinematic color grade with teal and orange tint” closer to the start of the prompt to prioritize it.
With small adjustments and Remix holding the layout, I can pin down the look.
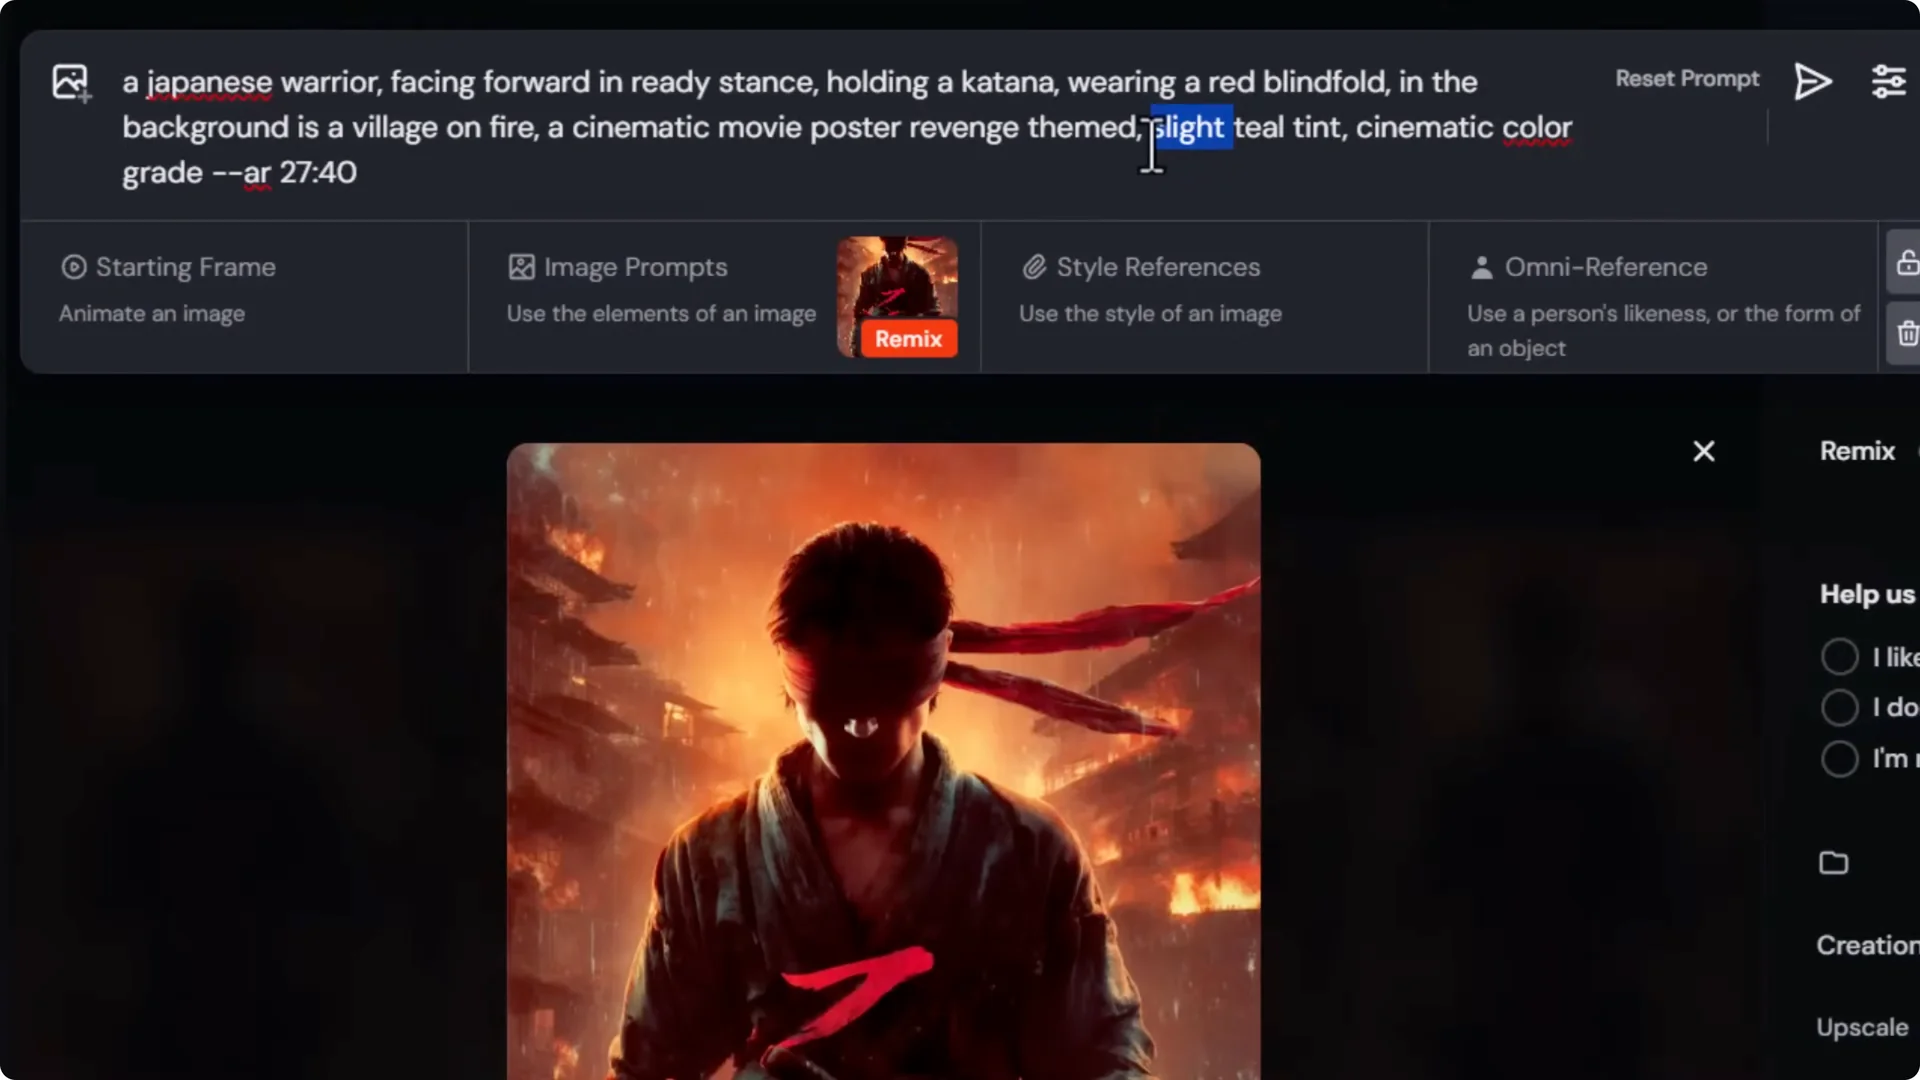
When minor tweaks hit their limit, escalate with a style reference to apply color and feel from another image:
- Add a style reference image that has the color palette I want.
- Reduce style weight with d-sw 50 to prevent pose changes and focus on color.
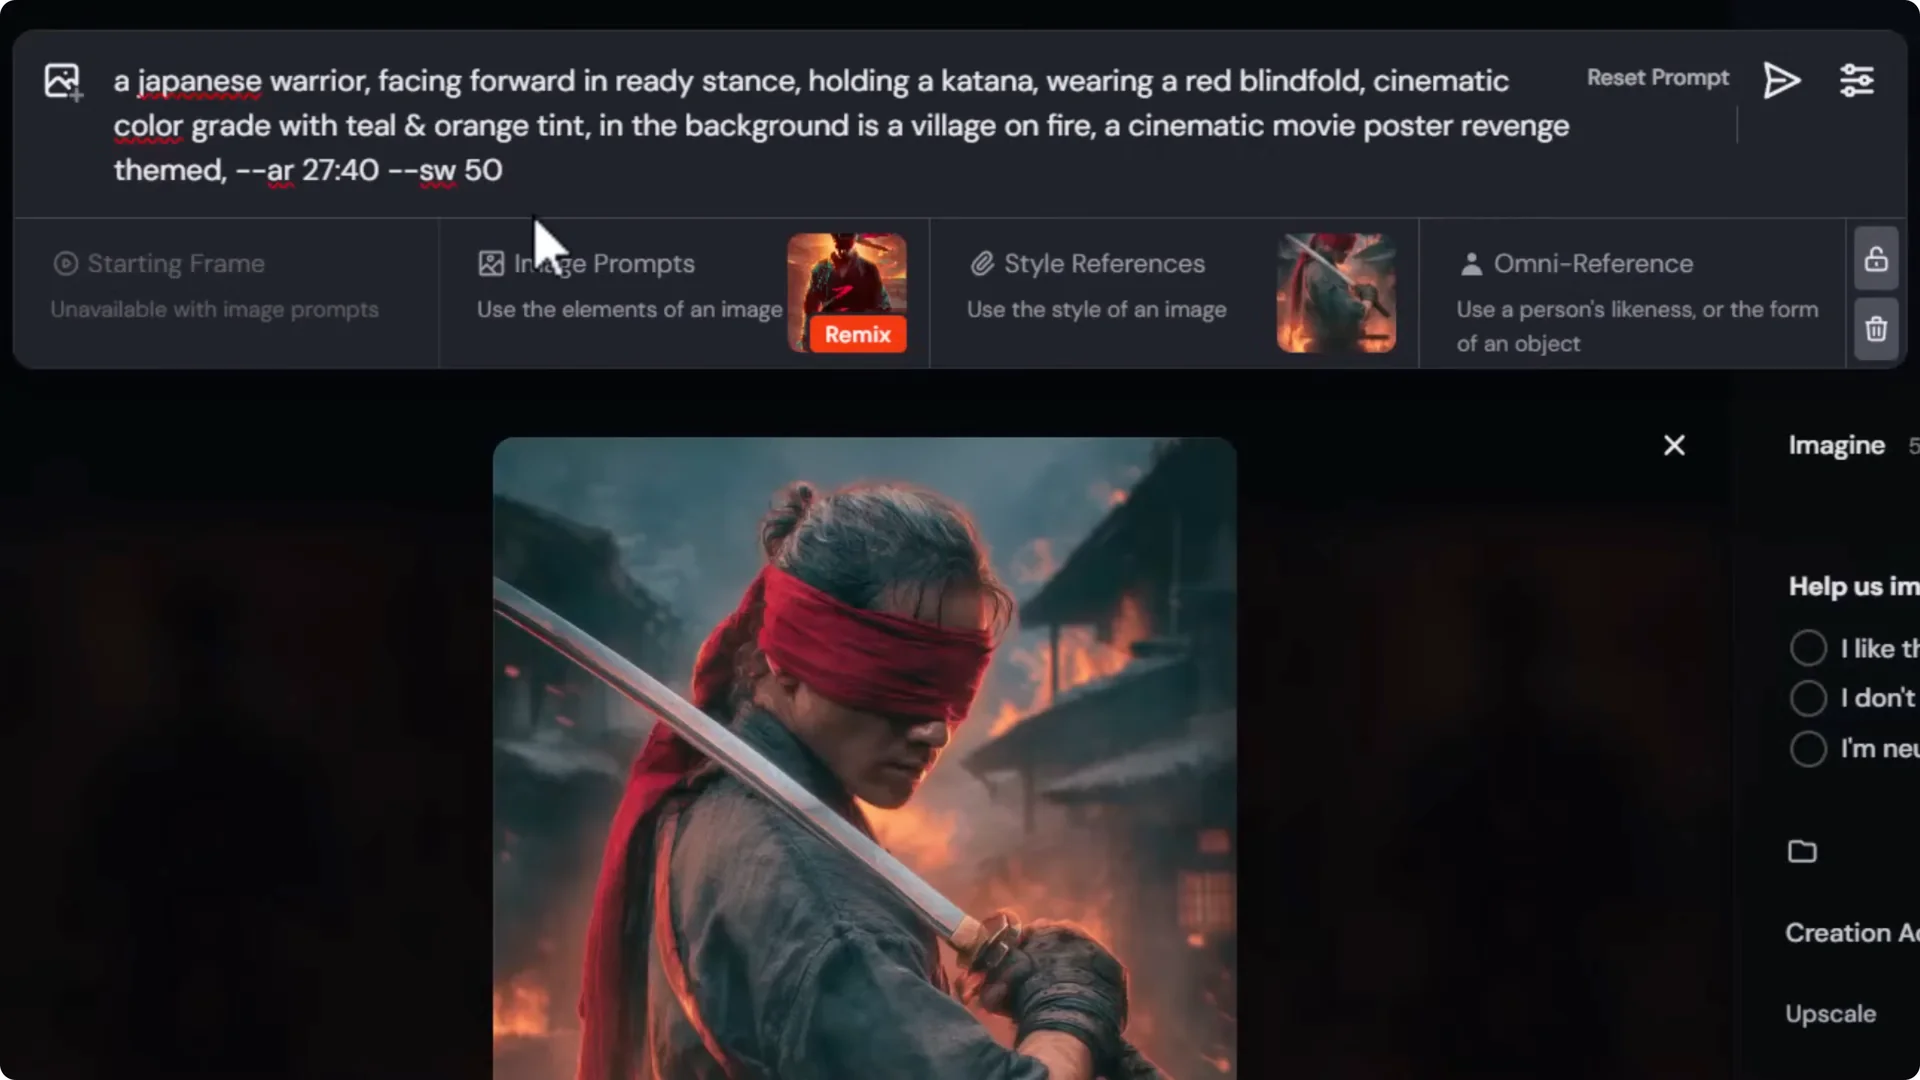
This combination nails down the layout while the style reference guides color and general feel.
Submit and review.
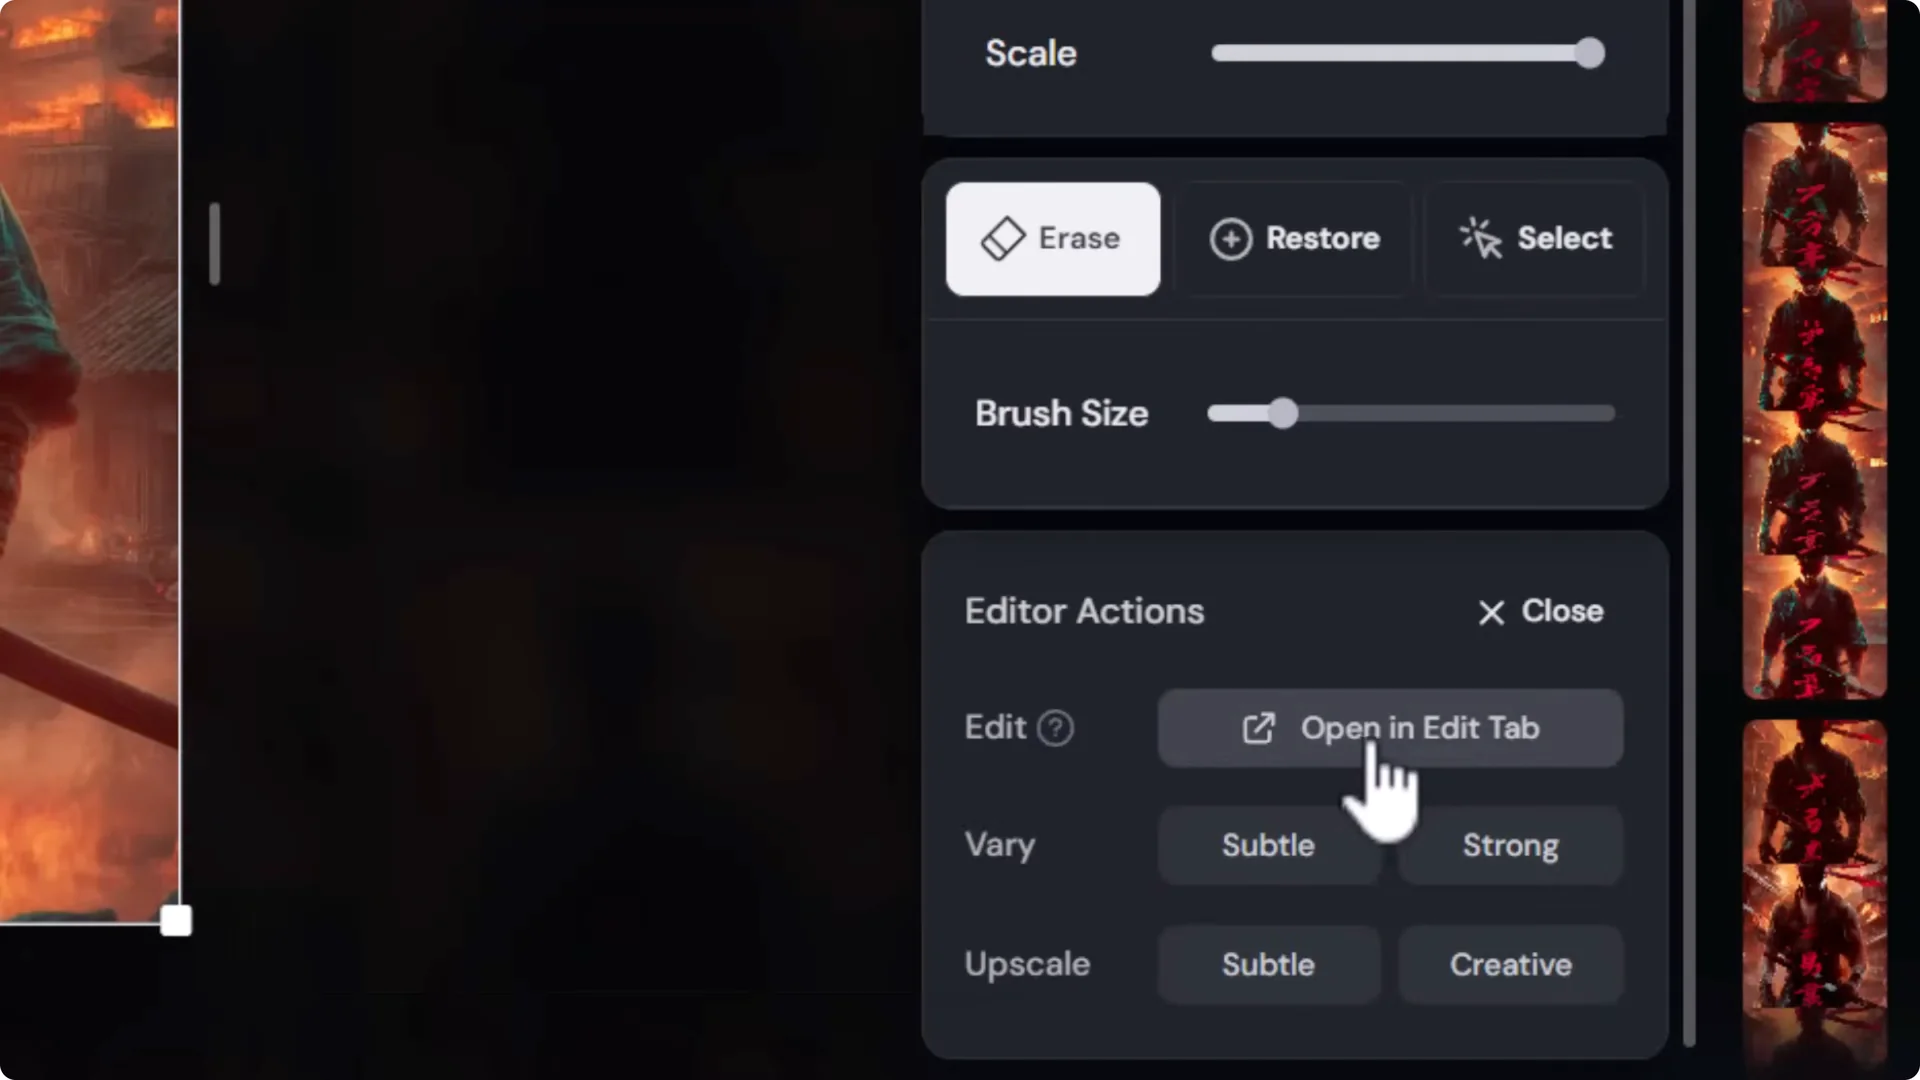
Midjourney AI Art Workflow: Step 3 – Edit the Finer Details With the AI Editor
Since the color still isn’t quite right and there are details to tighten, switch to the AI editor.
- Open the image in the editor and choose the full external editor.
- Move and resize the subject to create space at the top for a title.
- Remove unwanted symbols or text using the paint tool.
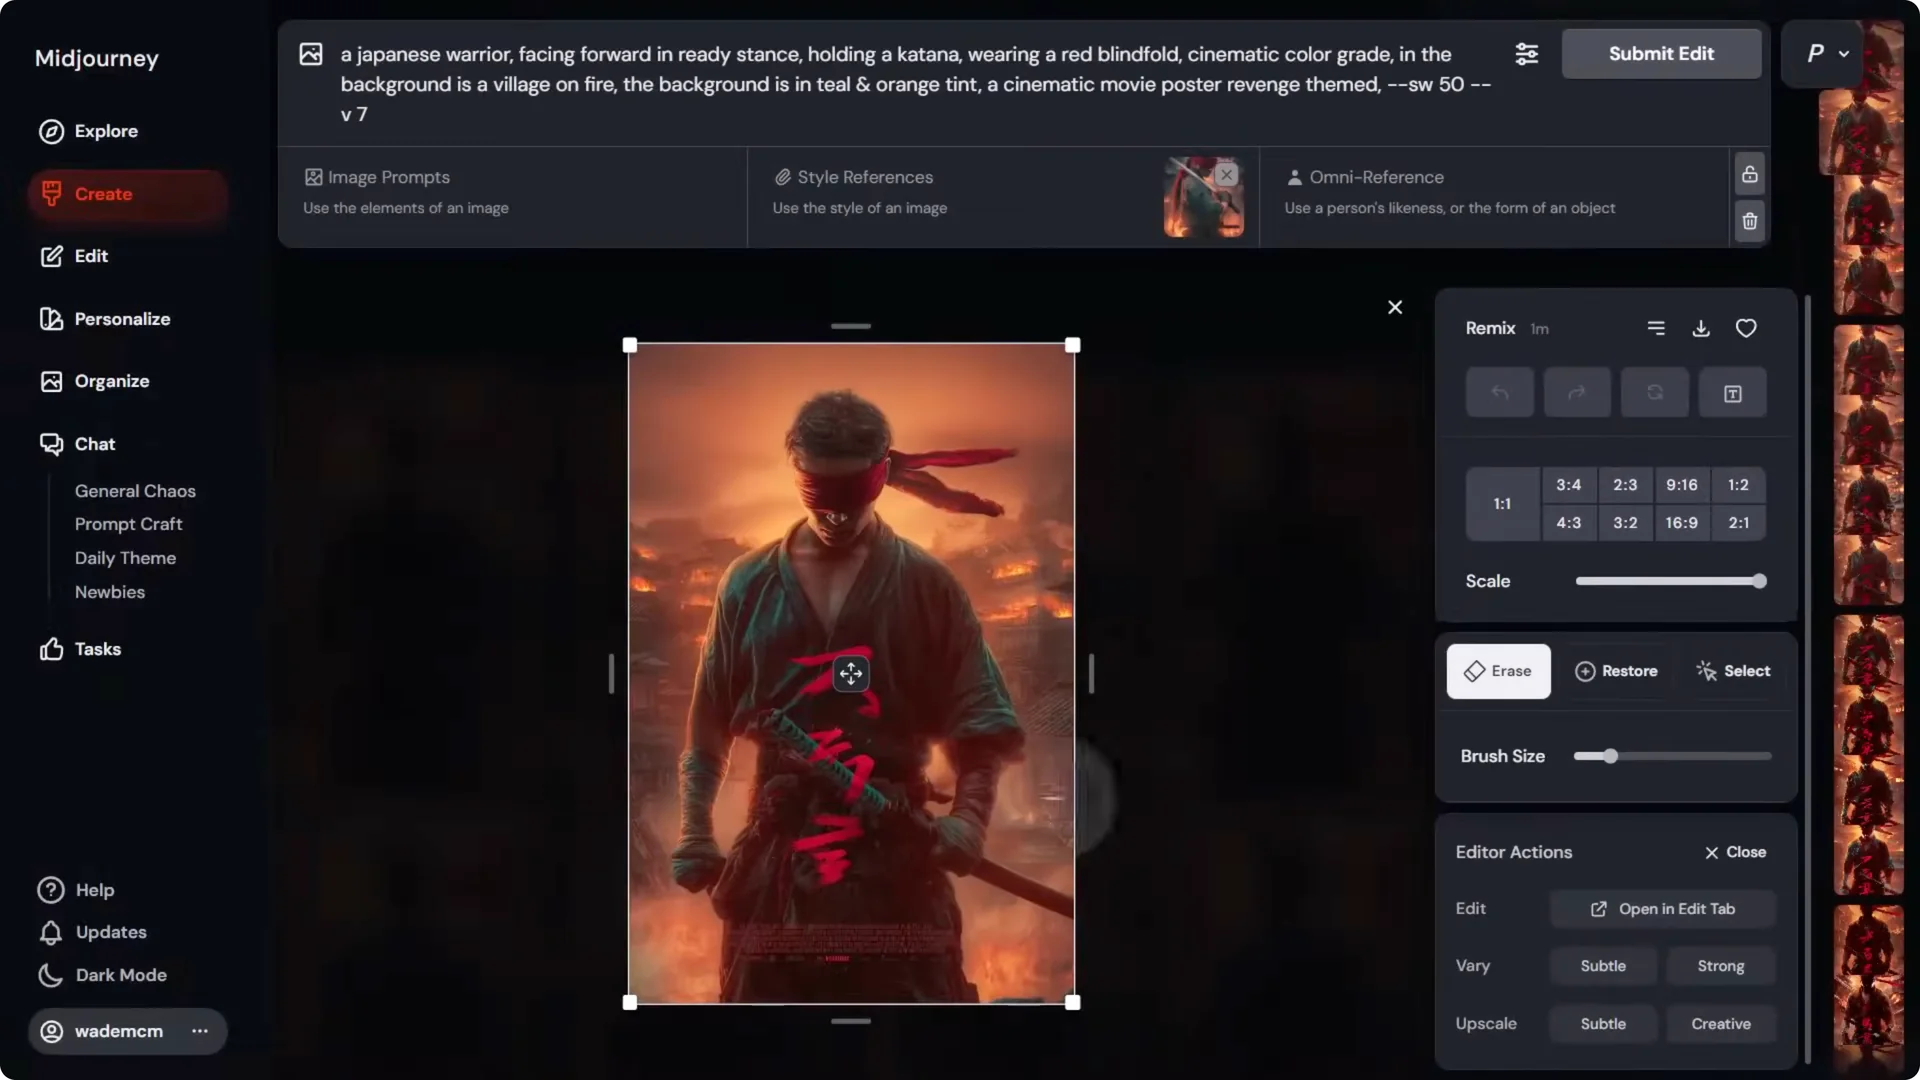
Because we already have a strong reference image, the edit prompt can be simpler and focus only on what needs changing. I type:
- A Japanese warrior, a burning village in the background, strong teal colored tint.
Submit a couple of times. Editors can be fickle, so repeat until you get a result that nudges the image in the right direction.
To guide color locally:
- Mask larger orange areas while keeping teal areas intact, then submit again.
- Rinse and repeat, progressively pushing teal into the background while preserving fire.
Keep locking down what you like and iterating on the smaller areas until you’re happy with the image.
Midjourney AI Art Workflow: Step 4 – Properly Upscale Your Images
AI outputs are usually not high resolution. Upscale to a higher resolution to add detail while preserving the image.
- Use Upscale to Gallery in Midjourney to double the resolution. For example, 896 x 1328 becomes 1792 x 2656.
- Download the upscaled image.
Open it in Topaz Gigapixel. Other upscalers can work, but I recommend Topaz Gigapixel for its quality and local processing. Bloom can also produce good results.
In Gigapixel:
- Start with Redefine – Realistic. Zoom to the face and render a preview.
- Add subtle creativity and paste your Midjourney prompt as an image description. Remove parameters so Gigapixel only reads descriptive text.
- Preview again. If you want more detail, try Redefine – Creative at Medium. This adds detail while staying close to the original.
- Leave it at 2x and export.
After the first upscale, I run a second pass for size:
- Load the newly exported image back into Gigapixel.
- Choose a standard model like High Fidelity and do another 2x upscale.
This takes the image to well over 10,000 pixels tall. It’s more than enough for large print, and you avoid overcooking detail.
Midjourney AI Art Workflow: Step 5 – Add Final Touches With a Photo Editor
Use a photo editor for full control over polish and typography. This step is crucial if you want professional results.
I bring the image into Photoshop and clean up details:
- Remove background people with Generative Fill. Use the lasso tool and fill one area at a time due to resolution limits.
- Remove stray text using Generative Fill.
Color and Glow Touchups
- Add a new layer and paint teal using a soft brush. Set the blend mode to Color and paint it into the background where you want teal, keeping flame areas intact.
- Darken the top edge and create a subtle border:
– Add a new layer, paint with a near-black color along the edges.
– Reduce opacity so it frames the subject with a glow.
Typography and Layering
- Add the title Blind Rage with your chosen fonts. I used Lulo for BLIND and a rougher font for RAGE.
- Center the text precisely. Use select all and the move tool alignment controls to center.
- Place the subject in front of the title:
– Select Subject, duplicate and mask that selection.
– Move the masked subject layer above the title group so the character overlaps the text.
Distressed Text Texture
To match the poster’s gritty feel, add a texture mask to the title:
- Open a concrete texture from a stock site, crop a section, and desaturate it.
- Use Curves to deepen blacks and lift whites.
- Invert the texture so black areas become the parts that will “cut away” from the type.
- Copy the texture, go back to the poster document, enter Quick Mask, paste and position the texture over the title, then exit Quick Mask to convert it to a selection.
- Mask the title group with that selection to create a distressed text effect.
- Slightly adjust the color of RAGE to a light creamy tone to finish the look.
The result looks strong at both poster and pixel level, with crisp detail from the upscales and targeted edits.
Midjourney AI Art Workflow: Print-Ready Resolution and DPI
For a 27 x 40 in poster at 300 dpi, you need 8100 x 12000 pixels. If your image is slightly under that, you can finish the upscale in Photoshop:
- Go to Image Size.
- Choose Preserve Details 2.0.
- Set the pixel dimensions to 8100 x 12000 and apply.
You now have a 300 dpi full poster size image. Zoom in to confirm the resolution holds up.
A quick DPI note: DPI depends on printed size. An image’s metadata saying 72 dpi or 300 dpi can be ignored if you specify the final pixel dimensions and print size. DPI is simply pixels per inch at the size you print. Specify the exact physical size and required pixel dimensions to your printer.
Final Thoughts
This Midjourney AI Art Workflow gets you from a rough prompt to a print-ready poster with control at every stage:
- Start with a clear aspect ratio and a concise base prompt.
- Iterate with Remix, prioritize key phrases, and add a style reference to lock in layout and color.
- Use the AI editor to refine local areas and nudge color where needed.
- Upscale in stages to add detail first, then size.
- Finish in a photo editor to clean distractions, tune color, and set professional typography.
The combination of AI generation and hands-on editing gives you precision where AI alone struggles, and the end result is a polished, print-ready design.