I’m sharing 10 practical ways to get better results in Midjourney, with examples from V8.1. These tips carry forward nicely to near future models. Use them to tighten control, improve clarity, and speed up your workflow.
I use HD mode for almost everything. It consistently produces cleaner illustrations, better small details, and stronger hand and body coherence. It also helps when your image contains lots of small faces.
Midjourney V8 Tips: Use HD mode
HD mode renders at 2K resolution versus 1K in SD. As of right now, V8.1 doesn’t have an upscaler, so creating in HD puts you at a similar resolution to an upscaled V7 image. Everything just looks better.
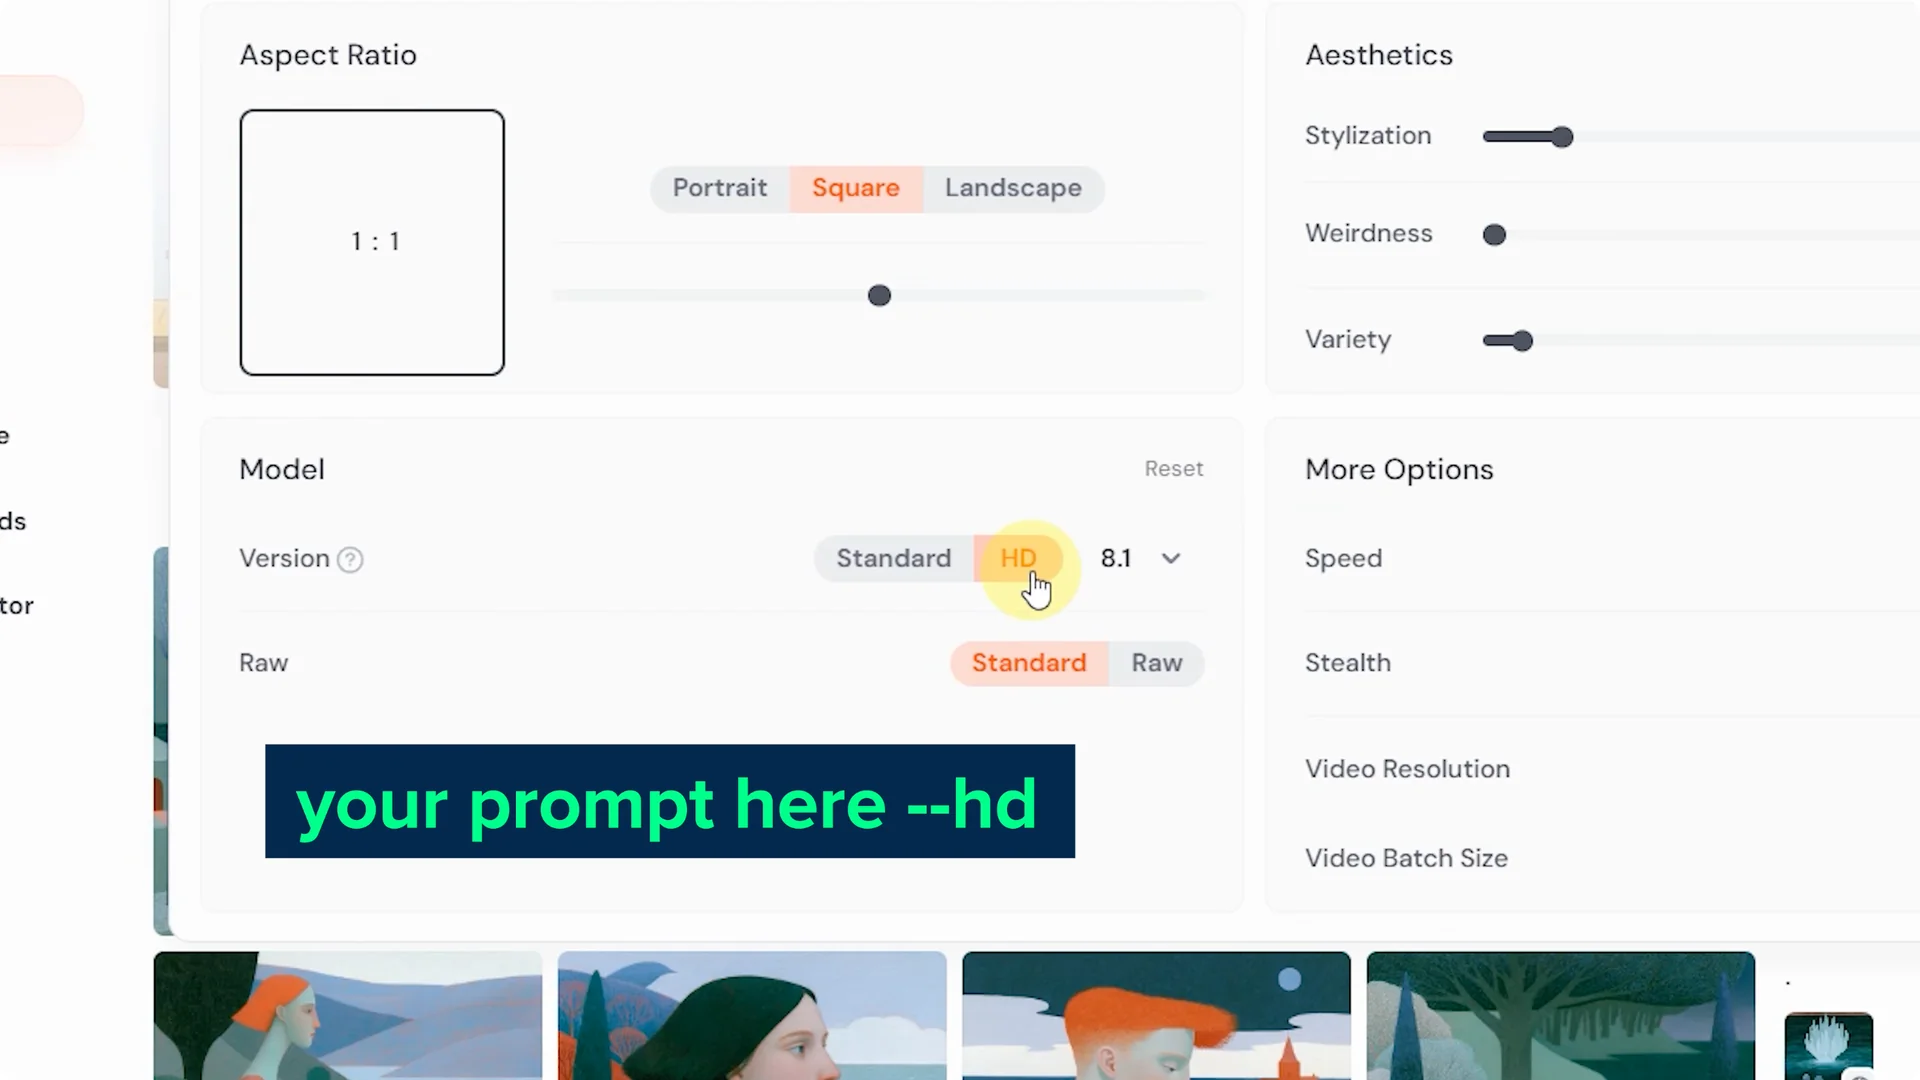
You can set HD as your default in settings or add it directly to your prompt.
Expect it to be slightly more expensive than SD in V7, but you’re getting twice the resolution for about 1.5x the cost.
HD also runs in relax mode, which means you can make HD images without using your monthly fast hours if your plan includes relax.
How to enable HD mode
- Open settings and select HD as your default mode.
- Or add the HD flag to your prompt.
- If you have relax mode, run HD in relax to save fast hours.
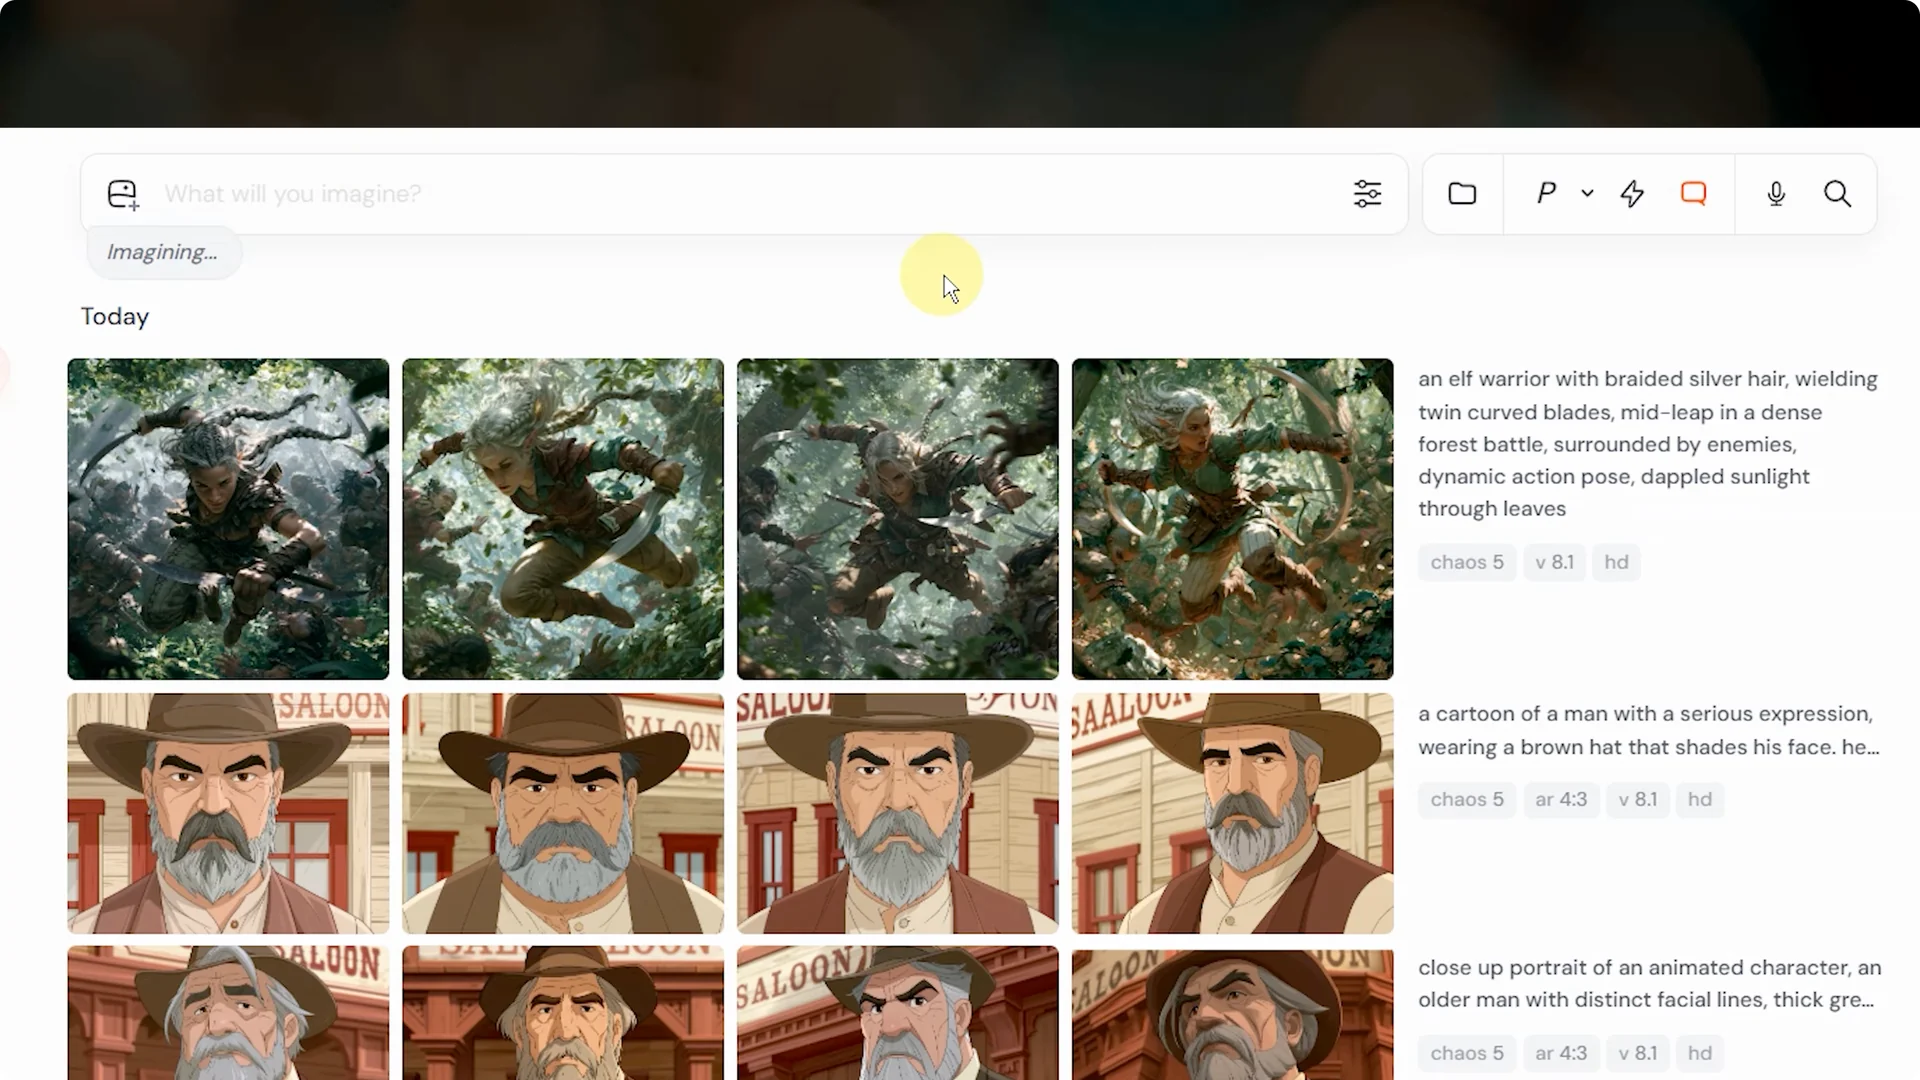
Midjourney V8 Tips: Be specific
When you want something specific, be specific. Vague prompts invite Midjourney to fill gaps in ways you might not like. You don’t need to write a novel, but the newer models follow precise directions well.
If you want a cartoon, say what kind of cartoon. For example, “1970s animated cartoon style with cell shading” is much clearer than just “cartoon.”
Models like 8.1 are better at truly following what you ask for.
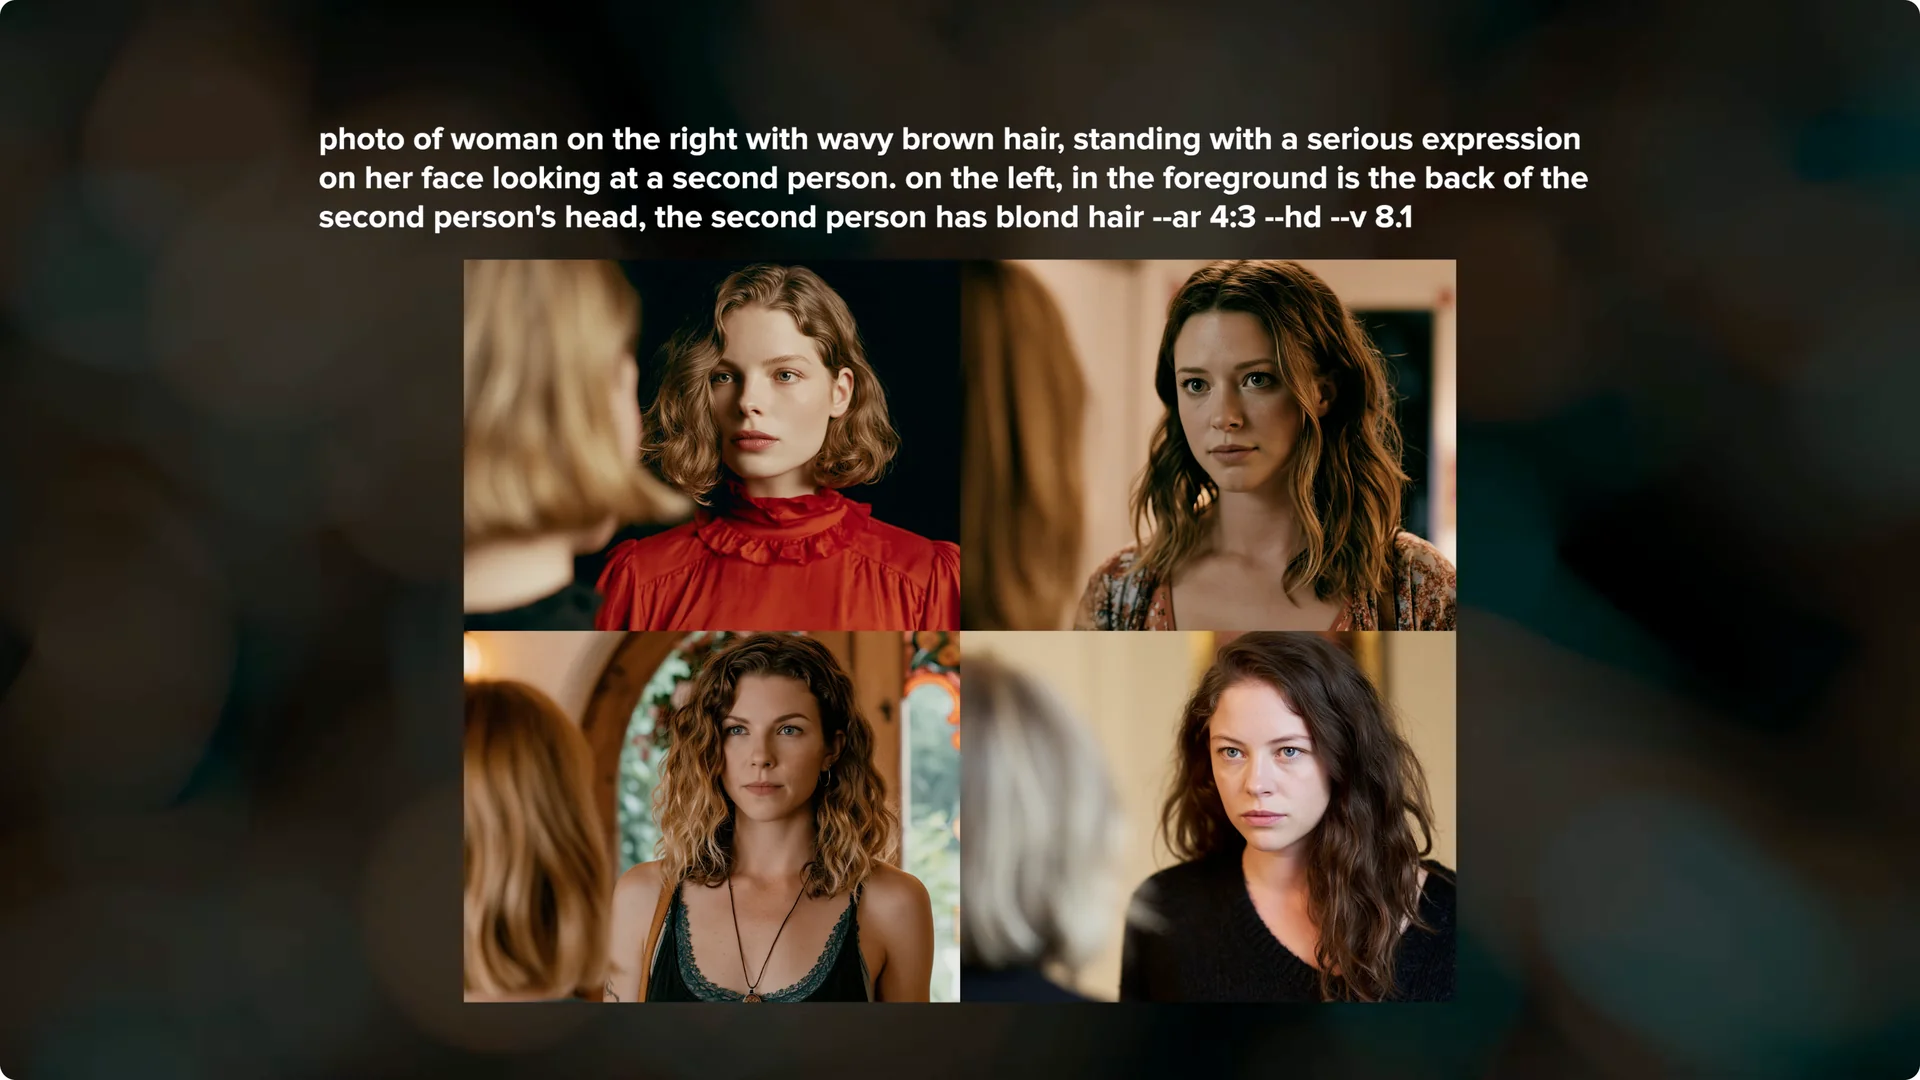
For complex scenes with multiple characters or elements, break the composition into sections. Describe what’s on the right, on the left, and in the foreground.
Anchor positions and the number of people so the composition is easier to follow. For added structure ideas and phrasing, see these prompt styles tips.
Midjourney V8 Tips: Raw mode and stylize for control
If a clear and concise prompt still isn’t giving you the results you want, add raw mode or lower your stylize value. Midjourney always balances your prompt with its default aesthetic, and sometimes the default aesthetic pulls too far.
Raw mode is great for improving prompt adherence.
Lowering stylize can also help Midjourney focus more on your text. The default stylize is 100, so try dropping it to 50 or lower and see if that helps.
Raw mode also works really well for photographic prompts.
Midjourney V8 Tips: Cleaner text in images
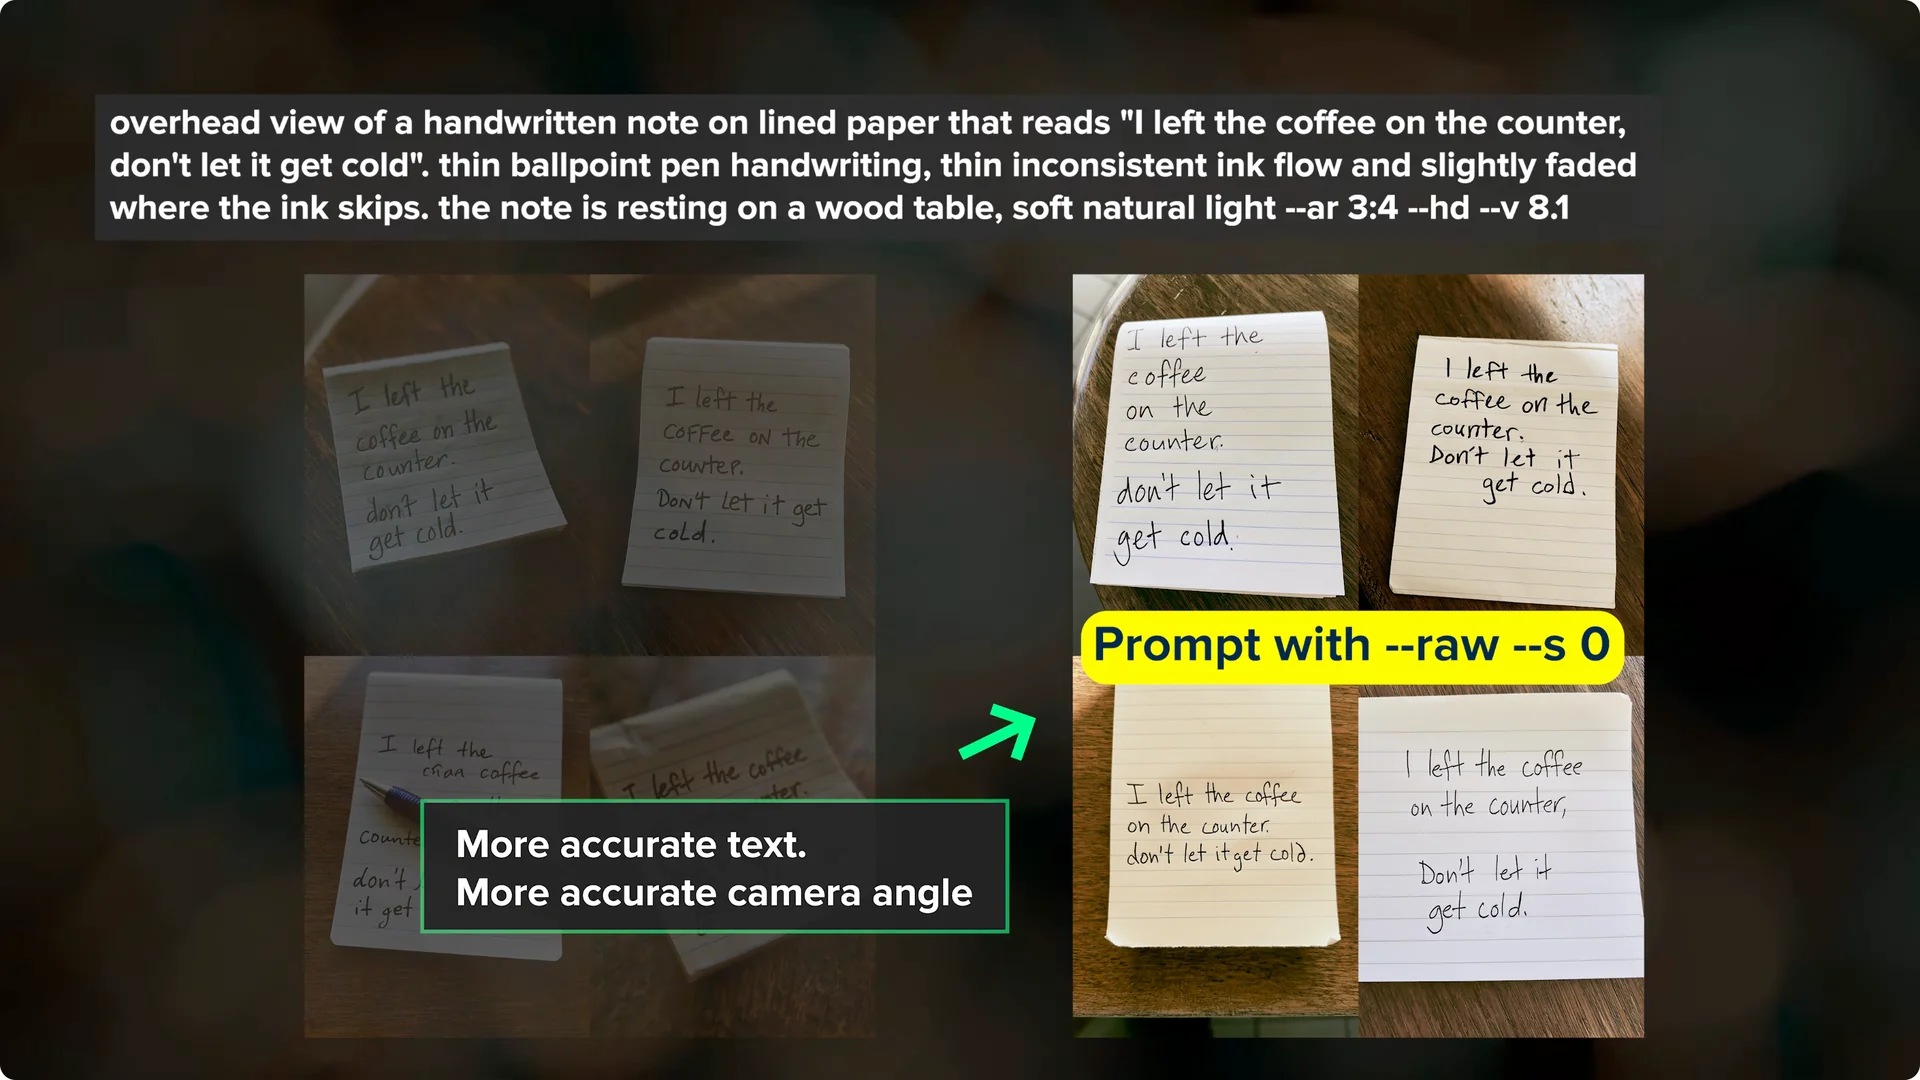
V8.1 has significantly improved text rendering, and you can now prompt full sentences with pretty good results.
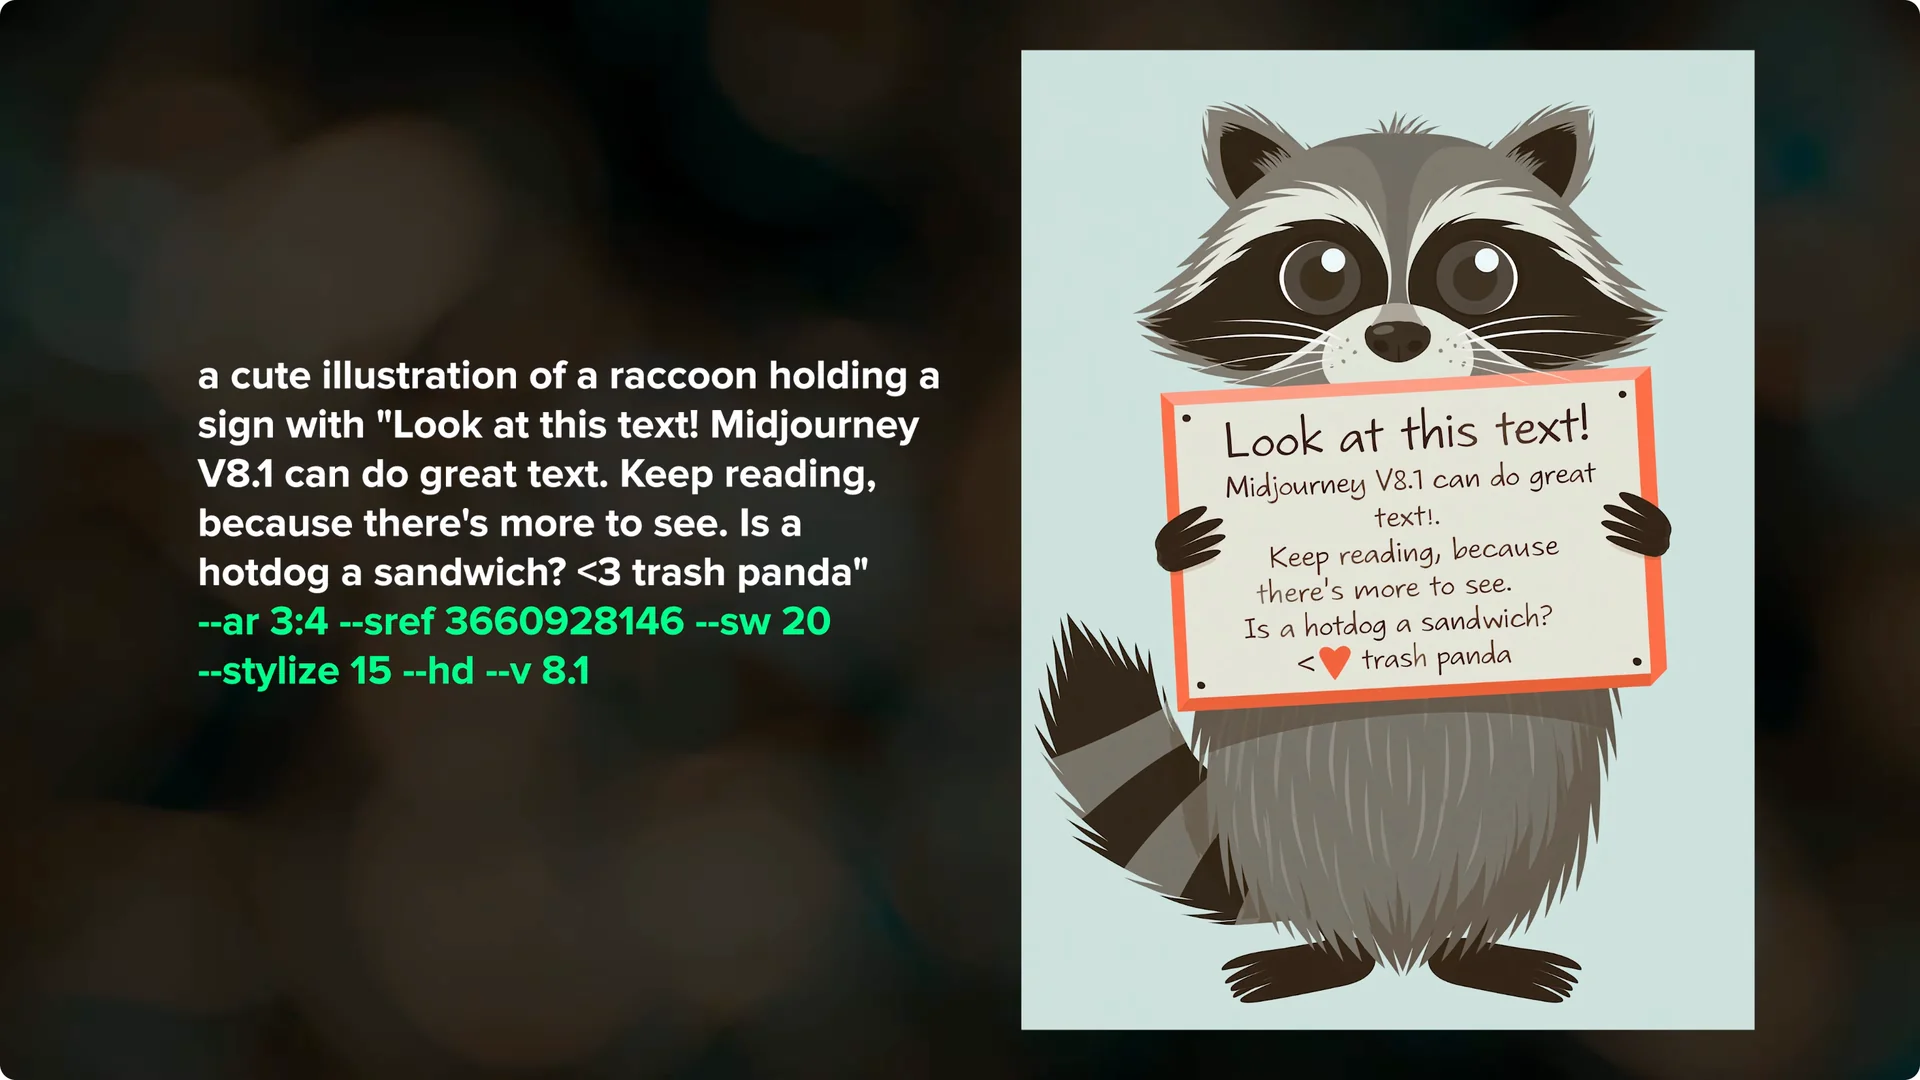
Longer text can still drop or duplicate words, especially if you have multiple long sentences.
Lowering stylize to 25 or even 0 often produces the cleanest text.
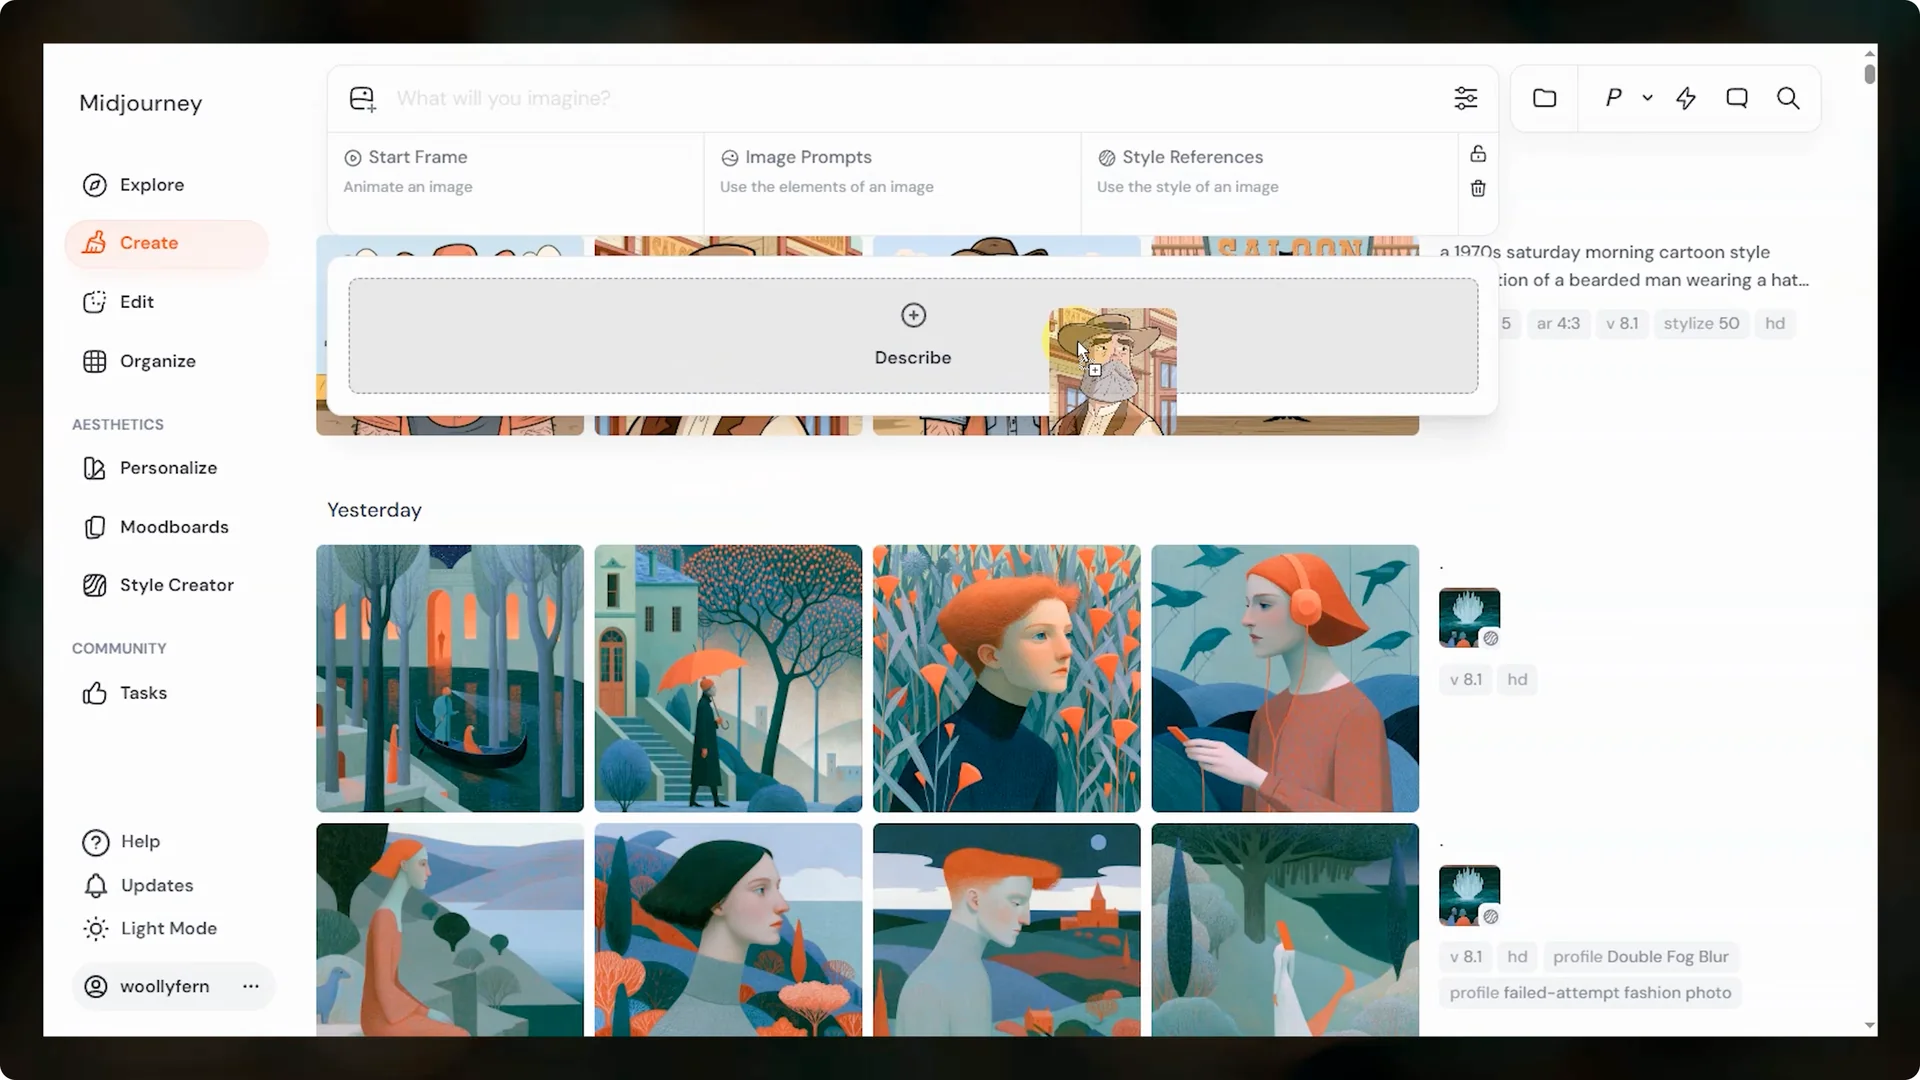
Midjourney V8 Tips: Describe to reverse-engineer prompts
Describe is Midjourney’s image to text model that returns four prompts based on what it sees. It’s better than before at generating concise prompts that work well with the newer models.
It’s not meant to exactly replicate your input, but it’s fantastic for brainstorming and learning which details matter.
One of my favorite uses is taking an image I loved from an older model, running Describe, and then testing those prompts in a newer model like 8.1.
You’ll see how certain descriptors carry forward across versions.
It also shows you how to structure prompts for similar results.
Quick steps for Describe
- Drag an image into the Describe box.
- Review the four prompts and pick one, or run all four at once.
- Keep the best phrases and re-run with small edits.
Midjourney V8 Tips: Conversation mode for natural prompting
Midjourney has a conversation mode that many people miss. Instead of writing a formal prompt, you just describe what you want in natural language and Midjourney figures out the prompt for you.
It’s chat style prompting with session memory.
Ask it to make a fantasy character and place them into an action scene. Let that run, then tell it to change the setting to a desert scene.
The back and forth is fast, direct, and great for iterative tweaks.
Read More: Hide Midjourney Images On Your Profile
Midjourney V8 Tips: Film and camera phrases
Including a specific film type or camera in your prompt can help you get closer to a desired vibe. I like adding Kodak Portra 400 film to photography prompts to brighten a scene, or calling out unique cameras like a pinhole camera.
These are approximations that suggest a typical look.
Midjourney understands high level traits, like Kodak Tri X 400 being black and white. It may miss finer characteristics like exact contrast or grain.
If you want strong contrast or heavy grain, include those terms directly in your prompt.
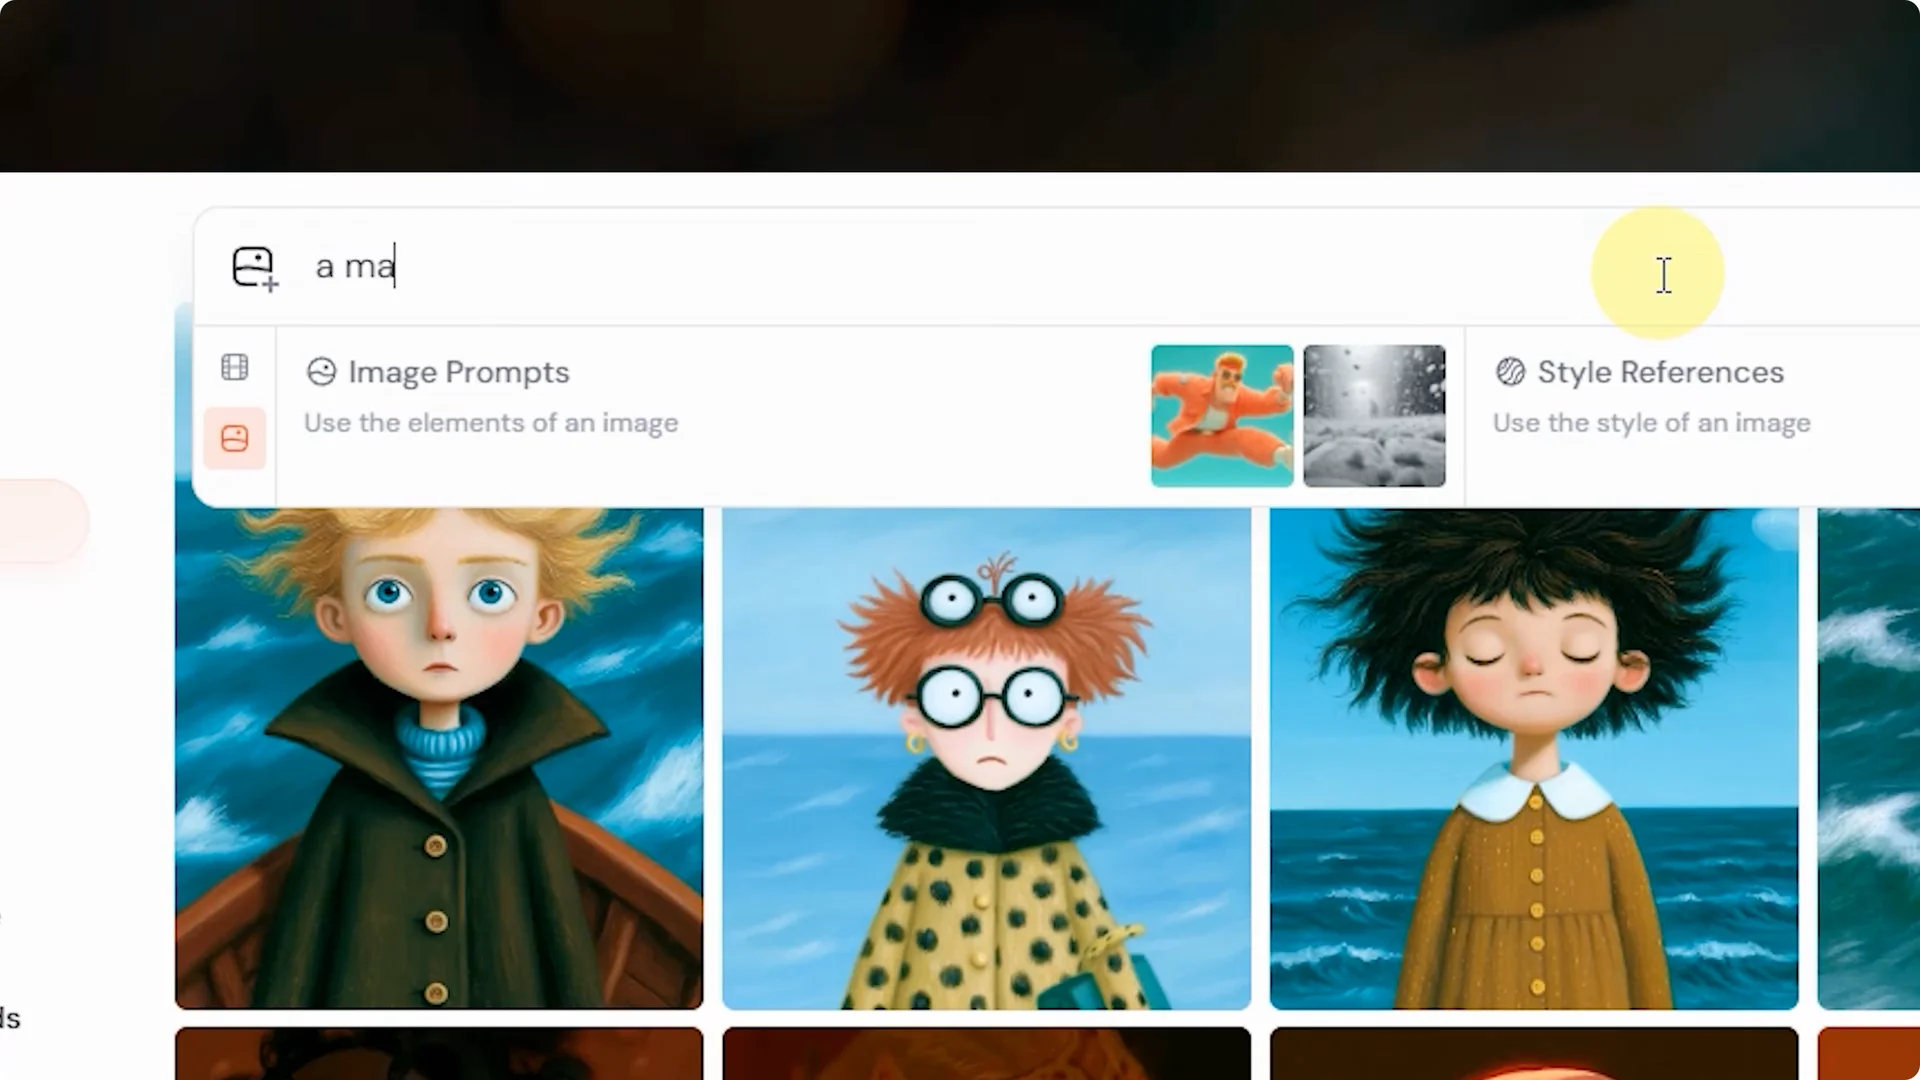
Midjourney V8 Tips: Image prompts for composition and feel
Image prompts loosely pull from the whole image at once, including composition, color, texture, and subject matter. You can blend multiple images to create something new, with or without text. They’re excellent for guiding body positions and facial expressions.
To set up an image prompt, drag your image into the image prompts box, add your text prompt and settings, and submit. If you are working with portraits and want to personalize results, you can also add your face to Midjourney images. There’s a lot you can do with image prompts, and they’re worth exploring.
Step by step: Create an image prompt
- Drag and drop one or more images into the image prompt box.
- Add concise text that clarifies style, mood, and key elements.
- Submit, review, and adjust with small edits for fast iteration.
Midjourney V8 Tips: Omni Reference for consistent subjects
Omni Reference lets you place a person, character, object, vehicle, or creature from a reference image into your creations. It currently works with the V7 family and is not compatible with features like inpainting or outpainting that still use V6.1. It costs more GPU time than regular V7 images and doesn’t work with fast, draft, or conversational modes.
Combine Omni Reference with a clear text prompt and reinforce any stylistic direction in the beginning and end of your prompt. If you want a different style than your reference, mention it plainly and consider lowering the Omni Reference weight, then reinforce physical traits in text. Use the Omni Reference weight parameter to control how much detail carries over.
How to use Omni Reference
- Upload your image and add it to the Omni Reference section or use the –oref parameter with a valid image URL.
- Add a clear text prompt that specifies scene, style, lighting, and important physical traits.
- If results drift, adjust the Omni Reference weight and restate critical details in text.
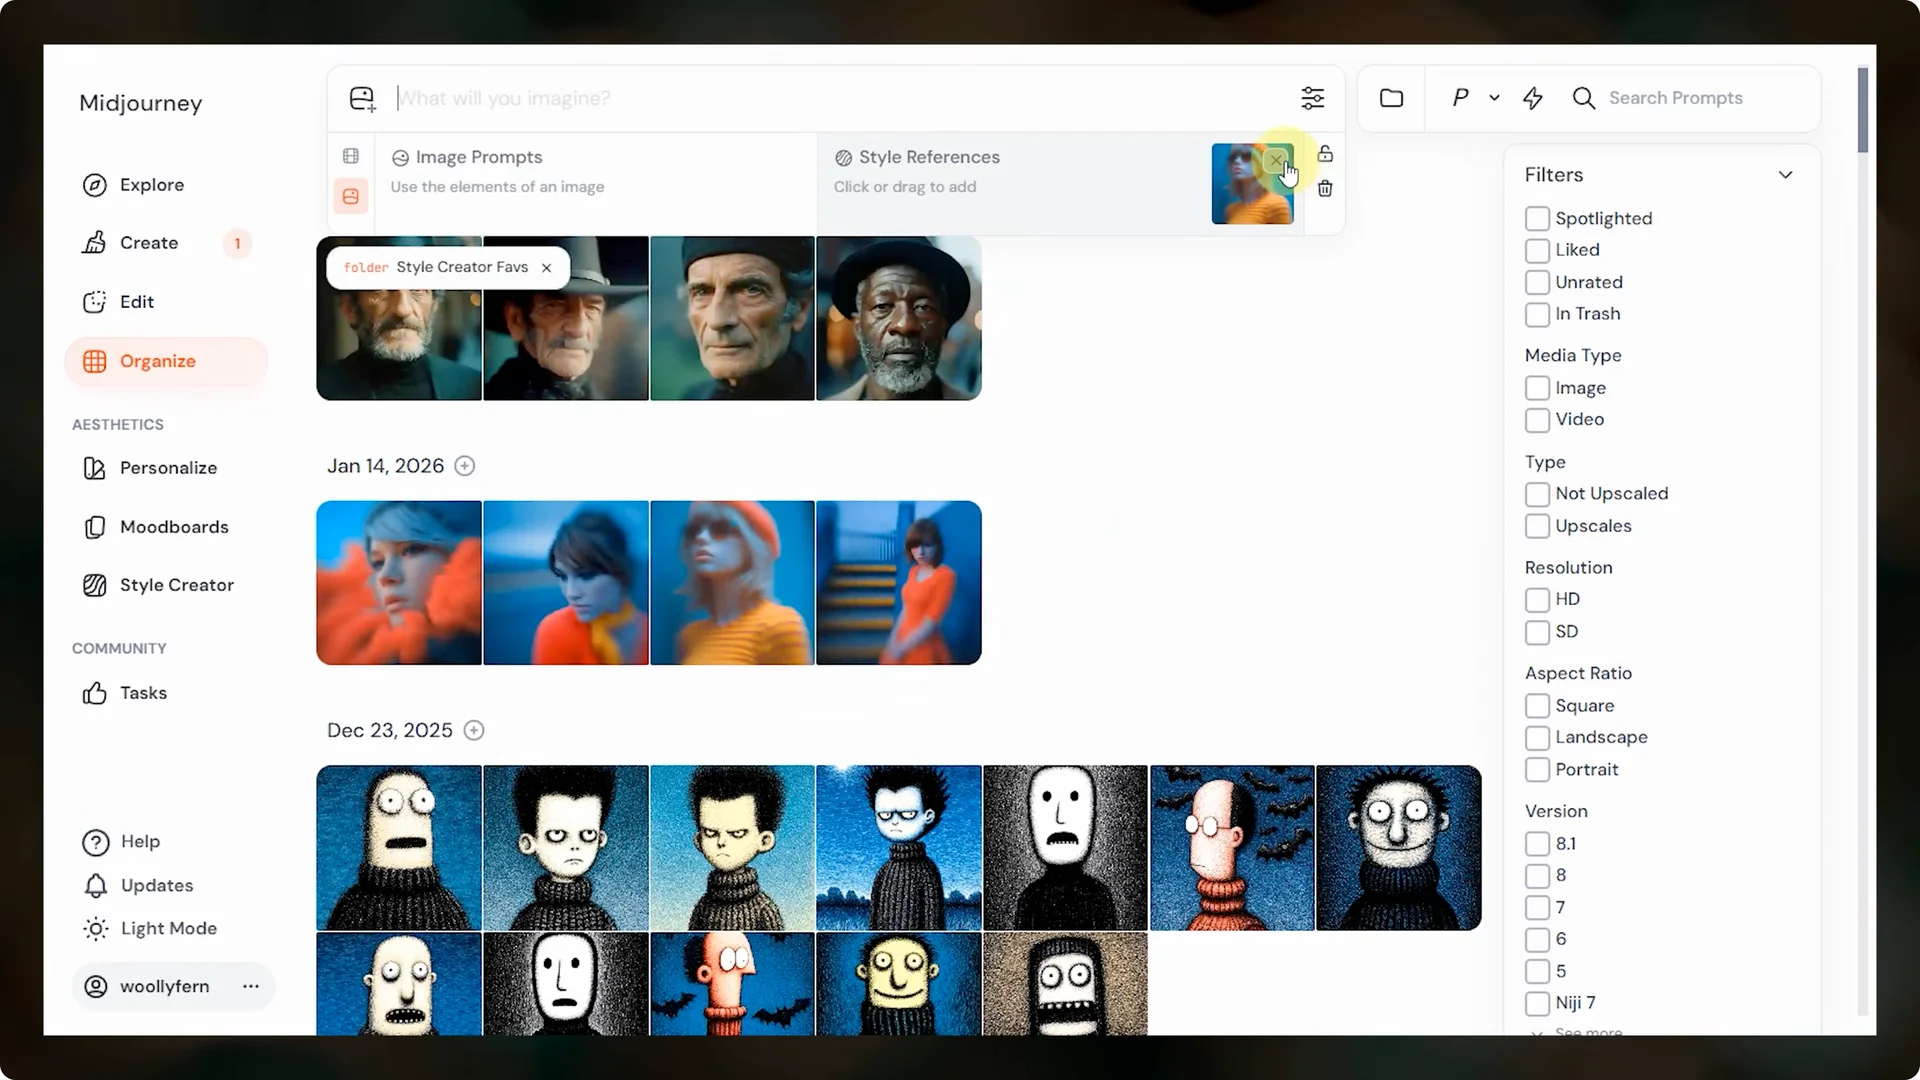
Midjourney V8 Tips: Old SREF codes in V8
Older SREF codes from the V6 SV4 system may not behave the same in V8.
A reliable workaround is to find an image you created with that code that best represents the style and use that image as your style reference. Create a folder in your gallery with representative images so you can reference them quickly.
Drag the chosen image into the style references box, then run your prompt. A looser alternative is a mood board, but style references are stricter and better for consistent results.
For style ideas and reusable examples, you can explore painting SREF codes for wall art and adapt them to your workflow.
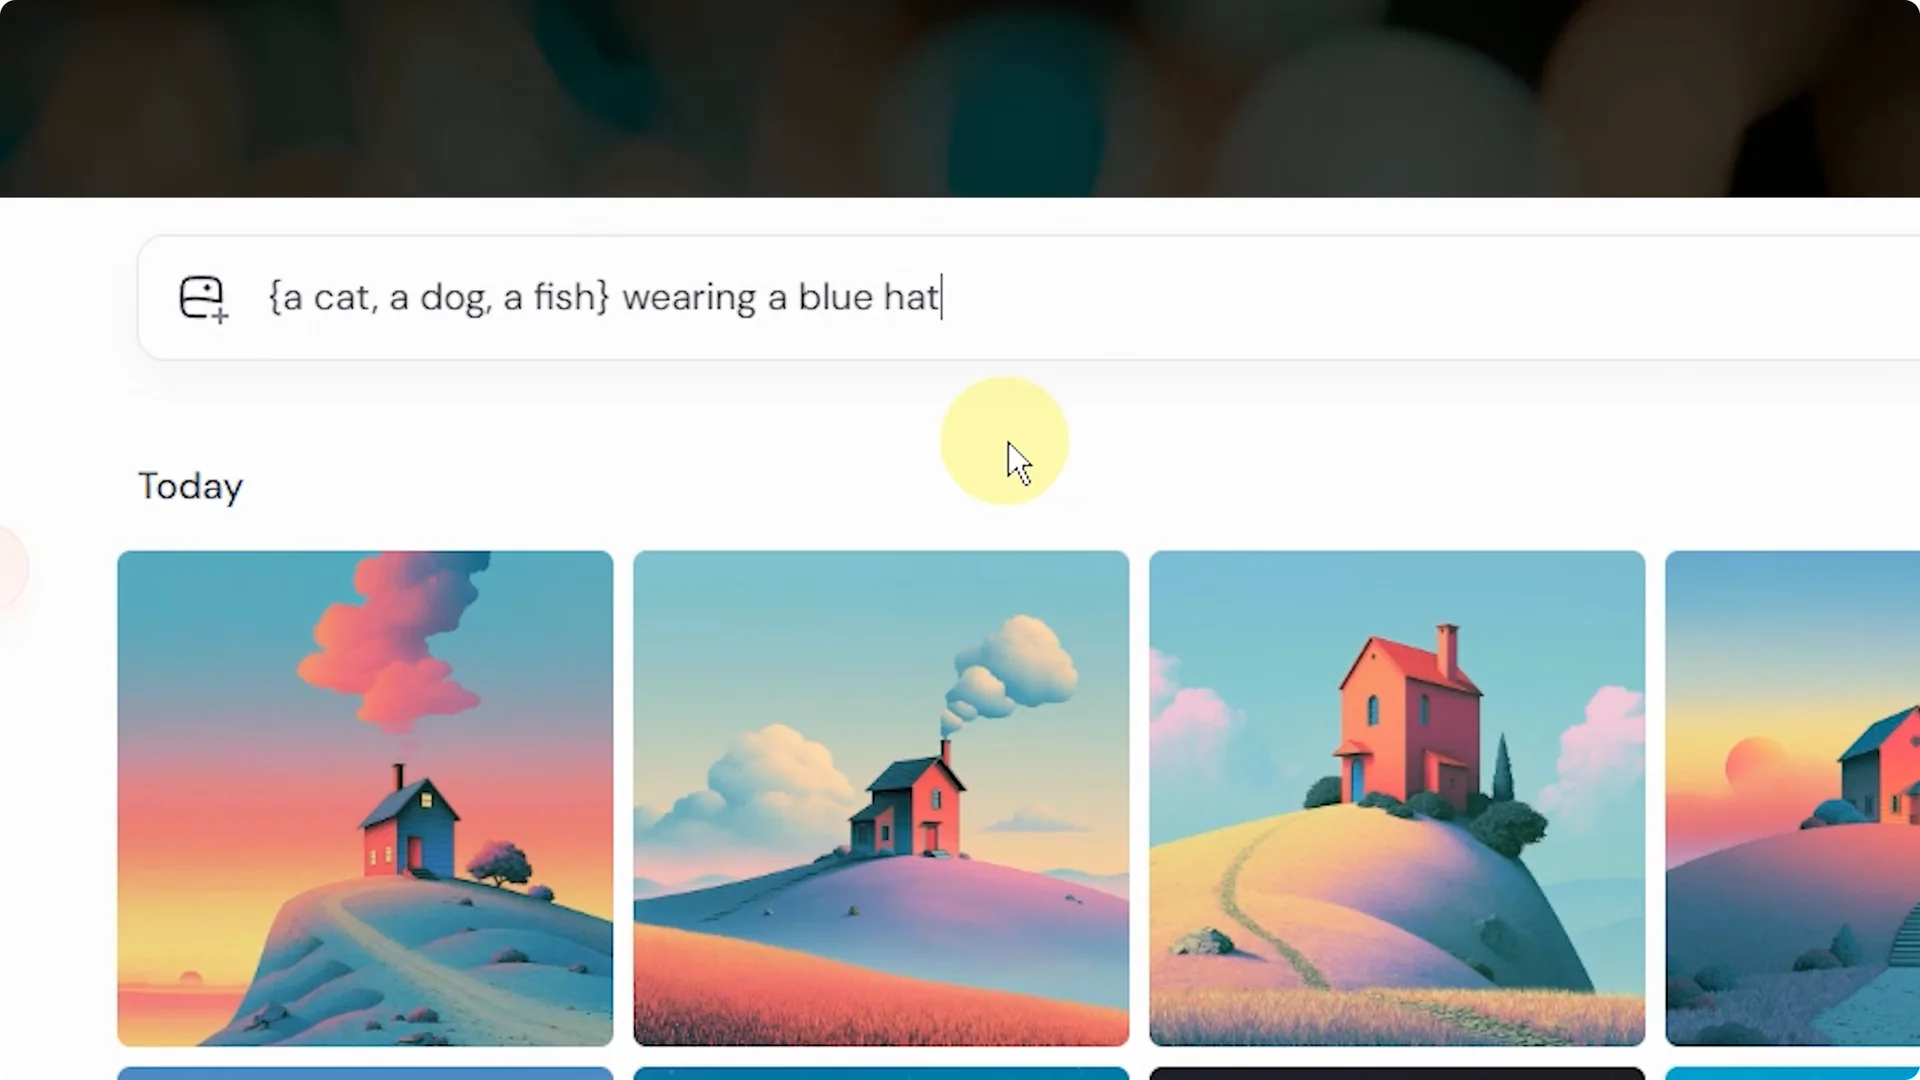
Midjourney V8 Tips: Permutation or batch prompts
Permutation prompts let you test multiple ideas at once using curly brackets with comma separated items.
Midjourney runs one prompt for each item inside the brackets, which makes it fast to compare phrases or parameter settings. Batch prompts only run in fast mode and will use your monthly fast hours.
Here’s a simple mental model. Put the variable words inside curly brackets and keep the rest of your prompt outside. Submit once and review multiple outputs side by side.
How to write a permutation prompt
- Place your variations inside {curly brackets}, separated by commas.
- Keep the constant parts of your prompt outside the brackets.
- Submit in fast mode, then compare and refine the winner.
Final Thoughts
V8.1 gives you stronger prompt adherence, cleaner details at HD, and better text rendering with the right stylize settings. Be specific, control the stylize or raw mode when needed, and lean on Describe, image prompts, and style references to iterate quickly. For character consistency across sessions, use Omni Reference in V7 and style references or curated images in V8.
If you’re building a personal workflow, consider conversation mode for quick edits and permutation prompts for rapid testing. Small, precise changes add up to consistently better results.