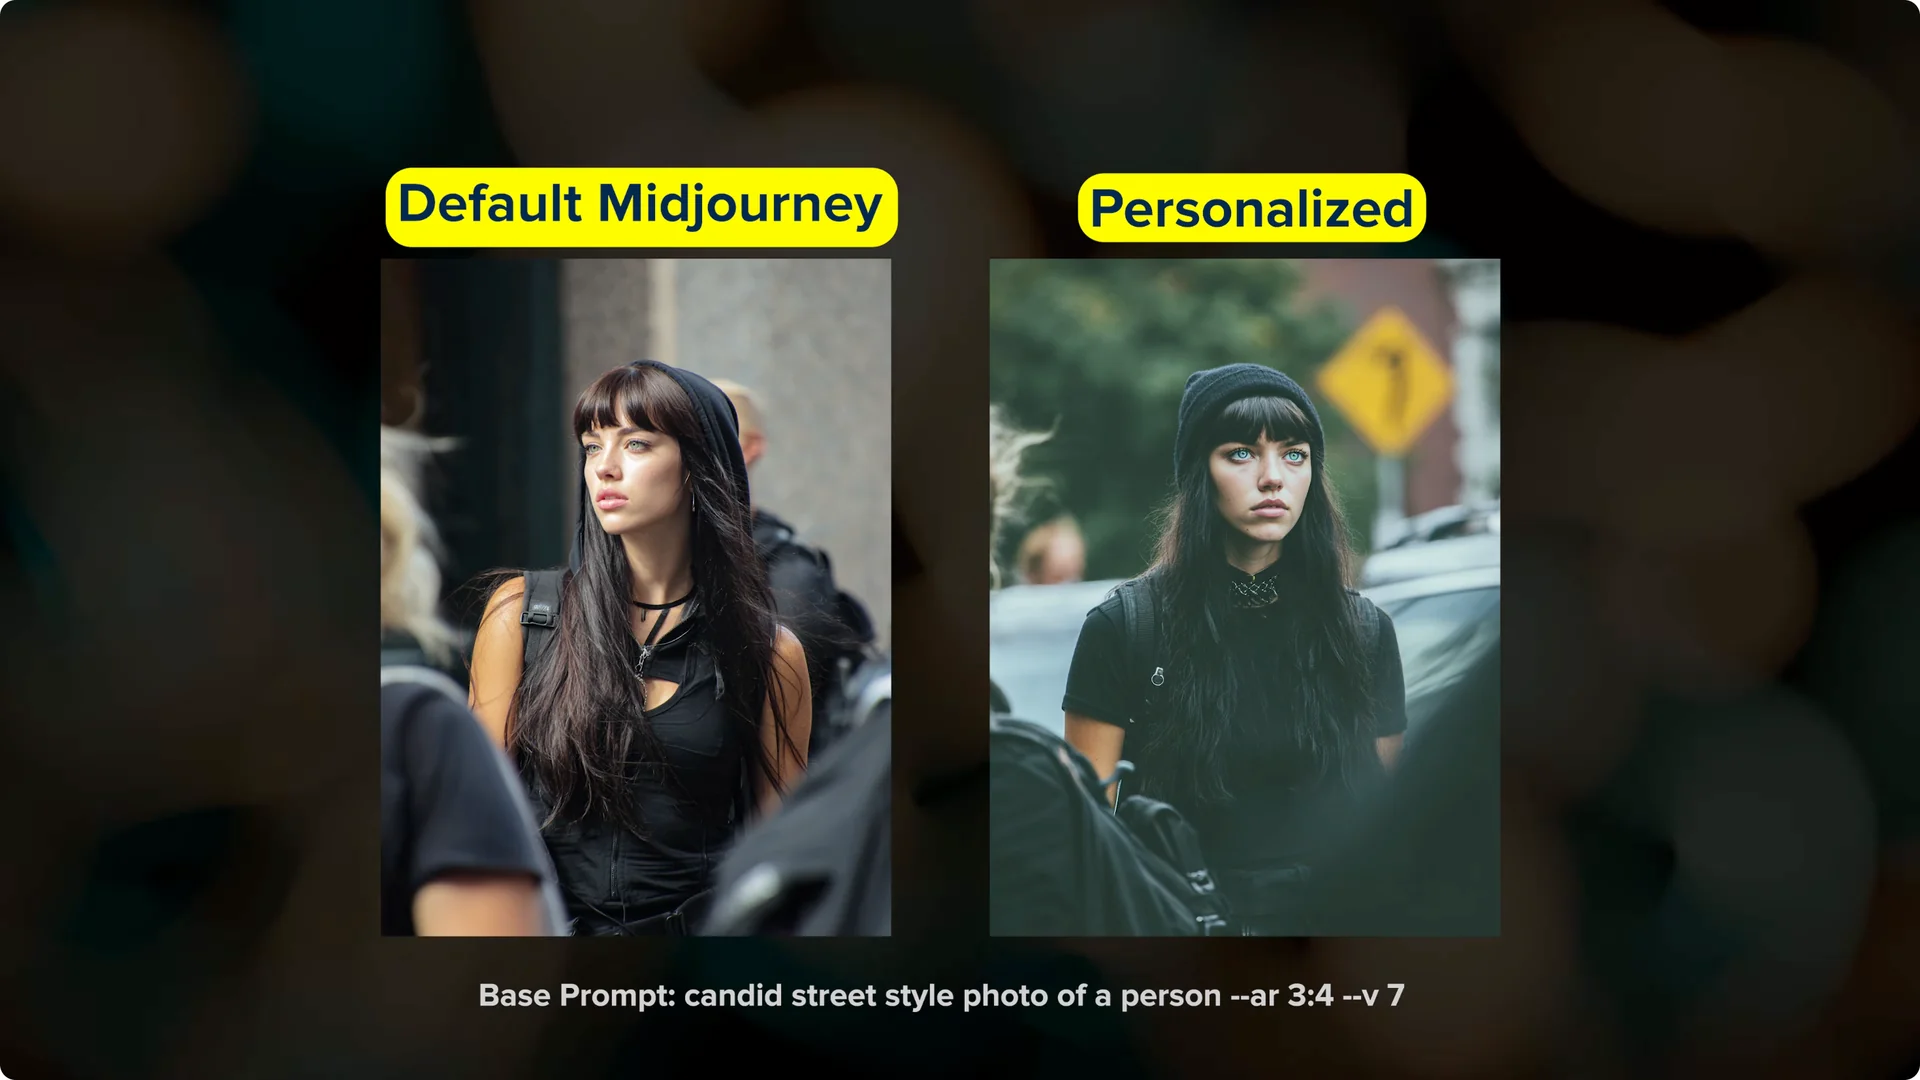
Each Midjourney model has its own default aesthetic. Preferences include colors, lighting, texture, and if results tend to lean photographic or illustrative. Personalization lets you override that default with your own aesthetic preferences.
You teach Midjourney what you like by selecting images from a grid, and it uses that to build you a custom profile. When I compare the same prompt with and without my personalization, I see clear differences in color palette and mood. I like to think of personalization as asking Midjourney, “What would this look like in my world?”
What Midjourney Personalization Profiles Do
Your results will look different from mine because your profile is built from your selections. The goal is to align outputs with your taste, not mine. That is why the selection process matters.
This system pays attention to what you pick and also what you pass by. Every scroll past an image without clicking is also a signal. Over time, the image grid adapts and shifts toward your preferences.
Set Up Midjourney Personalization Profiles
Start with your global profile
Step 1: Go to the personalize page. You will see a space for your profile that might say continue ranking to unlock.
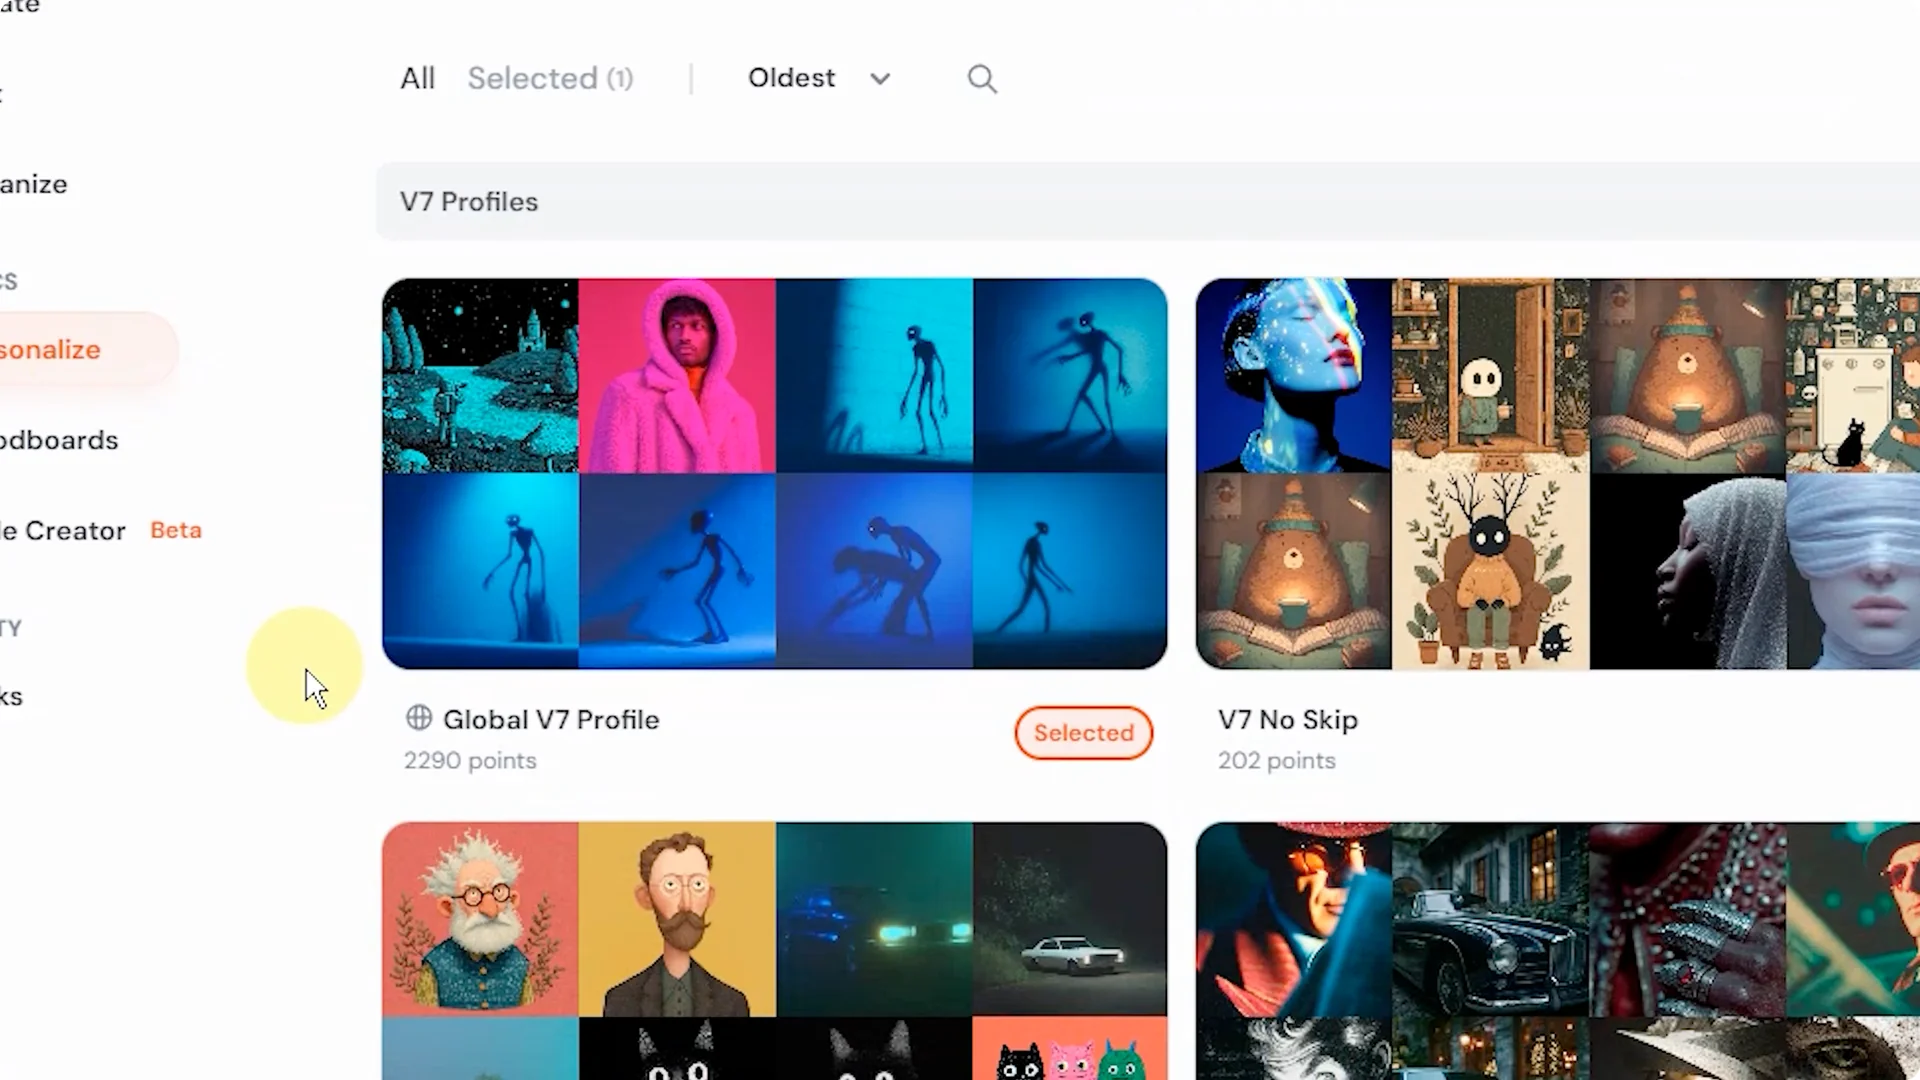
Step 2: This is your main default personalization profile, and it is the one to start with if you have never set one up. We will cover multiple profiles later.
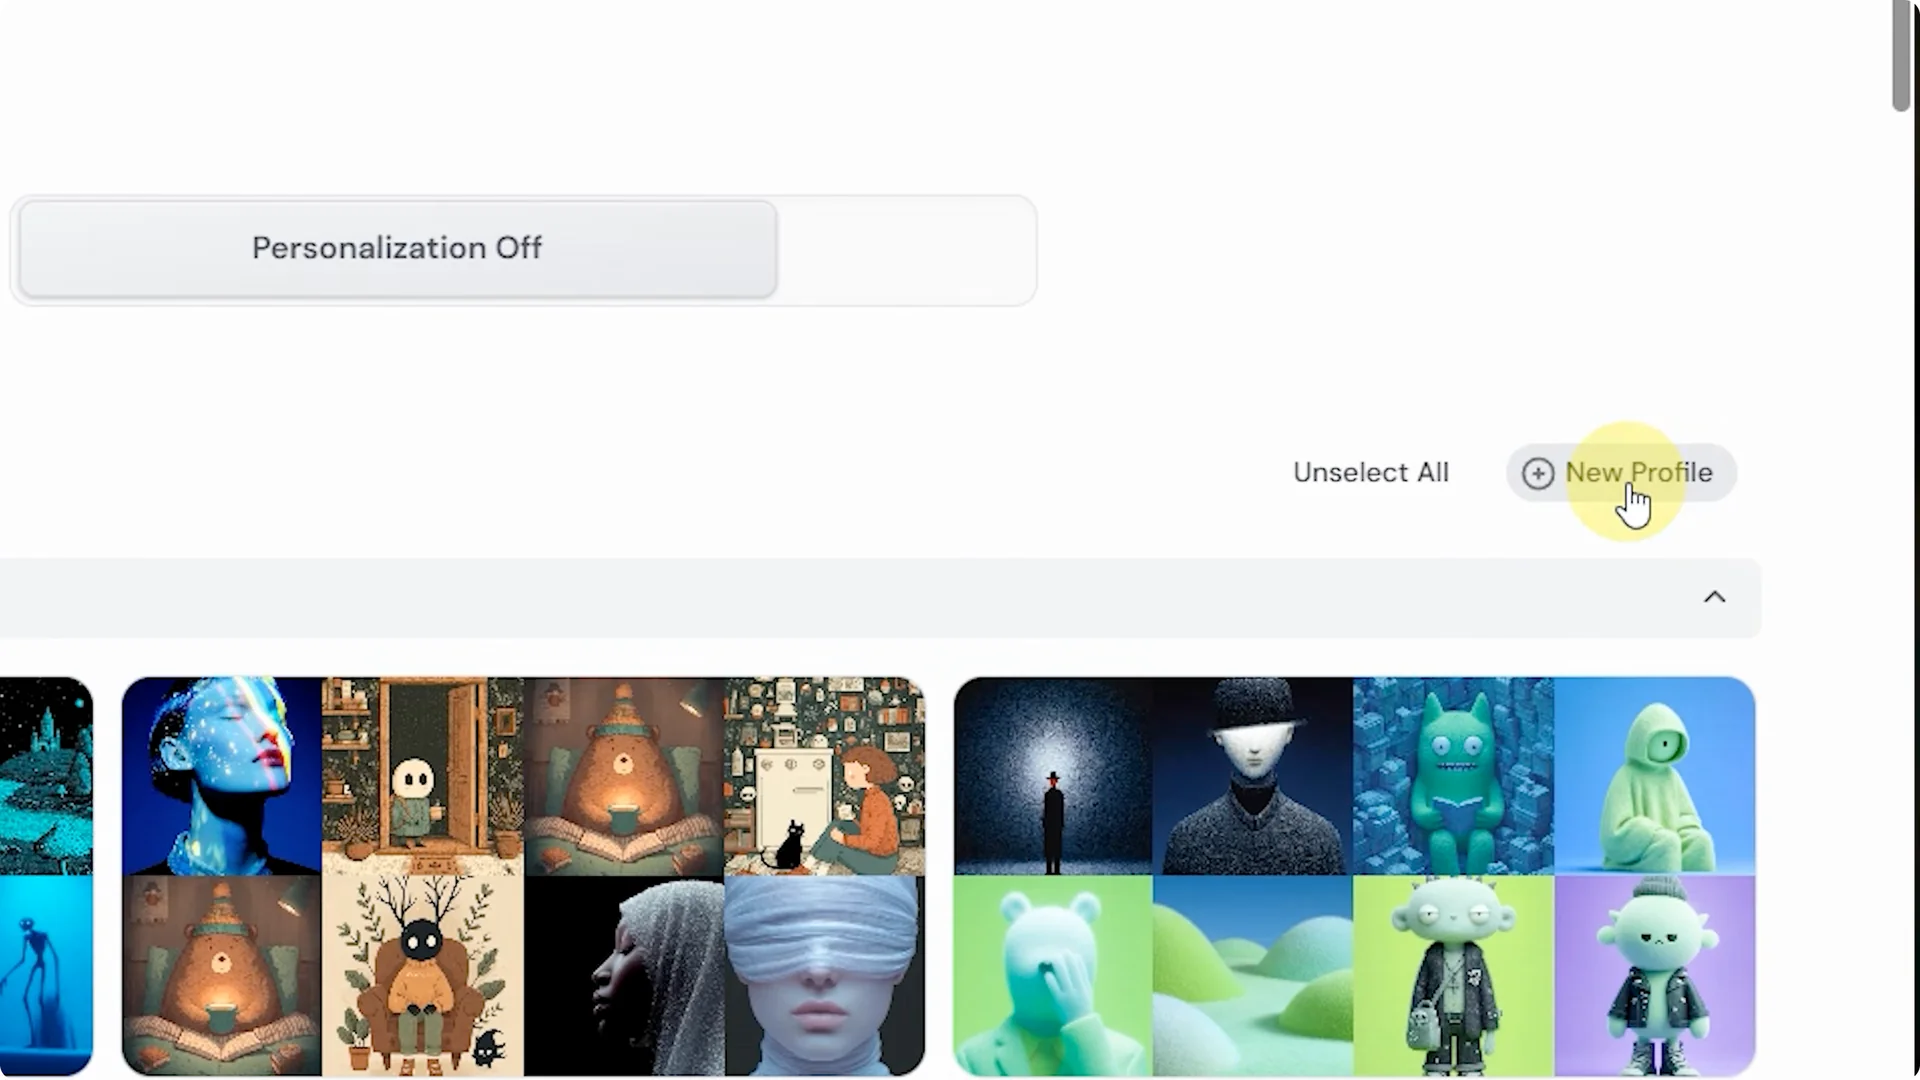
Step 3: Click your global profile to begin. This opens a scrolling image grid, which is the new interface as of late February 2026.
Step 4: If you remember the older pair-selection flow, this grid replaces it. I recommend switching to the four-column view so you can see more images at once. Seeing more options helps you move faster and stay consistent.
Make strong selections
Step 5: Scroll and click on the images you like. Do not overthink it. Pick based on overall vibe, color palette, lighting, and texture.
Step 6: Midjourney tracks what you select and what you do not select. Passing on an image is still information. As you select, the grid updates to lean into your aesthetic.

Step 7: If you choose many black and white cartoon illustrations, you will start seeing more in that direction. This feedback loop is intentional. Keep going until your grid feels aligned.
Unlock and refine
Step 8: Track your progress in the upper right. You need to reach at least 550 points to unlock your profile.
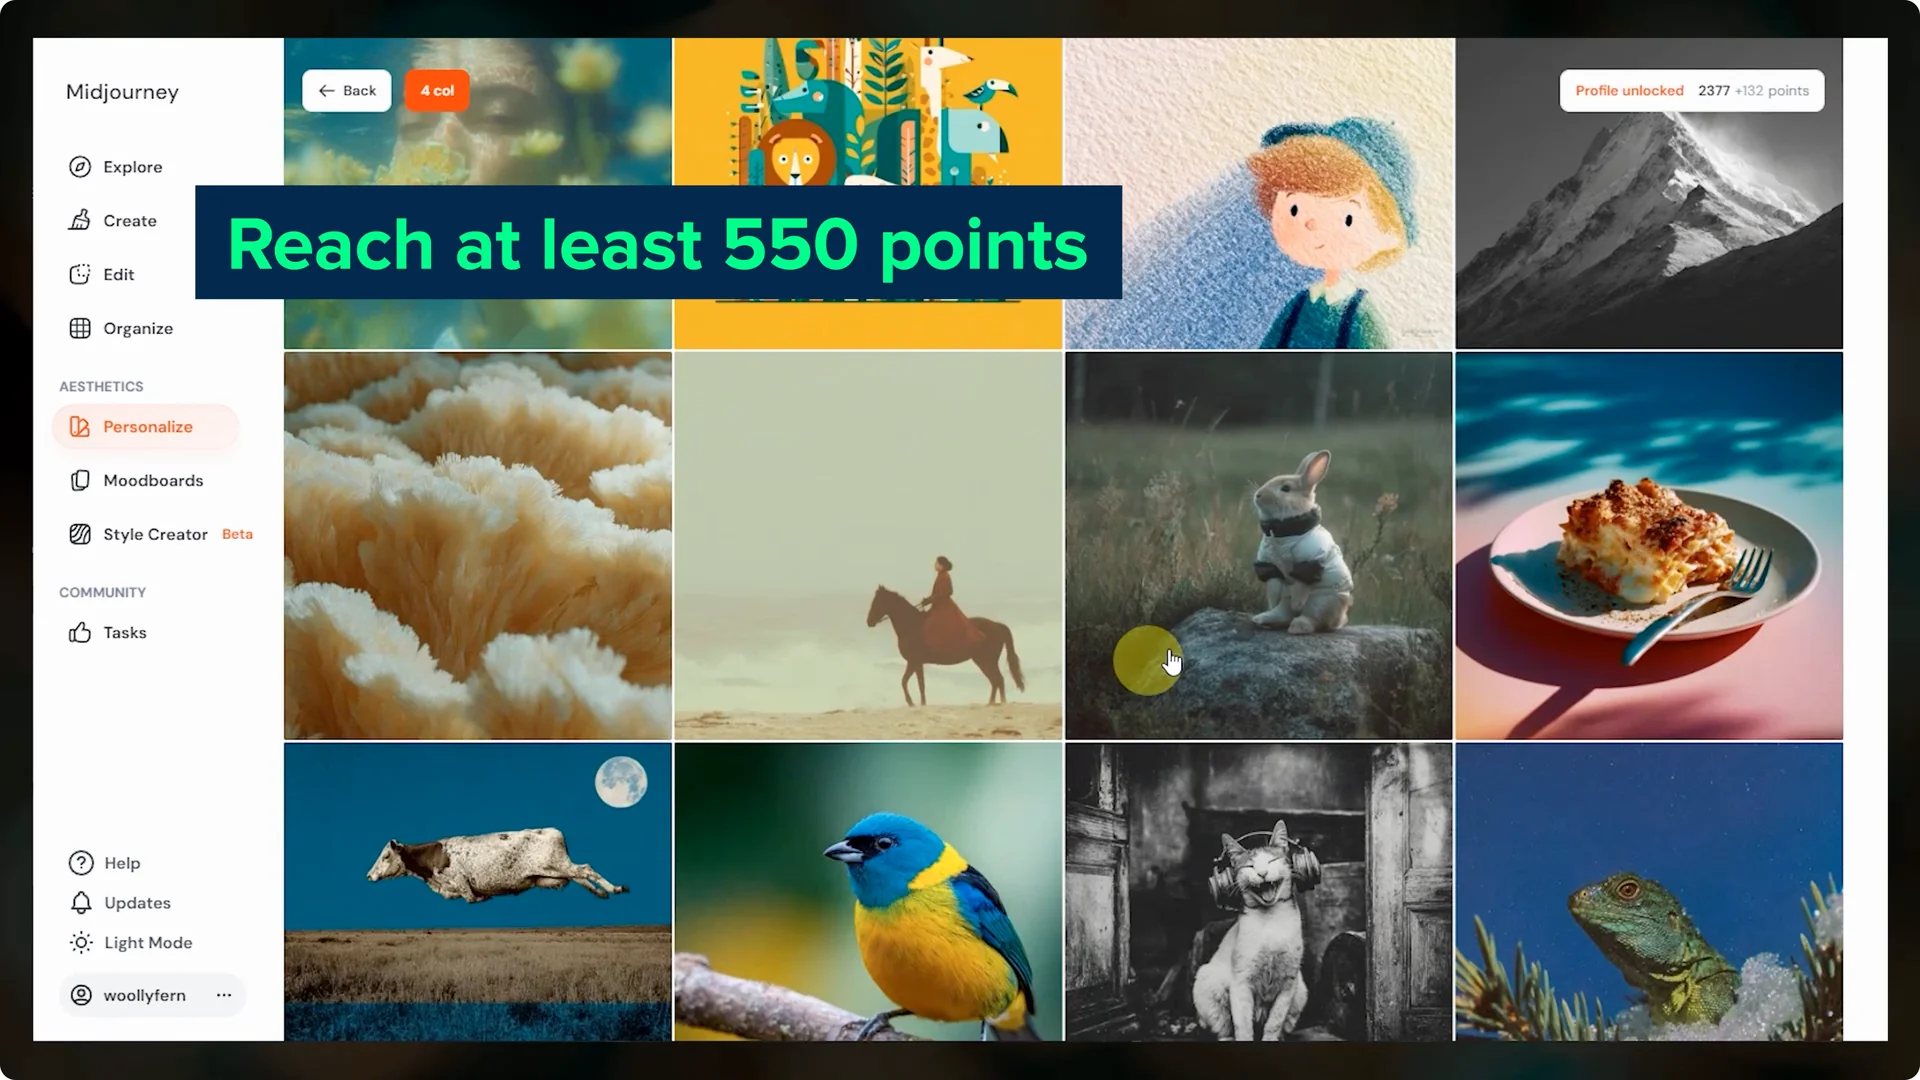
Step 9: Once you hit 550, you will see a confirmation that your profile is unlocked. You can test it immediately or keep selecting to refine it further.
Step 10: You can stop at any point and return later to make more selections. The interface may change a bit over time, but the core flow remains the same.
Use Midjourney Personalization Profiles While Prompting
Step 1: On the create page, click the P button next to the prompt bar until it turns red. Red means personalization is active.
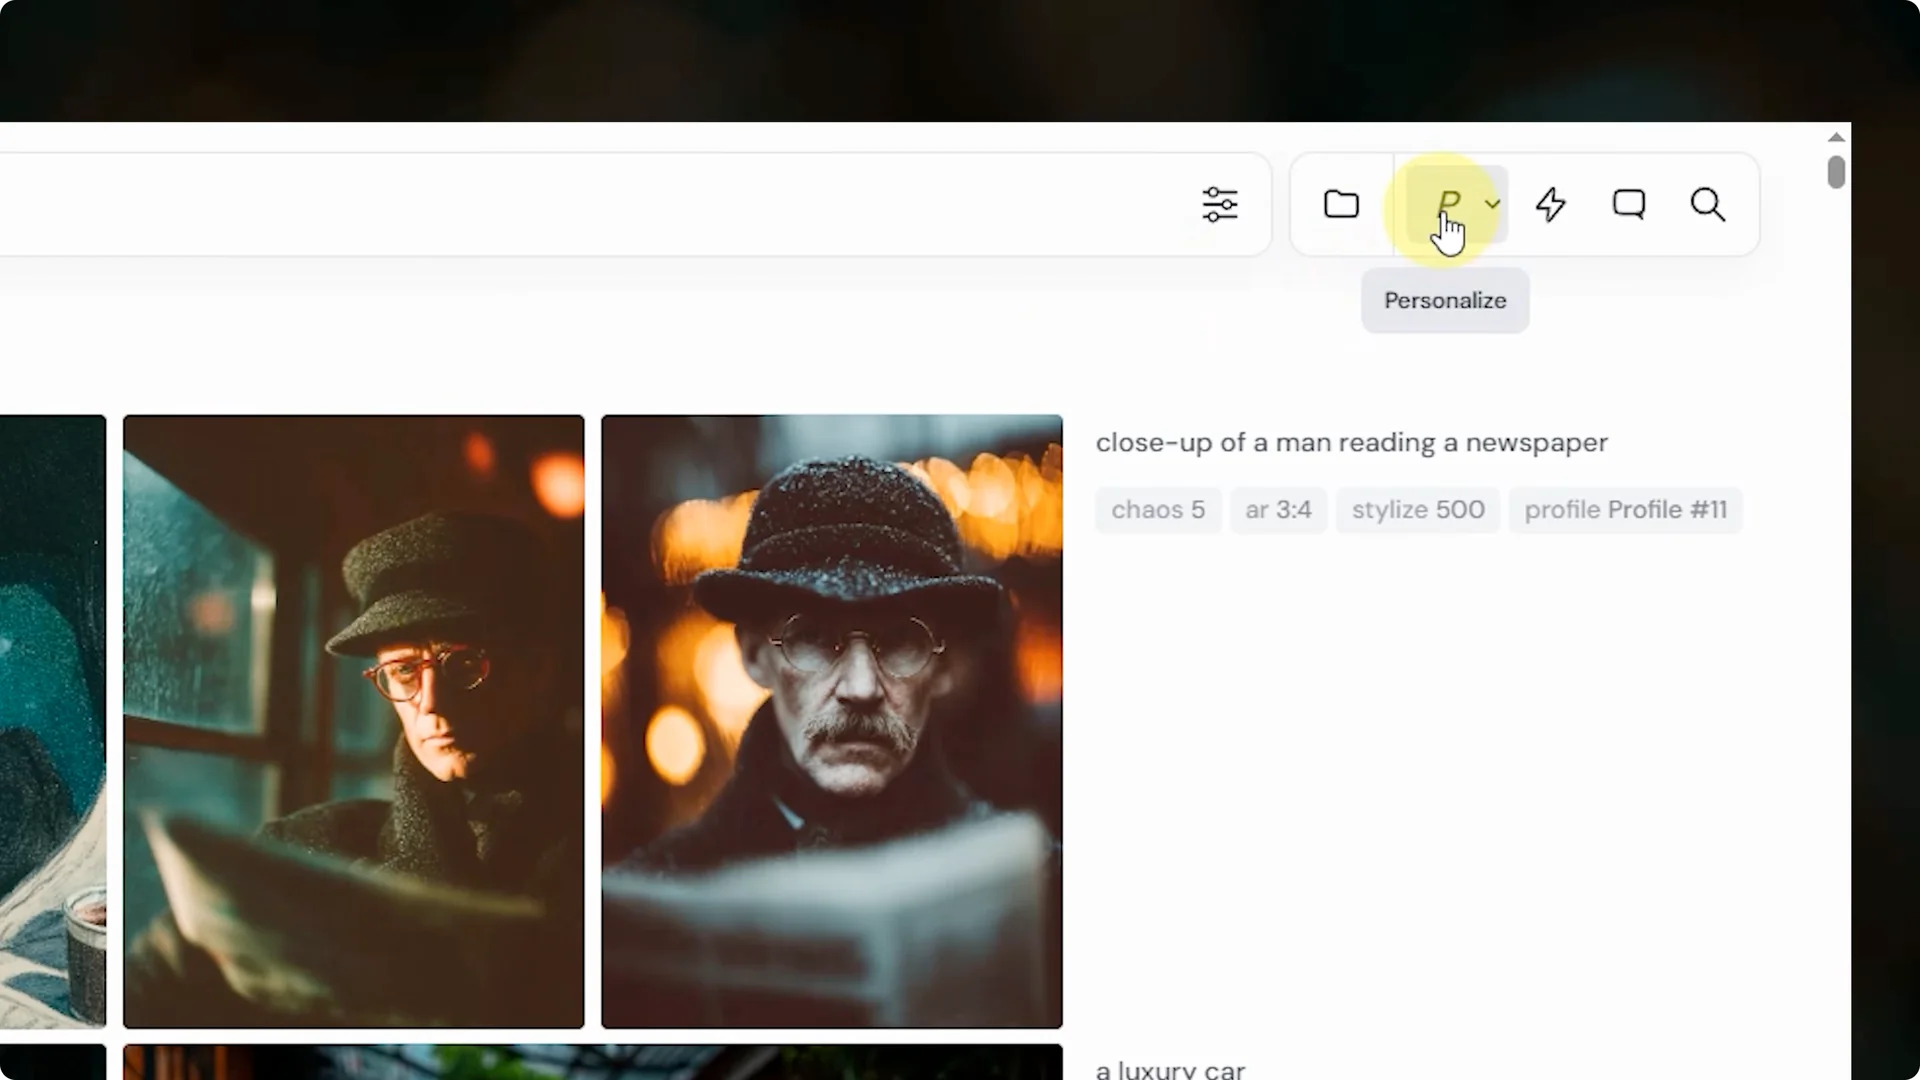
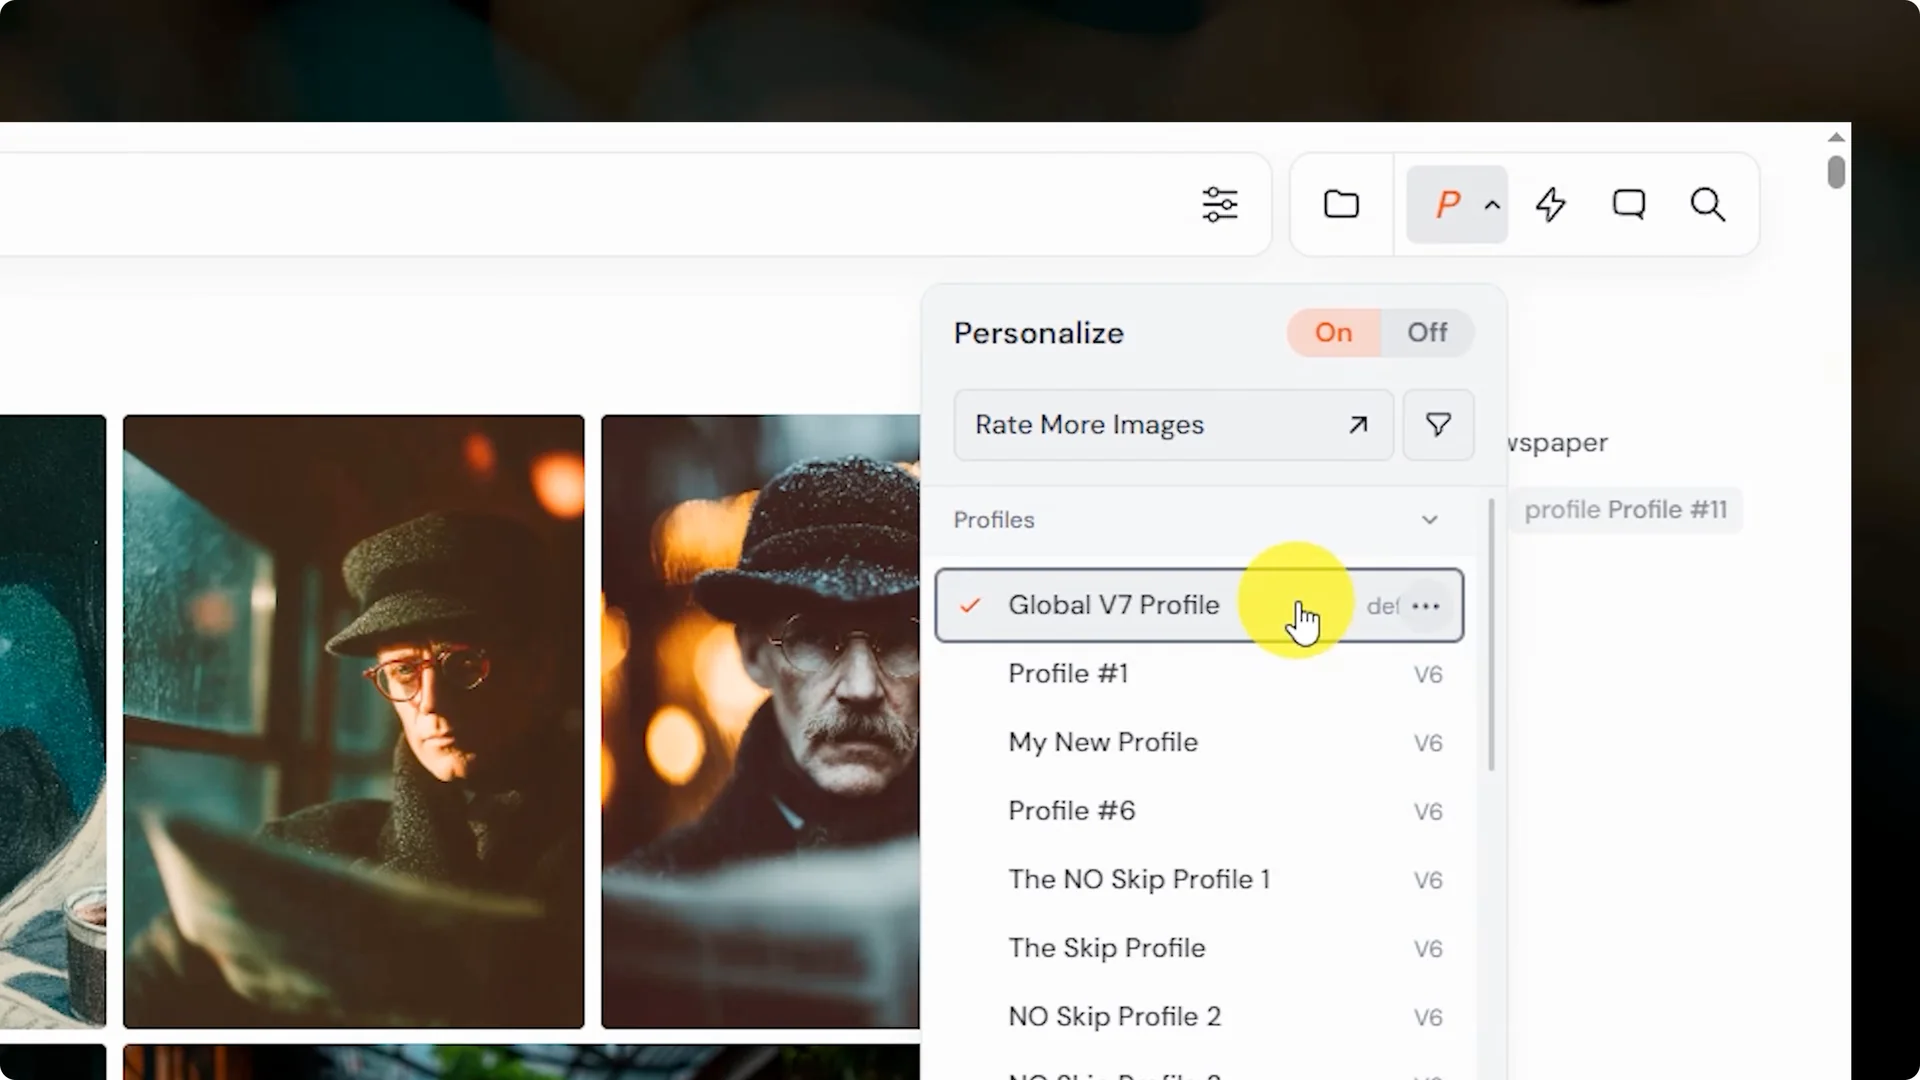
Step 2: Open the dropdown to confirm which profiles are selected. For now, ensure your global profile shows as default or has a red check.
Step 3: Prompt like normal and Midjourney applies your profile automatically. If you want help improving prompt structure, see this prompt guide.
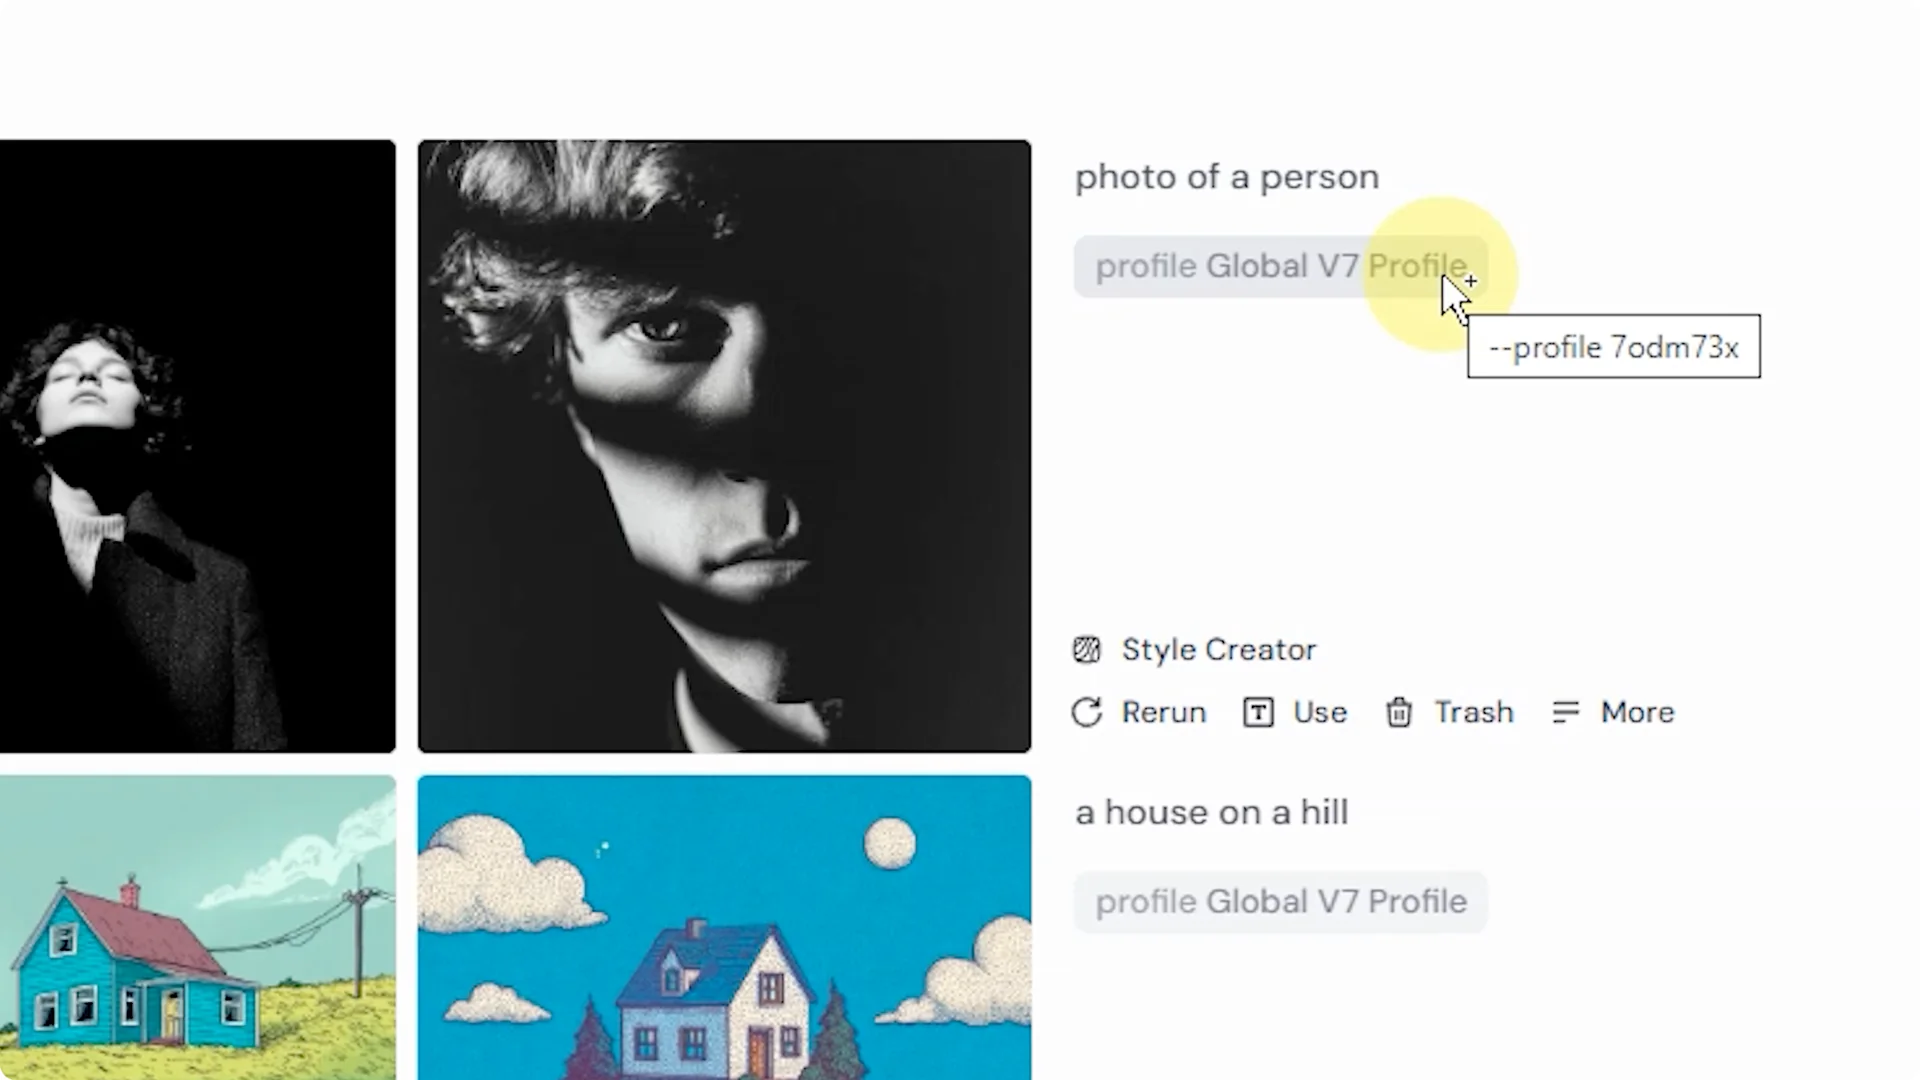
Step 4: On the right, you will see a profile tag on your results along with a short alphanumeric code that represents your profile. You can share this code with others to use in their prompts. Turn the P button off to disable personalization.
Step 5: Run a few simple prompts with and without personalization to learn the effect. Try a person, a cat, and a house. My global V7 profile tends to add a teal tint and a moodier feel.
Read More: Hide Midjourney Images On Your Profile
Control the Influence With Stylize
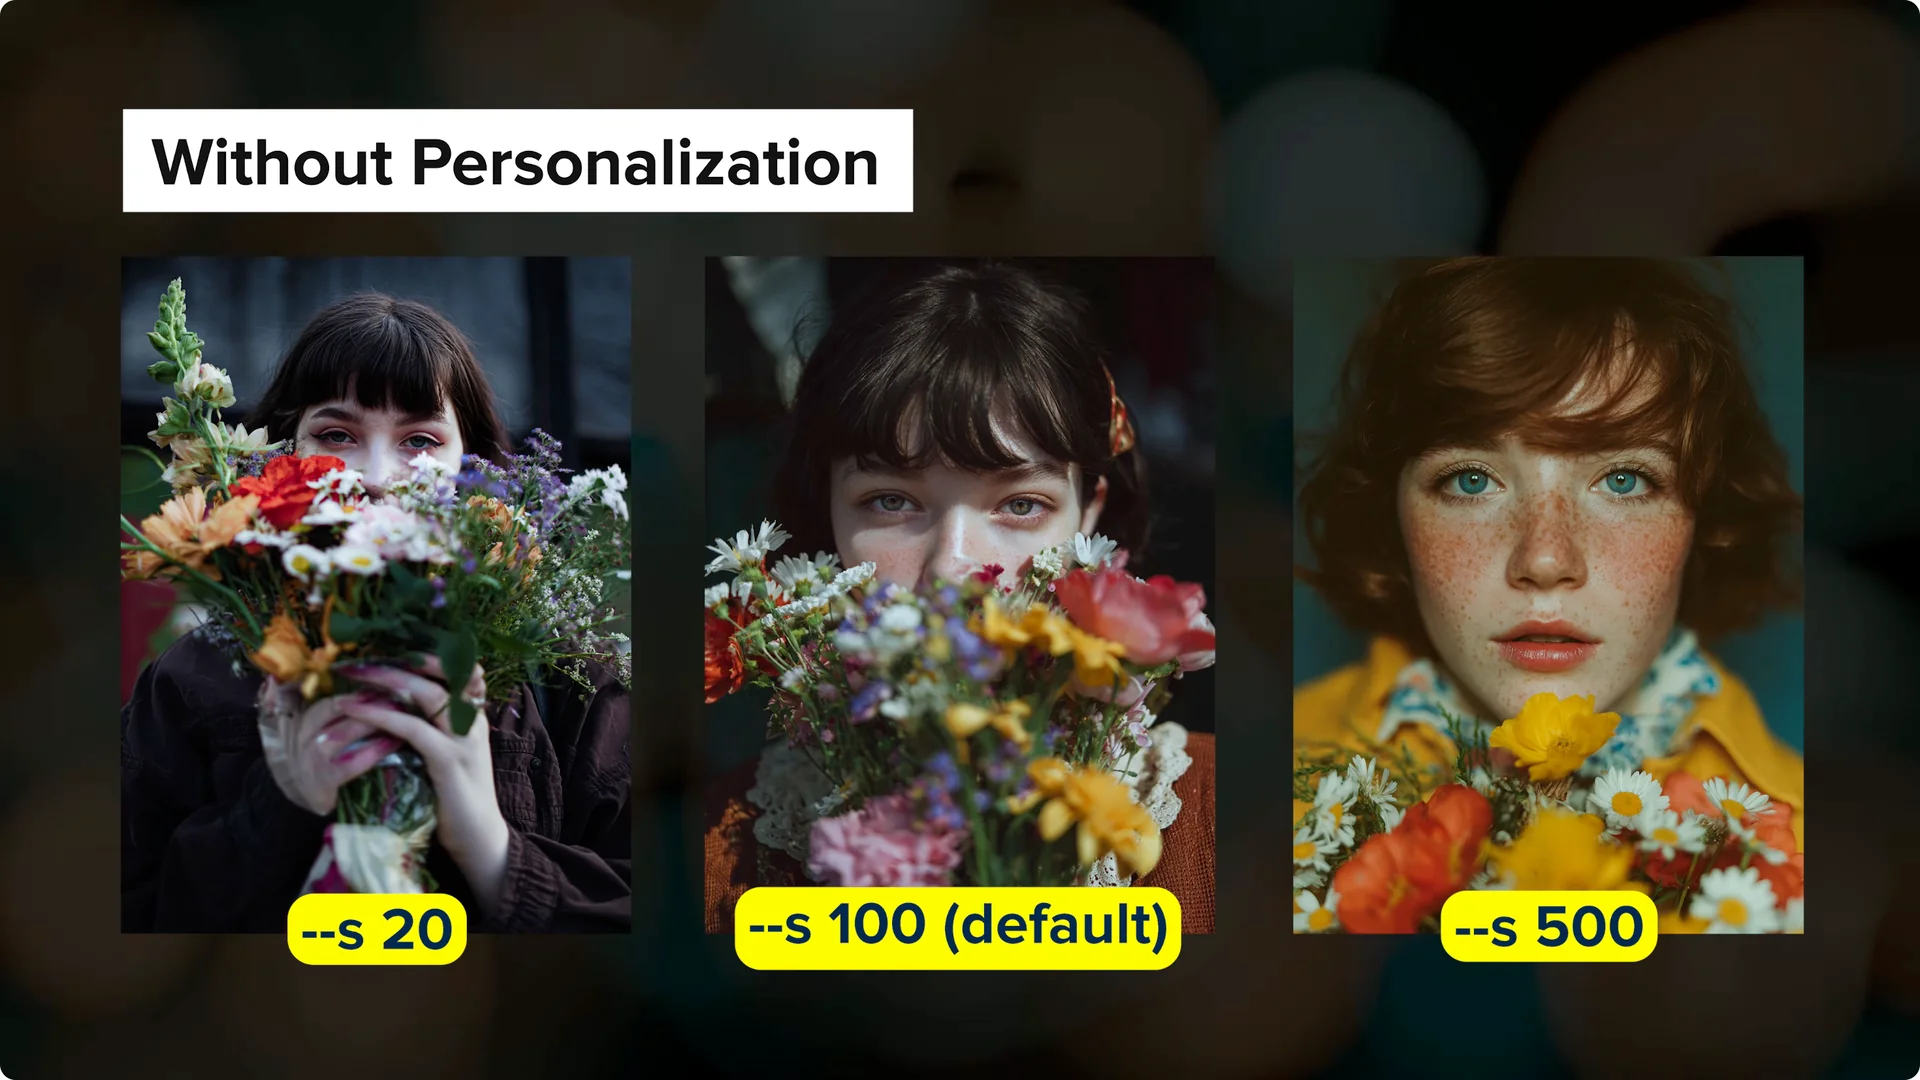
The stylize parameter controls the strength of Midjourney’s aesthetic effects on a scale from 0 to 1000. The default is 100. Lower it to reduce the effect of your personalization, or raise it for a stronger push.
One key detail is that stylize can control several things depending on your prompt. When personalization is active, stylize controls the strength of your personalization instead of the default Midjourney aesthetic. Stylize is also used for mood boards, though that is outside this guide.
If you are exploring deeper V6 controls and techniques beyond personalization, take a look at this advanced V6 guide.
Create and Manage Multiple Midjourney Personalization Profiles
Step 1: You can add more profiles beyond your global one. On the personalize page, click new profile and repeat the same selection process until it unlocks.
Step 2: Return to the personalize page and click the profile name to rename it. Keep names descriptive so you can recognize them at a glance.
Step 3: To use a specific profile, click its button to add the long profile code to the prompt bar. Add your prompt text and submit the job.
Step 4: On the create page, that long code converts to a shorter alphanumeric code you can reuse in future prompts. You can also activate personalization and choose your profile from the dropdown instead.
If you are building portrait-focused profiles and want to work with identity-driven prompts, see how to add your face to Midjourney images.
Understand and Share Profile Codes
Each alphanumeric code is a snapshot of your profile at a specific moment in time. You can reuse these codes and share them, and they will reproduce that version of your profile. Every time you make more selections, the profile updates and a new code is generated.
Older codes still work and point to the older version. If you want to be sure you are using the latest version, either grab the long code again from the personalize page or select the profile from the dropdown. The dropdown always pulls the most current version.
Global Profile vs Other Profiles
Your global profile acts as the universal default for a specific model. If you type a prompt and add –p with no code, Midjourney uses your latest global profile for that model. It does not pull from your other profiles.
To use a non-global profile, include its alphanumeric code after –p or activate personalization and select the profile you want. Liking images on the explore page updates your global profile only and does not affect your other profiles.
Read More: Hide Midjourney Images On Your Profile
Blend Profiles For New Results
You can blend multiple personalization profiles together. Activate personalization and select multiple profiles from the dropdown, then submit your prompt. Each selected profile is weighted equally.
You can also paste multiple profile codes after the profile parameter and separate them with spaces. Blending is a fast way to combine distinct or complementary aesthetics into fresh results. Test a few combinations to see how your look evolves.
Final Thoughts
Personalization teaches Midjourney your taste and shifts outputs toward your world. Select deliberately, reach 550 points, and refine over time. Use the P button, manage stylize for strength, and explore multiple profiles, codes, and blends.
If you want to go deeper into creative control while prompting, this advanced Midjourney V6 guide pairs well with personalization. And if you need a quick refresher on prompt structure, revisit the Midjourney Prompt Guide.