
Today, I’m excited to walk you through how to create stunning book cover art using MidJourney. From brainstorming ideas to refining your design, we’re going to cover it all. Make sure to check the other blog posts for additional resources and prompt examples.
Brainstorming the Concept
The book cover is the face of your story—it needs to capture the essence of your book’s theme and mood. Whether you’re working on a fantasy novel or a thriller, your concept is key to making your cover stand out.
Let’s start by brainstorming a strong visual idea. For this demonstration, I’ll choose a fantasy theme. Imagine a young sorcerer standing on a misty cliff, casting a spell with swirling magical energy surrounding him.
The goal is to achieve a mystical and powerful atmosphere.
Here’s how you can formulate a prompt for this concept:
- Theme: Fantasy
- Main Character: A young sorcerer
- Setting: Misty cliff
- Action: Casting a spell with magical energy
Setting the Image Size
Before we proceed to generate the image, we need to determine the image size. If you’re planning your book cover, it’s essential to choose the right dimensions.
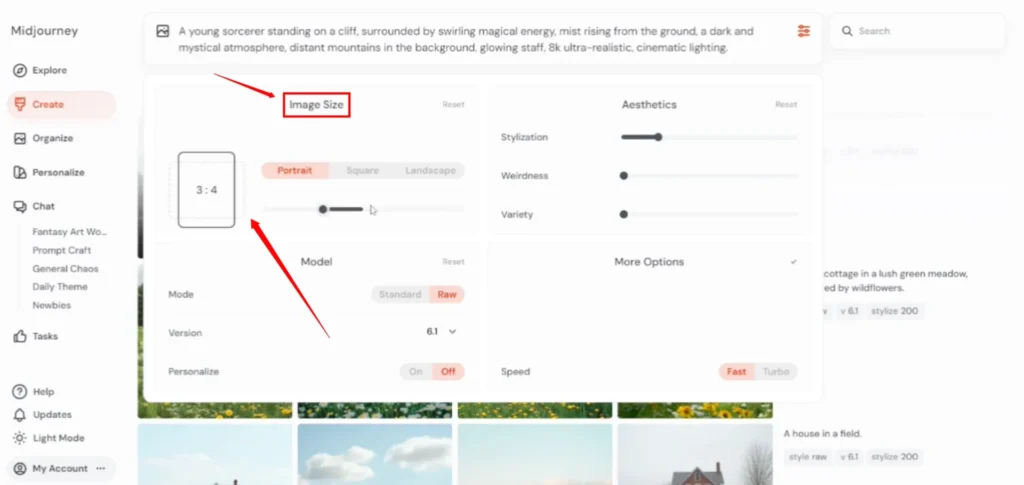
For most book covers, a portrait orientation works best, and that’s what I’m going with for this demonstration.
Now, let’s send the prompt to MidJourney and see what it generates.
Creating the Initial Design
MidJourney’s image generation process might take a little while, but be patient—the results are worth it. After a short wait, the system produces several options.
Reviewing the Results
Take a look at what MidJourney has created. In this case, we’ve achieved the magical atmosphere we were aiming for, with the sorcerer standing against a misty backdrop. The lighting in this particular image stands out, adding depth to the scene.
Now that we have a solid concept, it’s time to bring it to life. This is where we start to refine the vision in MidJourney.
Be Specific with Your Prompts
The more specific your prompt, the closer you’ll get to your imagined cover. Let’s change things up and go for a futuristic vibe next.
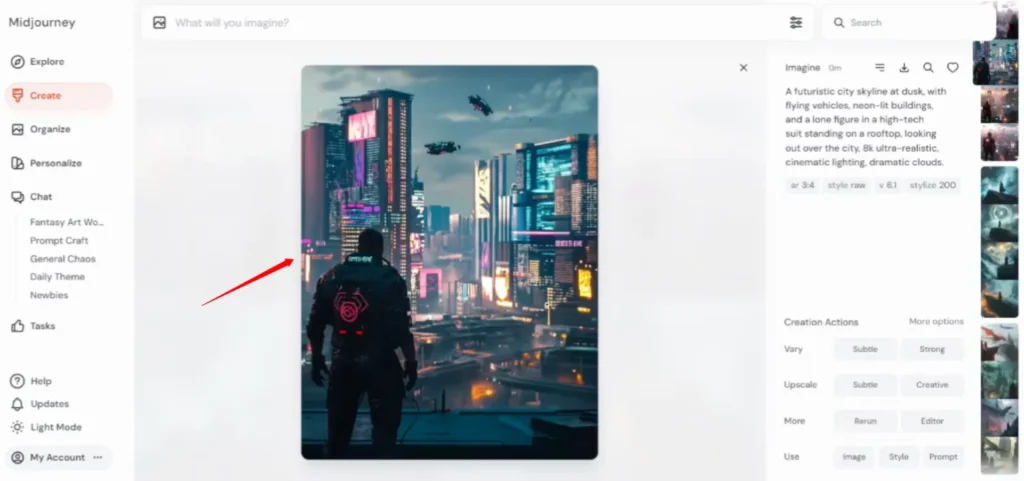
For example, imagine a city skyline at dusk, illuminated with neon lights, and a lone figure gazing out over the landscape.
Here’s how I would phrase this prompt in MidJourney:
- Theme: Futuristic
- Main Element: City skyline at dusk
- Details: Neon lights
- Character: Lone figure on a rooftop
Let’s send this prompt off and see what MidJourney generates.
Refining the Design
Once again, the generation process might take a few moments, but the result is impressive.
Reviewing the Futuristic Concept
The neon lights and the lone figure on the rooftop give this image a cinematic, futuristic feel. The lighting is perfect, making it visually striking.
This could work as a backdrop for a sci-fi book cover, with the title and author’s name placed strategically to complement the artwork.
You can easily envision the text overlaying this image without overshadowing the art itself. The details and atmosphere are eye-catching, making it an ideal book cover.
Adding Text and Final Touches
Now, let’s bring in the text—your book title and author’s name are just as important as the artwork. The text needs to stand out while complementing the design.
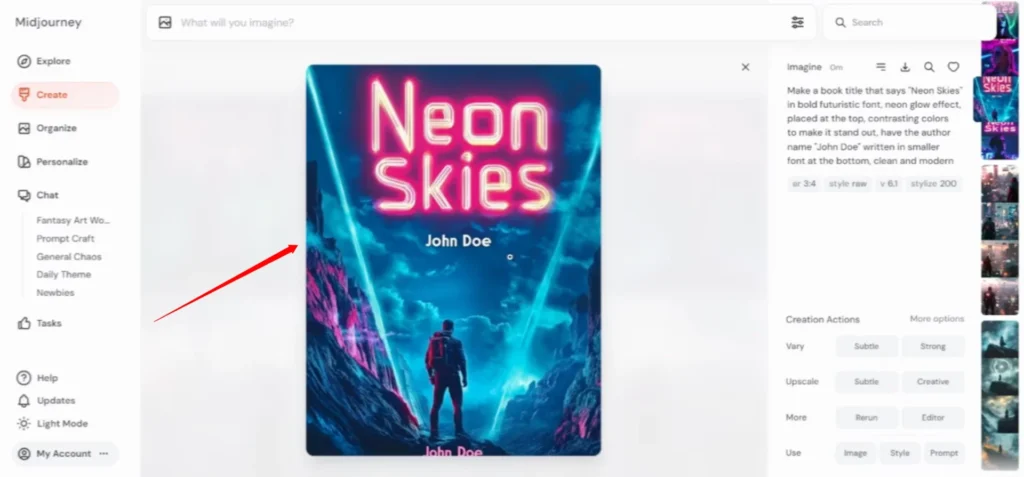
For this sci-fi cover, I want the title to pop, so I’m choosing a bold, modern font with a neon glow effect to match the futuristic vibe.
Creating the Text
Here’s the prompt I would use for adding text:
- Title: Use a bold font with a neon glow
- Author’s Name: Smaller, modern font at the bottom

Let’s submit this and see how MidJourney integrates the text with the image.
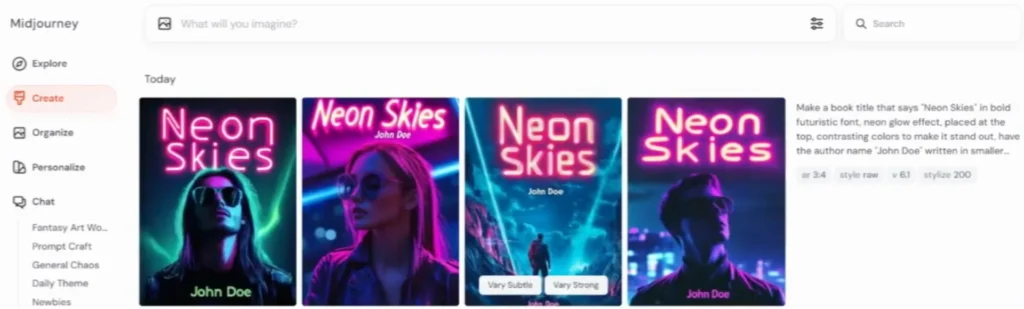
Reviewing the Final Design
As you can see, the title now stands out perfectly against the background. The neon glow effect works seamlessly with the futuristic cityscape, and the text placement doesn’t cover any key parts of the artwork.
If you’re not completely satisfied with the result, you can always adjust the text or prompt and try again.
Just press Enter and rerun the design.
Conclusion
That’s it for today’s tutorial on how to create book cover art using MidJourney. You can experiment with different themes, styles, and text placements to get the perfect cover for your book. Remember, the key is to be specific with your prompts and patient with the results.