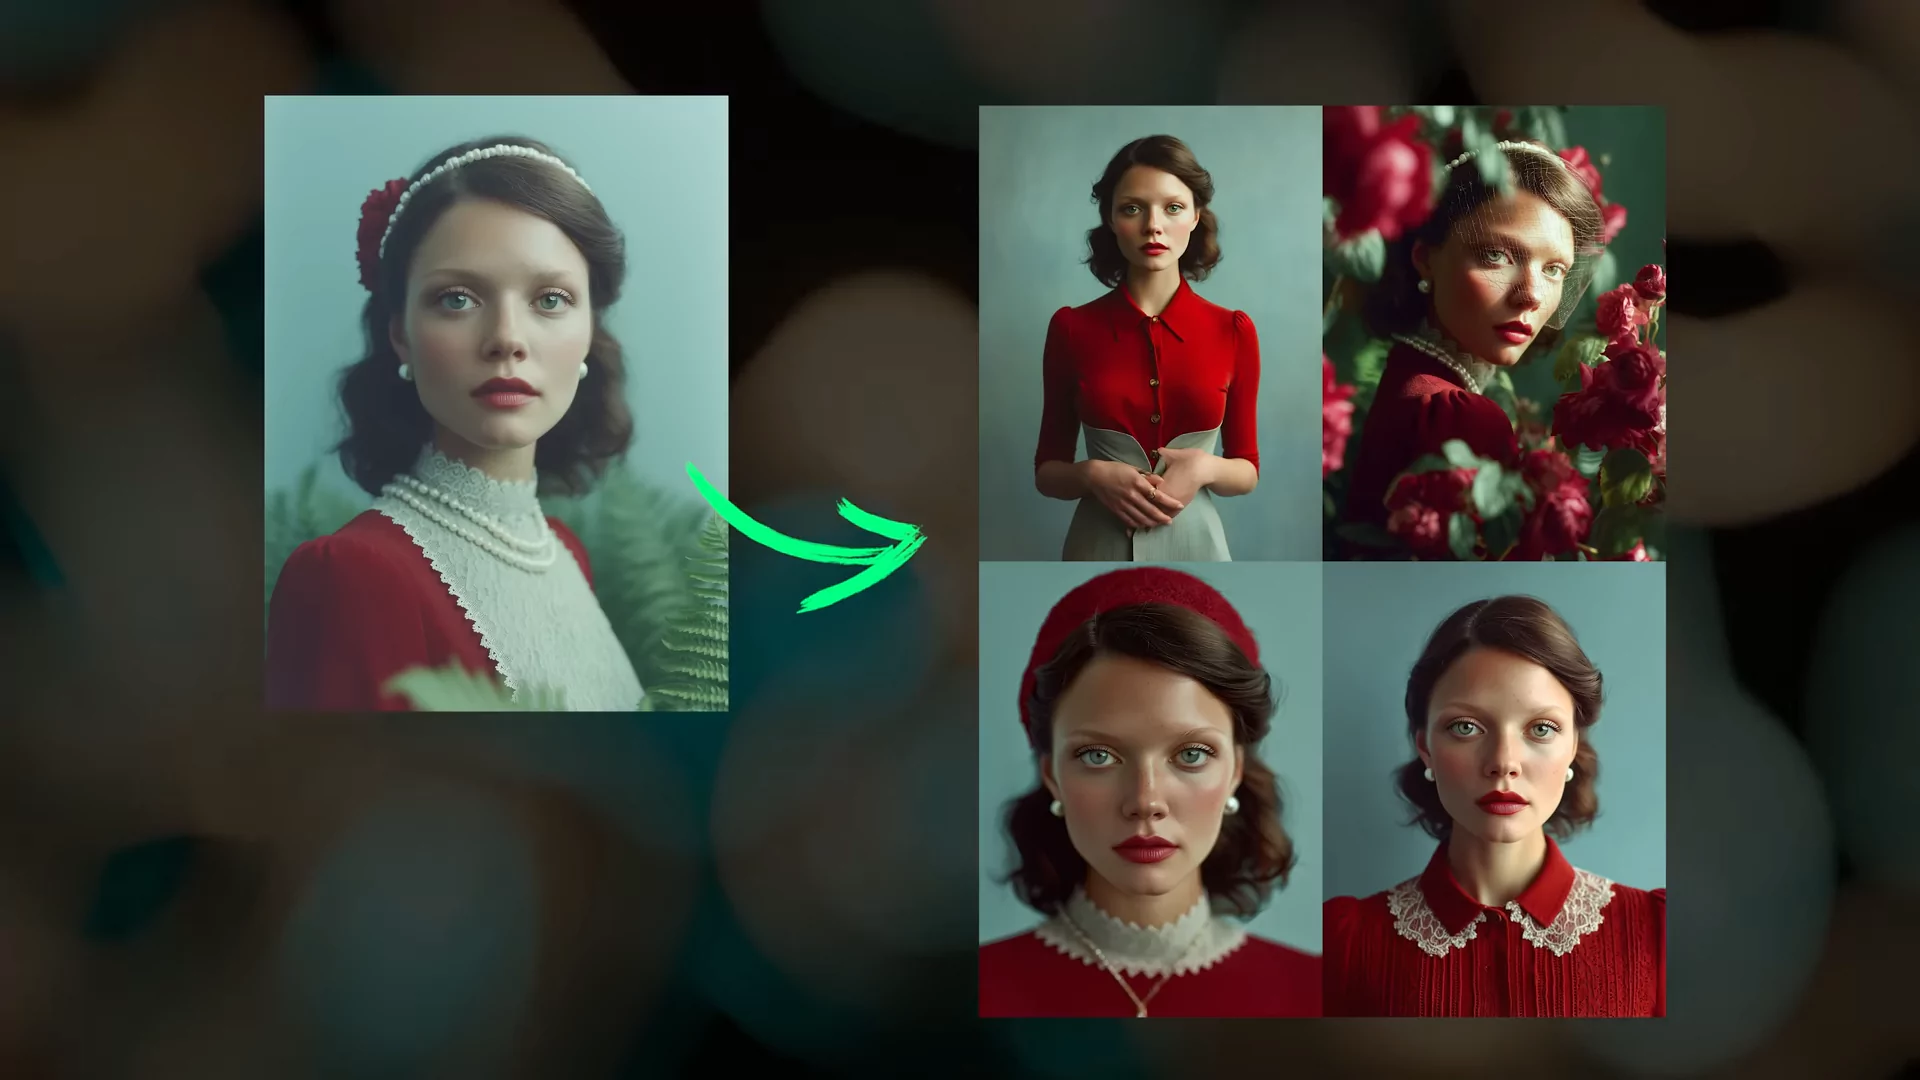
Midjourney has released the long-awaited Omni Reference. Omni Reference, or --oref, can be best thought of as a system for saying: “Put this into my image.” You can use it with Midjourney’s V7 model to place characters, objects, logos, animals, and so much more into new images.
I have several examples to share, but first, let’s start with the basics.
What is MidJourney Omni Reference?
Omni Reference is a new system that basically allows you to point to something and say:
“Put this in my picture.”

Yes, it’s that straightforward.
MidJourney Omni Reference Overview
| Feature | Description |
|---|---|
| Name | Omni Reference |
| Location | Beside the prompt box (icon for image upload) |
| Functionality | Use images to influence outputs directly |
| Image Support | Drag and drop or select from file system |
| Reference Weight | Adjustable between 1–1000 |
| Default Weight | 100 |
| Prompts Supported | Anything from portraits to anime to objects |
| Reference Limit | Only one image at a time (unless merged manually) |
Key Features of Omni Reference
- Upload an image and use it in the prompt directly.
- Adjust the Omni Strength to influence how strongly the reference is used.
- Allows control over image style, character likeness, object inclusion, etc.
- Useful for personal visualization, creative storytelling, and conceptual testing.
- Works with different prompt styles (e.g., descriptive, artistic, or cinematic).
How to Use Omni-Reference (–oref)?
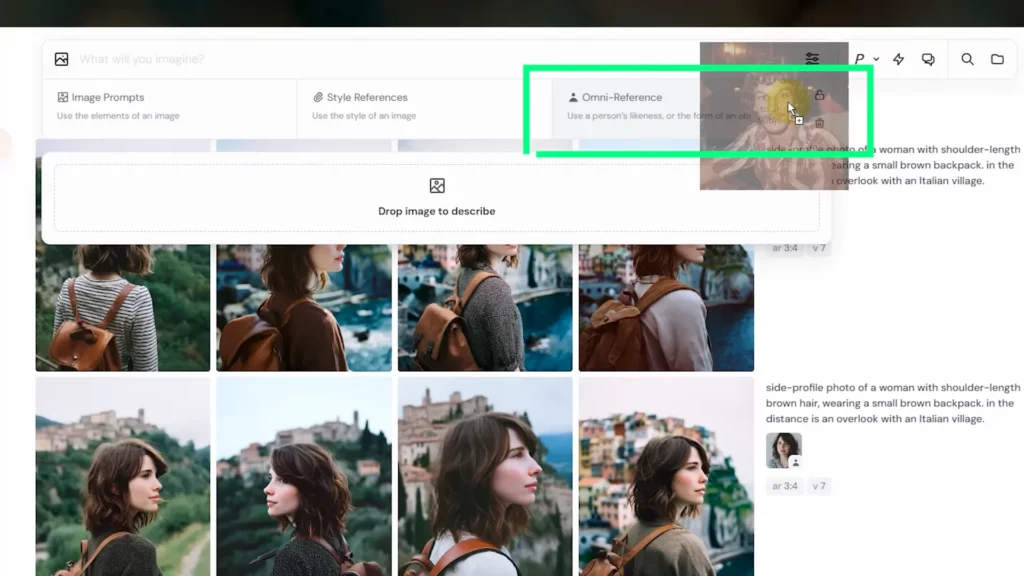
To use Omni Reference on the website:
Drag your image over to the Imagine bar and drop it where it says Omni Reference.
Make sure you have V7 selected in your settings before doing this.
If you have V6 selected, it will say Character Reference instead.
Using –oref on Discord
- Alternatively, you can type
--orefand then paste your image URL directly into the prompt. - This is what you’ll need to do if you’re using Omni Reference on Discord.
Your Omni Reference doesn’t have to be a Midjourney-created image.
You can use external images.
Omni Reference should work just as well with external images as it does with Midjourney-created ones.
So if you want, you can create all kinds of selfies or become a character in your own story with much higher consistency compared to --cref in V6.
Better Understanding of Camera Angles
Omni Reference is also much smarter about things like camera angles.
In V6, it’s not uncommon for a character’s head to be placed on backwards when the camera POV is more from behind the character.
That just doesn’t seem to happen with Omni Reference in V7.
It’s much smarter about understanding where the character’s head or face should be relative to the camera angle.
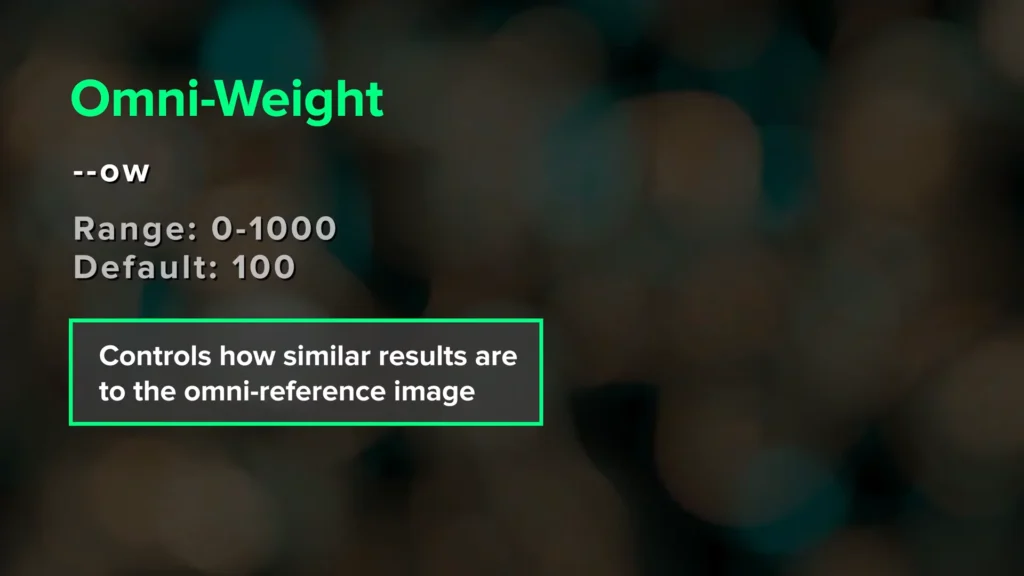
Omni-Weight (–ow) Guide
Omni Reference has a weight parameter called --ow, which takes values from 0 to 1000.
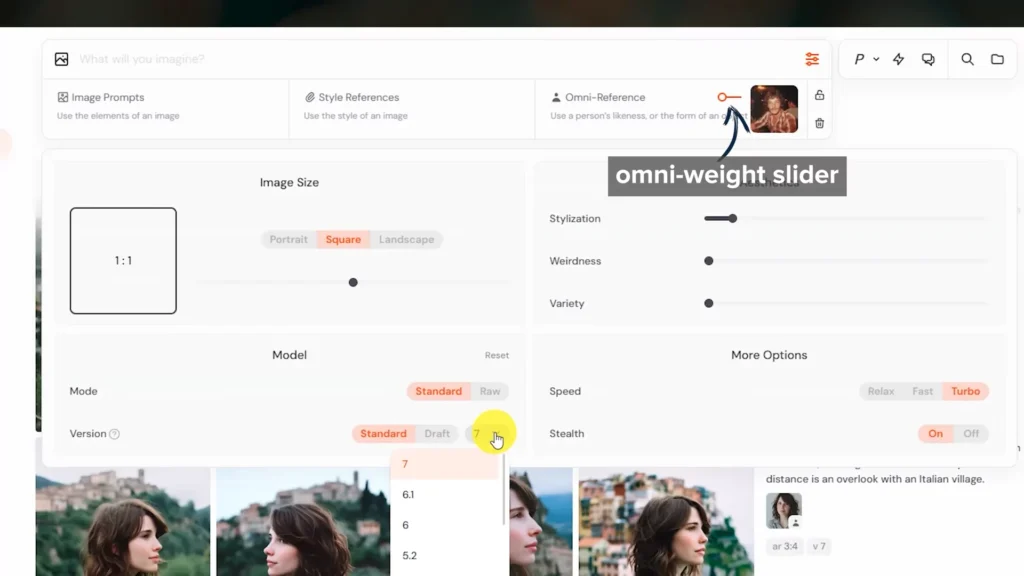
- 100 is the default value.
- Use lower values if you want the result to be less similar to your reference.
- Use higher values for higher similarity.
Tips on Weight Adjustments:
- Lower values can give you more flexibility, especially when you’re trying to create an image that is in a different style compared to your reference.
Example:
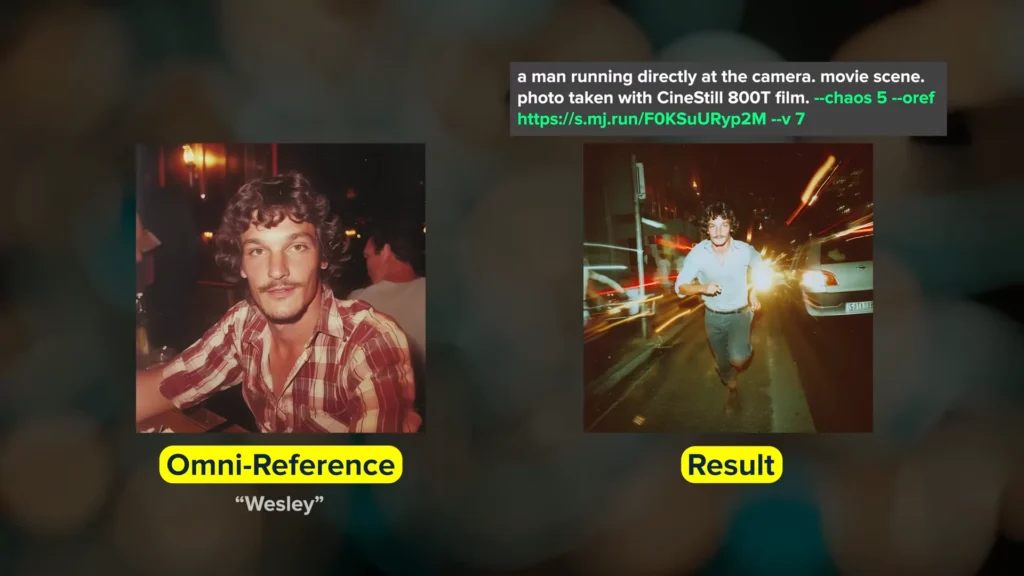
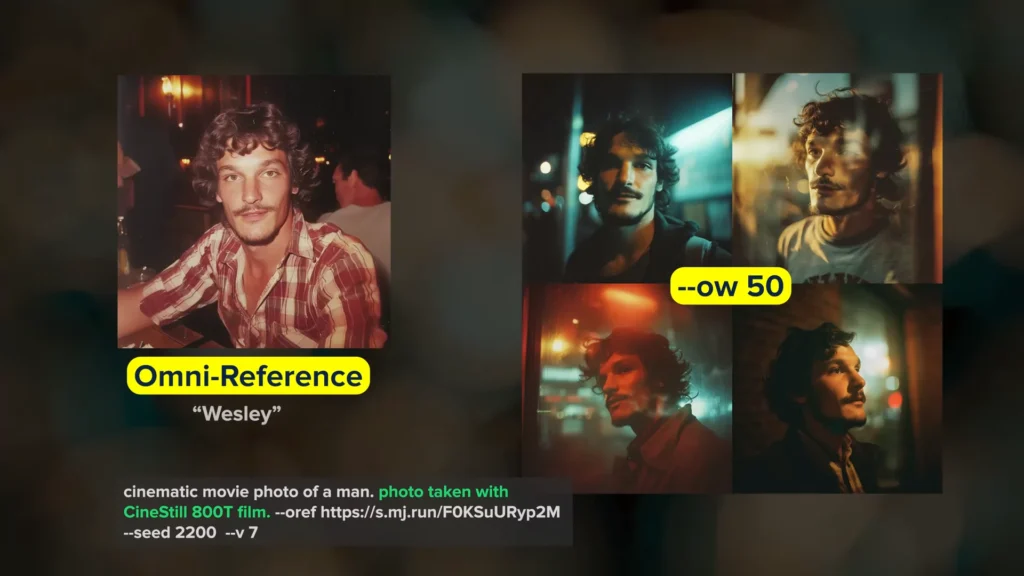
- I specified a film type in my prompt, which worked really well with lower weights.
- As the weight increased, the film style of my Omni Reference image (which is more vintage-y) began to overpower the prompt.
- At a weight of 50, every result looked like Wesley and it’s much more accurate compared to using
--crefin V6. - For illustration style, the lower Omni Weights worked much better.
- At a weight of 50, results started to look really similar.
- At 100, they looked even closer.
100 is a great default value, but you might need to adjust depending on the style and accuracy you need.
- I’ve noticed some quality degradation and weird things when
--owis higher than 400–500. - My recommended range is between 50 and 250.
Example: PNG Coffee Mug
Objects work really well with Omni Reference.
- I used a coffee mug with rockets on it.
- Even at weight 50, the results matched incredibly well, down to:
- Colors
- Rocket placements
- Starburst elements
I’m really impressed with how well this matches the reference.
Example: T-shirt Design
You can use clothing as a reference and place it onto new characters.
- This t-shirt reference is just a mockup I made using a Midjourney image as the design.
Currently, we cannot use multiple Omni References at the same time.
You can’t have separate images for a character and the clothing you want them to wear.
That will come eventually.
Until then, you can use the Editor to replace faces or add characters—I’ll talk about that in a moment.
Example: City Scene
I used a scene of a city street and buildings as reference.
- In my prompt, I say: “She is standing on a city street.”
- Midjourney recognizes the scene and: Observation Matching Element 3 out of 4 images Had the tall building with the black spire Side buildings Had same colors as reference
I then ran a similar prompt using the city as the Omni Reference, and also used it as a style reference.
This is really important if you want to build cohesive storyboards with the same style.
- Not only was the style more consistent, but the scene was too.
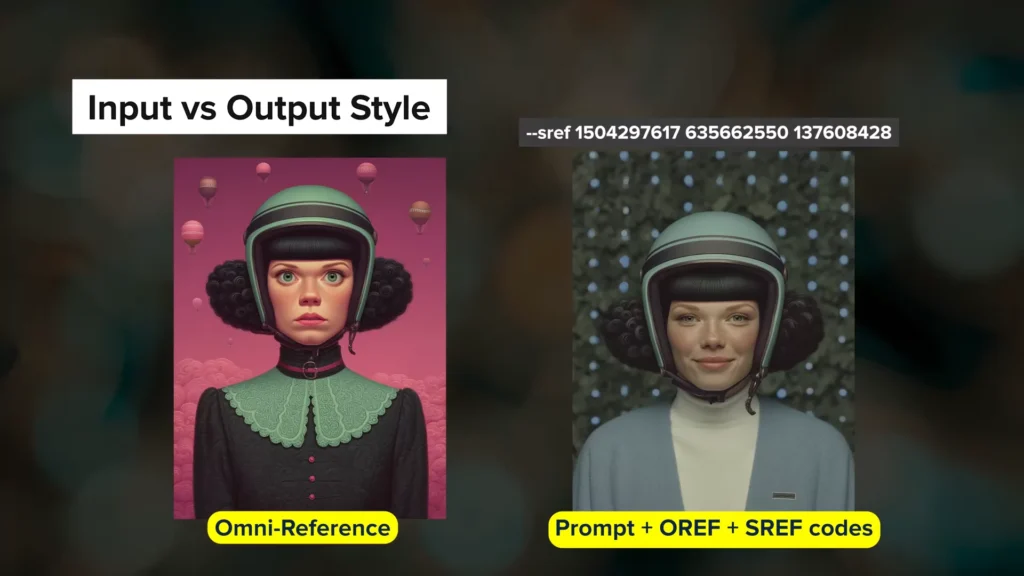
Differing Styles in –oref vs Results
Using style references applies to mood boards as well.
- If your input reference is in a different style than what you want to create:
- For example: an illustration style reference but you want photographic style.
Adjust Your Weights:
- You may need to lower your Omni Weight.
- I recommend going down to 50.
- If your weight is too high, the style of your Omni Reference can overpower your style reference.
You’ll need to play with it to get the right combination.
Always reinforce the style you want in the prompt itself.
Two Characters in a Scene
Method 1: Using a Combined Reference
If you want to place two characters into a scene:
- Try using a reference image that includes both characters.
- This works much better than with
--crefin V6.
Be sure to describe both characters in the prompt.
Method 2: Editor Workaround
If you don’t have a two-character image, use the Editor and Character Reference (--cref) in the V6 model.
Omni Reference cannot currently be used in the Editor.
Steps I followed:
- Created a new V7 image with Omni Reference.
- Sent it to the Editor.
- Expanded the scene to add space.
- Switched to V6.1.
- Added second character using Character Reference with weight 0.
- Updated the prompt to include him.
- Added original image as a style reference.
Here’s one of the results – it works well as a workaround for multi-character scenes.
I’m really looking forward to using multiple Omni References in the future.
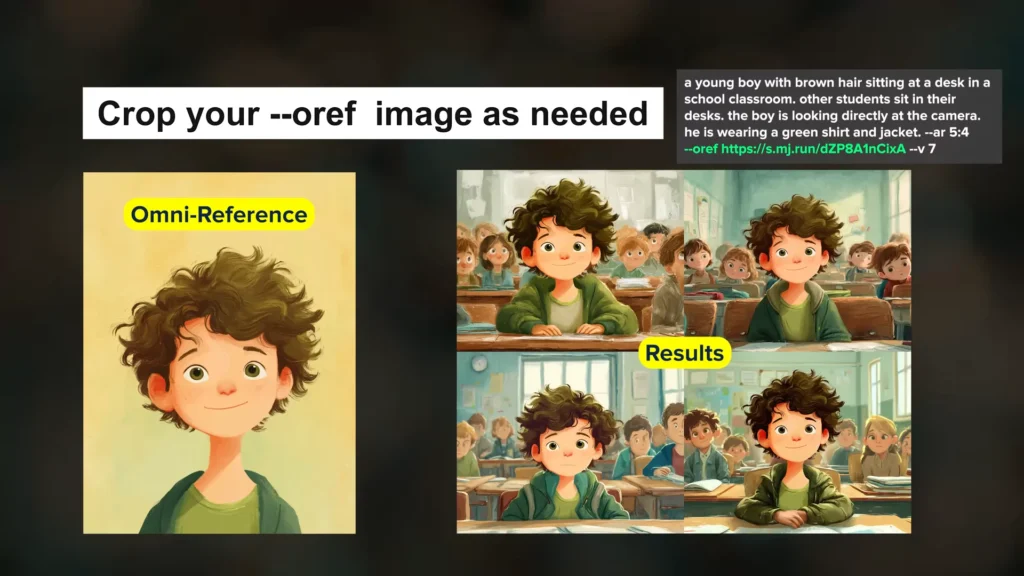
Importance of Cropping
To get the most out of Omni Reference:
- Crop your input reference as needed.
- If you just want the character, crop it down.
- Midjourney looks at the entire image, so unwanted elements can bleed into the result.
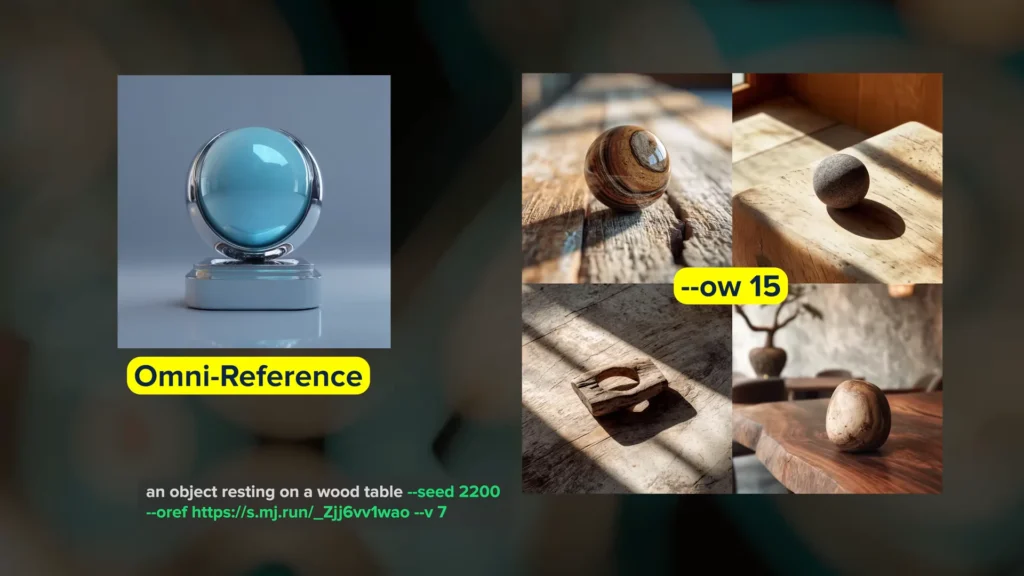
Merging Objects Into Scenes
Be specific with your prompt and add redundancy as needed.
Example:
- Reference image: Iridescent object
- Prompt: “Frog on a moss-covered tree”
Midjourney has no context to connect the reference, so nothing in the result resembled it.
Updated prompt: “Iridescent bulbous hexagonal frog”
Now Midjourney knows how to merge the frog and object, and the results are exactly what I expected.
Character Holding an Object
Same rule applies to characters holding objects:
- Say the character is holding an object and specify what it is.
- Describe clothing clearly in the prompt.
Example: Wesley
- Prompt: “Photo of a man” → matches his face, style, and environment, but not his clothing.
- Even increasing weight to 300 didn’t help.
But:
- Prompt: “Red and white plaid shirt” → matched the reference precisely, including:
- Diagonal pocket stripes
If I want to put him in a different scene, I must describe that scene in the prompt.
Omni Reference is so powerful, it can nearly recreate your reference image.
For even closer matches, include the image as both a normal image reference and an Omni Reference.
This is helpful for getting different angles in the same scene, while we wait for Midjourney’s 3D feature.
Other Parameters Affecting OREF Results
Be aware that other parameters can affect your results:
- High Stylize values
- Experimental parameter
--exp - Mood boards
- Style references
If you tend to work with higher Stylize values, you might want to:
- Use higher Omni Weights
- Or lower your Stylize value
Frequently Asked Questions (FAQs)
1. Can I use multiple Omni References at once?
No. Not directly. You’ll need to combine them in one image manually (e.g., via Photoshop).
2. What’s the ideal Omni Weight?
Between 50 and 130. Start with 100 and adjust based on results.
3. Is background metadata being used?
Possibly. Some images seemed to “remember” removed elements like plants.
4. What’s the success rate of getting accurate likeness?
Around 25% to 45% based on current tests.
5. Should I use transparent images?
Unclear. Transparent backgrounds might cause issues—try using original backgrounds.
6. How do I improve results?
- Use variations
- Refine your prompt
- Try different aspect ratios
- Mention background and subject clearly
Final Impressions & More Guides
I’m still testing the capabilities of Omni Reference, but I have to say:
I’m pretty impressed so far.
It feels like a big leap compared to Character Reference in V6.
If you’d like to see more examples from my initial testing:
- I’ve got another video on Patreon
- I post monthly prompt collections
- I’ll likely do a deeper exploration of Omni Reference once V7 stabilizes