
Today, I want to share the important tips and tricks of MidJourney V6 for beginners. If you’ve been curious about this latest model V6 and how to make the most of it, you’re in the right place.
Getting Started with MidJourney V6
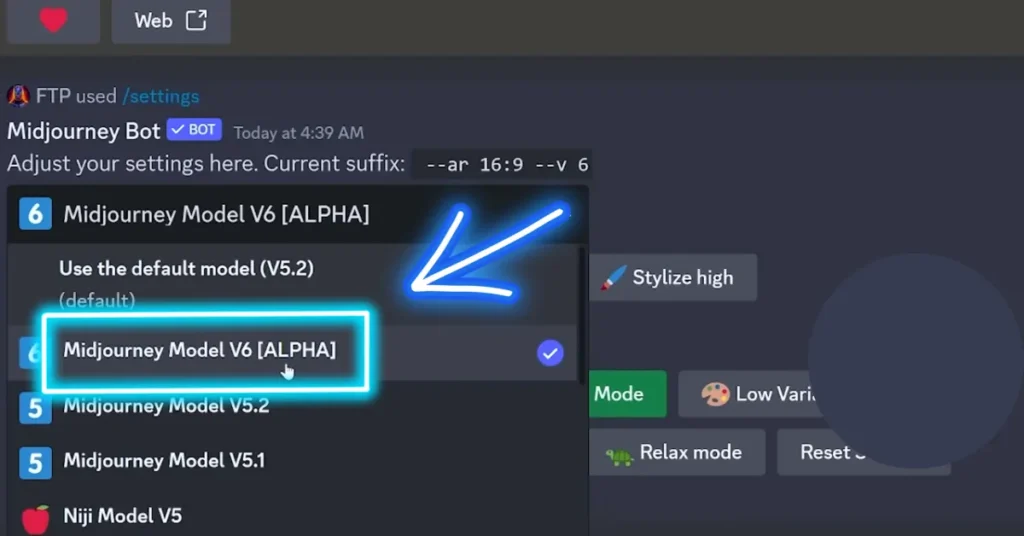
The first step is to check your settings by typing “/settings” to see which model is currently active. Alternatively, you can specify V6 by adding “–V6” or “v6.0” at the end of your prompt.
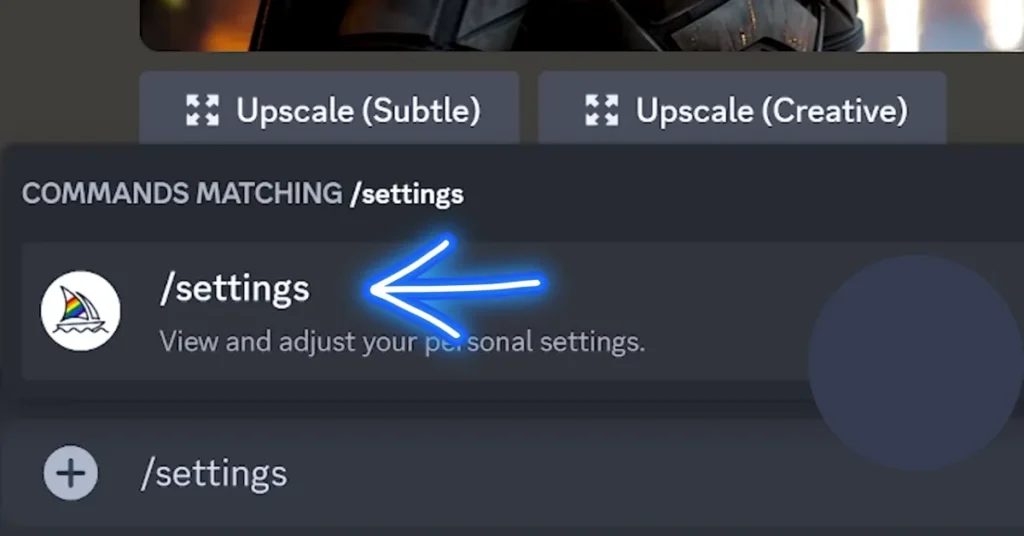
This choice depends on whether you want it as the default for all your prompts or prefer to specify it each time. Stick to the default version if you’re unsure.
Mastering Aspect Ratios
Now, let’s dive into some of the key arguments that can be used with V6.
The aspect ratio, represented by the argument “–ar,” allows you to control the shape of your generated image.
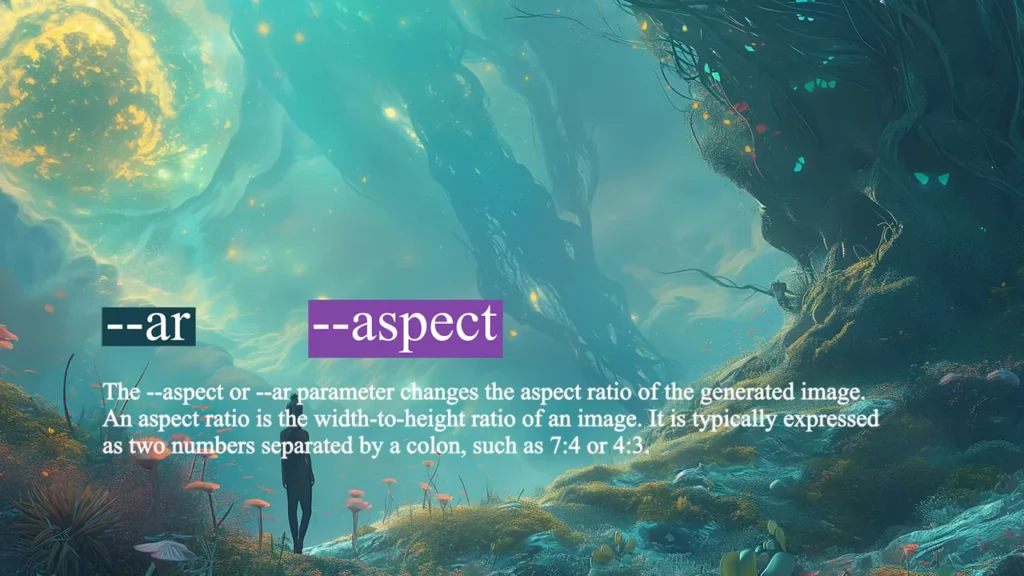
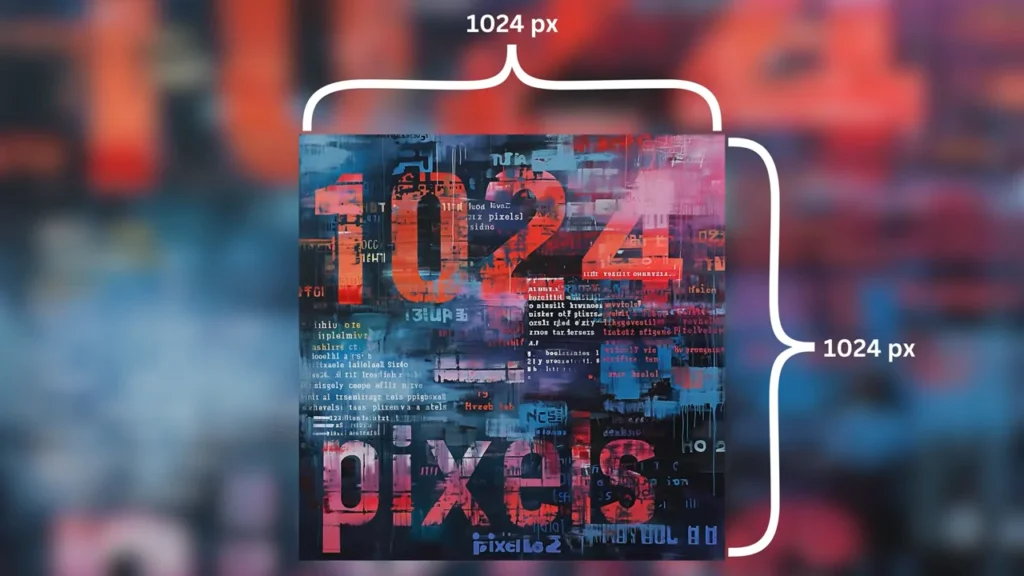
The default ratio is 1:1, producing an image of 124 by 124 pixels.
You can experiment with wider or taller ratios, but keep in mind that altering the aspect ratio may elongate the image in one direction while reducing its size in the other.
Aspect ratios have been a challenge in previous versions, so it’s great that V6 introduces this feature without limitations.
Navigating Grid Buttons
Once you’ve prompted your image in V6, you’ll encounter a menu under the generated image in Discord with nine buttons.
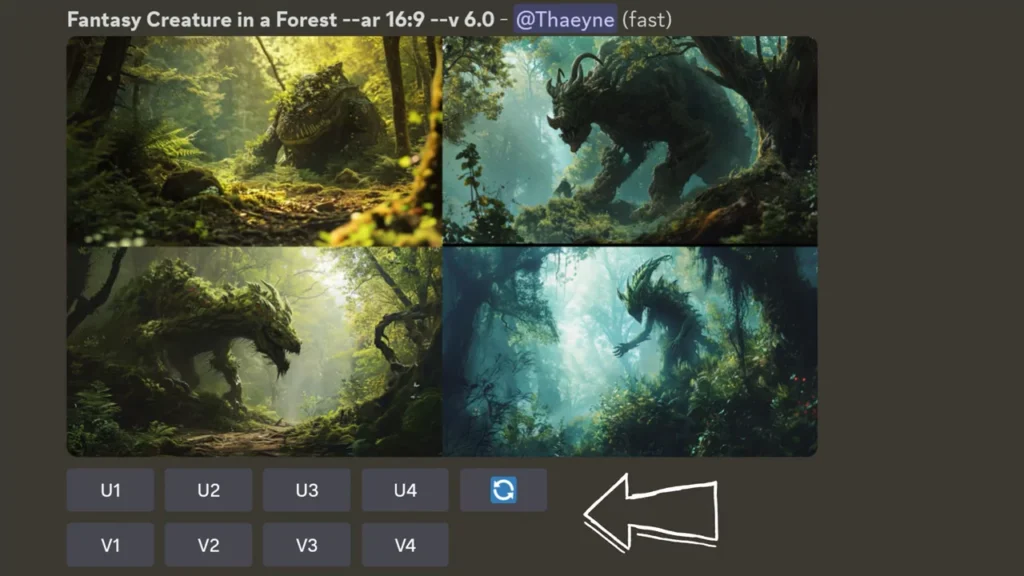
Familiarize yourself with these buttons for various functions:
- U1 to U4: Upscaling options without changing the image size.
- Refresh Button: Rerolls the same prompt for another attempt.
- V1 to V4: For obtaining variations of an image you like.
- Heart Button: Sets the rating of the image on MidJourney’s website to the highest.
- Web Button: This takes you to the image on MidJourney’s website for further actions.
Understanding these buttons is crucial for efficiently working with your generated images.
Upscaling Tips
Moving on to upscaling, V6 currently offers two options: Subtle and Creative. Both options provide a 248×248 pixels image. The Subtle option aims to preserve the original, while the Creative option may introduce some changes.
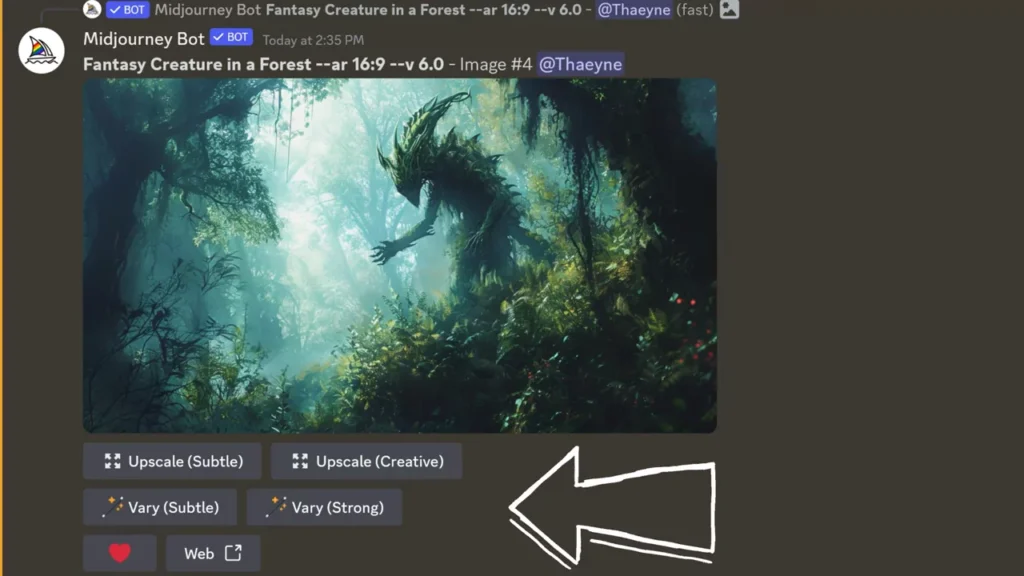
Additionally, you can explore the Very Subtle and Very Strong buttons for more variation.
The heart button serves to organize and highlight your favorite images on Midjourney’s website. The web button provides direct access to your image on the site.
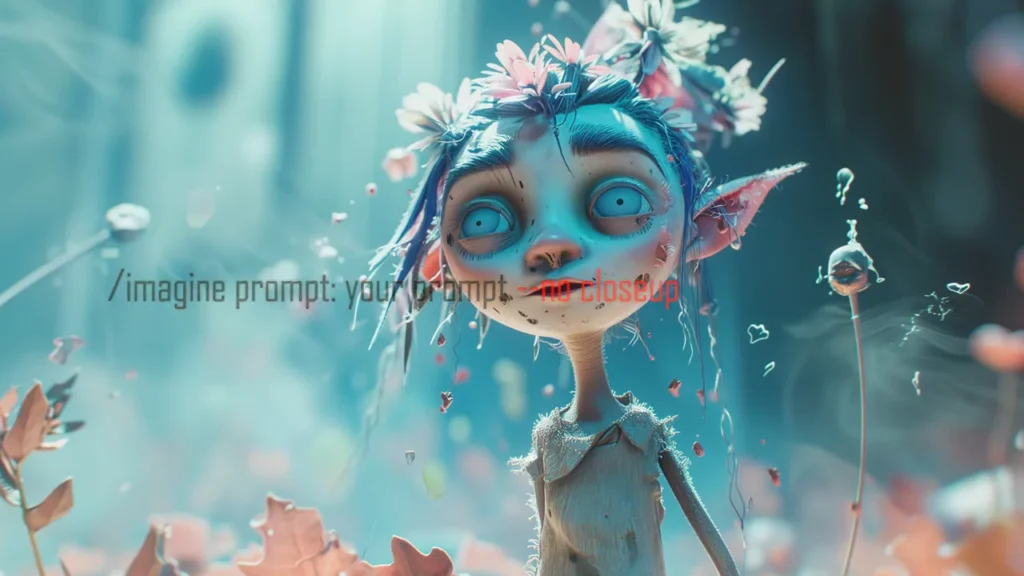
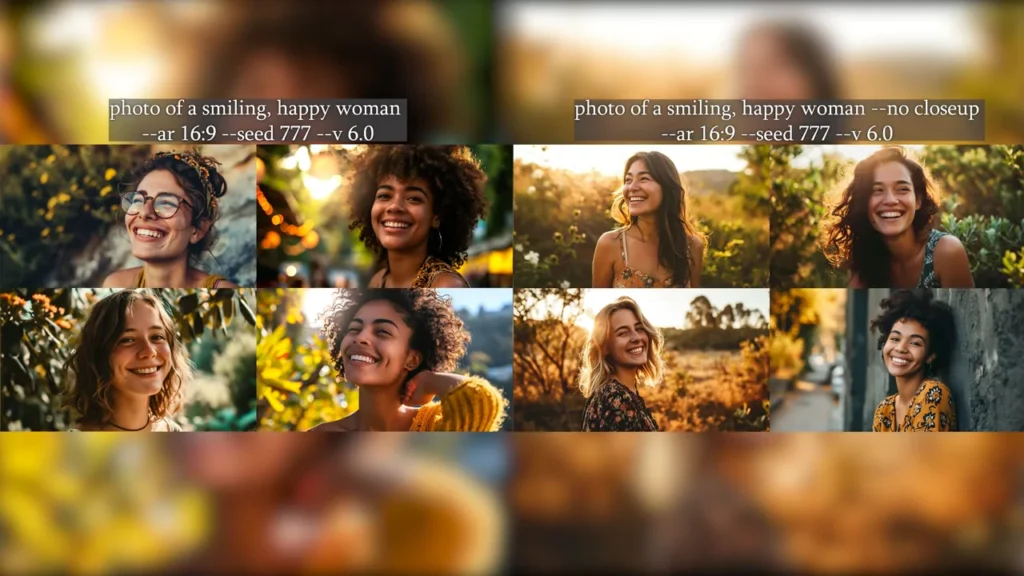
Tips for Zooming Out
One current limitation in V6 is the absence of pan, zoom, or VAR region options. Controlling the desired framing of an image has become a bit trickier.
Experiment with negative prompting, such as specifying “–no closeup,” to zoom out a bit. Playing with aspect ratios, particularly taller ratios, can also provide more room for creating a complete body in the images.
While we miss the pan and zoom features from previous versions, you can still achieve desired results by experimenting with detailed prompts, like specifying the type of shoes a person is wearing.
Using “Staircase” Technique
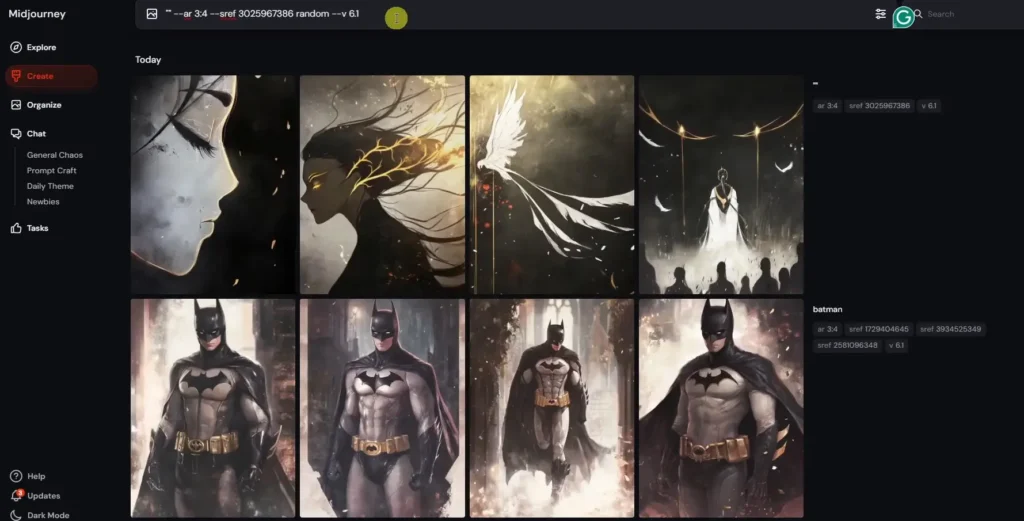
The next tip is something I like to call the “Staircase” technique. It involves using two apostrophes ('') in your prompt and an S reference (--sref).
Here’s a breakdown of how it works:
Start with a Void Prompt: Begin by adding --sref followed by a random value, such as “random” in this example.
No Specific Prompt Required: Unlike typical prompts, this one doesn’t need detailed input. Just use two apostrophes.
Generate Images: MidJourney will create images based on the --sref input.
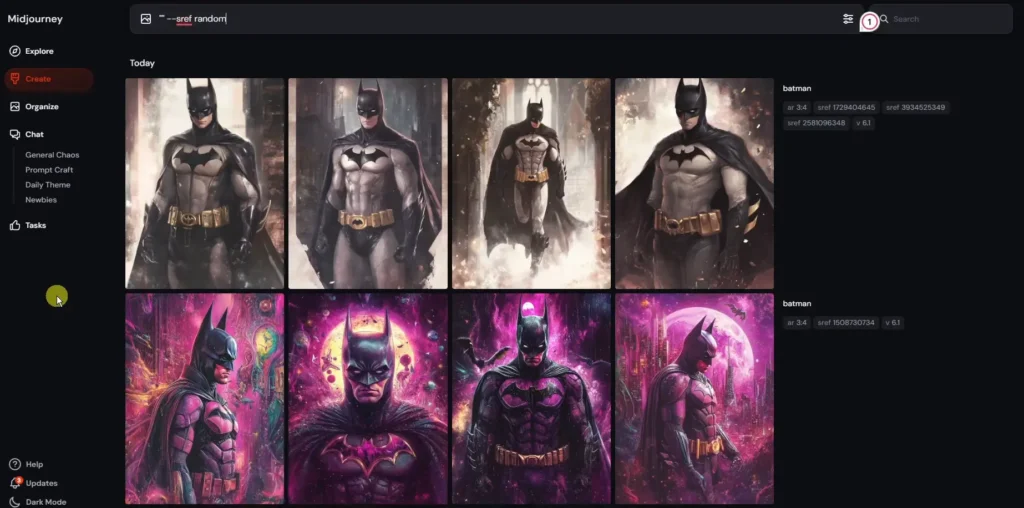
What happens is you get a series of images that, while different, maintain a consistent style. The reason it’s called the “Staircase” technique is because each time you generate a new image using this method, it’s like adding another step to the staircase.
The images evolve gradually while maintaining stylistic continuity.
It’s particularly useful if you want to explore variations on a theme while keeping things visually cohesive.
Pixel Dimensions for Specific Image Sizes
This next tip is all about pixel dimensions, which is incredibly useful when you need images with very specific sizes.
Here’s an example: I wanted to create a Batman banner with an exact resolution of 1920×1080 pixels. To do this:
- Use the prompt as usual (e.g., “Batman banner”).
- Include the aspect ratio code (
--ar). In this case, I used--ar 1920:1080. - Hit enter, and MidJourney generates the image to your specified dimensions.
This is especially helpful for creating custom-sized banners, wallpapers, or any specific layout that requires precise dimensions.
You’re not limited to the standard 16:9 or 7:9 ratios; you can customize it exactly to fit your needs.
Understanding the “Art” Keyword
The word “Art” in MidJourney is a powerful prompt. To demonstrate this, I generated two samples:
- One using the keyword “Art Deco” alone.
- Another using “Art Deco Art”.
You’ll notice that the prompt with the word “Art” brings a more creative and intricate result. It emphasizes artistic details, giving the output a polished, visually appealing look.
If you’re aiming for a specific art style, make sure to include the word “Art” to refine the results further.
Importance of Emphasis
Emphasis is another key aspect when crafting prompts. Let’s take a look at two examples:
- “A person walking in a city park”: Here, the focus is on the park as the main subject.
- “A city park with a person walking”: In this prompt, the person becomes the central focus.
The takeaway here is that MidJourney places emphasis on the first part of the prompt. If you want the subject to be the park, mention the park first.
If you want the focus to be on the person, start the prompt with the person.
Exploring V6 and V6.1 Versions
MidJourney allows you to experiment with different versions of its AI, including Version 6 (V6) and Version 6.1 (V6.1).
Here’s how you can switch between them:
- Start with V6: By default, your images are generated using version 6.
- Switch to V6.1: To switch to version 6.1, simply add
--v 6.1to your prompt.
The key difference between the two is that V6.1 offers subtle improvements in detail and overall image quality.
It’s a great way to fine-tune the look of your images if you find V6 doesn’t quite hit the mark.
Creating Character Sheets
For those looking to create character sheets, this next tip is invaluable. A character sheet contains a range of poses and angles for a specific character, which is useful in storytelling or design projects.
Here’s how to do it:
Use “Character Sheet” as a Prompt:
For example, if you want a character named Jimmy the Robot, input “Character sheet of Jimmy the Robot in different poses, angles, including front view, side view, and back view.”
Aspect Ratio:
Opt for a wider aspect ratio, like --ar 3:1, to fit more poses in one image.
Results:
You’ll get a series of images that display the character in various angles and perspectives, perfect for reference or artistic projects.
Permutations Without Quotes
In MidJourney, you can use permutations to explore multiple versions of a prompt by varying specific elements. However, there’s a shortcut you can use to avoid typing quotes or apostrophes around each part of the permutation.
Here’s how:
- Normally, you’d write a prompt like this: “The sky, the stars, the moon” with quotes around each element.
- But, you can skip the quotes by enclosing the entire phrase in one set of quotes or apostrophes.
This simplifies the process and makes generating permutations a lot quicker.
“Spot the Difference” Technique
Here’s a fun one: the Spot the Difference technique. You probably remember playing this game as a kid, where you compare two pictures and find the differences.
In MidJourney, you can create your own “spot the difference” images by doing the following:
- Generate a normal image.
- Use the in-painting tool (or editor) to erase certain parts of the image.
- Submit the edited image.
Now you’ll have two versions: the original and the altered one. This technique is not only entertaining but can also be used in interactive designs or educational materials.
1. MidJourney Subscription Plans
Before creating images, you’ll need a MidJourney account. Here’s how to choose the right subscription plan:
- Sign up at MidJourney.com.
- Click “Join Now” or “Subscribe” to view the available plans.
MidJourney offers four subscription tiers:
| Plan | GPU Time | Relaxed Mode | Best For |
|---|---|---|---|
| Basic | ~200 minutes (≈200 images) | No | Beginners testing the tool |
| Standard | 15 hours | Yes | Regular users who create often |
| Pro | 30+ hours | Yes | Professionals needing privacy (Stealth Mode) |
| Mega | Highest GPU time | Yes | Heavy commercial users |
Recommendation: Start with the Basic Plan and upgrade as needed.
2. How Many Images Can You Create?
MidJourney measures usage in GPU minutes:
- Basic Plan: ~200 minutes (about 200 image jobs).
- Standard Plan: 15 hours (with Relaxed Mode for slower but unlimited generations).
- Pro/Mega Plans: Higher GPU time + Stealth Mode (private images).
Check your remaining GPU time by clicking your username → “Manage Subscription.”
Navigating MidJourney’s Website
MidJourney’s website has several key sections:
1. Explore Page
- Shows recent creations from the community.
- Filter by “Random,” “Hot,” or “Top Rated” images.
- Use the search bar to find inspiration.
2. Create Page
- Your main workspace for generating images.
- Enter prompts in the “Imagine” bar.
- Adjust default settings (more on this later).
3. Organized Page
- Your personal gallery of generated images.
- Filter, search, and download your work.
4. Chat Rooms
- Collaborate with others in “Newbies” or “Prompt Craft” rooms.
5. Tasks Page
- Complete activities to help improve MidJourney’s AI.
6. Help Section
- Find tutorials, FAQs, and report issues.
Writing Your First Prompt
Start simple—your first prompt doesn’t need to be perfect.
Step-by-Step Example:
- Choose a subject (e.g., “two bears having a tea party”).
- Type it into the Imagine bar and press Enter.
- MidJourney generates 4 square images (default aspect ratio is 1:1).
Problem: The images look cartoonish, but you wanted a photorealistic style.
Solution: Refine your prompt:
- Original: “two bears having a tea party”
- Revised: “photo of two bears having a tea party”
- Better: “photo of two bears having a tea party, taken with Kodak Portra 400 film”
Adding “photo” and film type improves realism.
Customizing Your Images
1. Creating Variations
Hover over an image and click:
- “Subtle” – Slight changes.
- “Strong” – More dramatic variations.
2. Upscaling
- Upscale Subtle: Keeps details close to the original.
- Upscale Creative: Adds new details.
3. Remix Mode
Modify the prompt before generating new variations.
Example:
- Original: “two bears having a tea party”
- Remix: “two bears having a tea party on a sandy beach”
4. Pan & Zoom
- Pan: Extend the image in any direction.
- Zoom Out: Expand the scene.
5. Image Editor
- Repaint sections (e.g., add a hat to a bear).
- Change aspect ratio.
- Edit prompts mid-process.
Adjusting Default Settings
Click the settings icon to customize:
Key Settings for Beginners:
- Aspect Ratio: Default is 1:1 (square). Adjust for tall (9:16) or wide (16:9) images.
- Model Version: V6 is the latest (best for realism).
- Speed Mode:
- Fast Mode (uses GPU time).
- Relaxed Mode (unlimited but slower).
Using Parameters
Add –ar 9:16 at the end of a prompt for a tall image.
Example:
- “vintage space rocket –ar 9:16”
Other useful parameters:
- –v 5 (use an older model).
- –style raw (less stylized).
Organizing & Downloading Images
- Create folders to group images by project.
- Search prompts to find past work.
- Download images individually or in bulk.
Prompting Tips for Better Results
- Be clear and descriptive.
- Bad: “Show me a picture of a cat.”
- Good: “A black cat sitting on a wooden ledge, sunlight streaming through a window.”
- Avoid unnecessary terms like “4K” or “HD.” MidJourney ignores rendering specs.
- Watch for visual stereotypes:
- “Wizard” → Old man with a beard.
- “Hero” → Superhero in a cape.
- Experiment! Try different styles, lighting, and compositions.
Model Personalization (Advanced)
Once comfortable, train MidJourney to match your style:
- Helps generate consistent aesthetics.
- Requires feedback on generated images.
Conclusion
That wraps up our exploration of Midjourney V6 for beginners. Here, you’ll dive into more advanced features and their functionalities. There’s so much to discover and figure out with V6, and if you have any tips or findings to share, drop them in the comments below.
Latest Posts:
Demi Franco, a BTech in AI from CQUniversity, is a passionate writer focused on AI. She crafts insightful articles and blog posts that make complex AI topics accessible and engaging.